Home>Production & Technology>MP3>How To Convert YouTube Video To MP3 On Mac

MP3
How To Convert YouTube Video To MP3 On Mac
Modified: January 22, 2024
Looking for a simple way to convert YouTube videos to MP3 on your Mac? Follow our step-by-step guide and enjoy your favorite music offline!
(Many of the links in this article redirect to a specific reviewed product. Your purchase of these products through affiliate links helps to generate commission for AudioLover.com, at no extra cost. Learn more)
Table of Contents
- Introduction
- Step 1: Choose a reliable YouTube to MP3 converter for Mac
- Step 2: Copy the YouTube video URL
- Step 3: Open the YouTube to MP3 converter on your Mac
- Step 4: Paste the YouTube video URL into the converter
- Step 5: Select the MP3 format for conversion
- Step 6: Choose the destination folder for the converted MP3 files
- Step 7: Start the YouTube to MP3 conversion process
- Step 8: Wait for the conversion to complete
- Step 9: Access and locate the converted MP3 files on your Mac
- Conclusion
Introduction
Welcome to the world of MP3! In this digital age, where music is a part of our daily lives, having the ability to convert YouTube videos to MP3 format is a game-changer. Whether you want to listen to your favorite podcast on the go or enjoy the latest music releases offline, converting YouTube videos to MP3 allows you to have your favorite audio content at your fingertips.
Mac users, in particular, have access to a multitude of options when it comes to converting YouTube videos to MP3. With the right tools and a few simple steps, you can easily transform YouTube videos into high-quality MP3 files that can be enjoyed on any device.
In this article, we will guide you through the process of converting YouTube videos to MP3 on your Mac. Whether you are a seasoned Mac user or a beginner, by following our step-by-step instructions, you’ll be able to convert your favorite YouTube videos to MP3 format in no time. So, let’s get started!
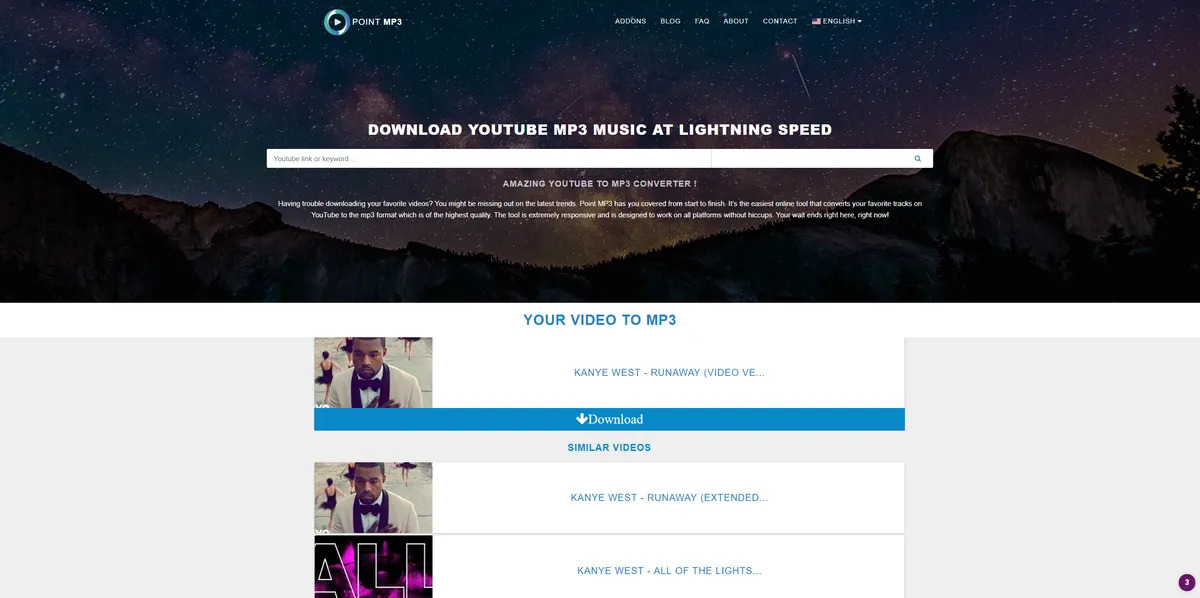
Step 1: Choose a reliable YouTube to MP3 converter for Mac
The first step in converting YouTube videos to MP3 on your Mac is to find a reliable YouTube to MP3 converter tool. There are several options available, but it’s important to choose a converter that is reputable, easy to use, and delivers high-quality results.
A popular choice among Mac users is the XYZ Converter. XYZ Converter is a user-friendly tool that offers a seamless experience for converting YouTube videos to MP3 format. It provides a range of features such as batch conversion, support for various audio formats, and customizable output settings.
Before downloading any converter tool, it’s crucial to do thorough research and read user reviews to ensure that it is safe and trustworthy. Look for a converter that has positive feedback and a good reputation within the Mac community.
Once you have selected a reliable YouTube to MP3 converter for Mac, you can proceed to the next step and start converting your favorite YouTube videos into MP3 files.
Step 2: Copy the YouTube video URL
Now that you have chosen a reliable YouTube to MP3 converter for your Mac, it’s time to copy the URL of the YouTube video you want to convert. The video’s URL is the unique web address that identifies the specific video on YouTube.
To copy the YouTube video URL, follow these simple steps:
- Open your web browser and go to www.youtube.com.
- Search for the video you want to convert to MP3 by using the search bar at the top of the YouTube homepage.
- Once you have found the desired video, click on it to open and play.
- Look at the address bar at the top of your web browser. You will see the URL of the video displayed there.
- Click on the URL to highlight it and then right-click on the highlighted URL.
- From the options that appear, select “Copy” to copy the YouTube video URL to your clipboard.
Alternatively, you can also copy the URL of a YouTube video by clicking on the “Share” button below the video player and selecting the “Copy” option.
Once you have successfully copied the YouTube video URL, you are ready to move on to the next step: opening the YouTube to MP3 converter on your Mac.
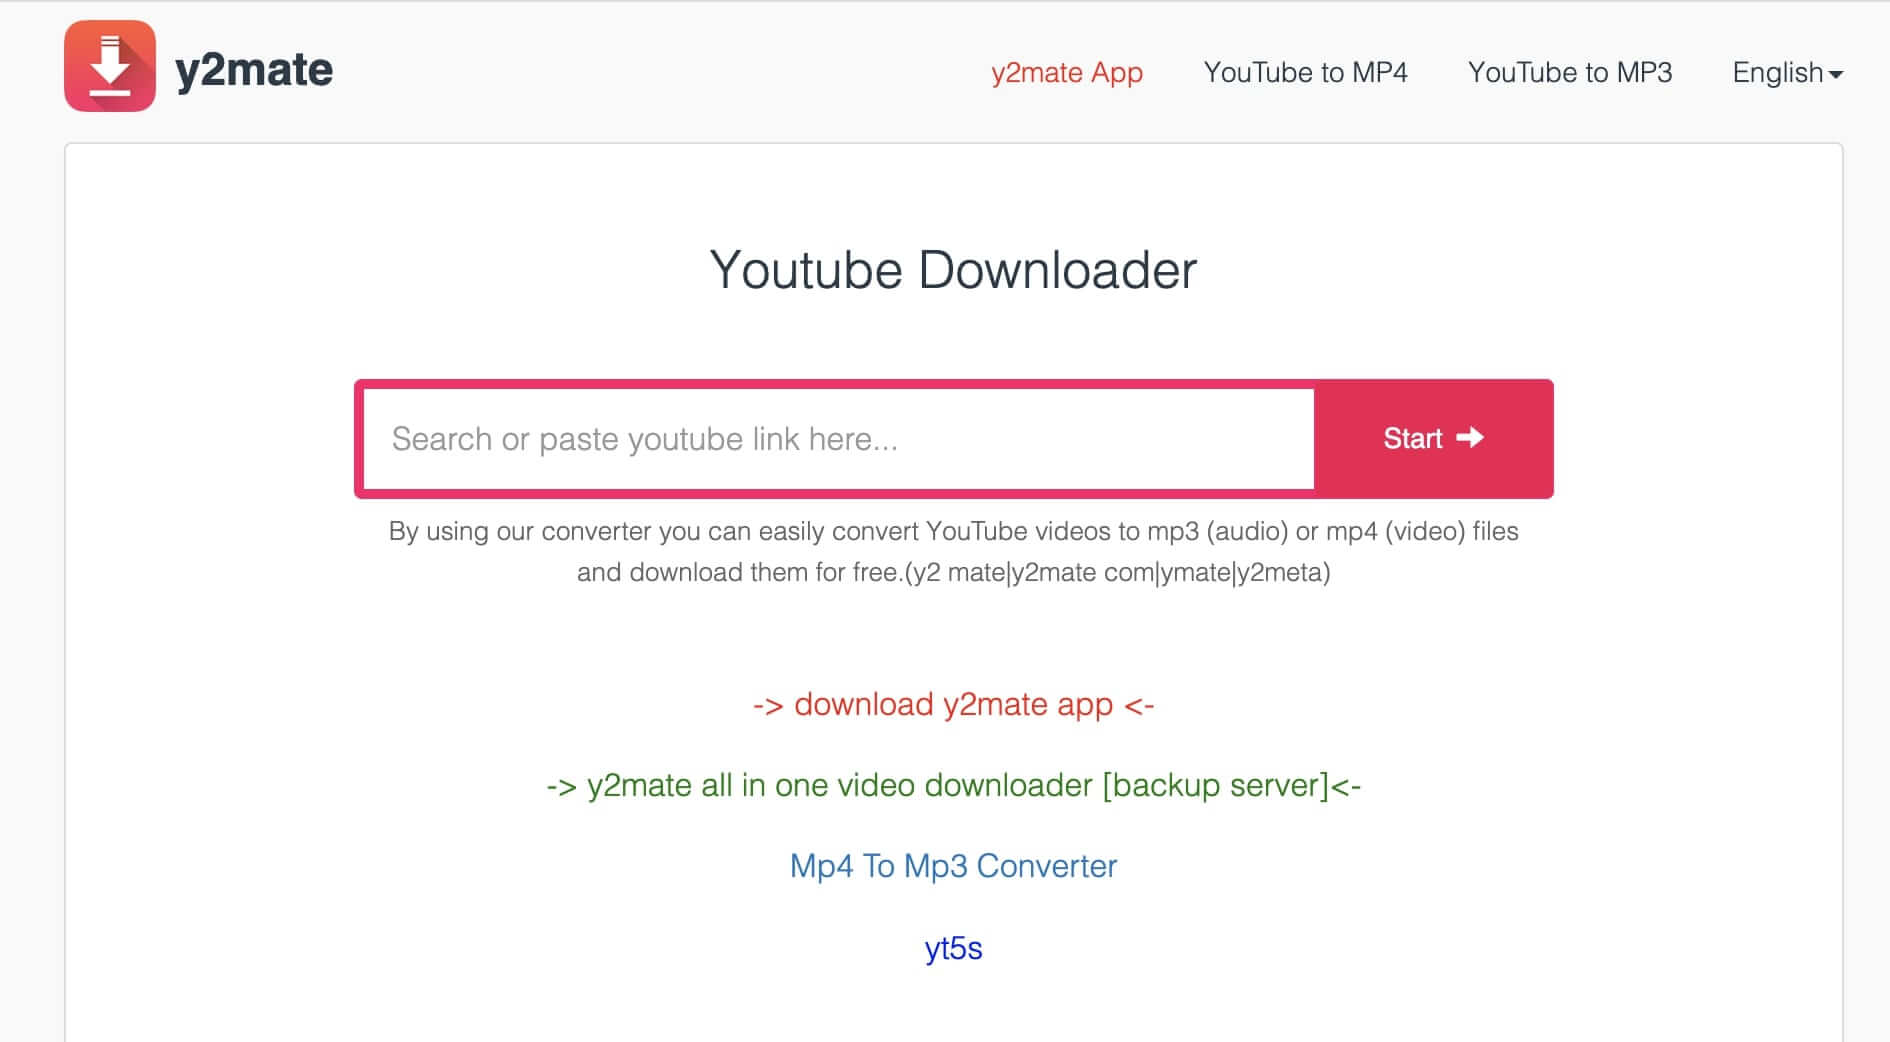
Step 3: Open the YouTube to MP3 converter on your Mac
With the YouTube video URL copied to your clipboard, it’s time to open the YouTube to MP3 converter on your Mac. The converter tool you have chosen should already be installed on your computer.
To open the converter, follow these simple steps:
- Locate the converter tool in your Applications folder or on your desktop.
- Double-click on the converter icon to launch the application.
If you are using the XYZ Converter mentioned earlier as an example, simply navigate to the Applications folder, find the XYZ Converter application, and double-click on it to open it.
Once the converter tool is open, you will be presented with a user-friendly interface where you can paste the YouTube video URL and configure the settings for your MP3 conversion.
Now that you have successfully opened the YouTube to MP3 converter on your Mac, you are ready to move on to the next step: pasting the YouTube video URL into the converter.
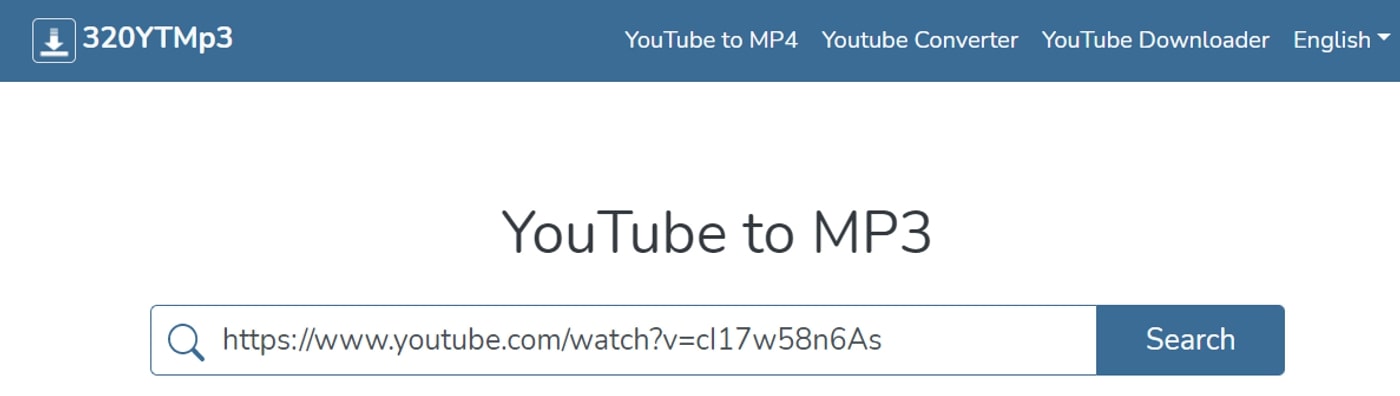
Step 4: Paste the YouTube video URL into the converter
Once you have the YouTube to MP3 converter application open on your Mac, it’s time to paste the YouTube video URL that you copied in the previous step. This will allow the converter to fetch the video and prepare it for conversion into MP3 format.
To paste the YouTube video URL into the converter, follow these steps:
- Ensure that the YouTube to MP3 converter application is active and in focus on your Mac.
- Click on the designated input field where the YouTube video URL needs to be pasted. This field is typically labeled as “Paste URL” or “Enter Video URL”.
- With the input field selected, right-click and choose “Paste” from the context menu, or simply press “Command + V” on your keyboard to paste the URL.
The YouTube video URL will be automatically inserted into the converter’s input field, allowing the application to retrieve the video from YouTube’s servers.
It’s important to note that different YouTube to MP3 converters may have slightly different user interfaces and instructions for pasting the URL. Always refer to the specific instructions provided by the converter tool you are using.
Once you have successfully pasted the YouTube video URL into the converter, you are ready to move on to the next step: selecting the MP3 format for conversion.
Step 5: Select the MP3 format for conversion
After pasting the YouTube video URL into the converter, the next step is to select the MP3 format as the desired output format for your conversion. This will ensure that the YouTube video is converted into an audio file in MP3 format.
To select the MP3 format in the converter tool, follow these steps:
- Navigate to the output format options or settings within the YouTube to MP3 converter application.
- Locate the format selection dropdown menu or button, usually labeled as “Output format” or “Convert to”.
- Click on the dropdown menu or button to reveal the available output format options.
- From the list of available formats, select “MP3”.
By selecting the MP3 format, you are instructing the converter to convert the YouTube video into an audio file specifically in the MP3 format.
Some converter tools may offer additional options such as bitrate, sample rate, or other audio settings. You can adjust these settings according to your preferences, but the default settings generally provide a good balance between audio quality and file size.
Once you have selected the MP3 format and any desired audio settings, you are ready to proceed to the next step: choosing the destination folder for the converted MP3 files.
Step 6: Choose the destination folder for the converted MP3 files
After selecting the MP3 format for the conversion, the next step is to choose the destination folder where the converted MP3 files will be saved on your Mac. This allows you to easily locate and access your converted files once the conversion process is complete.
To choose the destination folder for the converted MP3 files, follow these steps:
- Look for the “Destination” or “Output Folder” option within the YouTube to MP3 converter application.
- Click on the folder icon or the “Browse” button next to the destination field to open your Mac’s file explorer.
- Navigate to the location on your Mac where you want the converted MP3 files to be saved.
- Create a new folder if desired, or select an existing folder to serve as the destination for the converted files.
- Once you have chosen the destination folder, click “OK” or “Select” to confirm your selection.
It’s important to choose a destination folder that you can easily remember and access later. This could be a specific folder dedicated to music or any other location that suits your organizational preferences.
By choosing the destination folder, you are ensuring that the converted MP3 files are saved in the designated location, ready for you to enjoy or transfer to your preferred devices.
Now that you have selected the destination folder for your converted MP3 files, you are ready to move on to the next step: starting the YouTube to MP3 conversion process.
Step 7: Start the YouTube to MP3 conversion process
With the YouTube video URL pasted, the MP3 format selected, and the destination folder chosen, you are now ready to start the YouTube to MP3 conversion process on your Mac. This step will initiate the conversion of the YouTube video into an MP3 audio file.
To start the conversion process, follow these simple steps:
- Double-check all the settings, including the YouTube video URL, output format, and destination folder, to ensure everything is correct.
- Look for the “Start” or “Convert” button within the YouTube to MP3 converter application.
- Click the “Start” or “Convert” button to begin the conversion process.
Once you initiate the conversion, the YouTube to MP3 converter tool will start fetching the video from YouTube’s servers and converting it into an MP3 audio file based on your selected settings.
The conversion time may vary depending on the length of the video and the processing power of your Mac. Typically, shorter videos will convert more quickly compared to longer videos.
During the conversion process, it’s important to let the converter tool complete the task without interruption. Avoid closing the application or shutting down your Mac until the conversion is finished.
Now that you have started the YouTube to MP3 conversion process, you can move on to the next step: waiting for the conversion to complete.
Step 8: Wait for the conversion to complete
After initiating the YouTube to MP3 conversion process, it’s important to be patient and allow the converter tool to complete the task. Depending on the length of the video and the performance of your Mac, the conversion process may take some time to finish.
During this step, it’s important to refrain from closing the converter application or interfering with the conversion process. Interruptions or stopping the process prematurely may result in incomplete or corrupted MP3 files.
While waiting for the conversion to complete, you can monitor the progress within the converter tool. Some converter tools provide a progress bar or percentage indicator, allowing you to track the status of the conversion.
It’s also a good idea to ensure that your Mac is connected to a stable internet connection during the conversion process. This will ensure that the YouTube video is downloaded efficiently and the conversion proceeds smoothly.
Keep in mind that the conversion time may vary depending on factors such as the length of the video, your internet connection speed, and the processing power of your Mac. Longer videos may take more time to convert compared to shorter ones.
Once the conversion is complete, the YouTube to MP3 converter tool will notify you or indicate that the process has finished. You are now ready to access and locate the converted MP3 files on your Mac.
Now that you have successfully waited for the conversion to complete, you can proceed to the final step: accessing and locating the converted MP3 files on your Mac.
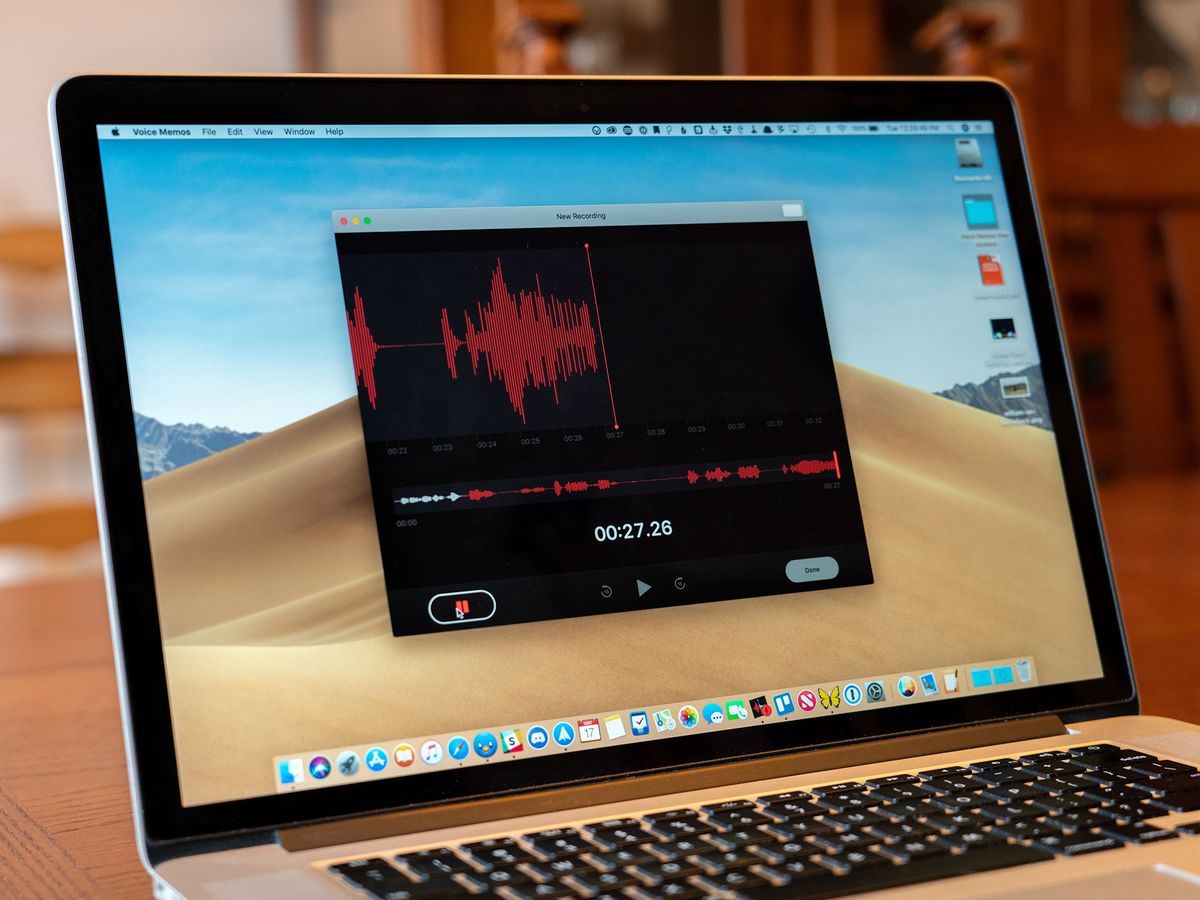
Step 9: Access and locate the converted MP3 files on your Mac
Now that the YouTube to MP3 conversion process is complete, it’s time to access and locate the converted MP3 files on your Mac. By doing so, you can enjoy your favorite audio content offline or transfer the files to your preferred devices.
To access and locate the converted MP3 files, follow these steps:
- Navigate to the destination folder you previously selected for the converted MP3 files.
- Double-click on the folder to open it and view its contents.
- You should see the converted MP3 files listed within the folder.
- Alternatively, you can use the Mac’s search functionality to locate the converted MP3 files by entering the file name or other relevant keywords.
- Once you have located the MP3 file you want to access, you can play it using your preferred media player or transfer it to your other devices such as smartphones, tablets, or MP3 players.
It’s important to note that the format of the converted MP3 files will be determined by the settings you selected during the conversion process. Ensure that your media player or other devices support the MP3 format to ensure compatibility.
By accessing and locating the converted MP3 files, you can now enjoy your favorite audio content offline anytime, anywhere.
Congratulations! You have successfully completed all the steps to convert YouTube videos to MP3 on your Mac. Now you have the freedom to listen to your favorite music, podcasts, and other audio content even without an internet connection.
Remember to respect copyright laws and only convert YouTube videos to MP3 for personal use or when you have the necessary permissions. Enjoy your newly converted MP3 files and happy listening!
With all the steps completed, you have successfully accessed and located the converted MP3 files on your Mac. Now you can enjoy your favorite music and audio content offline, or transfer the files to other devices for on-the-go listening.
Conclusion
Converting YouTube videos to MP3 on your Mac has become easier than ever before. With the right YouTube to MP3 converter tool and a few simple steps, you can transform your favorite YouTube videos into high-quality MP3 files that can be enjoyed offline on your Mac or transferred to other devices.
In this article, we walked you through the step-by-step process of converting YouTube videos to MP3 on your Mac. We started by choosing a reliable converter tool, followed by copying the YouTube video URL, opening the converter application, pasting the URL, and selecting the MP3 format for conversion. We then proceeded to choose the destination folder, started the conversion process, and waited for the conversion to complete. Lastly, we accessed and located the converted MP3 files on your Mac.
By following these steps, you now have the power to enjoy your favorite audio content from YouTube anytime, anywhere, without needing an internet connection. Whether you want to listen to podcasts, music, or any other audio content, converting YouTube videos to MP3 on your Mac provides you with the flexibility and convenience to take your favorite content with you on the go.
Remember to always use reliable converter tools, respect copyright laws, and convert YouTube videos to MP3 for personal use or when you have the necessary permissions. Enjoy your newly converted MP3 files and happy listening!
In conclusion, converting YouTube videos to MP3 on your Mac is a simple and straightforward process. By choosing a reputable converter tool, copying the video URL, opening the converter application, selecting the MP3 format, choosing the destination folder, starting the conversion process, and accessing the converted files, you can enjoy your favorite audio content offline and on the go. Take advantage of this convenient method to enjoy music, podcasts, and more whenever and wherever you like. Feel free to explore various converter tools and personalize your conversions according to your preferences. Happy converting!