Home>Production & Technology>MP3>How To Save An MP3 File On An IPhone
MP3
How To Save An MP3 File On An IPhone
Published: December 8, 2023
Learn how to save an MP3 file on your iPhone and enjoy your favorite music on the go. Follow our step-by-step guide to easily download and store MP3 files on your device.
(Many of the links in this article redirect to a specific reviewed product. Your purchase of these products through affiliate links helps to generate commission for AudioLover.com, at no extra cost. Learn more)
Table of Contents
Introduction
Welcome to this guide on how to save an MP3 file on an iPhone. MP3 files are a popular audio format used for storing and playing music, podcasts, audiobooks, and more. While iPhones are known for their seamless integration with the iTunes Store and Apple Music, you may come across situations where you need to save an MP3 file from other sources directly onto your device.
Whether you have downloaded an MP3 file from a website, received it via email, or transferred it from your computer, we will walk you through the process of saving the file onto your iPhone. Having your favorite songs, educational podcasts, or inspirational audiobooks readily available on your iPhone can be incredibly convenient, especially when you’re on the go or without an internet connection.
In this step-by-step guide, we will cover the entire process, from selecting the MP3 file to accessing it in your iPhone’s music library. We will also cover some essential tips and tricks along the way to optimize your experience and ensure the best audio quality for your saved MP3 files.
So, if you’re ready to learn how to save an MP3 file on your iPhone and take your audio collection with you wherever you go, let’s dive in!
Step 1: Selecting the MP3 File
The first step in saving an MP3 file on your iPhone is selecting the file you want to save. There are various sources from which you can obtain MP3 files, such as websites, email attachments, or your computer.
If you are downloading an MP3 file from a website, navigate to the webpage or platform where the file is available. Look for a download link or button next to the MP3 file you wish to save. Tap on the link or button to initiate the download process. Depending on your browser, you may see a pop-up window asking you to confirm the download.
If you have received an MP3 file via email, open the email on your iPhone and locate the attachment. Tap on the attachment to open it, and you will be presented with several options, including saving the attachment to your device. Choose the option to save the MP3 file to proceed.
In the case of transferring an MP3 file from your computer to your iPhone, you will need to connect your iPhone to your computer using a USB cable. Once connected, open the file management system on your computer and locate the MP3 file you want to transfer. Drag and drop the file into the designated folder for your iPhone or use the appropriate file transfer software.
It is important to note that not all files labeled as MP3 may be compatible with your iPhone. Ensure that the file you select is indeed in the MP3 format. Additionally, be cautious when downloading files from unfamiliar sources, as they may contain malware or unwanted elements that could compromise your device’s security.
Once you have selected the MP3 file you want to save, you are ready to proceed to the next step, which involves downloading a file management app on your iPhone.
Step 2: Downloading a File Management App
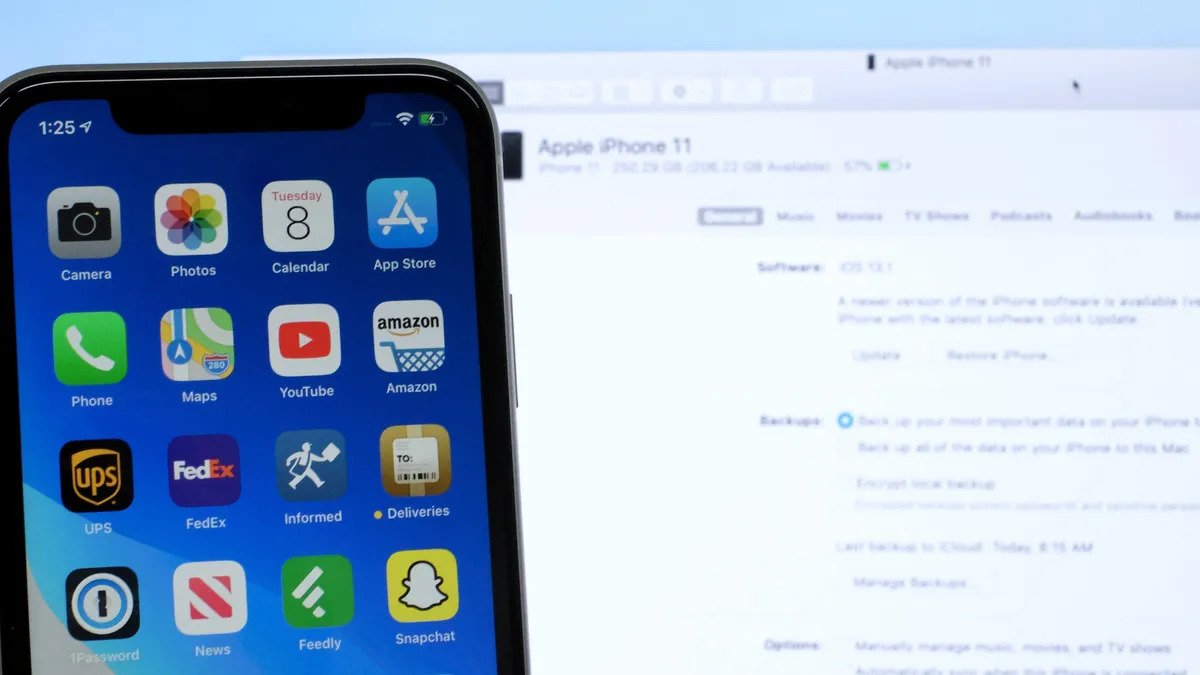
In order to save and manage MP3 files on your iPhone, you will need to download a file management app from the App Store. While iPhones come with a built-in Files app, it may not always offer the necessary functionality for organizing and accessing your saved MP3 files.
There are several file management apps available on the App Store, each offering different features and user interfaces. Some popular options include Documents by Readdle, FileMaster, and iFile. To download a file management app, follow these steps:
- Open the App Store on your iPhone.
- Tap on the Search tab at the bottom of the screen.
- Type in the name of the file management app you want to download, such as “Documents by Readdle.”
- Tap on the app from the search results.
- Tap on the Get or Download button next to the app.
- If prompted, authenticate your download with your Apple ID and password or using Touch ID/Face ID.
- Wait for the app to download and install on your iPhone.
Once the file management app is successfully installed on your iPhone, you can proceed to the next step of importing the MP3 file into the app.
It is worth noting that while there are free file management apps available, some may offer premium features or require in-app purchases to access certain functionalities. Take a moment to explore the features and pricing options before making your selection. Additionally, check the app’s user reviews and ratings to ensure a positive experience.
Step 3: Importing the MP3 File into the File Management App
Now that you have downloaded a file management app on your iPhone, it’s time to import the MP3 file into the app. This step allows you to transfer the file from its original location to the file management app, where you can organize and access it easily.
To import the MP3 file into the file management app, follow these steps:
- Open the file management app you downloaded in the previous step.
- Navigate to the section or folder where you want to store your MP3 file.
- Look for an option to import or add a file.
- Tap on the import/add file option.
- Depending on the app, you may be presented with different methods of importing files.
- If you downloaded the MP3 file from a website or received it via email, you may be able to find it in the Downloads or Attachments folder respectively. Tap on the file to select it.
- If you transferred the MP3 file from your computer, locate the file in your file management app’s designated folder for your iPhone. Tap on the file to select it.
- Confirm the import process and wait for the app to transfer the MP3 file.
Once the import process is complete, you will see the MP3 file listed within the file management app, ready to be accessed and organized. You can repeat this process for multiple MP3 files, allowing you to build a collection of your favorite audio files within the app.
Remember to keep track of the location where you imported the MP3 file within the app, as this will be important in the next step of saving the file to your iPhone.
Step 4: Saving the MP3 File to the iPhone
With the MP3 file successfully imported into the file management app on your iPhone, it’s time to save the file to your device’s storage. This step ensures that the MP3 file is readily accessible even when you’re offline or without an internet connection.
To save the MP3 file to your iPhone, follow these steps:
- Open the file management app on your iPhone.
- Navigate to the section or folder where the MP3 file is located.
- Find the MP3 file in the list of files.
- Swipe left or tap and hold on the file to reveal a list of options.
- Look for an option to save or export the file.
- Tap on the save/export option.
- Select a location on your iPhone where you want to save the file. This can be your device’s internal storage or a specific folder within the Music app.
- Confirm the save process and wait for the app to save the MP3 file to your iPhone.
Upon successful completion, you will have the MP3 file saved directly on your iPhone, allowing you to access it through the built-in Music app or any other media player app you prefer. This means you can enjoy your favorite music, podcasts, or audiobooks anytime, anywhere, without relying on an internet connection.
It is important to note that the process of saving the MP3 file may vary slightly depending on the file management app you are using. Refer to the app’s user guide or help section for specific instructions tailored to that app.
Now that you have saved the MP3 file to your iPhone, let’s move on to the final step of accessing the saved file in the Music app.
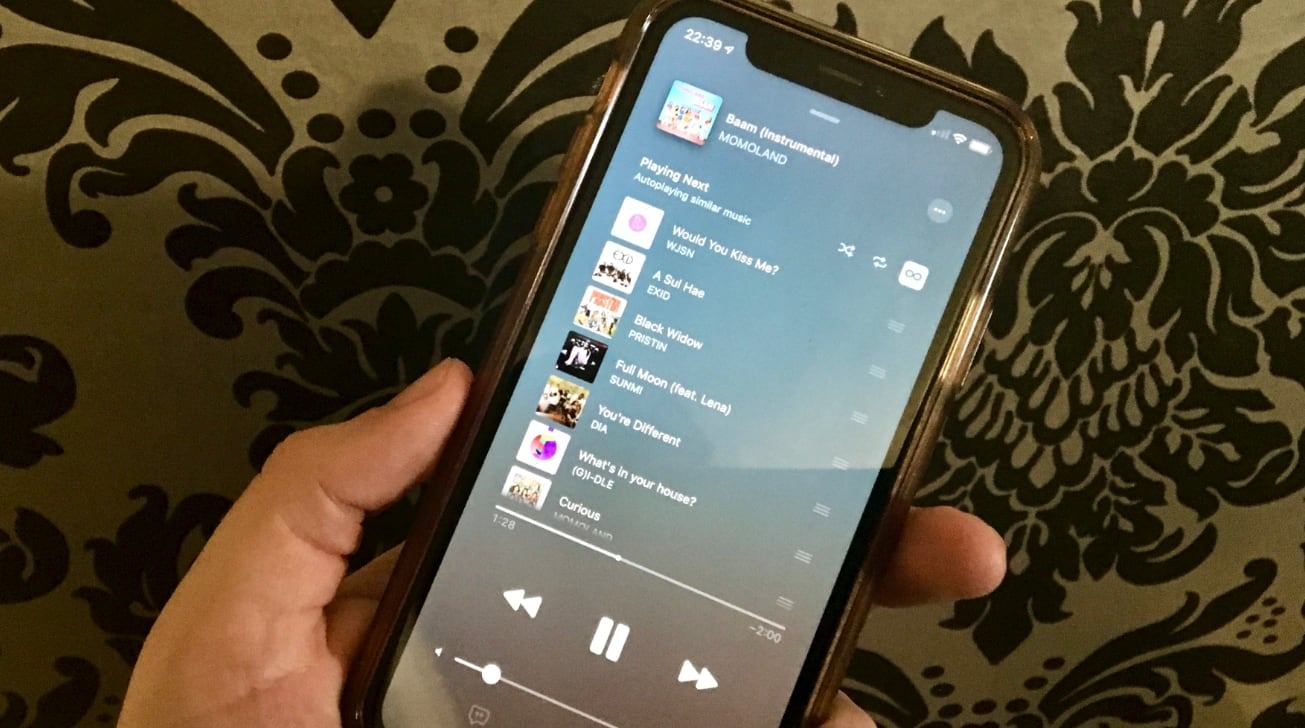
Step 5: Accessing the Saved MP3 File on the iPhone
After saving the MP3 file to your iPhone, you can access it through the built-in Music app or any other preferred media player app installed on your device. This step allows you to enjoy your saved MP3 file and listen to it whenever you want.
To access the saved MP3 file on your iPhone, follow these steps:
- Locate and open the Music app on your iPhone. It is represented by a musical note icon.
- Tap on the Library tab at the bottom of the screen to access your music library.
- Depending on the organization of your music library, look for a section or category that corresponds to the location where you saved the MP3 file. For example, if you saved it in a specific folder within the Music app, navigate to that folder.
- You should see the saved MP3 file listed among your other music files. Tap on the MP3 file to begin playing it.
The built-in Music app on your iPhone offers various playback controls, including play/pause, skip forward, skip backward, and volume adjustment. You can also create playlists, shuffle songs, and organize your music library to personalize your listening experience.
If you prefer to use a different media player app, such as Spotify or VLC, open the app and navigate to the location where you saved the MP3 file. The process of accessing the file may vary depending on the app you are using, so refer to the app’s instructions or user guide for specific guidance.
Congratulations! You have successfully accessed and played the saved MP3 file on your iPhone. Now you can enjoy your favorite music, podcasts, or audiobooks anytime, anywhere, without the need for an internet connection.
Remember to keep your MP3 files organized within the file management app to easily find and manage your collection. You can also create playlists within the Music app or your preferred media player app to curate your own personalized listening experience.
And that concludes our guide on how to save an MP3 file on an iPhone. We hope this step-by-step process has been helpful and that you can now make the most of your iPhone’s capabilities to enjoy your favorite audio content.
Happy listening!
Conclusion
In conclusion, saving an MP3 file on your iPhone enables you to have easy access to your favorite music, podcasts, audiobooks, and other audio content wherever you go. By following the steps outlined in this guide, you can seamlessly transfer MP3 files from various sources to your iPhone and enjoy them offline.
We began by selecting the MP3 file from websites, email attachments, or by transferring files from your computer. Next, we discussed the importance of downloading a file management app from the App Store to enhance your ability to organize and manage your MP3 files effectively.
After downloading a file management app, we covered the process of importing the MP3 file into the app, ensuring it is ready for saving to your iPhone. By following the instructions provided, you can easily transfer the MP3 file to the file management app and have it at your fingertips.
Once the MP3 file is imported into the app, we explored the process of saving it to your iPhone. This final step ensures that the MP3 file is available for playback even when you lack an internet connection. By saving the file to your iPhone’s storage, you can access it through the built-in Music app or any other preferred media player app.
In the last step of our guide, we discussed how to access the saved MP3 file on your iPhone using the Music app. We highlighted the importance of locating the file within the app and enjoying your favorite music, podcasts, or audiobooks through its seamless playback capabilities.
By following these steps, you can fully utilize your iPhone’s capabilities and take your audio collection to the next level. Whether you’re a music enthusiast, podcast lover, or enjoy listening to audiobooks, saving MP3 files on your iPhone provides convenience and flexibility.
Remember to keep your MP3 files organized within the file management app to easily find and manage your collection. And don’t forget to explore additional features and functionalities offered by the file management app and your preferred media player app to enhance your listening experience.
We hope this guide has been informative and valuable in helping you save and access MP3 files on your iPhone. Now, you can enjoy your favorite audio content anytime, anywhere, with just a few taps. Happy listening!