Home>Production & Technology>MP3>How To Transfer MP3 Files To IPhone

MP3
How To Transfer MP3 Files To IPhone
Published: December 8, 2023
Learn how to easily transfer MP3 files to your iPhone and enjoy your favorite music on-the-go. Follow our step-by-step guide for a seamless MP3 transfer experience.
(Many of the links in this article redirect to a specific reviewed product. Your purchase of these products through affiliate links helps to generate commission for AudioLover.com, at no extra cost. Learn more)
Table of Contents
Introduction
Music has always been an important part of our lives, and with the advent of smartphones, we can now carry our favorite tunes with us wherever we go. MP3 files have become the most popular format for digital music, thanks to their high audio quality and compact size. If you’re an iPhone user and wondering how to transfer your MP3 files to your device, you’ve come to the right place. In this article, we will explore various methods that you can use to easily transfer MP3 files to your iPhone.
Having your favorite songs on your iPhone not only allows you to enjoy your music on the go but also gives you the freedom to create personalized playlists and set them as ringtones. Luckily, there are several ways you can transfer MP3 files to your iPhone, whether you prefer using iTunes, iCloud Drive, or third-party apps. Each method offers its own set of advantages and limitations, so it’s important to choose the one that best suits your needs.
In the following sections, we will walk you through different methods for transferring MP3 files to your iPhone. From the classic method of using iTunes to the convenience of cloud storage services like iCloud Drive, Dropbox, and Google Drive, and even the simplicity of AirDrop and third-party apps, you’ll find a solution that works for you. Whether you’re a tech-savvy individual or new to iPhone file management, we’ve got you covered.
With these methods at your disposal, you no longer have to worry about being limited to purchasing music from the iTunes Store. You can now add your existing MP3 collection or even discover new music by downloading songs from the internet and transferring them to your iPhone. Let’s dive into the details of each method and get your MP3 files onto your iPhone in no time!
Method 1: Using iTunes
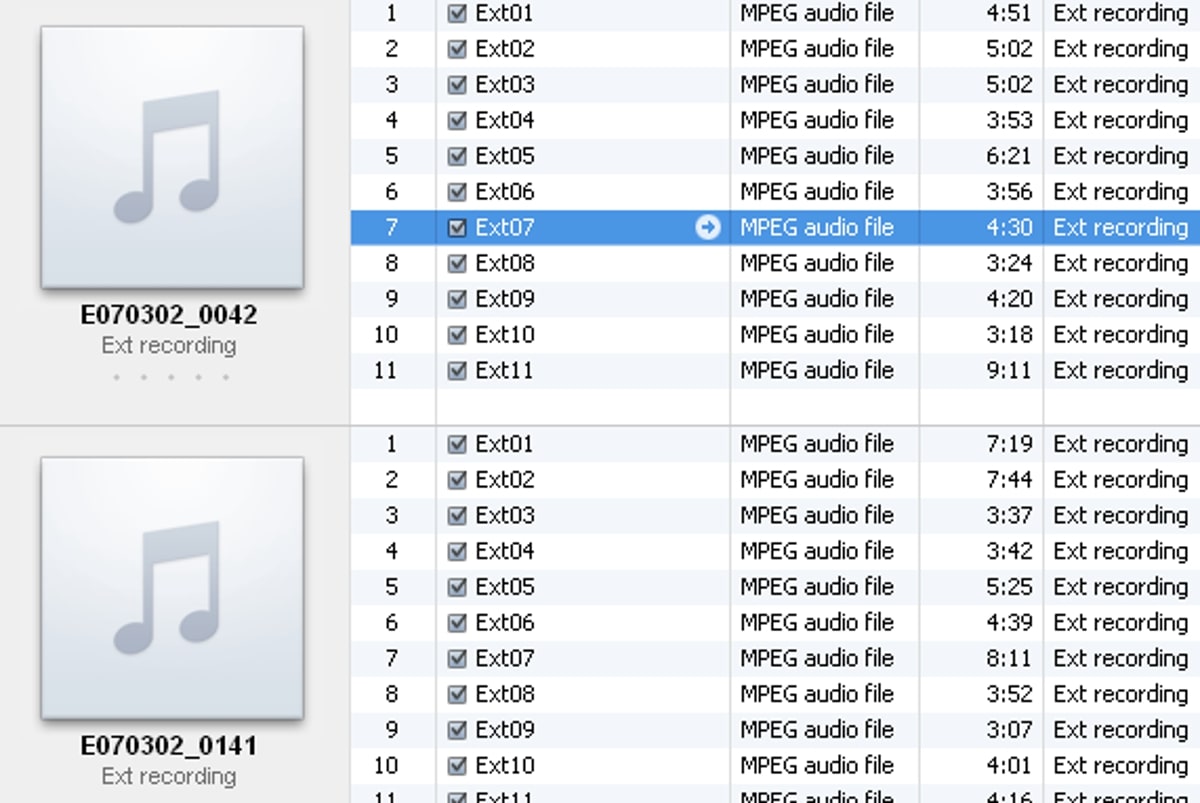
iTunes has long been the go-to software for managing content on Apple devices, including music. If you already have iTunes installed on your computer, transferring MP3 files to your iPhone is a straightforward process.
Here’s how to transfer MP3 files to your iPhone using iTunes:
- Connect your iPhone to your computer using a USB cable.
- Launch iTunes if it doesn’t open automatically. On the top-left corner of the iTunes window, click on the device icon.
- In the sidebar menu, click on “Music” to open the music management section for your iPhone.
- Ensure that the “Sync Music” option is checked.
- Choose the option that suits your needs:
- To transfer your entire MP3 library, select the “Entire music library” option.
- To transfer specific MP3 files or folders, choose the “Selected playlists, artists, albums, and genres” option. You can then select individual MP3 files or create playlists to be synced.
- Click on the “Apply” or “Sync” button to start the transfer process.
- Once the transfer is complete, disconnect your iPhone from the computer and check the Music app on your iPhone to ensure that the MP3 files have been successfully transferred.
It’s important to note that by using iTunes to transfer MP3 files, your existing music library on your iPhone may be overwritten. If you prefer to keep your current library intact, you can create a separate playlist in iTunes and select that playlist for syncing instead.
Furthermore, iTunes only allows you to transfer MP3 files that are in a compatible format. If you have MP3 files with different file extensions, you may need to convert them to the proper format using a third-party converter tool before transferring them.
Using iTunes provides a direct and reliable method for transferring MP3 files to your iPhone, especially if you prefer organizing your music library within the iTunes application. However, if you’re looking for alternative methods that don’t require a computer, keep reading to explore other options.
Method 2: Using iCloud Drive
If you prefer a wireless method to transfer MP3 files to your iPhone, using iCloud Drive is a convenient option. iCloud Drive is a cloud storage service provided by Apple that allows you to store and access your files across multiple devices.
Here’s how to transfer MP3 files to your iPhone using iCloud Drive:
- Ensure that you have an active iCloud account and that iCloud Drive is enabled on your iPhone. To check this, go to “Settings” and tap on your name at the top of the screen. Then, select “iCloud” and make sure that “iCloud Drive” is toggled on.
- On your computer, open a web browser and visit the iCloud website (www.icloud.com).
- Sign in with your Apple ID and password.
- Click on the “iCloud Drive” icon to access your iCloud Drive storage.
- Create a folder or navigate to an existing folder where you want to transfer the MP3 files.
- Drag and drop the MP3 files from your computer into the iCloud Drive folder.
- On your iPhone, open the Files app.
- Navigate to the “iCloud Drive” section, and locate the folder where you transferred the MP3 files.
- Tap on the MP3 file you want to transfer, and it will begin playing.
- To save the MP3 file on your iPhone, tap on the “Share” button and select the “Save to Files” option. Choose the desired location within the Files app to save the MP3 file.
Using iCloud Drive offers the advantage of wireless file transfer, allowing you to access your MP3 files from any device with an internet connection. It also provides a seamless syncing experience, meaning any changes you make to the MP3 files in iCloud Drive will be reflected on all your devices linked to the same iCloud account.
However, keep in mind that iCloud Drive offers limited free storage space, and you may need to upgrade your iCloud storage plan if you have a large MP3 library. Additionally, transferring multiple MP3 files using iCloud Drive may take some time, depending on the size and speed of your internet connection.
If you’re looking for other cloud storage options to transfer MP3 files to your iPhone, continue reading to explore methods using Dropbox and Google Drive.
Method 3: Using Dropbox
Dropbox is a popular cloud storage service that allows you to store and share files online. With the Dropbox app installed on your iPhone, you can easily transfer MP3 files from your computer to your iPhone.
Here’s how to transfer MP3 files to your iPhone using Dropbox:
- Sign up for a Dropbox account if you don’t already have one. Download and install the Dropbox app on both your computer and iPhone.
- On your computer, open the Dropbox app or visit the Dropbox website (www.dropbox.com) and sign in with your Dropbox account.
- Create a new folder in your Dropbox account or navigate to an existing folder where you want to transfer the MP3 files.
- Drag and drop the MP3 files from your computer into the Dropbox folder.
- On your iPhone, open the Dropbox app and sign in with the same Dropbox account.
- Navigate to the folder where you saved the MP3 files.
- Tap on the MP3 file you want to transfer, and it will begin playing.
- To save the MP3 file on your iPhone, tap on the “…” button next to the file and select the “Export” option. Then, choose the “Save to Files” option and select the desired location within the Files app to save the MP3 file.
Using Dropbox for transferring MP3 files offers the advantage of easy accessibility and simple file management. You can access your MP3 files from any device with the Dropbox app installed, and changes made to the files will be synced across all your devices.
However, keep in mind that the free Dropbox account comes with limited storage space. If you have a large MP3 library or need additional storage, you may need to upgrade to a paid Dropbox plan.
If you prefer to use another cloud storage service, continue reading to explore how to transfer MP3 files to your iPhone using Google Drive.
Method 4: Using Google Drive
Google Drive is a versatile cloud storage service offered by Google that allows you to store, share, and access files from any device. If you use Google Drive for file storage, you can easily transfer MP3 files to your iPhone using the Google Drive app.
Here’s how to transfer MP3 files to your iPhone using Google Drive:
- Sign up for a Google account if you don’t already have one. Download and install the Google Drive app on both your computer and iPhone.
- On your computer, open the Google Drive app or visit the Google Drive website (www.drive.google.com) and sign in with your Google account.
- Create a new folder in your Google Drive account or navigate to an existing folder where you want to transfer the MP3 files.
- Drag and drop the MP3 files from your computer into the Google Drive folder.
- On your iPhone, open the Google Drive app and sign in with the same Google account.
- Navigate to the folder where you saved the MP3 files.
- Tap on the MP3 file you want to transfer, and it will begin playing.
- To save the MP3 file on your iPhone, tap on the “…” button and select the “Send a copy” option. Then, choose the “Save Image” option to save the MP3 file to your device’s local storage.
Using Google Drive to transfer MP3 files offers the advantage of seamless integration with other Google services and easy collaboration with others. You can access your MP3 files from any device with the Google Drive app installed and share them with friends or colleagues.
It’s important to note that the free Google Drive account comes with limited storage space. If you have a large MP3 library or need additional storage, you may need to upgrade to a paid Google Drive plan.
If you’re looking for a more direct method to transfer MP3 files between devices, continue reading to explore using AirDrop.
Method 5: Using AirDrop
If you have both a Mac computer and an iPhone, using AirDrop is a quick and seamless method to transfer MP3 files wirelessly. AirDrop is a feature that allows you to share files between Apple devices with a simple tap.
Here’s how to transfer MP3 files to your iPhone using AirDrop:
- Ensure that both your Mac computer and iPhone have Wi-Fi and Bluetooth enabled.
- On your Mac computer, locate the MP3 files you want to transfer.
- Right-click on the MP3 file(s) and select the “Share” option.
- Select the AirDrop option from the sharing menu.
- On your iPhone, open the Control Center by swiping down from the top-right corner (on iPhone X or later) or swiping up from the bottom (on older iPhone models).
- Press and hold the connectivity section (top-left corner) to open the expanded view.
- Tap on “AirDrop” to open the AirDrop options.
- Select your Mac computer from the AirDrop list.
- On your Mac computer, a notification will appear, asking you to accept the AirDrop transfer. Click “Accept” to initiate the transfer to your iPhone.
- Once the transfer is complete, the MP3 files will be available in the designated location on your iPhone.
Using AirDrop provides a simple and direct way to transfer MP3 files between your Mac computer and iPhone without the need for any cables or additional software. It’s especially useful if you have a small number of MP3 files to transfer quickly.
It’s worth noting that AirDrop requires both devices to be in close proximity to each other. Additionally, AirDrop functionality may vary depending on the age and compatibility of your devices.
If you prefer using third-party apps for transferring MP3 files to your iPhone, continue reading to explore the next method.
Method 6: Using Third-party Apps
If you want more flexibility and customization options for transferring MP3 files to your iPhone, using third-party apps is a great solution. There are numerous apps available on the App Store that offer file management and transfer features beyond what is provided by default on iOS devices.
Here’s how to transfer MP3 files to your iPhone using a third-party app:
- Visit the App Store on your iPhone and search for a file management or transfer app that suits your needs. Some popular options include Documents by Readdle, iFile, and File Manager & Browser.
- Download and install the app onto your iPhone.
- Launch the app and familiarize yourself with its interface and features.
- Using the app’s file browsing or importing functions, locate the MP3 files you want to transfer.
- Select the MP3 files and choose the option to transfer or import them into the app.
- Once the files are stored within the app, you can access and play them directly from the app itself.
- To transfer the MP3 files to the native Music app on your iPhone, check if the app provides an option to export or share the files. This will typically prompt you to save the files to your device’s storage or directly to the Music app.
Using third-party apps for transferring MP3 files provides you with greater control and flexibility over the file management process. These apps often offer additional features like file organization, custom playlists, and advanced playback options.
However, it’s important to note that not all third-party apps are created equal, and it’s recommended to read reviews and choose reputable apps from trusted developers. Additionally, some apps may require in-app purchases or subscriptions for full functionality.
Now that you’ve explored various methods for transferring MP3 files to your iPhone, you can choose the method that best suits your preferences and needs. Whether you opt for using iTunes, iCloud Drive, Dropbox, Google Drive, AirDrop, or third-party apps, you can enjoy your favorite tunes on your iPhone wherever you go!
Conclusion
Transferring MP3 files to your iPhone allows you to enjoy your favorite music on the go and gives you the freedom to curate personalized playlists. In this article, we explored various methods to easily transfer MP3 files to your iPhone, ranging from traditional options like iTunes to wireless solutions like iCloud Drive, Dropbox, and Google Drive, as well as the convenience of AirDrop and third-party apps.
If you prefer the familiarity of using iTunes, you can connect your iPhone to your computer and transfer MP3 files directly. However, if you prefer wireless and cloud-based options, you can use services like iCloud Drive, Dropbox, or Google Drive to store and access your MP3 files from any device with an internet connection.
AirDrop provides a quick and seamless way to transfer MP3 files between a Mac computer and an iPhone. And if you’re looking for more flexibility and customization options, third-party apps offer additional features like advanced file management and playback controls.
When choosing a method, consider factors such as ease of use, storage capacity, and the specific features you require. It’s also important to keep in mind any potential limitations, such as file format compatibility and available storage space.
Now that you have a range of methods to choose from, you can easily transfer your MP3 files to your iPhone and enjoy your music on the go. Whether you’re a tech-savvy user or new to iPhone file management, there’s a method to suit everyone’s needs. So go ahead, transfer those MP3 files, and let the music play!

