Home>Production & Technology>Sound Effects>How To Add Sound Effects Of Video


Sound Effects
How To Add Sound Effects Of Video
Published: November 20, 2023
Learn how to add captivating sound effects to your videos with our step-by-step guide. Enhance the viewer experience and make your videos stand out!
(Many of the links in this article redirect to a specific reviewed product. Your purchase of these products through affiliate links helps to generate commission for AudioLover.com, at no extra cost. Learn more)
Table of Contents
- Introduction
- Step 1: Choosing the Right Sound Effects
- Step 2: Finding Sound Effects Online
- Step 3: Downloading the Sound Effects
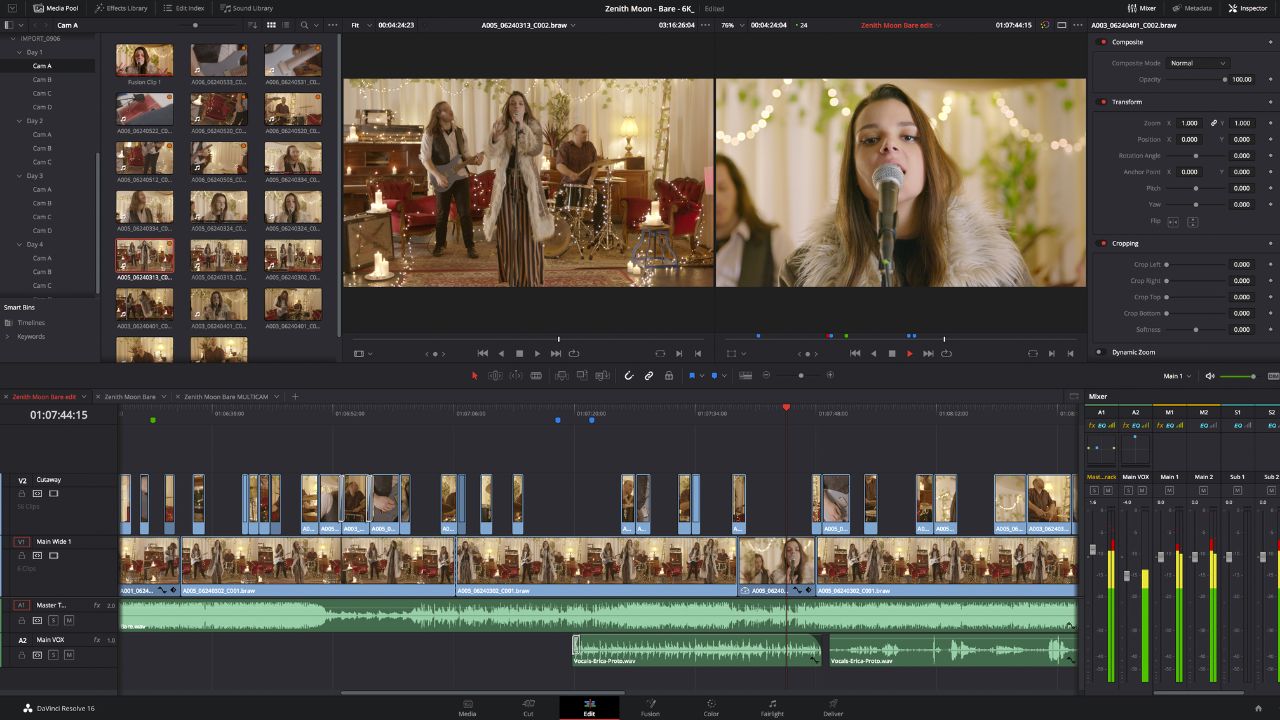
- Step 4: Importing the Video into Editing Software
- Step 5: Adding Sound Effects to the Video
- Step 6: Adjusting Sound Effects Timing
- Step 7: Editing Sound Effects Volume
- Step 8: Exporting the Final Video with Sound Effects
- Conclusion
Introduction
Sound effects play a crucial role in enhancing the overall experience of videos. Whether you are creating a professional film, a YouTube vlog, or a fun social media clip, adding the right sound effects can bring your visuals to life and engage your audience on a deeper level. From explosions and gunshots to bird songs and footsteps, sound effects create a sense of realism and immerse viewers in the world you’ve created.
In this article, we will guide you through the process of adding sound effects to your videos. We’ll cover everything from choosing the right sound effects to downloading and importing them into your video editing software. We’ll also discuss adjusting the timing and volume of the sound effects to ensure they are perfectly synchronized with the visuals. By the end of this article, you’ll have the knowledge and tools to transform your videos with captivating sound effects.
Before we dive into the technical aspects, it’s important to note that sound effects should be used strategically and purposefully. While they can add excitement and depth, overusing or using them inappropriately can be distracting and diminish the overall quality of your video. Aim for a balance between enhancing your content and maintaining a cohesive narrative.
Now, let’s get started and learn how to add sound effects to your videos, step by step.
Step 1: Choosing the Right Sound Effects
Choosing the right sound effects for your video is essential to create the desired atmosphere and impact. The sound effects you select should align with the theme, mood, and genre of your video. Here are a few tips to help you choose the right sound effects:
- Identify the Purpose: Determine the purpose of the sound effect in your video. Is it meant to create tension, evoke emotions, or add realism? Understanding the role of the sound effect will help you narrow down your options.
- Consider the Setting: Take into account the setting or environment of your video. If it’s a nature scene, you might want to include sounds of birds chirping or wind rustling through the trees. If it’s an action-packed scene, you’ll need sound effects that match the intensity, such as explosions or gunshots.
- Pay Attention to Timing: Consider the timing of the sound effects. Think about when and how frequently you want to use them. A well-timed sound effect can elevate a specific moment or highlight a key action.
- Match the Tone: Make sure the sound effects align with the overall tone of your video. For example, if your video is a comedy, you’ll want to select sound effects that are light-hearted and humorous.
- Experiment: Don’t be afraid to experiment and try different sound effects. Sometimes, unexpected choices can create a unique and memorable impact.
There are several online resources where you can browse and listen to a wide range of sound effects. These platforms offer categorized libraries, making it easier to find the specific sound effect you’re looking for. Popular sound effects libraries include SoundBible, Freesound, and ZapSplat. Additionally, many video editing software also provide built-in sound effects libraries for convenient access.
Once you’ve chosen the ideal sound effects for your video, it’s time to move on to the next step: finding and downloading them.
Step 2: Finding Sound Effects Online
The internet is a treasure trove of sound effects libraries, offering an extensive collection of audio clips to enhance your videos. Here’s how you can find and explore sound effects online:
- Sound Effects Websites: There are dedicated websites that specialize in hosting and providing a wide variety of sound effects. Some popular options include Freesound, ZapSplat, and SoundBible. These platforms offer user-friendly search functions and categorization, making it easy to find the specific sound effect you’re looking for.
-
Video Editing Software Libraries: Many video editing software come with built-in sound effects libraries. These libraries offer a convenient and integrated approach to finding sound effects as you work on your video. Explore the sound effects library within your editing software and browse through the available options. - Stock Music and Sound Effects Platforms: Stock music and sound effects platforms like AudioJungle and Pond5 also offer a wide range of sound effects for purchase. These platforms often have high-quality sound effects created by professional musicians and sound designers, ensuring a polished and refined result for your videos. Although there is usually a cost associated with these platforms, the investment may be worth it for a more unique and professional sound.
- YouTube Audio Library: If you’re working on a budget or looking for royalty-free sound effects, the YouTube Audio Library is a valuable resource. It provides a vast collection of free-to-use sound effects that you can incorporate into your videos without worrying about copyright issues.
When searching for sound effects online, be sure to take advantage of the search filters and categories provided by these platforms. These tools will help you narrow down your options and find the perfect sound effect for your video. Before downloading any sound effect, make sure to check the licensing terms and ensure that it is compatible with your intended use.
Now that you know where to find sound effects online, it’s time to move on to the next step: downloading the sound effects and preparing them for your video editing software.
Step 3: Downloading the Sound Effects
Once you have chosen the desired sound effects for your video, it’s time to download them onto your computer. Here’s how you can download sound effects from various sources:
- Sounds Effects Websites: If you are using a dedicated sound effects website like Freesound or SoundBible, locate the download button or link next to the chosen sound effect. Click on it to initiate the download. Make sure to save the file in a location on your computer where you can easily access it later.
- Video Editing Software Libraries: If you are using a video editing software with built-in sound effects libraries, the downloading process might not be necessary. Simply click on the sound effect you want to use and import it directly into your project.
- Stock Music and Sound Effects Platforms: When using stock music and sound effects platforms like AudioJungle or Pond5, you will usually find a “buy” or “add to cart” option. Select the desired sound effect and proceed with the purchase. Once you have completed the purchase, you will usually be able to download the sound effect file in a format specified by the platform.
- YouTube Audio Library: For sound effects obtained from the YouTube Audio Library, you can download them directly from the platform. Click on the download icon next to the sound effect, and it will be saved to your computer.
After downloading the sound effect files, it’s a good practice to organize them in a dedicated folder on your computer. This will make it easier to locate and import them into your video editing software later on.
It’s important to note that sound effects come in various formats, including WAV, MP3, and AIFF. Different video editing software may have specific format requirements, so it’s a good idea to check the supported file formats of your software. If needed, you can convert the sound effect files to the appropriate format using various online or desktop file conversion tools.
Now that you have successfully downloaded the sound effects, it’s time to move on to the next step: importing your video and sound effects into your editing software.
Step 4: Importing the Video into Editing Software
Before you can add sound effects to your video, you need to import both the video footage and the downloaded sound effects into your video editing software. Here’s how you can import your video file into most common editing software:
- Open Your Project: Launch your video editing software and create a new project or open an existing one.
- Import Media: Look for the “Import” or “Import Media” option in the software’s menu. Click on it to open the file explorer or media browser.
- Select Video File: Navigate to the location where your video file is saved and select it. Click “Open” to import the video into your project.
Once the video is imported, you should see it appear in the media library or project timeline of your video editing software. This indicates that the video is ready for editing and you can proceed to the next step of adding sound effects.
It’s worth mentioning that different video editing software may have slightly different import procedures. The general concept of importing media files, however, remains the same. If you’re unsure about the steps for your specific software, consult the software’s documentation or online tutorials for detailed instructions.
Now that your video is imported and ready to be edited, let’s move on to the next step: adding the sound effects to your video.
Step 5: Adding Sound Effects to the Video
Now that you have your video imported into the editing software, it’s time to add the sound effects to enhance your visuals. Follow these steps to seamlessly integrate sound effects into your video:
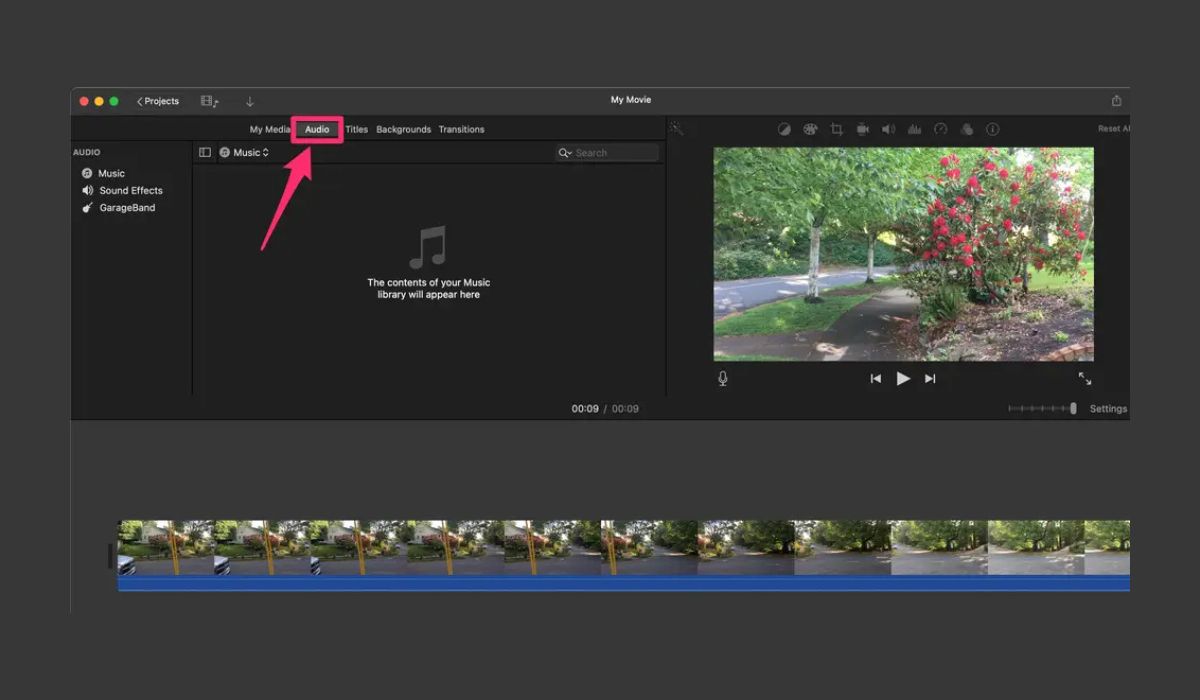
- Locate the Sound Effects Library: In your video editing software, look for the sound effects library or panel. It may be labeled as “Audio Effects” or “Sound Library.”
- Import Sound Effects: Depending on your editing software, you may have the option to directly import and drag sound effect files into the timeline or arrange them separately.
- Drag and Drop: Drag the sound effect from the library onto the timeline at the desired point in your video. Ensure it lines up with the corresponding action or scene.
- Trim and Adjust Timing: If necessary, you can trim the sound effect clip to align it precisely with the visuals. Most video editing software allows you to stretch or compress the length of the sound effect to fit the scene perfectly.
- Layering Sound Effects: For more complex scenes, you may want to layer multiple sound effects to achieve the desired effect. Simply repeat the process of importing and arranging the additional sound effects.
- Crossfade or Fade In/Out: Smooth out transitions by adding fades to your sound effects. This technique can be particularly useful when transitioning between scenes or when a sound effect abruptly starts.
As you add sound effects to your video, play it back to ensure that the timing and synchronization are accurate. Make adjustments as needed to fine-tune the audio-visual experience. Remember to strike a balance between the sound effects and the original audio of the video to maintain clarity and avoid overwhelming the viewer.
Experiment with different combinations of sound effects, and don’t be afraid to move them around or make changes until you achieve the desired result. Remember, sound effects can enhance the dramatic impact, emphasize emotions, or add a touch of realism to your video.
With the sound effects now integrated into your video, let’s move on to the next step: adjusting the volume of the sound effects.
Step 6: Adjusting Sound Effects Timing
Once you have added the sound effects to your video, it’s important to ensure that they are properly synchronized with the visuals. Adjusting the timing of the sound effects will help create a seamless and immersive experience for your viewers. Here’s how you can fine-tune the timing of your sound effects:
- Play Back the Video: Preview your video with the sound effects to identify any areas where the timing feels off or out of sync.
- Trim or Extend Sound Effects: If you notice that a sound effect starts too early or lingers too long, you can trim or extend the length of the clip to align it perfectly with the corresponding action.
- Adjust Sound Effect Placement: Drag the sound effect along the timeline to precisely position it relative to the visuals. This can be particularly useful when you want the sound effect to emphasize a specific moment or action.
- Use Keyframes: Some advanced video editing software allows you to create keyframes for sound effects, enabling you to control the volume and timing more precisely. Experiment with keyframes to achieve the desired effect.
Take the time to watch and listen to your video multiple times, paying close attention to the timing of the sound effects. Make necessary adjustments until the sound effects seamlessly synchronize with the visuals. Maintaining a cohesive flow between the video and sound effects will result in a more professional and engaging end product.
Remember, timing is crucial when it comes to sound effects. Even a slight delay or early start can significantly impact the overall impact of the effect. Take care to ensure that the timing is accurate and enhances the desired effect you want to convey.
With the timing of your sound effects now adjusted, let’s move on to the next step: editing the volume of the sound effects.
Step 7: Editing Sound Effects Volume
Adjusting the volume of your sound effects is crucial to create a balanced audio mix in your video. You want the sound effects to be audible and impactful without overpowering the other audio elements. Here’s how you can edit the volume of your sound effects:
- Select the Sound Effect: In your video editing software, locate the sound effect clip in the timeline and select it.
- Access the Volume Controls: Look for the volume controls for the selected sound effect. These controls are usually located in the audio effects panel or on the timeline itself.
- Adjust the Volume Level: Use the volume controls to increase or decrease the volume of the sound effect. Listen to the effect while making adjustments to achieve the desired balance and impact.
- Apply Fades: If necessary, you can apply fades to the beginning or end of the sound effect clip to create smoother transitions between the sound effect and the surrounding audio.
- Layer Sound Effects: If you have multiple sound effects layered in your video, adjust the volume levels of each sound effect to ensure they complement each other and create a cohesive audio experience.
It’s important to maintain a proper balance between the sound effects and the other audio elements in your video, such as dialogue and background music. The goal is to enhance the visuals without overpowering or distracting from the overall audio mix. Regularly preview and adjust the volume levels of the sound effects while listening to the entire video to ensure a harmonious audio balance throughout.
Additionally, be mindful of any audio effects or filters that may be applied to your sound effects. Some editing software allows you to add effects like reverb or EQ adjustments to further enhance the sound effects. Experiment with these effects to achieve the desired result while keeping in mind not to compromise the overall audio quality.
With the volume of your sound effects appropriately adjusted, let’s move on to the final step: exporting the final video with sound effects.
Step 8: Exporting the Final Video with Sound Effects
Once you have added and fine-tuned your sound effects in your video editing software, it’s time to export the final video with the integrated sound effects. Follow these steps to ensure a high-quality export:
- Review and Proofread: Before exporting, carefully watch and listen to your video to ensure that the sound effects are in sync, balanced, and enhance the visual experience as intended.
- Select Export Settings: In your video editing software, access the export or render settings. Choose the desired file format and resolution that best suits your needs. It’s recommended to use a high-quality output format to preserve the visual and audio integrity.
- Adjust Audio Settings: Pay attention to the audio settings during the export process. Ensure that the audio bitrate, sample rate, and codec settings are optimized for the best audio quality.
- Choose Output Location: Select the destination folder on your computer where you want to save the exported video file. Make it easily accessible for future use or sharing.
- Start the Export: Initiate the export process by clicking the “Export” or “Render” button. Depending on the length of your video and the power of your computer, the export process may take some time.
- Preview the Exported Video: Once the export is complete, take a moment to play the exported video in a media player to ensure that the sound effects are intact and synchronized with the visuals.
Congratulations! You have successfully added sound effects to your video and completed the editing process. The final exported video is now ready to be shared with your audience or uploaded to your desired platforms, such as social media, websites, or video sharing platforms. Ensure that you properly credit any royalty-free sound effects utilized in your video, as required by the licensing terms of the sound effect source.
Remember, every video editing software has its own interface and export options, so the steps and terminology may vary slightly. Consult your software’s documentation or online tutorials for specific instructions on exporting your final video with sound effects.
That concludes our step-by-step guide on adding sound effects to your video. By choosing the right sound effects, finding them online, downloading and importing them into your editing software, and fine-tuning the timing and volume, you can create a captivating audio-visual experience for your viewers. So, go ahead and give your videos that extra punch with the perfect sound effects!
Conclusion
Adding sound effects to your videos is a powerful way to enhance the overall experience and engage your audience on a deeper level. By following the step-by-step process outlined in this article, you can effectively incorporate sound effects into your videos and create a more immersive and captivating viewing experience.
We started by emphasizing the importance of choosing the right sound effects that align with the purpose, setting, and tone of your video. We then explored various resources for finding sound effects online, including dedicated sound effects websites, stock music platforms, and the YouTube Audio Library. Once you have downloaded the sound effects, we discussed how to import both the video and sound effects into your chosen video editing software.
The next steps focused on adding the sound effects to your video, adjusting their timing to synchronize with the visuals, and editing their volume for a balanced audio mix. We highlighted the significance of playing back your video, experimenting with fades and keyframes, and ensuring that the volume of the sound effects complements the other audio elements.
Finally, we discussed the process of exporting the final video with the integrated sound effects, ensuring that the export settings are optimized for the best audio and visual quality. We concluded with the reminder to credit any royalty-free sound effects used and the importance of previewing the exported video to ensure that the sound effects are intact and synchronized.
Adding sound effects to your videos takes careful consideration, creativity, and technical know-how. It allows you to immerse your viewers in a rich and dynamic audio-visual experience, making your videos more memorable and engaging. So, don’t hesitate to explore the world of sound effects and let your creativity shine in your video projects. Happy editing!


