Home>Production & Technology>Background Music>How To Add Background Music To Video On Instagram

Background Music
How To Add Background Music To Video On Instagram
Published: October 30, 2023
Learn how to easily add background music to your Instagram videos and make them more engaging. Follow these simple steps to enhance your content with captivating tunes.
(Many of the links in this article redirect to a specific reviewed product. Your purchase of these products through affiliate links helps to generate commission for AudioLover.com, at no extra cost. Learn more)
Table of Contents
Introduction
Adding background music to your videos can elevate the overall experience and make them more engaging and enjoyable. Whether you’re creating content for personal use or for a business or brand, incorporating background music can enhance the mood, evoke emotions, and leave a lasting impression on your audience.
With the popularity of video-sharing platforms like Instagram, it’s important to stand out from the crowd and make your videos memorable. Adding background music is a great way to achieve this. Not only does it add a professional touch, but it also helps to create a unique identity for your videos.
In this article, we will walk you through the step-by-step process of adding background music to your videos on Instagram. Whether you are using the Instagram app or a third-party editing app, we will provide you with the necessary guidance to seamlessly integrate music into your videos.
Before we dive into the steps, it’s important to note that copyright laws apply to background music as well. It’s essential to use royalty-free music or obtain the necessary licenses to avoid copyright infringement. There are several websites and platforms that offer a wide selection of royalty-free music that you can choose from.
Now, let’s get started and explore how to add background music to your Instagram videos!
Step 1: Prepare Your Background Music
The first step in adding background music to your Instagram videos is to prepare the music you want to use. You can either choose an existing track or create your own. Here are a few things to consider during this process:
- Select a Suitable Genre: Think about the mood and theme of your video. Choose a genre of music that complements the content and enhances the desired emotions. For example, if you’re creating a cheerful and upbeat video, you may opt for a pop or electronic track. If you’re going for a more emotional tone, a soft piano or orchestral piece might be more appropriate.
- Consider the Length: The length of your video will determine the duration of the background music. Ensure that the music fits well within the time frame without feeling rushed or dragging on. If needed, you can edit the music later to match the desired length.
- Find Royalty-Free Music: It’s essential to use royalty-free music to avoid copyright issues. There are several websites and platforms that offer a wide range of royalty-free music. Explore these resources and choose a track that aligns with your video’s theme and mood.
- Check the Licensing Requirements: If you choose to use copyrighted music, make sure you have the necessary licenses or permissions to do so. Some artists or music platforms may require you to credit them in your video description, so be sure to comply with any stipulations.
Once you have selected the background music, make sure to download it in a format that is compatible with your editing app or software.
By taking the time to carefully prepare your background music, you’ll be able to set the right tone for your Instagram videos and enhance the overall viewing experience for your audience.
Step 2: Download an Editing App
To add background music to your Instagram videos, you’ll need a reliable editing app that offers audio editing capabilities. There are plenty of options available for both iOS and Android devices. Here’s how to download and choose the right editing app:
- Research and Discover: Take some time to research and explore the various editing apps available in your device’s app store. Read reviews, compare features, and consider the user interface and overall usability of the apps.
- Consider Your Needs: Think about the specific features you require for your video editing needs. Apart from adding background music, do you need additional editing options like trimming, transitions, or effects? Make a list of the features that are important to you.
- Choose a Reputable App: Opt for a well-known and reputable editing app that has positive reviews and a strong user base. You can also check out the app’s website or social media channels for tutorials and customer support.
- Compatibility: Ensure that the editing app you choose is compatible with your device’s operating system. Check the system requirements before downloading to avoid any compatibility issues.
- Free vs. Paid: Decide whether you are comfortable with using a free app or if you are willing to invest in a paid version. Free apps often have limitations, such as watermarked videos or limited features, while paid apps offer more advanced options and a smoother editing experience.
- Download and Install: Once you have made your decision, go to your device’s app store and download the editing app. Follow the installation process and grant any necessary permissions.
Having a reliable editing app on your device will give you the tools and flexibility you need to seamlessly integrate background music into your Instagram videos.
Step 3: Choose the Video and Add Music
Now that you have your background music ready and an editing app installed on your device, it’s time to choose the video you want to add music to and begin the process of integrating the background music. Here’s how:
- Select Your Video: Open the editing app and choose the video you want to enhance with background music. You can either import a video from your device’s gallery or shoot a new video directly within the app.
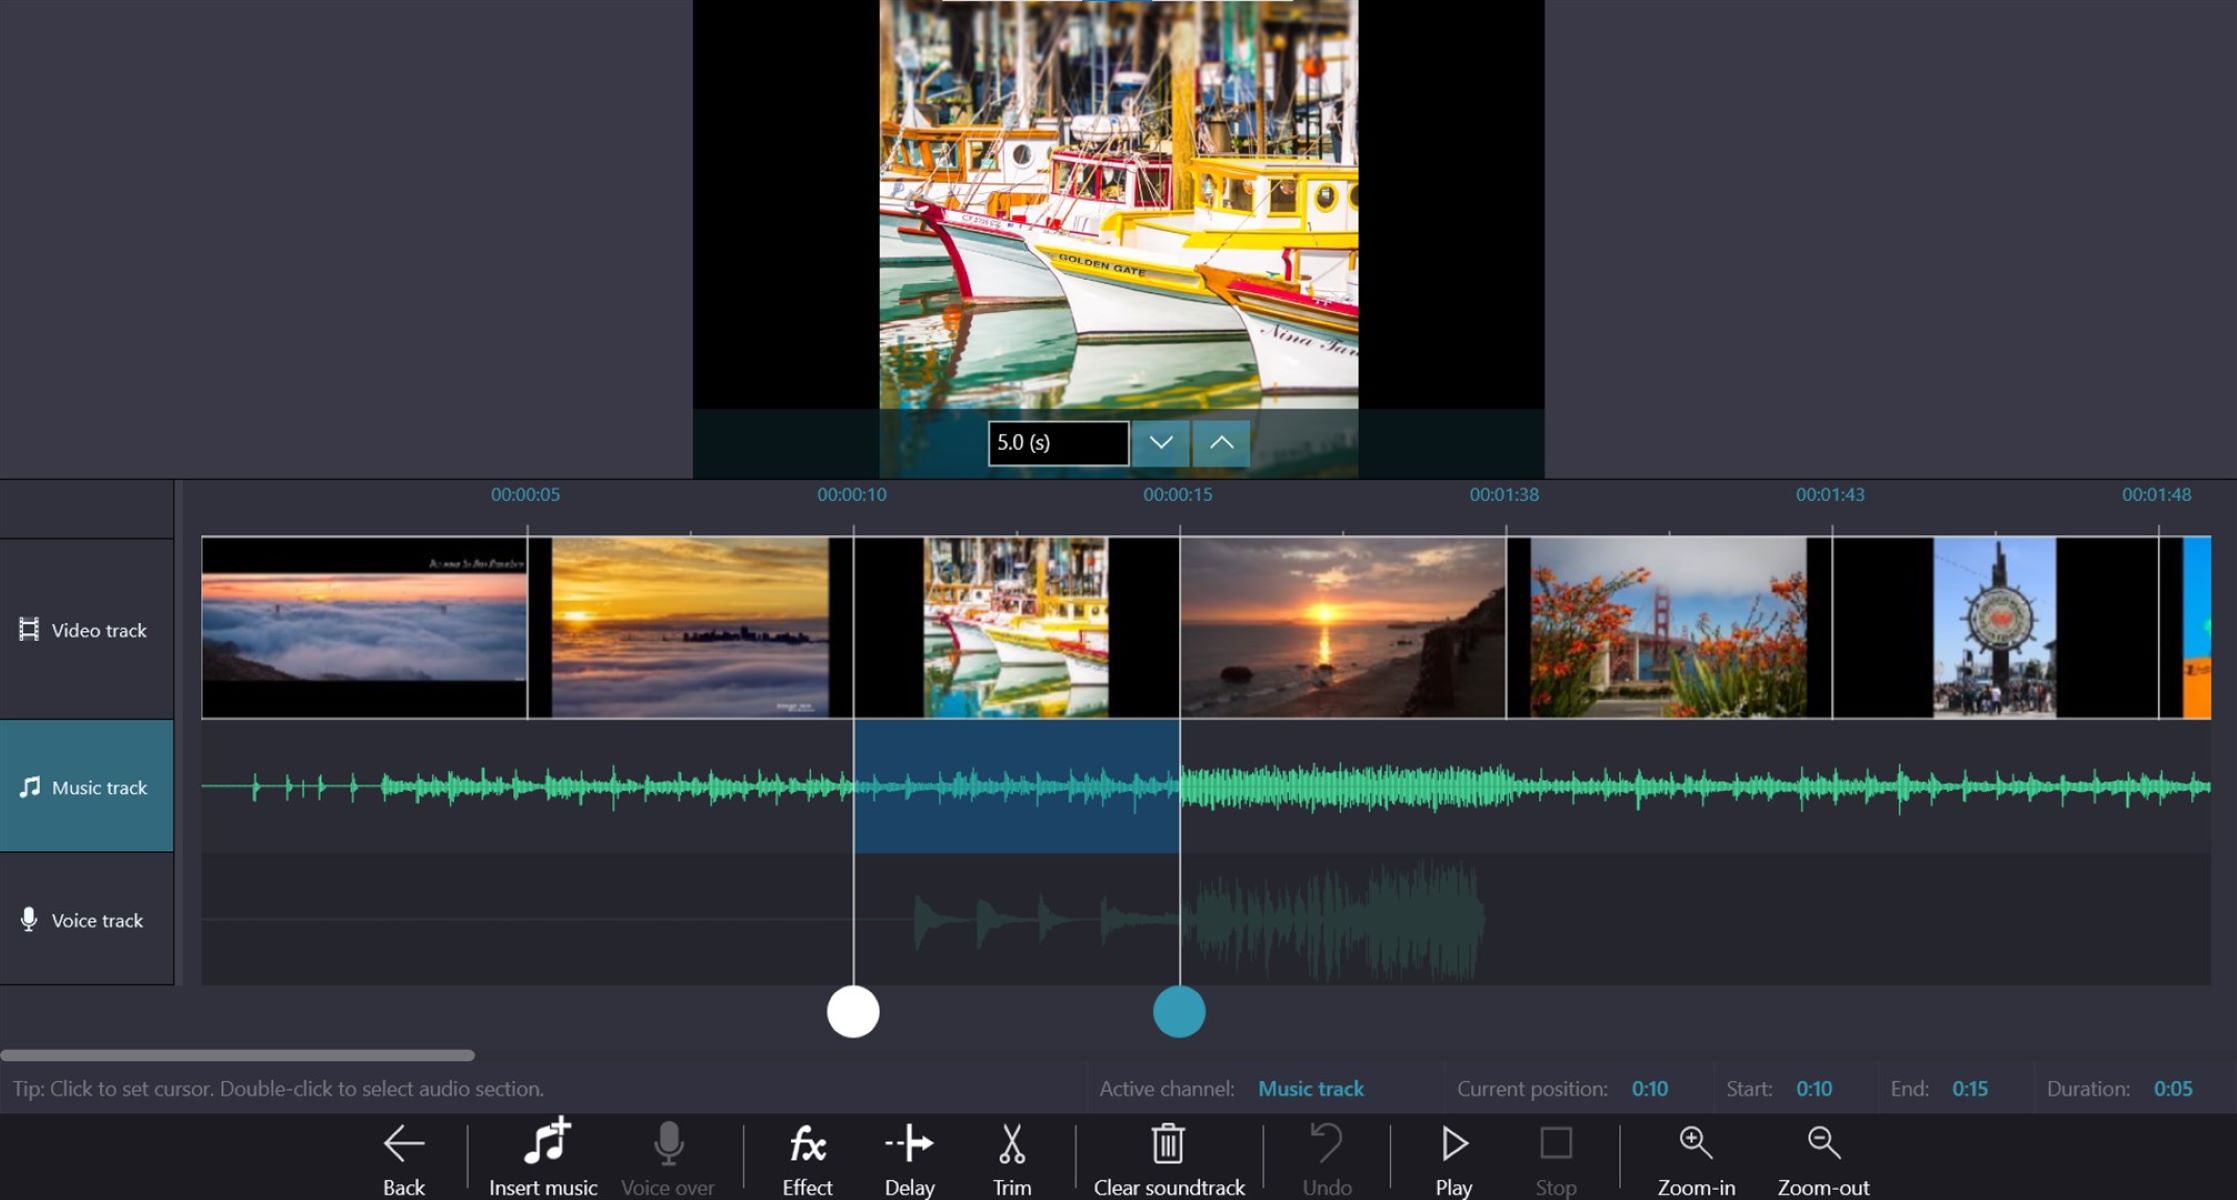
- Import Background Music: Look for the option to import or add audio within the app’s interface. Tap on it, and then select the background music file from your device’s storage. Some apps may offer the option to directly access music from your device’s library.
- Sync the Music with the Video: Once you have imported the background music, it’s time to sync it with your video. Most editing apps will display a timeline or waveform that represents both the video and audio tracks. Use this visual representation to align the music with the desired sections of your video.
- Trim or Adjust the Video: If necessary, you can trim or adjust the video length to ensure that it matches the duration of the background music. This step is particularly important if your video is longer or shorter than the chosen music track.
- Preview and Fine-tune: Play the video with the added background music to preview how they complement each other. Take note of any parts that may need further adjustments, such as reducing the volume of the video’s audio or adjusting the timing of certain sections.
- Experiment with Different Music Options: If you’re not satisfied with the initial results, don’t hesitate to try out different background music options until you find the perfect match for your video.
By following these steps, you’ll be able to seamlessly integrate background music into your selected video, enhancing its overall impact and engagement.
Step 4: Adjust the Volume and Trim the Music
Once you have added the background music to your video, it’s important to fine-tune the audio to achieve the desired balance. Adjusting the volume and trimming the music is crucial to ensure that it complements the video without overpowering or being too subtle. Here’s how you can do it:
- Volume Control: Most editing apps provide a volume control option for the background music. Use this feature to adjust the volume level to an appropriate level that allows the music to be heard clearly without overshadowing other audio elements or dialogue in your video.
- Audio Fade-In and Fade-Out: Consider adding gradual fade-in and fade-out effects to the background music. This technique helps to smooth the transition between sections and avoids abrupt starts or stops, creating a more seamless listening experience.
- Trimming the Music: If your video is shorter than the duration of the background music, you may need to trim the music to match the video length. Look for the option to trim or cut the audio track within the editing app. Carefully select the desired start and end points to remove any unnecessary sections of the music.
- Transitions and Effects: Experiment with different transitions and effects offered by the editing app to add further dynamics and artistic flair to your video. Some apps allow you to apply audio effects like echo or reverb to the background music, giving it a unique touch.
- Preview and Fine-tune: After making adjustments, play the video with the background music to ensure that everything sounds harmonious and balanced. Listen for any parts that may need further tweaking, such as adjusting the volume levels of specific sections or refining the trimming points.
Remember, the goal is to find the right balance between the video content and the accompanying background music. Make sure to periodically preview your video while making these adjustments to achieve the desired audiovisual impact.
Step 5: Save and Share
Now that you have successfully added background music to your Instagram video and made necessary adjustments, it’s time to save and share your creation with the world. Follow these final steps to ensure your video is ready to be shared:
- Save the Video: Look for the save or export option within the editing app. Tap on it to save your video with the background music applied. Choose a suitable file format and quality settings based on your intended use.
- Review the Final Video: Before sharing your video, take a moment to review the final product. Make sure the background music is properly synced, the volume levels are balanced, and there are no errors or glitches in the video or audio.
- Add Captions or Descriptions: Consider adding captions or descriptions to provide context or extra information about your video. This can be especially useful if your video contains valuable content or if you want to engage your audience further.
- Select the Appropriate Sharing Platform: Choose the platform where you want to share your video. If you created the video specifically for Instagram, you can directly upload it to your Instagram account. If you want to share it on other platforms like Facebook or YouTube, make sure to export the video in the appropriate format.
- Engage with Your Audience: Once your video is uploaded and shared, actively engage with your audience by responding to comments and feedback. This helps to build a community and encourages viewers to share your video with others.
By following these final steps, you’ll be able to save your Instagram video with the added background music and share it with confidence, knowing that you’ve created a captivating and polished piece of content.