Home>Production & Technology>Sound Effects>How To Add Sound Effects In Davinci Resolve

Sound Effects
How To Add Sound Effects In Davinci Resolve
Modified: January 22, 2024
Learn how to add captivating sound effects to your videos in Davinci Resolve. Enhance your storytelling with the power of sound.
(Many of the links in this article redirect to a specific reviewed product. Your purchase of these products through affiliate links helps to generate commission for AudioLover.com, at no extra cost. Learn more)
Table of Contents
- Introduction
- Overview of Davinci Resolve
- Understanding Sound Effects
- Locating Sound Effects
- Importing Sound Effects into Davinci Resolve
- Adding Sound Effects to the Timeline
- Adjusting Sound Effects Properties
- Applying Sound Effects Transitions
- Mixing and Balancing Sound Effects
- Exporting the Final Video with Sound Effects
- Conclusion
Introduction
Welcome to the exciting world of sound effects in Davinci Resolve! Adding sound effects is a key aspect of video editing, as it helps create a more immersive and engaging experience for viewers. Whether you’re working on a short film, a commercial, or a personal project, incorporating sound effects can elevate the quality of your work and bring your visuals to life.
Davinci Resolve, a powerful and versatile video editing software, offers a wide range of features to help you manipulate and enhance audio elements. In this article, we will explore how to add sound effects to your projects in Davinci Resolve, from finding the perfect sound effects to mixing and balancing them with your existing audio tracks.
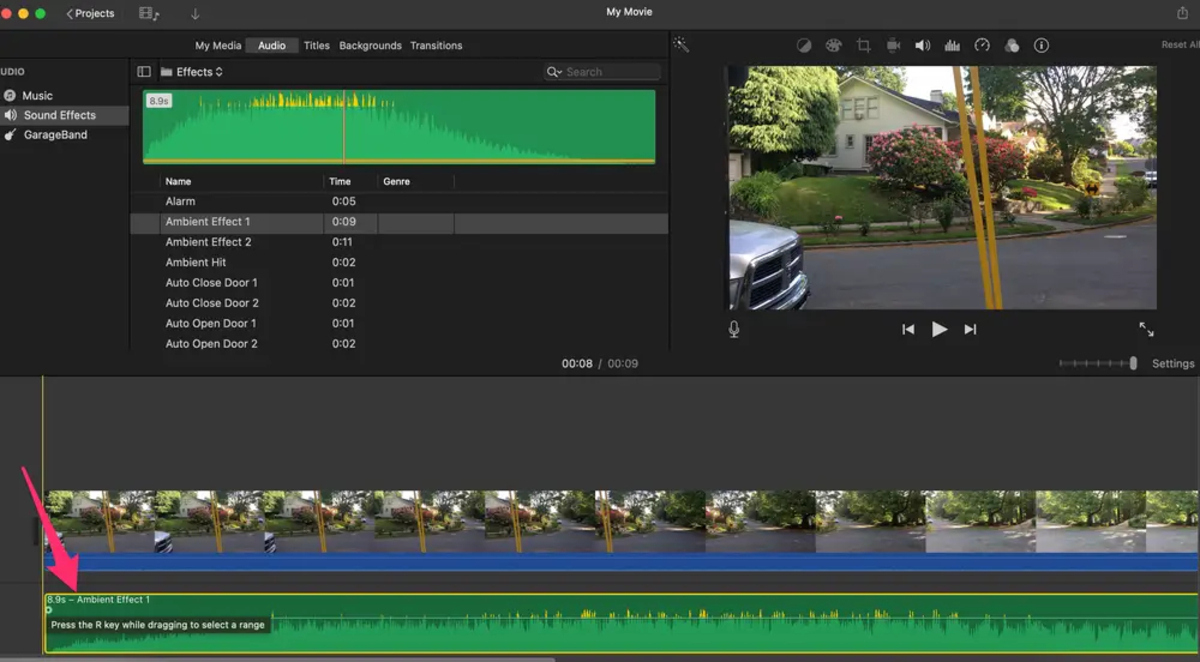
Understanding sound effects is crucial to effectively incorporating them into your videos. Sound effects are audio assets that simulate real-life or fictional sounds. They can be used to create ambiance, enhance emotions, emphasize actions, or even add depth to your storytelling. From the subtle sound of footsteps to the explosive roar of an engine, sound effects play a vital role in enhancing the overall cinematic experience.
The key to finding the right sound effects is knowing where to look. There are various resources available online that offer a vast collection of high-quality sound effects, ranging from free to premium options. Whether you’re searching for ambient sounds, Foley effects, or special sound design elements, you’re sure to find the perfect sound effects to suit your project.
Once you have found the ideal sound effects for your video, it’s time to import them into Davinci Resolve. Davinci Resolve supports a wide range of audio file formats, including WAV, MP3, and AIFF, making it easy to seamlessly integrate your chosen sound effects into your project.
Overview of Davinci Resolve
Davinci Resolve is a comprehensive video editing software that offers a robust set of tools for editing, color correction, visual effects, and audio post-production. It is widely regarded as one of the industry-leading software for professional video editing and has gained popularity among editors, filmmakers, and content creators alike.
One of the standout features of Davinci Resolve is its powerful color grading capabilities. It provides a dedicated color grading panel, advanced color wheels, and a wide range of grading options to achieve the desired look for your footage. Whether you’re correcting the colors of a scene, enhancing the aesthetics of your video, or creating a distinct visual style, Davinci Resolve offers the necessary tools and precision for professional-grade color grading.
Beyond color grading, Davinci Resolve excels in its editing capabilities. It provides a flexible and intuitive timeline where you can import, arrange, and trim your video clips with ease. The software supports a wide range of video formats and resolutions, making it suitable for various project types, from social media content to feature films.
In addition to its editing and color grading features, Davinci Resolve offers a comprehensive suite of visual effects tools. You can apply and customize transitions, add text and titles, create dynamic motion graphics, and integrate visual effects seamlessly into your videos. This allows you to enhance the visual aspects of your project and add a touch of creativity.
When it comes to audio post-production, Davinci Resolve provides a complete audio editing and mixing environment. It allows you to import, edit, and manipulate audio tracks, including voiceovers, music, and sound effects. You can adjust volume levels, apply effects and plugins, and synchronize audio with your video footage.
With its user-friendly interface and powerful suite of tools, Davinci Resolve offers a seamless workflow from start to finish. Whether you’re a beginner or an experienced professional, the software provides the necessary features and flexibility to bring your creative vision to life.
Understanding Sound Effects
Sound effects are integral components of the audio design in video production. They are used to enhance the auditory experience and create a more immersive and realistic environment for viewers. Sound effects are audio recordings or artificially created sounds that mimic real-life or fictional events, actions, or objects.
There are various types of sound effects that serve different purposes in video storytelling. Ambient sound effects help establish the background atmosphere and set the mood of a scene. For example, the sound of birds chirping in a park or the bustling noise of a city street can create a sense of place and time.
Foley sound effects are recordings of everyday sounds made by a Foley artist, such as footsteps, door creaks, or the rustling of clothing. These sounds are crucial for adding realism to the visuals and creating an auditory connection with the audience. Foley effects are often used to replace or enhance sounds that are difficult to capture during filming or to exaggerate certain actions or movements.
Another category of sound effects is special sound design elements. These are sounds that are created or manipulated to bring a specific creative vision to life. This could include sounds like sci-fi lasers, magical spells, or otherworldly ambiances. Special sound design effects allow filmmakers to add a unique and distinctive auditory signature to their projects.
Sound effects can have a significant impact on the overall mood and emotional resonance of a video. By using the right combination of sound effects, creators can evoke specific emotions, intensify suspenseful moments, or heighten the impact of action sequences. For example, a thunderous explosion sound effect can make a dramatic scene more thrilling, while a gentle breeze sound effect can evoke a serene and calm atmosphere.
It’s essential to consider the context and purpose of your video when selecting sound effects. Sound effects should complement and enhance the visuals without overpowering them. They must be carefully chosen to convey the intended message, support the narrative, and create an immersive experience for the audience.
Understanding the different types and purposes of sound effects allows you to make informed decisions when incorporating them into your video projects. Whether you’re aiming for realism, fantasy, or evoking specific emotions, sound effects can greatly contribute to the overall impact and quality of your videos.
Locating Sound Effects
When it comes to finding the perfect sound effects for your video projects, there are plenty of resources available online. Here are some effective ways to locate high-quality sound effects:
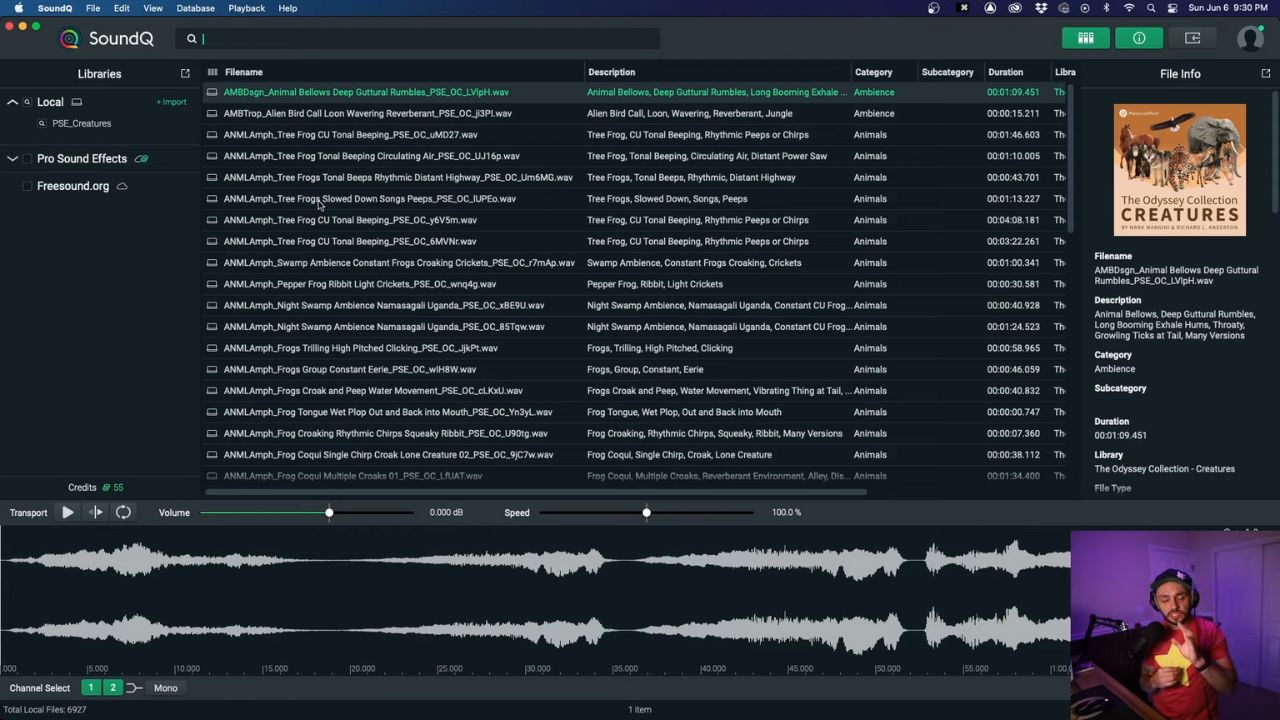
- Sound Effect Libraries: There are numerous websites and online platforms dedicated to providing a vast collection of sound effects. These libraries offer a wide range of categories and genres, allowing you to search for specific sounds that suit your video. Some popular sound effect libraries include Epidemic Sound, AudioJungle, and Freesound.
- Stock Media Sites: Many stock media sites, such as Shutterstock and Pond5, offer a selection of sound effects along with their collection of stock photos and videos. These sites often provide high-quality sound effects that you can purchase and download for use in your projects.
- Free Sound Effect Websites: If you’re on a budget, there are also websites that offer free sound effects for personal and commercial use. Freesound.org is a popular platform where you can find a wide range of sounds contributed by its community of users. Always be sure to check the licensing requirements for each sound effect you use to ensure compliance.
- Creating Your Own Sound Effects: For more specialized or unique sound effects, you may consider creating them yourself. This can involve recording sounds using a microphone or using audio editing software to manipulate existing sounds. Experimenting with different techniques and tools can yield custom sound effects that perfectly fit your project.
When searching for sound effects, it’s essential to consider the quality and format of the files. Look for sound effects that are in high-quality audio formats, such as WAV or AIFF, to ensure optimal sound fidelity. Also, consider the specific requirements of your video editing software, as different platforms may have preferences for certain file types.
Remember, sound effects play a significant role in enhancing the overall audio experience of your videos. Take the time to explore different resources and find the perfect sound effects that match the tone, atmosphere, and narrative of your project. Experiment with different combinations of sound effects to create a unique auditory landscape that captivates and engages your audience.
Importing Sound Effects into Davinci Resolve
Once you have chosen and downloaded the desired sound effects for your video project, it’s time to import them into Davinci Resolve. Davinci Resolve supports a wide range of audio file formats, including WAV, MP3, and AIFF, making it effortless to incorporate your chosen sound effects seamlessly.
Before importing, organize your sound effects into a specific folder on your computer. This will make it easier to locate and access them within Davinci Resolve. Once you have your sound effects folder ready, follow these steps to import them into your project:
- Launch Davinci Resolve and open your project.
- In the Media panel, locate the Sound Effects tab.
- Click on the Import button or use the shortcut Ctrl+I (Cmd+I on Mac).
- Navigate to the folder where your sound effects are stored.
- Select all the sound effects you want to import.
- Click on Open to import the selected sound effects into your project.
- The imported sound effects will now appear in the Sound Effects tab.
Once imported, you can easily access your sound effects within Davinci Resolve and begin incorporating them into your timeline.
It’s important to note that as with any imported media, it’s recommended to optimize your sound effects for Davinci Resolve by converting them to a compatible format and resolution. This will ensure smooth playback and efficient editing. Davinci Resolve provides various options for optimizing media within the software, allowing you to transcode or generate optimized media files for better performance.
By importing and organizing your sound effects within Davinci Resolve, you can easily access and utilize them throughout your editing process. This allows for a streamlined workflow and efficient integration of sound effects into your video project.
Adding Sound Effects to the Timeline
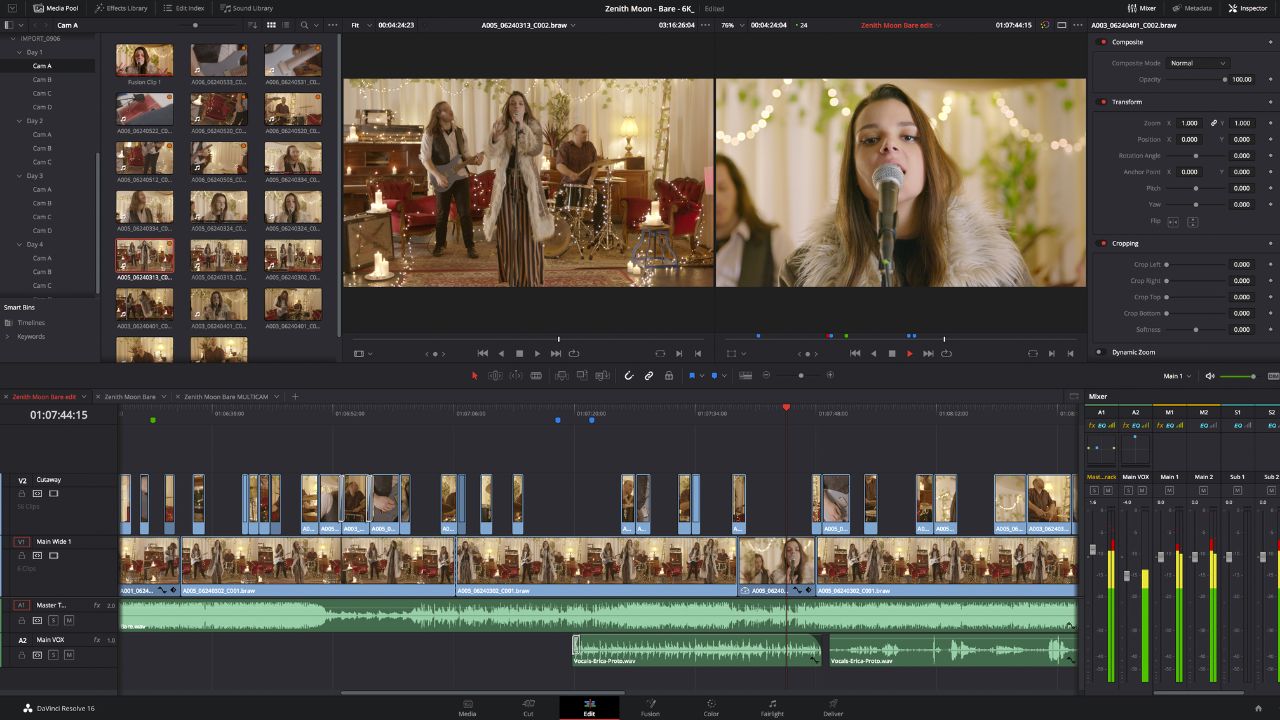
Now that you have imported your sound effects into Davinci Resolve, it’s time to add them to your project’s timeline. The timeline is where you arrange and sequence your video and audio clips to create the final edited version of your project. Here’s how to add sound effects to your timeline in Davinci Resolve:
- Ensure the timeline is selected and active in Davinci Resolve.
- Locate the sound effects you want to add in the Sound Effects tab or the media pool.
- Drag and drop the desired sound effect onto the timeline at the desired point.
- The sound effect will now appear as a separate audio track in the timeline.
By default, the sound effect will be added to a new audio track in the timeline. If you want to place it on a specific existing audio track, drag and drop it onto that track instead.
Once the sound effect is added to the timeline, you can adjust its position and duration by dragging and adjusting the edges of the audio clip. You can also move the clip to different tracks on the timeline for organization and layering purposes. This allows you to precisely position the sound effect in relation to the corresponding visuals and other audio elements.
Furthermore, you can use the ripple edit tool in Davinci Resolve to extend or shorten the duration of the sound effect without affecting the rest of your timeline. This is helpful when you want to align the sound effect precisely with specific moments or actions in your video.
Adding sound effects to your timeline in Davinci Resolve is a straightforward process. By placing them at the appropriate points in your project, you can enhance the overall audio experience and bring your videos to life in a dynamic and engaging way.
Adjusting Sound Effects Properties
Once you have added your sound effects to the timeline in Davinci Resolve, you have the flexibility to adjust various properties of the sound effects to achieve the desired impact and blend them seamlessly with your video. Here are some key properties you can modify:
- Volume: Adjusting the volume of a sound effect allows you to control its prominence in relation to other audio elements. You can increase or decrease the volume to ensure that the sound effect is audible but not overpowering. In Davinci Resolve, you can adjust the volume of a sound effect by selecting the audio clip on the timeline and modifying the volume level in the Inspector panel or using keyframes for more precise control.
- Pan: Pan adjustment refers to the positioning of the sound effect in the stereo field. You can pan a sound effect to the left or right channels to create a sense of movement or to position the sound in a specific location within the audio mix. Pan adjustment can help enhance the spatial realism or create a desired auditory effect. In Davinci Resolve, you can adjust the pan of a sound effect using the Pan control in the Inspector panel.
- EQ and Effects: Davinci Resolve provides a variety of audio effects and EQ controls that allow you to shape and enhance the sound of your effects. You can apply equalization to modify the frequency balance or add effects like reverb, delay, or distortion to create a particular ambiance or tonal character. Explore the available audio effects and EQ controls in Davinci Resolve to experiment and fine-tune your sound effects to fit your video’s aesthetic and narrative requirements.
- Trimming: You can trim the duration of a sound effect to precisely fit the desired timing in your video. Trimming allows you to adjust the start and end points of the sound effect clip, ensuring that it aligns perfectly with specific actions or moments on-screen. In Davinci Resolve, simply select the audio clip on the timeline and use the trim tools or manually drag the edges of the clip to trim it accordingly.
By adjusting these properties, you can customize and refine your sound effects to perfectly complement your video. Experiment with different volume levels, pans, effects, and trims to achieve the desired auditory impact and create a cohesive audiovisual experience.
Remember to listen to your sound effects in the context of your video project and make adjustments as necessary. Regularly preview your edits to ensure a seamless integration of sound effects and a balanced audio mix. By taking the time to fine-tune the properties of your sound effects, you can enhance the overall quality and impact of your video’s audio.
Applying Sound Effects Transitions
Sound effects transitions add smoothness and continuity to the audio in your video projects. They help create seamless transitions between different sound effects or audio clips, ensuring a natural flow and enhancing the overall viewer experience. In Davinci Resolve, you can apply various sound effects transitions to achieve this effect. Here are some common sound effect transitions:
- Crossfade: The crossfade transition is a popular choice for smoothly blending two sound effects together. It involves fading out the first sound effect while simultaneously fading in the second one. This creates a seamless transition between the two, eliminating any sudden interruptions or jarring jumps in audio. In Davinci Resolve, you can apply a crossfade by overlapping the edges of the sound effect clips on the timeline and adjusting the fade handles.
- Speed Ramps: Speed ramps are transitions that alter the speed or pitch of a sound effect to create a smooth change in audio. By gradually increasing or decreasing the speed or pitch of a sound effect, you can create a dynamic effect that seamlessly connects two audio clips. This technique is often used to convey a change in time or to enhance dramatic moments. In Davinci Resolve, you can use keyframes to manipulate the speed or pitch of a sound effect over time.
- Panning: Panning transitions involve shifting the position of a sound effect from one channel to another. By gradually panning a sound effect from left to right or vice versa, you can create a sense of movement, space, or perspective in your audio. Panning transitions are commonly used in action sequences, where the sound follows the movement of the visuals. In Davinci Resolve, you can animate the pan control to create smooth panning transitions.
- Filters and Effects: Applying audio filters and effects can also serve as transitions between different sound effects. By gradually applying or removing effects such as reverb, delay, or modulation, you can create a smooth transition between two audio clips. These transitions can add depth, texture, or a unique auditory character to your sound effects. In Davinci Resolve, you can use keyframes or automation to control the intensity or duration of the applied filters and effects.
When applying sound effects transitions, it’s important to consider the timing and context of your video. Smooth transitions should enhance the flow of the audio and not draw unnecessary attention. Experiment with different transition techniques and adjust the parameters to achieve the desired effect.
By applying sound effects transitions in your video projects using Davinci Resolve, you can create a polished and professional audio experience that engages and captivates your audience. Practice and experimentation will help you master these techniques and achieve seamless transitions between your sound effects.
Mixing and Balancing Sound Effects
Mixing and balancing sound effects is a crucial step in creating a cohesive and engaging audio experience in your video projects. Properly mixing and balancing sound effects ensures that they blend harmoniously with other audio elements, such as dialogue and music, and create an immersive and balanced sound environment. Here are some tips for effectively mixing and balancing sound effects in Davinci Resolve:
- Volume Levels: Adjust the volume levels of your sound effects to ensure they are audible and balanced with other audio elements. Consider the importance of the sound effect in the scene and its relative prominence. You can use the volume automation feature in Davinci Resolve to dynamically adjust the volume of your sound effects over time and create a more nuanced and dynamic audio mix.
- Panning: Utilize panning to position sound effects within the stereo field. By panning sound effects to different channels, you can create a sense of space and enhance the realism of your audio. Experiment with the positioning of sound effects to achieve a balanced distribution and a more immersive soundstage.
- Frequency Balance: Pay attention to the frequency balance of your sound effects. Make sure they don’t clash or overpower other important audio elements. Use the EQ controls in Davinci Resolve to fine-tune the frequency response of your sound effects. For example, if your scene already has a lot of low-frequency content, you may want to reduce the bass in your sound effects to avoid muddiness and maintain clarity.
- Proximity and Perspective: Consider the spatial attributes of your sound effects. Adjust their volume, EQ, and reverb settings to create a sense of distance or proximity, depending on the scene. This can help enhance the realism and make the viewer feel more immersed in the audio environment. For instance, distant sounds might have less low-end and reverb, while close-up sounds could have more presence and reverberation.
- Layering and Sound Design: Experiment with layering multiple sound effects to create a rich and complex audio experience. Combining different sound effects can result in a more lifelike and dynamic audio mix. Additionally, consider using sound design techniques like layering, modulation, or time-stretching to add depth and nuance to your sound effects.
- Dialogue and Music Balance: Ensure that your sound effects are balanced with dialogue and music tracks. Sound effects should enhance the overall audio experience without overpowering or overshadowing important dialogue lines or musical elements. Use automation or manual adjustments to balance the levels of sound effects with other audio tracks within Davinci Resolve.
Regularly preview your video with sound effects and make adjustments as needed. Pay attention to the overall audio mix and its impact on the storytelling. Strive for a balanced and polished sound design that elevates the visual content and augments the emotional impact of your video.
Mixing and balancing sound effects in Davinci Resolve allows you to create a professional-quality audio mix that enhances the overall viewing experience. With practice and attention to detail, you can achieve a cohesive and immersive audio environment that elevates your video projects to the next level.
Exporting the Final Video with Sound Effects
Once you have finished editing your video in Davinci Resolve, including the addition of sound effects, it’s time to export the final version with all the audio elements intact. Exporting your video ensures that the final result can be viewed and shared on various platforms and playback devices. Here’s how you can export your video with sound effects in Davinci Resolve:
- Ensure that your video timeline is finalized, including the placement and settings of your sound effects.
- Go to the Delivery tab in Davinci Resolve.
- Select the desired file format and settings for your exported video. This will depend on the specific requirements of your project and the intended use of the final video.
- Under the Audio section, make sure to select the option to include the audio tracks and sound effects in your export. This ensures that the sound effects are included in the final video file.
- Specify the output location and file name for your exported video.
- Click on the Export button to start the export process.
During the export process, Davinci Resolve will render the video with the selected settings and encode it with the included audio, including the sound effects. The time it takes to export the video will depend on the length of the timeline, the complexity of the effects, and the performance of your computer.
It’s important to preview the exported video to ensure that the sound effects are accurately represented and properly synchronized with the visuals. Check the volume levels, panning, and overall audio balance to confirm that the intended audio experience has been preserved.
Once you are satisfied with the exported video and its sound effects, you can share it on various platforms, upload it to video hosting websites, or use it for your desired purposes.
Remember to keep a backup of your project files, including the original footage and sound effects, to have the flexibility to make future changes or modifications if needed.
Exporting the final video with sound effects from Davinci Resolve is the last step in the post-production process. By following these steps and ensuring that your sound effects are properly included, you can deliver a complete and immersive audiovisual experience to your audience.
Conclusion
Adding sound effects to your video projects in Davinci Resolve can elevate the overall audiovisual experience and bring your content to life. Understanding the various types of sound effects and how to locate, import, and manipulate them is crucial for creating a professional and engaging video.
Davinci Resolve offers a powerful suite of tools that allow you to effortlessly incorporate sound effects into your projects. By adjusting properties such as volume, panning, and EQ, you can ensure that your sound effects seamlessly blend with other audio elements and enhance the narrative and emotional impact of your videos.
During the editing process, don’t forget to consider the balance between sound effects, dialogue, and music. By fine-tuning the mix and layering multiple sound effects, you can create a rich and immersive sound environment that captivates your audience.
Before exporting the final video, double-check that your sound effects are accurately represented and synchronized. Include them in the export settings to ensure that the final video file contains all the desired audio elements, ready to be shared and enjoyed on various platforms.
In conclusion, sound effects are a powerful tool that can enhance the quality and impact of your video projects in Davinci Resolve. With the right techniques and a creative approach, you can create a compelling audio experience that complements your visuals and engages your audience.
So, go ahead and explore the world of sound effects in Davinci Resolve, infuse your videos with immersive soundscapes, and take your storytelling to new heights.

