Home>Production & Technology>Stereo>How To Get A Stuck Cassette Out Of A Car Stereo
Stereo
How To Get A Stuck Cassette Out Of A Car Stereo
Modified: January 22, 2024
Learn how to remove a stuck cassette from your car stereo with our easy step-by-step guide. Get your stereo working again quickly and effortlessly![Stereo]
(Many of the links in this article redirect to a specific reviewed product. Your purchase of these products through affiliate links helps to generate commission for AudioLover.com, at no extra cost. Learn more)
Table of Contents
- Introduction
- Step 1: Gathering the necessary tools
- Step 2: Preparing the work area
- Step 3: Disconnecting the car battery
- Step 4: Removing the car stereo
- Step 5: Locating the cassette deck
- Step 6: Assessing the stuck cassette
- Step 7: Using basic troubleshooting techniques
- Step 8: Manually ejecting the cassette
- Step 9: Reinstalling the car stereo
- Step 10: Testing the cassette player functionality
- Conclusion
Introduction
Having a stuck cassette in your car stereo can be frustrating, especially if you have a nostalgic collection of tapes that you want to enjoy. When a cassette gets jammed, it can prevent you from playing any other tapes or even using other features of your car stereo. However, fear not! With a few simple steps, you can learn how to safely and effectively remove a stuck cassette from your car stereo.
In this article, we will guide you through the process of getting a stuck cassette out of your car stereo. We will cover the necessary tools you will need, preparing your work area, disconnecting the car battery, removing the car stereo, locating the cassette deck, assessing the stuck cassette, using basic troubleshooting techniques, manually ejecting the cassette, reinstalling the car stereo, and finally, testing the cassette player functionality.
Whether you’re a DIY enthusiast or just someone looking to save time and money, this step-by-step guide will help you resolve the issue of a stuck cassette. So, without further ado, let’s dive into the process and get your car stereo back in working order.
Step 1: Gathering the necessary tools
Before you begin the process of removing a stuck cassette from your car stereo, it’s essential to gather the necessary tools. Having these tools ready will ensure a smoother and more efficient experience. Here are the tools you will need:
- Flathead screwdriver: This will be used to remove any screws or fasteners holding the car stereo in place. Make sure to choose a screwdriver that fits the size of the screws on your specific car stereo.
- Needle-nose pliers: These pliers will come in handy for gripping and maneuvering the cassette if it’s difficult to remove by hand.
- Flashlight: A flashlight will help you better see the inner workings of the cassette deck and determine the cause of the jam.
- Tweezers: Tweezers with a slim profile can assist in gently pulling out any broken or loose parts of the cassette.
- Cleaning supplies: It’s always a good idea to have some cleaning supplies on hand, such as cotton swabs and rubbing alcohol. These can be used to clean the cassette deck and remove any debris that may be causing the issue.
Make sure to gather these tools before you start working on your car stereo. By having them readily available, you’ll be prepared to tackle any challenges that arise during the removal process.
Step 2: Preparing the work area
Before diving into the process of removing the stuck cassette from your car stereo, it’s important to prepare your work area for the task at hand. Taking a few minutes to prepare will help ensure a safe and organized working environment. Here’s what you should do:
- Park your car in a safe location: Find a well-lit and flat area where you can comfortably work on your car stereo. Ensure that you have enough space to move around freely without any obstructions.
- Turn off the ignition: Before getting started, turn off your car’s engine and remove the keys from the ignition. This will prevent any accidental power surges or electrical mishaps during the process.
- Gather necessary safety equipment: It’s always a good idea to wear safety gloves and protective eyewear while working on your car stereo. This will protect your hands and eyes from any potential hazards or sharp edges.
- Clean the work area: Clear away any debris or clutter from your car’s dashboard and surrounding areas. This will provide you with a clean and organized work surface and minimize the risk of losing any small parts or tools.
- Have a workspace light: If the lighting in your work area isn’t sufficient, consider using an adjustable workspace light or portable flashlight. This will help you see the intricate components of the car stereo more clearly.
By following these steps to prepare your work area, you’ll create a safe and conducive environment to perform the task effectively. Once you’ve completed this step, you’ll be ready to move on to the next stage of removing the stuck cassette from your car stereo.
Step 3: Disconnecting the car battery
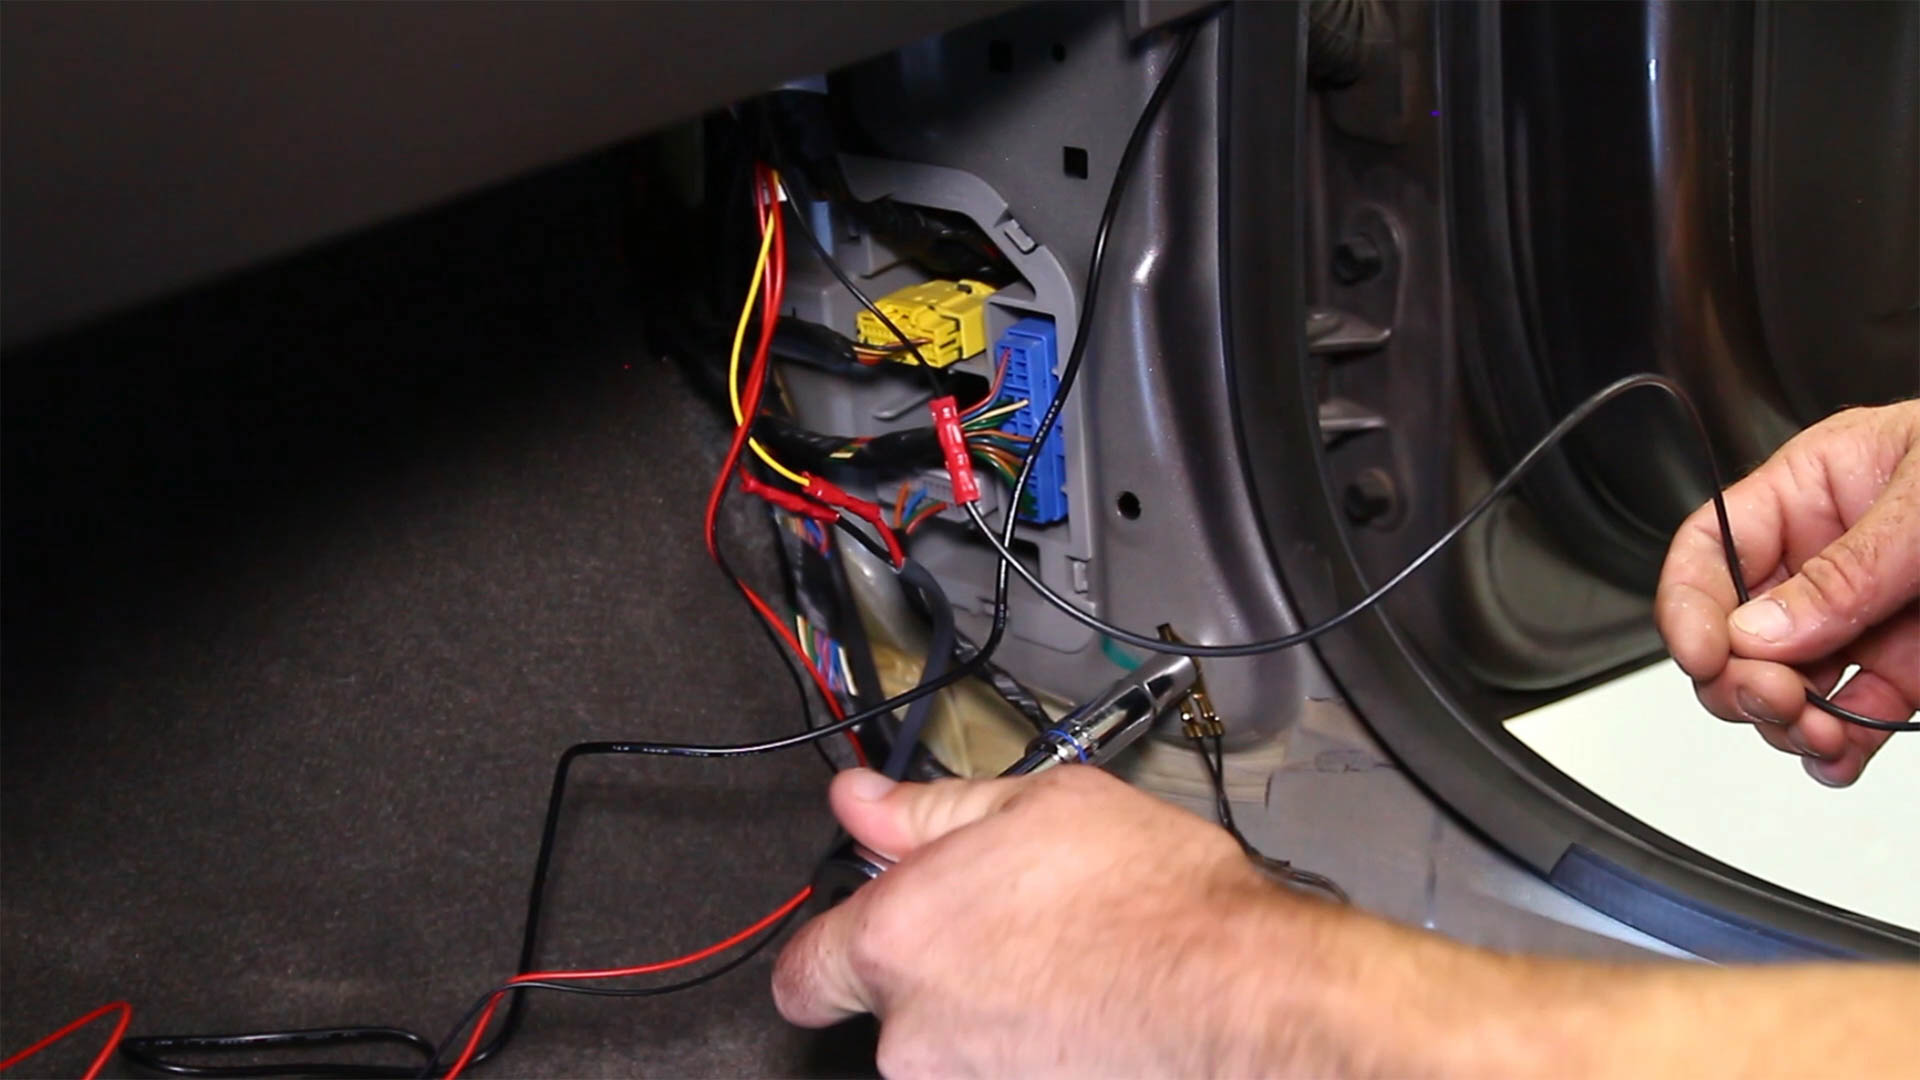
Before you begin working on your car stereo, it’s crucial to disconnect the car battery to ensure your safety and prevent any electrical mishaps. Here’s how you can safely disconnect the car battery:
- Locate the car battery: The car battery is typically located under the hood of your vehicle. It is usually a rectangular or square-shaped box with two terminals labeled as positive (+) and negative (-).
- Put on safety gloves and eyewear: Prioritize your safety by wearing protective gloves and eyewear to protect yourself from any potential electrical hazards or acid exposure.
- Identify the negative terminal: Look for the negative terminal on the car battery. It is usually marked with a minus sign (-) and is connected to the car’s body or engine block.
- Loosen the negative terminal: Use a wrench or a proper-sized socket to loosen the nut or bolt that secures the negative terminal. Turn it counterclockwise to loosen it, but avoid completely removing the nut or bolt at this stage.
- Remove the negative cable: Once the terminal is loosened, gently wiggle and pull the negative cable away from the battery terminal. Make sure to keep it away from the battery post to prevent any accidental contact.
- Secure the cable: To prevent the negative cable from accidentally reconnecting, you can either tuck it away from the battery or cover the end with electrical tape.
By disconnecting the car battery, you eliminate the risk of electrical shocks or short circuits while working on your car stereo. It’s important to remember to reconnect the battery once you’ve completed all the necessary steps to avoid any issues with your car’s electrical systems. Now that you’ve safely disconnected the car battery, you can proceed to the next step of removing the stuck cassette from your car stereo.
Step 4: Removing the car stereo
With the car battery safely disconnected, you can now proceed to remove the car stereo. To access the cassette deck and resolve the issue with the stuck cassette, follow these steps:
- Consult your car’s manual: Refer to your car’s manual to determine the specific process for removing the car stereo. Different car models may have variations in the removal process, so it’s important to familiarize yourself with the instructions provided in the manual.
- Locate the mounting screws: Use a flashlight to locate the mounting screws that hold the car stereo in place. These screws are usually found on the sides or bottom of the stereo unit. You may need to remove a trim panel or console to access them.
- Remove the mounting screws: Using a flathead screwdriver, carefully remove the mounting screws by turning them counterclockwise. Be cautious not to scratch or damage any surrounding parts or panels while doing so.
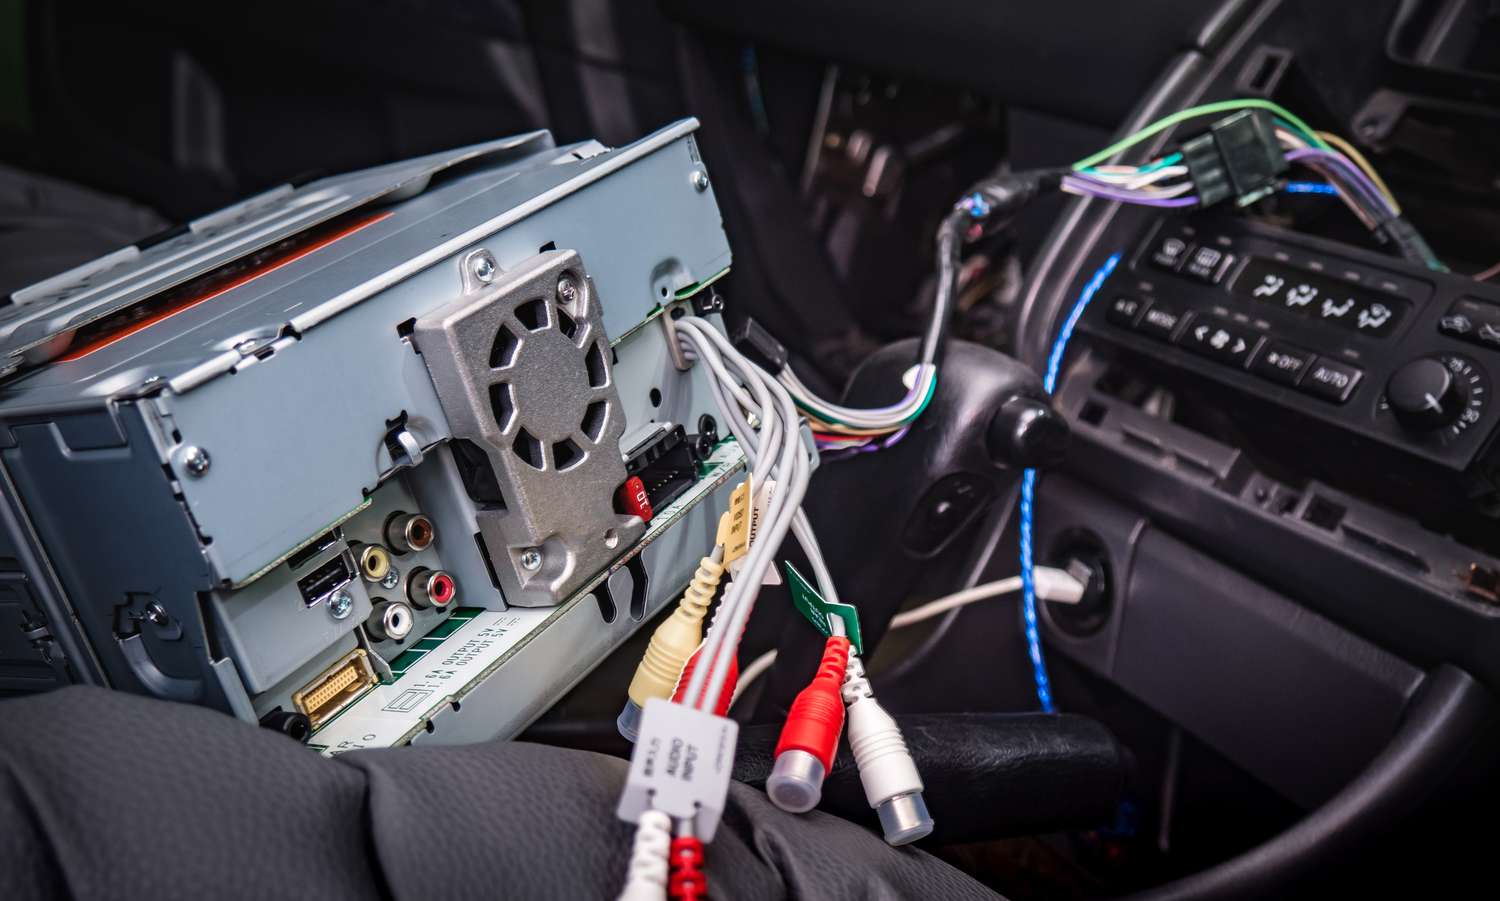
- Disconnect the wiring harness: Once the mounting screws are removed, pull the car stereo out slightly. Locate the wiring harness connected to the back of the stereo unit. Gently press the locking tab and unplug the harness to disconnect it.
- Remove the car stereo: With the wiring harness disconnected, carefully slide the car stereo out of the dashboard. Remember to do this slowly and gently to avoid any damage to the surrounding interior components.
Once you have removed the car stereo, place it in a safe and clean area to prevent any damage during the rest of the process. Removing the car stereo will provide you with better access to the cassette deck so that you can address the issue of the stuck cassette. Now that you have successfully removed the car stereo, proceed to the next step to locate the cassette deck.
Step 5: Locating the cassette deck
Now that you have removed the car stereo, it’s time to locate the cassette deck. Depending on the make and model of your car stereo, the cassette deck may be located in different positions. Here are a few common areas where you can typically find the cassette deck:
- Front-loading cassette deck: In some car stereos, the cassette deck is situated at the front of the stereo unit, easily accessible once you remove the faceplate. Look for a slot or compartment where you can insert and remove cassettes.
- Top-loading cassette deck: Other car stereos feature a top-loading cassette deck. In this case, the cassette deck is usually located towards the top of the stereo unit, covered by a protective lid or door. You will need to flip open or remove the lid to access the cassette deck.
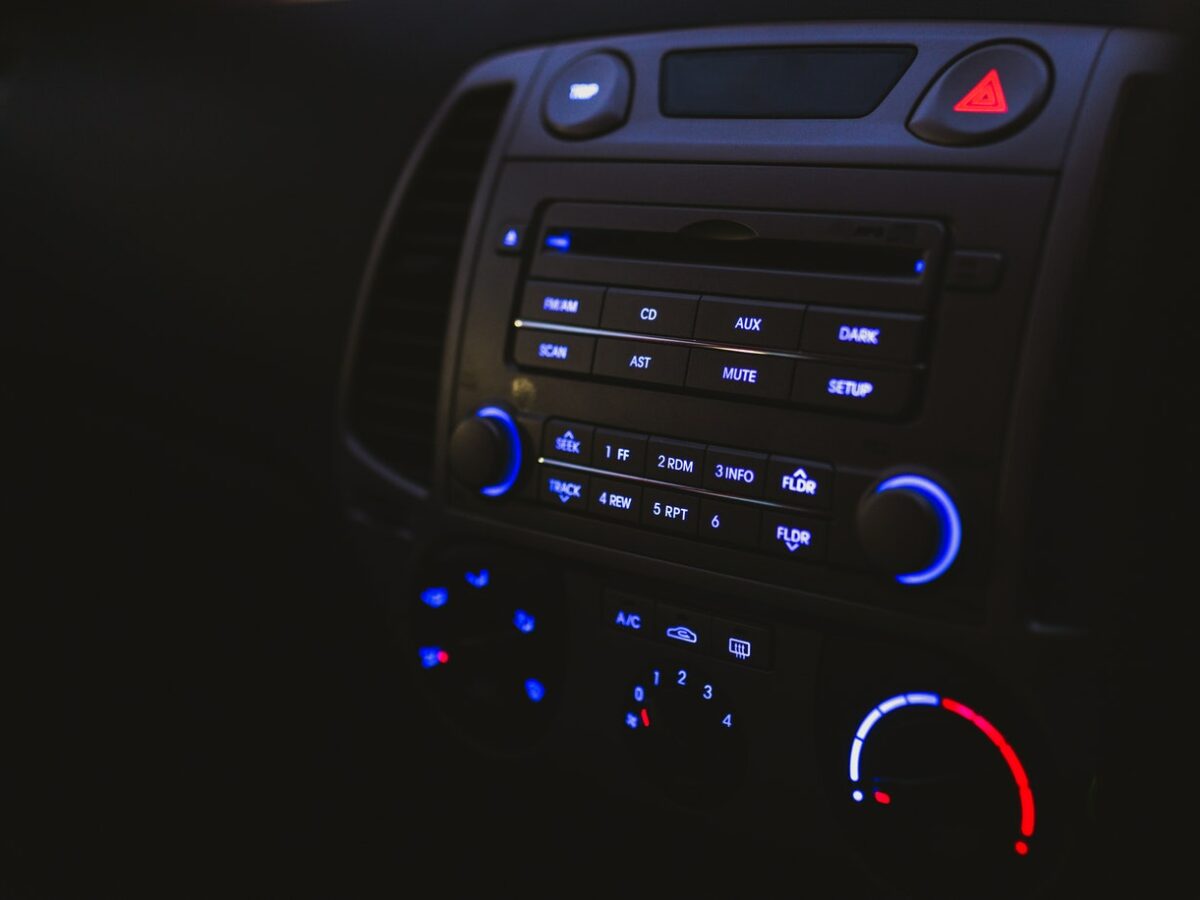
- Integrated cassette deck: In certain car stereo models, the cassette deck is integrated with the main control panel. In this case, the cassette controls and slot may be located among the buttons and knobs on the front of the stereo unit.
Take a close look at your car stereo and determine the specific location of the cassette deck. This will help you better understand the mechanism of the cassette player and assist in troubleshooting the issue of the stuck cassette. Familiarize yourself with the layout and operation of the cassette deck before moving on to the next step.
Remember, the goal at this stage is to identify the precise location of the cassette deck so that you can assess the situation and begin resolving the issue. By locating the cassette deck, you’re one step closer to freeing the stuck cassette from your car stereo. Let’s move on to the next step and assess the condition of the cassette.
Step 6: Assessing the stuck cassette
Now that you have located the cassette deck in your car stereo, it’s time to assess the condition of the stuck cassette. By examining the cassette and understanding the root of the problem, you’ll be better equipped to find the appropriate solution. Here’s what you should do:
- Inspect the cassette: Carefully examine the cassette that is stuck in the deck. Look for any visible signs of damage, such as a broken or warped cassette shell, loose tape, or tangled tape inside the cassette.
- Check for foreign objects: Sometimes, foreign objects like small coins, pens, or paper clips can inadvertently find their way into the cassette deck. Look for any foreign objects that may be obstructing the proper insertion or ejection of the cassette.
- Listen for unusual sounds: Power on your car stereo and listen for any unusual sounds or grinding noises when you attempt to play, fast forward, or rewind the stuck cassette. This can help identify potential mechanical issues.
- Observe the cassette mechanism: As you operate the cassette controls, pay close attention to the cassette mechanism. Watch for any misalignments, cassette door malfunctions, or issues with the tape heads that may be causing the cassette to get stuck.
By thoroughly assessing the stuck cassette and its surrounding components, you can gain valuable insights into the nature of the problem. This assessment will inform your troubleshooting steps and guide you towards an effective solution. Once you have completed your assessment, move on to the next step and explore basic troubleshooting techniques to address the stuck cassette issue.
Step 7: Using basic troubleshooting techniques
When dealing with a stuck cassette in your car stereo, there are some basic troubleshooting techniques you can try before resorting to more advanced solutions. These techniques can help resolve common issues and potentially free the stuck cassette. Here are a few troubleshooting techniques to consider:
- Gently eject the cassette: Press the eject button on your car stereo to try and release the stuck cassette. Apply gentle pressure and avoid forcing the cassette out to prevent further damage.
- Power cycle the car stereo: Turn off your car’s ignition and remove the keys. Wait for a few minutes before turning the ignition back on and powering up the car stereo. Sometimes, a quick power cycle can reset the cassette deck and resolve minor issues.
- Check the tape tension: If the cassette is partially or unevenly spooled, it can cause a jam. Use a pencil or a similar object to manually wind the tape back into the cassette, ensuring it is evenly spooled on the reels.
- Clean the cassette deck: Dust, debris, or dirt build-up can hinder the proper functioning of the cassette player. Use a cleaning solution specifically designed for cassette players or isopropyl alcohol to clean the tape heads and other components of the cassette deck.
- Try a different cassette: Test the cassette player with a different cassette to determine if the issue lies with the specific tape or the cassette player itself. If another cassette plays without a problem, it may indicate a problem with the stuck cassette.
Remember to approach these troubleshooting techniques with caution and gentleness. If these basic techniques do not resolve the issue, it may be necessary to move on to more advanced methods or seek professional assistance. However, trying these techniques first can often provide a simple solution to get the stuck cassette working again. Proceed to the next step for manual techniques to eject the cassette.
Step 8: Manually ejecting the cassette
If the basic troubleshooting techniques didn’t successfully eject the stuck cassette from your car stereo, it may be necessary to manually remove it. Here are some manual techniques you can try to safely eject the cassette:
- Using needle-nose pliers: Gently grasp the exposed edge of the cassette with needle-nose pliers and carefully pull it out. Be cautious not to apply too much force or damage the cassette in the process.
- Inserting another cassette: Insert another cassette partially into the deck and gently press down on it while pressing the eject button. This added pressure may help dislodge the stuck cassette.
- Using a credit card or thin object: Insert a credit card or a slim, flat object into the cassette slot alongside the stuck cassette. Gently push the card downwards while pressing the eject button to encourage the stuck cassette to come out.
- Tilting the car stereo: In some cases, tilting the car stereo slightly forward or backward may help release the stuck cassette. Do so carefully to avoid causing any damage to the stereo or other electrical components.
- Seeking professional assistance: If the manual techniques do not work or if you feel uncomfortable attempting them yourself, it may be best to seek the help of a professional car stereo technician. They have experience in handling delicate mechanisms and can assist in safely ejecting the cassette without causing further damage.
Remember, it’s essential to be patient and use gentle motions when manually ejecting the cassette. Applying excessive force or using sharp objects can lead to irreversible damage to the cassette player or the cassette itself. If the manual techniques are unsuccessful, don’t despair. There are still more steps you can take to resolve the issue. Proceed to the next step to learn how to reinstall the car stereo.
Step 9: Reinstalling the car stereo
After successfully removing the stuck cassette from your car stereo, it’s time to reinstall the stereo back into your vehicle. Properly reinstalling the car stereo will ensure its functionality and secure it in place. Follow these steps to reinstall the car stereo:
- Retrieve the car stereo: Take the car stereo from the safe area where you placed it after removing it in earlier steps.
- Align the car stereo: Carefully align the car stereo with the slot in the dashboard where it was originally installed. Make sure the stereo is in the correct position and matching any mounting holes or brackets.
- Connect the wiring harness: Reconnect the wiring harness to the back of the car stereo. Line up the connectors and firmly push them together until you hear a click or feel them securely joined.
- Secure the car stereo: Once the wiring harness is connected, gently slide the car stereo back into the dashboard slot. Ensure it is securely in place.
- Reinstall the mounting screws: Using a flathead screwdriver, reinsert and tighten the mounting screws that hold the car stereo in place. Make sure the screws are snug but not overly tight.
It’s important to be careful during the reinstallation process to avoid scratching or damaging the interior trim of your vehicle or the car stereo. Take your time to align and secure the stereo correctly. Once the car stereo is securely installed, you’re ready to proceed to the final step and test the functionality of the cassette player.
Note: The specific installation process may vary depending on your car model and stereo type. Consult your car manual or seek professional assistance if you encounter any difficulties.
Step 10: Testing the cassette player functionality
After reinstalling the car stereo, it’s essential to test the functionality of the cassette player to ensure that the issues with the stuck cassette have been resolved. Here’s how you can test the cassette player:
- Reconnect the car battery: Before testing the cassette player, reconnect the car battery by attaching the negative cable back to the negative terminal. Tighten the nut or bolt to secure the connection, being careful not to overtighten.
- Turn on the car stereo: Start your car’s ignition and power on the car stereo. Wait for it to boot up and access the cassette player function.
- Insert a cassette: Take a test cassette, preferably one that is in good condition, and insert it into the cassette deck. Push it gently until it clicks into place.
- Operate the cassette player: Use the controls on the car stereo to play, fast forward, rewind, and eject the test cassette. Pay attention to any unusual sounds or malfunctions that may indicate ongoing issues.
- Monitor cassette playback: Listen to the audio quality and check if the cassette plays smoothly without any issues such as tape snags or fluctuations in sound. Ensure that both stereo channels are working correctly.
If the cassette player functions properly and the test cassette plays without any problems, it indicates that the issue with the stuck cassette has been successfully resolved. However, if you encounter any further difficulties, it may be necessary to seek professional assistance or consider more in-depth repairs or replacements.
Remember to exercise caution while using the cassette player and handle cassettes carefully to avoid any future problems. With the functionality of the cassette player restored, you can once again enjoy your beloved cassette tapes while on the road.
Conclusion
Removing a stuck cassette from your car stereo can be a frustrating experience, but by following the steps outlined in this guide, you can overcome this issue and get your cassette player back in working order. Here’s a recap of the steps:
- Gather the necessary tools for the job.
- Prepare your work area by ensuring a safe and clean environment.
- Disconnect the car battery to prevent any electrical mishaps.
- Remove the car stereo by locating and removing the mounting screws and disconnecting the wiring harness.
- Locate the cassette deck to assess the condition and cause of the stuck cassette.
- Assess the stuck cassette by inspecting for damage, checking for foreign objects, and listening for unusual sounds.
- Use basic troubleshooting techniques to try and resolve the issue.
- If necessary, manually eject the cassette using techniques like needle-nose pliers or credit cards.
- Reinstall the car stereo by aligning it with the slot, reconnecting the wiring harness, and securing it with mounting screws.
- Test the cassette player functionality by reconnecting the car battery, inserting a test cassette, and operating the controls.
By carefully following these steps, you should be able to successfully remove a stuck cassette from your car stereo and restore its functionality. However, if you encounter any difficulties or feel uncomfortable performing these steps yourself, it is always advisable to seek professional assistance from a car stereo technician or an automotive expert.
Remember, prevention is key to avoiding future issues with your cassette player. Regularly clean and maintain your car stereo, handle cassettes with care, and avoid inserting damaged or warped tapes to prevent jams from occurring in the first place.
Now that you have the tools and knowledge to address a stuck cassette, you can rediscover the joy of listening to your favorite tapes while cruising down the road. So, put on some music, enjoy the ride, and embrace the nostalgia of cassette tapes!