Home>Production & Technology>Stereo>How To Make A Mono Recording Stereo Audacity
Stereo
How To Make A Mono Recording Stereo Audacity
Published: November 25, 2023
Learn how to easily convert a mono recording to stereo using Audacity. Enhance your audio experience by adding depth and dimension with this simple tutorial.
(Many of the links in this article redirect to a specific reviewed product. Your purchase of these products through affiliate links helps to generate commission for AudioLover.com, at no extra cost. Learn more)
Table of Contents
Introduction
Audacity is a powerful and popular open-source software that allows audio enthusiasts and professionals alike to perform a wide range of audio editing tasks. One interesting feature of Audacity is its ability to turn a mono recording into a stereo one, giving it a more immersive and dynamic sound.
In this article, we will explore the process of making a mono recording stereo using Audacity. We will discuss the difference between mono and stereo recordings, provide an overview of Audacity, and guide you through the steps to import the mono recording, duplicate the track, create a stereo effect with panning, apply stereo plugin effects, and finally export the stereo recording.
Whether you want to add depth to your podcast, enhance the richness of your music recordings, or give your audio projects a professional touch, learning how to make a mono recording stereo in Audacity is a valuable skill to have.
Before we dive into the technical details, let’s first understand the difference between mono and stereo recordings.
Understanding Mono and Stereo Recordings
Before we delve into the process of making a mono recording stereo in Audacity, it is important to have a clear understanding of the difference between mono and stereo recordings.
A mono recording, short for monaural, is a type of audio recording where there is only one channel of sound. This means that all audio signals, whether it’s vocals, instruments, or other sound sources, are combined into a single track. When you listen to a mono recording, you will hear the sound evenly distributed from both the left and right speakers.
On the other hand, a stereo recording is a more immersive and realistic audio experience. It employs multiple channels to separate the audio signals and create a sense of space and depth in the sound. In a typical stereo recording, the left and right channels carry different audio information. When you listen to a stereo recording, you will hear a more expansive soundstage, with certain elements panned to the left or right speaker, creating a sense of directionality.
The choice between using mono or stereo recordings depends on the context and purpose of the audio project. Mono recordings are often used for podcasts, speech recordings, or situations where simplicity and compatibility are key factors. On the other hand, stereo recordings are preferred for music, sound effects, and any situation where a more immersive and dynamic audio experience is desired.
Now that we have a clear understanding of the difference between mono and stereo recordings, let’s move on to explore the capabilities of Audacity for transforming mono recordings into stereo masterpieces.
Overview of Audacity
Audacity is a free, open-source digital audio workstation that offers a wide range of features and tools for audio editing and manipulation. With its user-friendly interface and powerful functionality, it has become a popular choice among musicians, podcasters, and audio enthusiasts.
Some of the key features of Audacity include:
- Multi-track editing: Audacity allows you to work with multiple tracks, making it easy to mix and layer different audio elements.
- Effects and plugins: It offers a variety of built-in effects such as equalization, noise reduction, reverb, and more. Additionally, you can install third-party plugins to further enhance the capabilities of the software.
- Editing tools: Audacity provides a range of editing tools including cut, copy, paste, and delete, allowing you to manipulate audio in a precise manner.
- Real-time preview: You can listen to the changes you make to the audio in real-time, enabling you to fine-tune your edits.
- Import and export options: Audacity supports various audio file formats, making it easy to import and export your projects in the format of your choice.
Whether you are a beginner or an experienced audio editor, Audacity provides a flexible and intuitive platform to work with. Its extensive documentation and active community of users also make it easy to find tutorials, tips, and troubleshooting assistance.
Now that we have a brief overview of Audacity and its capabilities, let’s proceed to the next step of importing the mono recording into Audacity.
Importing the Mono Recording
Once you have Audacity installed on your computer, the first step in the process of making a mono recording stereo is to import the mono recording into the software.
Follow the steps below to import the mono recording:
- Launch Audacity on your computer.
- Click on the “File” menu and select “Open” or use the shortcut Ctrl+O (Command+O for Mac).
- Navigate to the location where your mono recording is stored and select the file.
- Click “Open” to import the mono recording into Audacity.
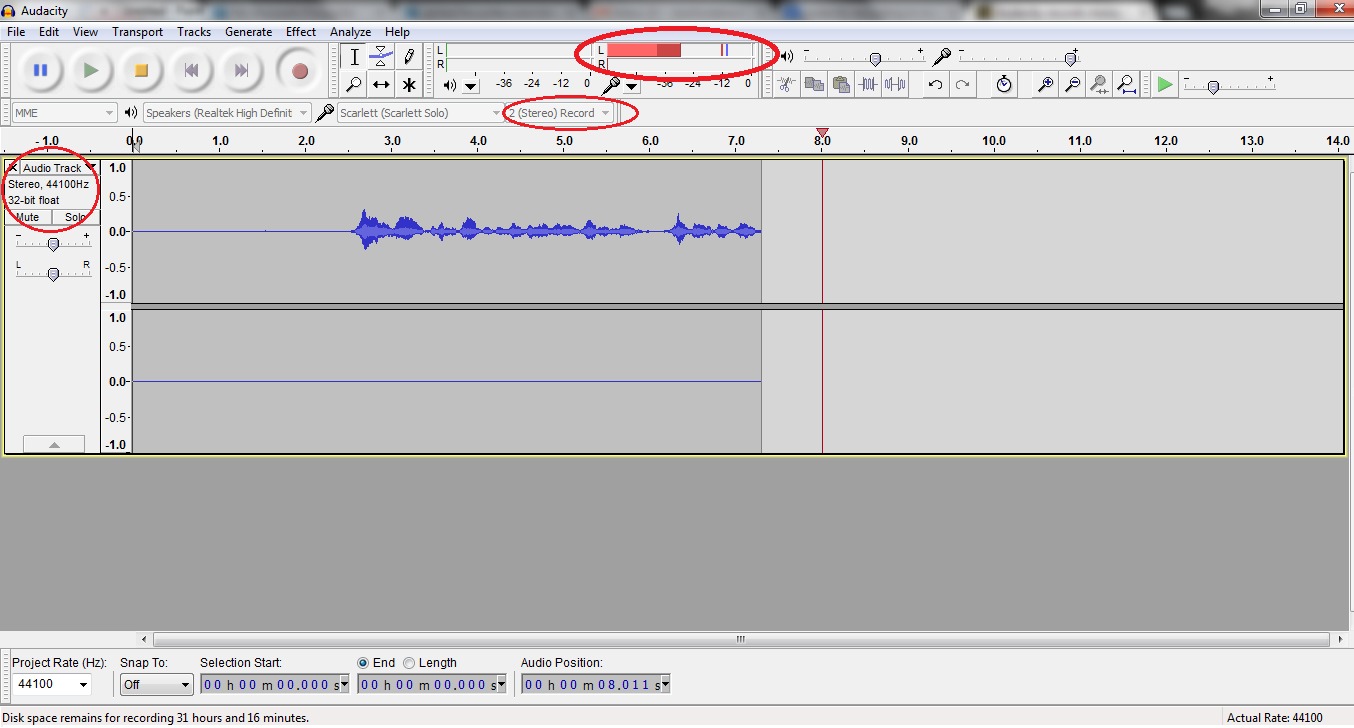
Once imported, you will see the waveform of your mono recording displayed in the Audacity workspace.
It’s important to note that Audacity supports various audio file formats, so you can import your mono recording in formats such as WAV, MP3, AIFF, and more.
Now that we have successfully imported the mono recording into Audacity, let’s move on to the next step which is duplicating the track.
Duplicating the Track
After importing the mono recording into Audacity, the next step in the process of creating a stereo effect is to duplicate the track. Duplicating the track will allow us to manipulate and process the two copies of the audio independently, creating a sense of stereo width.
Follow these steps to duplicate the track:
- Select the entire waveform of the imported mono recording by clicking and dragging your mouse over it, or by pressing Ctrl+A (Command+A for Mac) to select all.
- With the selection active, click on the “Edit” menu and choose “Duplicate” or use the shortcut Ctrl+D (Command+D for Mac).
Once the track is duplicated, you will see two identical waveforms displayed in the Audacity workspace. These represent the left and right channels of the stereo recording we will create.
It’s worth noting that you can now edit and process each track independently, allowing you to apply different effects or adjust the volume, panning, and other parameters to create a more compelling stereo effect.
With the track successfully duplicated, we can now proceed to the next step, which involves panning the duplicated track to create a stereo effect.
Creating Stereo Effect with Panning
To create a stereo effect with the duplicated track in Audacity, we will utilize panning. Panning refers to the process of distributing the audio signals between the left and right channels, thereby creating a sense of spatialization and stereo width.
Follow these steps to pan the duplicated track:
- Select the second track (the duplicated track) by clicking on its waveform.
- Locate the pan slider in the track control area, which is typically represented by a knob or a sliding control.
- Drag the pan slider to the left to increase the volume in the left channel, or drag it to the right to increase the volume in the right channel.
By adjusting the pan slider, you can control the panning position of the duplicated track, creating a stereo effect. Experiment with different panning positions to find the desired stereo width and balance that suits your audio recording.
It’s important to note that extreme panning to one side may result in an unbalanced mix, so make subtle adjustments until you achieve the desired stereo effect.
By panning the duplicated track, we have successfully created a basic stereo effect. However, we can further enhance the stereo image by applying stereo plugin effects in the next step.
Applying Stereo Plugin Effects
Applying stereo plugin effects in Audacity can elevate the stereo experience of your recording and add depth and dimension to the audio. These effects can further enhance the spatialization and create a more immersive listening experience.
Follow these steps to apply stereo plugin effects:
- Select the track or section of the audio where you want to apply the effect.
- Click on the “Effect” menu in Audacity.
- Browse through the list of available stereo plugin effects such as chorus, flanger, stereo enhancer, or any other effect of your choice.
- Select the desired effect and adjust the parameters to achieve the desired effect strength and character.
- Click “OK” to apply the effect to the selected track or section of audio.
By applying stereo plugin effects, you can further widen the stereo image, create interesting modulation effects, and add spatial depth to your recording. Experiment with different effects and settings to find the combination that enhances the overall sonic experience of the stereo recording.
After applying the desired stereo plugin effects, take the time to listen and adjust the settings as needed. Remember, the goal is to achieve a balanced and pleasing stereo effect that enhances the listening experience.
With the stereo plugin effects applied, we are now ready to export the final stereo recording in the next step.
Exporting the Stereo Recording
Once you have successfully created the desired stereo effect by panning and applying stereo plugin effects in Audacity, it’s time to export the final stereo recording. Exporting the recording will allow you to save it as a standalone audio file that can be easily shared, distributed, or used in your projects.
Follow these steps to export the stereo recording:
- Make sure you have selected the entire stereo recording by clicking and dragging over both tracks or by pressing Ctrl+A (Command+A for Mac) to select all.
- Go to the “File” menu and select “Export” or use the shortcut Ctrl+Shift+E (Command+Shift+E for Mac).
- Choose the desired file format for your export. Audacity supports various audio file formats such as WAV, MP3, FLAC, and more.
- Specify the location where you want to save the stereo recording and provide a name for the file.
- Click “Save” to export the stereo recording.
Depending on the selected file format, you may encounter additional options such as quality settings or metadata tags. Adjust these settings according to your requirements.
Once the export process is complete, you will have a standalone stereo recording file that you can use for broadcasting, uploading to streaming platforms, or incorporating into your audio projects.
It is recommended to listen to the exported stereo recording to ensure it matches your expectations and meets the desired quality standards. Feel free to make any adjustments and repeat the export process if necessary.
Now that you have successfully exported the stereo recording, you can proudly share your enhanced audio with the world!
Conclusion
Turning a mono recording into a stereo one can significantly enhance the overall listening experience, adding depth, dimension, and a more immersive sound. With Audacity, you have the power to transform your mono recordings into stereo masterpieces.
In this article, we explored the process of making a mono recording stereo using Audacity. We discussed the difference between mono and stereo recordings, provided an overview of Audacity’s features, and guided you through the steps of importing the mono recording, duplicating the track, creating a stereo effect with panning, applying stereo plugin effects, and exporting the final stereo recording.
Throughout the process, remember to experiment with different techniques, settings, and effects to achieve the desired stereo width and balance. Each recording may require a unique approach based on the specific audio content and artistic vision.
By utilizing Audacity’s powerful tools and features, you can take your mono recordings to the next level and create captivating stereo sounds that will impress your audience, whether you’re producing music, podcasts, or any other audio content.
So, what are you waiting for? Dive into Audacity, explore its capabilities, and start transforming your mono recordings into stunning stereo experiences. Let your creativity flow and allow your audio projects to come to life with the magic of stereo sound.
Remember, the journey of creating stereo recordings is an ongoing process of learning, experimenting, and refining your skills. With dedication and practice, you will continue to expand your sonic horizons and unlock new possibilities in the world of audio production.
Enjoy the journey and have fun exploring the rich world of stereo recordings in Audacity!