Home>Production & Technology>Treble>How To Adjust Treble On Fl Studio
Treble
How To Adjust Treble On Fl Studio
Modified: January 22, 2024
Learn how to adjust the treble on FL Studio with our step-by-step guide. Enhance your audio quality and create the perfect sound balance.
(Many of the links in this article redirect to a specific reviewed product. Your purchase of these products through affiliate links helps to generate commission for AudioLover.com, at no extra cost. Learn more)
Table of Contents
Introduction
FL Studio is a powerful digital audio workstation that offers an array of tools and features for music production. One crucial element in creating a polished and professional sound is adjusting the treble. Treble refers to the high-frequency range in the audio spectrum, specifically the frequencies above the midrange. It can add brightness, clarity, and definition to your tracks, making them more vibrant and engaging.
In this article, we will explore how to adjust treble in FL Studio, using the various tools and techniques available. Whether you’re a beginner or an experienced producer, understanding how to master treble can greatly enhance your music production skills.
By learning how to manipulate and control the treble, you can bring out the finer details in your tracks, make vocals shine through the mix, and add sparkle and presence to your instruments. It’s important to strike the right balance in the treble frequencies to avoid any harshness or distortion.
In the following sections, we’ll cover the essentials of adjusting treble in FL Studio, from accessing the equalizer to using presets and customizing the treble with the Parametric EQ 2. We’ll also delve into advanced techniques to fine-tune the treble and provide some tips to help you achieve the desired treble balance in your music.
So let’s get started and unlock the full potential of treble adjustment in FL Studio!
Understanding Treble in FL Studio
Before diving into the specifics of adjusting treble in FL Studio, it’s important to have a clear understanding of what treble represents and its significance in music production.
Treble, also known as high frequency or high-end, refers to the higher range of frequencies in the audio spectrum. In FL Studio, these frequencies are typically above the midrange and encompass the upper harmonics of instruments, vocals, and other audio elements.
The treble range is responsible for adding clarity, brightness, and presence to your tracks. It brings out the finer details, such as the shimmer of cymbals, the crispness of vocals, and the clarity of high-pitched instruments like guitars or bells. By adjusting the treble appropriately, you can control the overall tonal balance of your music and ensure that each element is well-defined and audible in the mix.
However, it’s crucial to exercise caution when adjusting the treble, as too much or too little can have adverse effects on your mix. Excessive treble can lead to harshness, sibilance, and ear fatigue, while insufficient treble can result in a dull and muddy sound.
By understanding the role of treble and its impact on the overall audio quality, you can make informed decisions when adjusting this parameter in FL Studio. With careful adjustment, you can achieve a clear, balanced, and professional sound that enhances the impact and appeal of your music.
Now that we have a solid foundation in understanding treble, let’s explore how to access the necessary tools and settings in FL Studio to adjust the treble effectively.
Accessing the Equalizer
FL Studio provides several tools and plugins that allow you to adjust the treble in your tracks. One of the most commonly used tools for this purpose is the equalizer, also known as an EQ.
To access the equalizer in FL Studio, follow these steps:
- Open FL Studio and load your project.
- Select the mixer track you want to adjust.
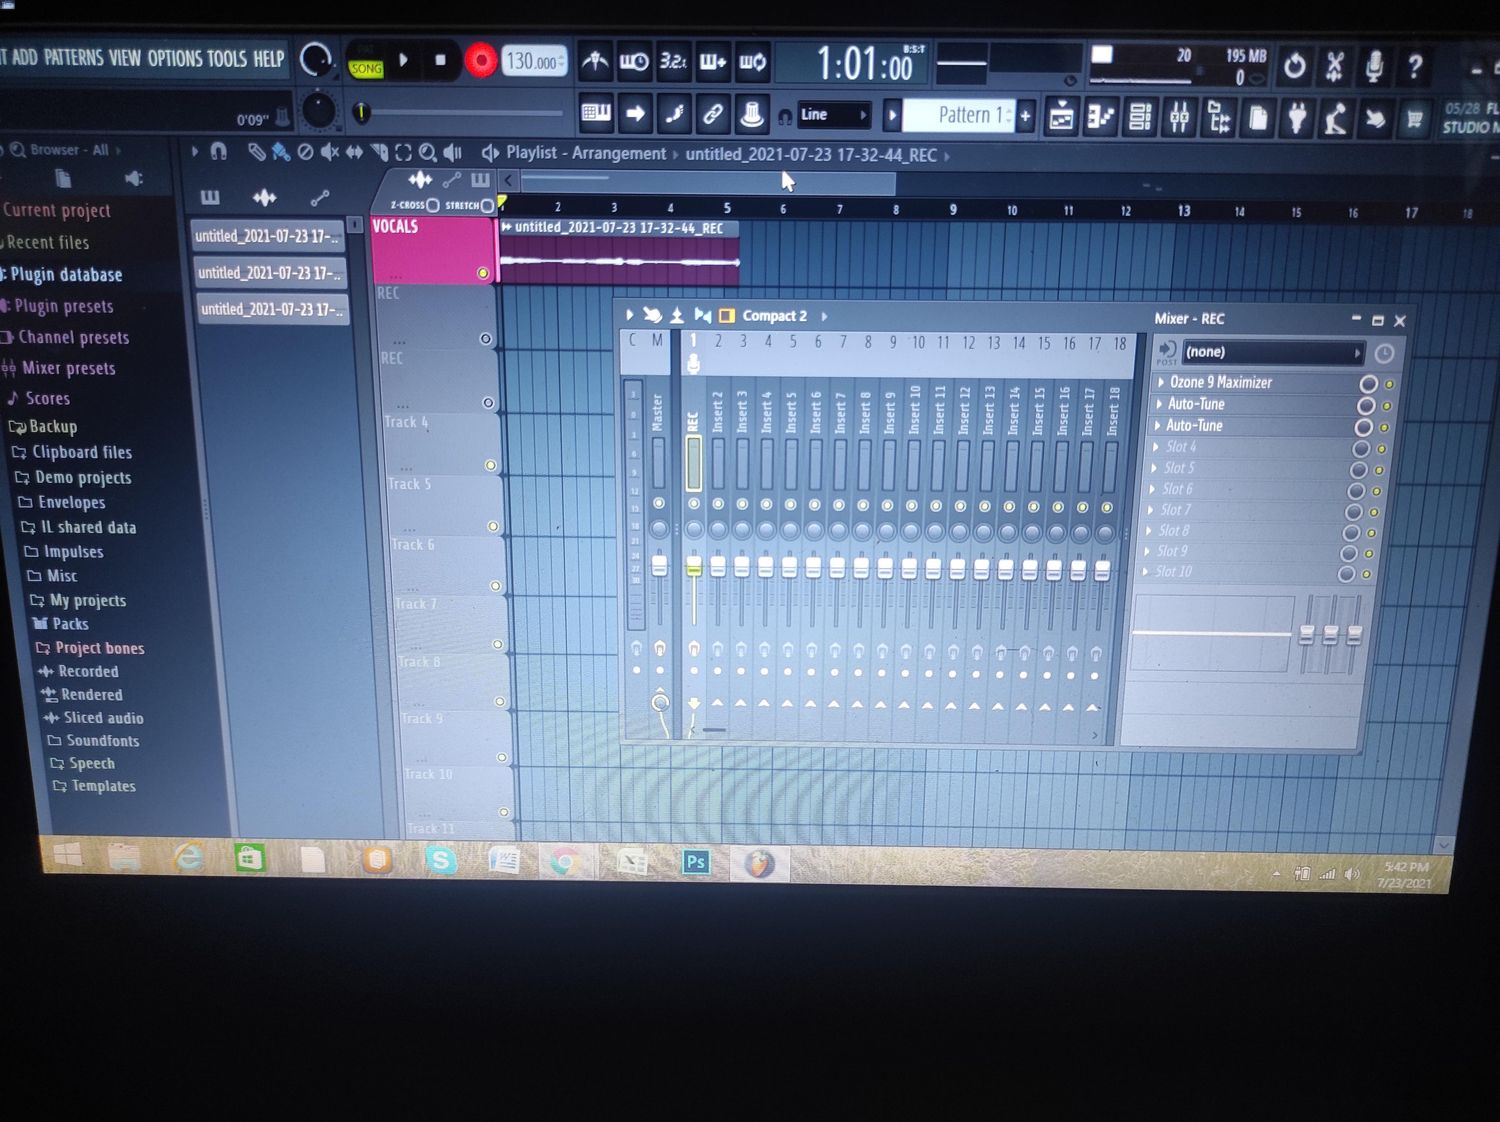
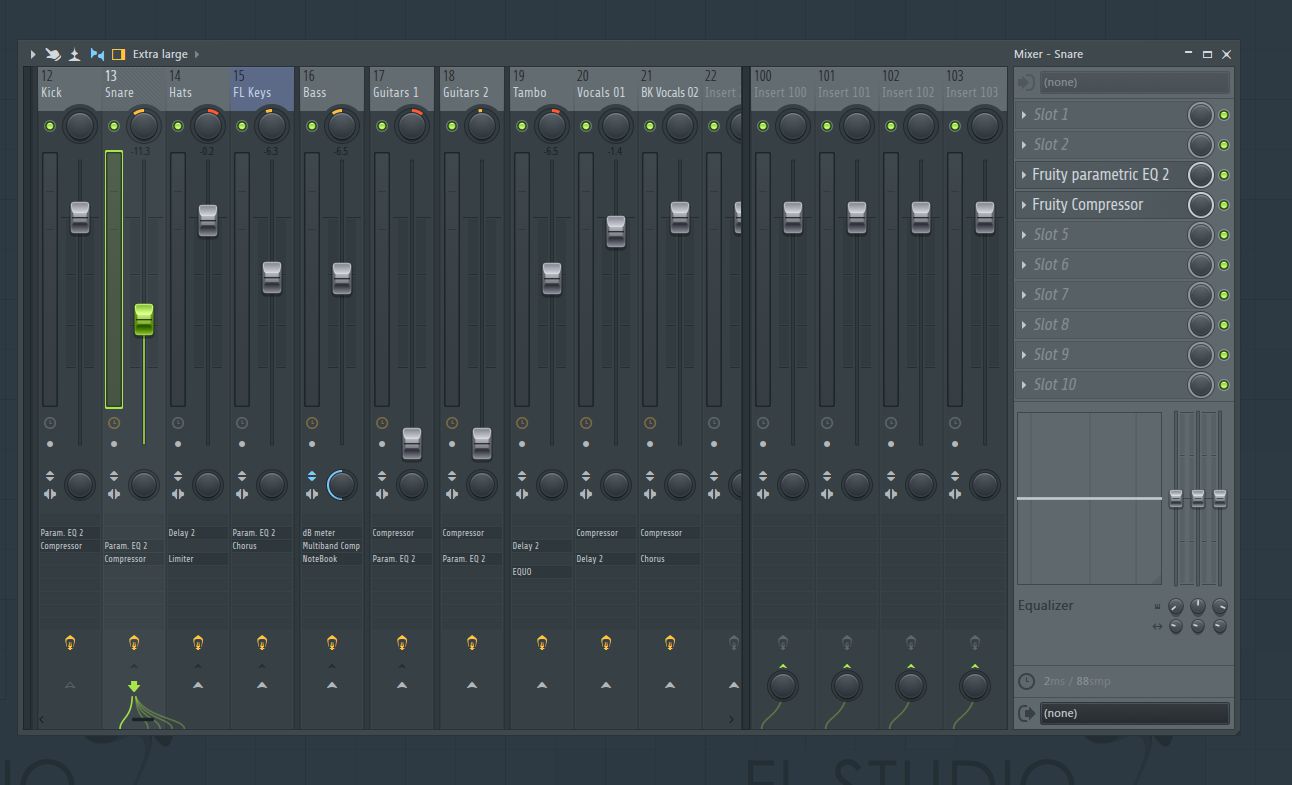
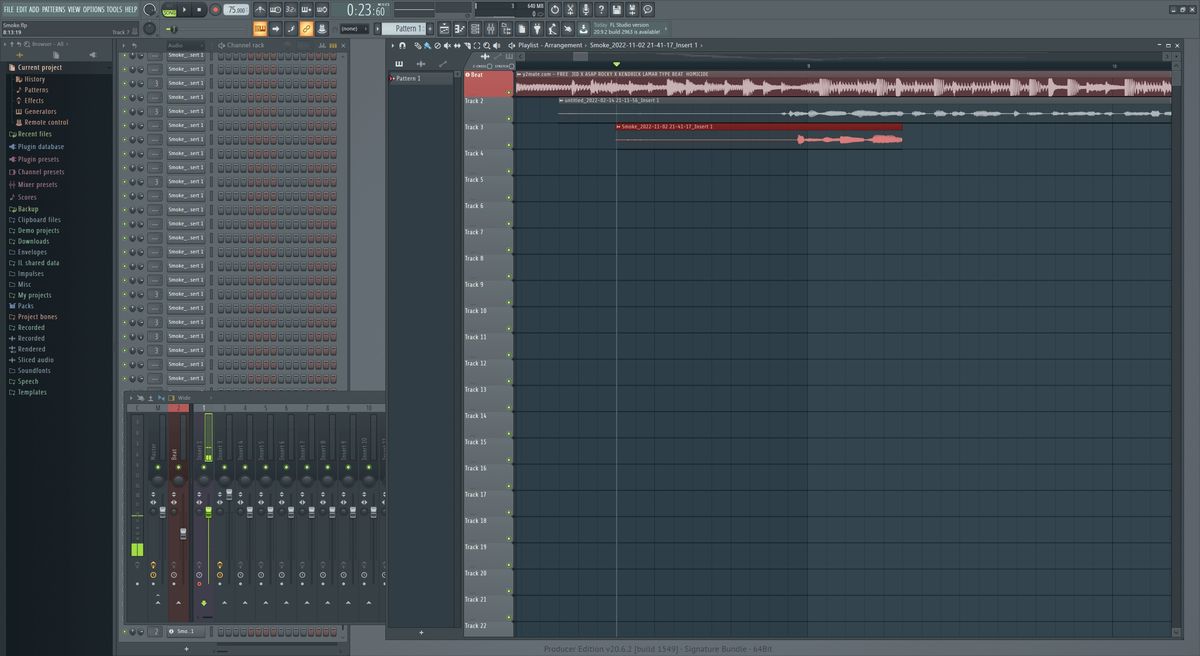
- Locate the mixer section in FL Studio. It can usually be found at the bottom of the screen.
- Click on the mixer track you selected to expand it.
- In the expanded view, locate the EQ knob or the EQ button, depending on the version of FL Studio you are using. Click on it to access the equalizer.
Once you have accessed the equalizer, you will see a graphical representation of the frequency spectrum. The equalizer allows you to control the volume levels of specific frequency bands, which in turn enables you to adjust the treble frequencies.
FL Studio offers different types of equalizers, including parametric EQs and graphic EQs. Each has its own set of controls and features, but the basic concept remains the same – to manipulate the treble frequencies to achieve the desired sound.
Now that you know how to access the equalizer in FL Studio, let’s move on to the next section, where we’ll explore the process of adjusting treble settings in more detail.
Adjusting Treble Settings
Once you have accessed the equalizer in FL Studio, you can start adjusting treble settings to shape the sound of your tracks. Here are the steps to adjust treble in FL Studio:
- Identify the treble frequency range: In the equalizer, the treble frequency range usually starts around 2kHz and extends to higher frequencies. This range may vary depending on the equalizer plugin you are using.
- Boost or cut the treble frequencies: Use the gain controls or sliders in the equalizer to boost or cut the treble frequencies. Moving the slider upwards will boost the treble, while moving it downwards will cut the treble. Be mindful of the overall tonal balance and avoid going to extremes, as it can lead to unnatural or harsh sounds.
- Listen and make adjustments: As you adjust the treble settings, listen carefully to the changes in sound. Pay attention to the clarity, brightness, and presence of the treble frequencies. Make small adjustments and fine-tune the settings until you achieve the desired result.
Remember that every track is unique, and the treble adjustments you make will depend on the specific requirements of your composition. For example, if you have a vocal track that lacks clarity, you can try boosting the treble slightly to bring out the presence and intelligibility of the vocals. On the other hand, if you have a track with bright and energetic instruments like hi-hats or synth leads, you may want to cut the treble slightly to prevent any harshness.
It’s important to trust your ears and make changes based on what sounds best to you. Experiment with different settings and listen critically to the results. Don’t be afraid to make adjustments and revert them if they don’t produce the desired outcome.
Now that you know how to adjust treble settings in FL Studio, let’s explore the use of presets as a convenient way to achieve the desired treble balance.
Using Presets for Treble Adjustment
FL Studio offers a wide range of presets that can be used as a starting point for adjusting treble in your tracks. These presets are pre-configured settings that are designed to enhance specific aspects of your audio, including the treble frequencies.
To use presets for treble adjustment in FL Studio, follow these steps:
- Open FL Studio and load your project.
- Select the mixer track you want to adjust.
- Access the equalizer for the selected track as mentioned earlier.
- Look for a preset menu or preset options within the equalizer plugin.
- Browse through the available presets and select one that focuses on treble enhancement or balancing.
- Apply the preset to the equalizer settings and listen to the changes in the treble frequency range.
Using presets can save you time and provide a quick starting point for adjusting the treble in your tracks. These presets are often created by professionals and are designed to achieve specific tonal characteristics or desired effects. However, it’s important to remember that presets are not one-size-fits-all solutions. You may need to make further adjustments to fit the specific needs of your composition.
As you apply a preset, listen carefully to the changes it makes in the treble frequencies. Assess whether it enhances the desired aspects of your audio or if further tweaking is necessary. You can individualize the preset by making additional adjustments to the treble frequencies using the gain controls or sliders within the equalizer.
Experiment with different presets and find the ones that work best for your tracks. By utilizing presets as a starting point, you can quickly achieve a balanced and professional treble sound in your music.
Next, let’s explore how to customize the treble frequencies using the Parametric EQ 2 plugin in FL Studio.
Customizing Treble with Parametric EQ 2
In FL Studio, the Parametric EQ 2 plugin offers a powerful and flexible tool for customizing the treble frequencies in your tracks. This plugin allows you to precisely shape the treble response and achieve a personalized tonal balance.
To customize treble with Parametric EQ 2 in FL Studio, follow these steps:
- Open FL Studio and load your project.
- Select the mixer track you want to adjust.
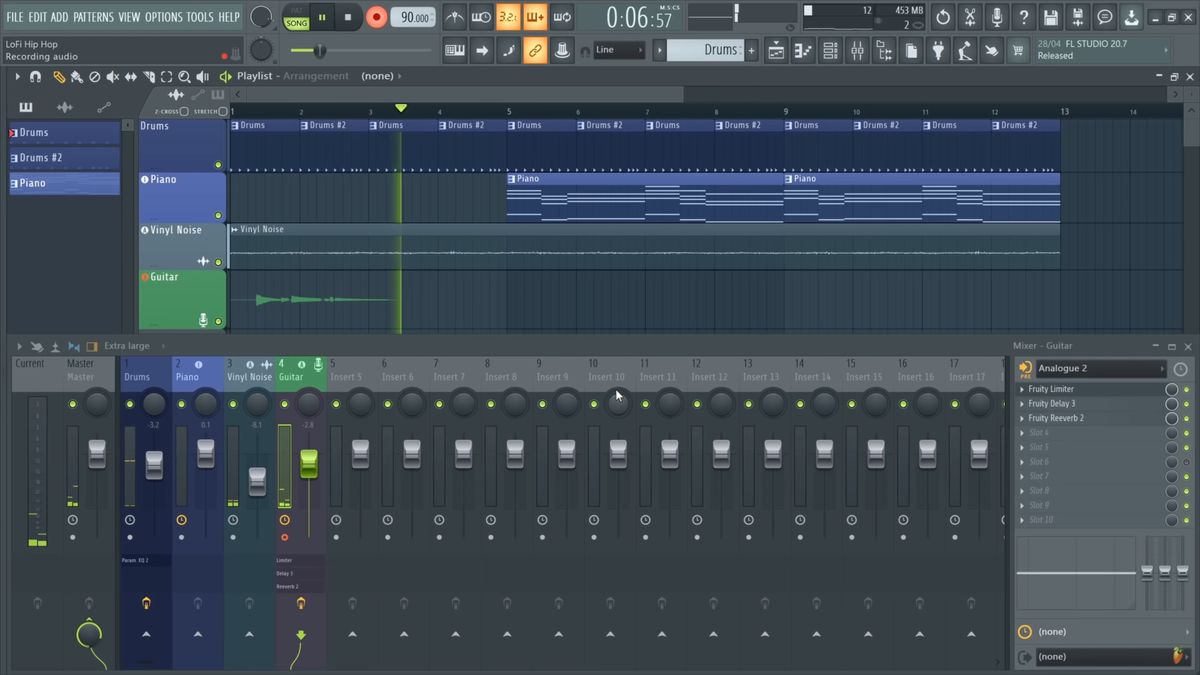
- Access the equalizer for the selected track, either through the mixer or by loading the Parametric EQ 2 plugin directly onto the track.
- Once the Parametric EQ 2 interface is open, locate the frequency band controls or sliders.
- Adjust the treble frequency band: Identify the range of frequencies you want to target for treble customization. Typically, this will be in the higher frequencies, around 2kHz to 10kHz or higher. Use the frequency band controls to narrow down the range.
- Boost or cut the treble frequencies: Use the gain controls or sliders to adjust the level of the treble frequencies. Moving the control upwards will boost the treble, while moving it downwards will cut the treble. Make small adjustments to achieve the desired tonal balance.
- Q and slope adjustments: The Parametric EQ 2 also provides controls for Q and slope. The Q setting determines the width of the frequency band affected by the adjustments, while the slope adjusts the steepness of the boost or cut. Experiment with these settings to refine and shape the treble response further.
- Listen and make adjustments: As you customize the treble with Parametric EQ 2, listen attentively to the changes in the sound. Pay attention to the clarity, brightness, and presence of the treble frequencies. Make small adjustments and fine-tune the settings until you achieve the desired result.
The Parametric EQ 2 in FL Studio provides precise and detailed control over the treble frequencies, allowing you to sculpt the sound to your liking. Experiment with different frequency band settings, gain adjustments, and Q/slope settings to achieve the desired treble balance in your tracks.
Now that you’re familiar with customizing treble using Parametric EQ 2, let’s explore some advanced treble adjustment techniques in FL Studio.
Advanced Treble Adjustment Techniques
FL Studio offers advanced techniques that can take your treble adjustment skills to the next level. These techniques allow for more precise control and fine-tuning of the treble frequencies in your tracks. Here are a few advanced treble adjustment techniques to consider:
- Mid/Side EQ: The Mid/Side EQ technique allows you to separately adjust the treble frequencies in the center (mid) and the sides of the stereo field. By making specific treble adjustments to each component, you can create a more focused and spacious sound. Use FL Studio’s built-in Mid/Side EQ plugins or external plugins that support this functionality to achieve this advanced treble adjustment.
- Dynamic EQ: Dynamic EQ is a powerful technique that combines the functionality of an equalizer and a compressor. It allows you to selectively boost or cut treble frequencies based on the amplitude or dynamics of the audio signal. This technique is particularly useful for controlling harsh or sibilant treble frequencies in a dynamic mix.
- Multiband Compression: Multiband compression is a technique that divides the audio signal into multiple frequency bands and applies compression independently to each band. By using a multiband compressor with specific settings tailored for the treble frequencies, you can achieve better control and consistency in the treble response of your tracks.
- Automation: Automation is a powerful feature in FL Studio that allows you to modify various parameters dynamically over time. By automating the treble adjustments, such as boosting or cutting specific frequencies at specific moments, you can add movement and excitement to your tracks. This advanced treble adjustment technique can help highlight certain elements or create dramatic effects.
These are just a few examples of the advanced treble adjustment techniques available in FL Studio. As you become more comfortable with the basic techniques and tools, don’t hesitate to explore these advanced techniques to further refine the treble frequencies in your tracks.
Remember, it’s essential to use these advanced techniques judiciously and critically evaluate the impact on the overall mix. Always trust your ears and make adjustments that enhance the musicality and cohesiveness of your tracks.
Now that we’ve explored some advanced treble adjustment techniques, let’s move on to some valuable tips for achieving the desired treble balance in your music.
Tips for Achieving the Desired Treble Balance
When it comes to achieving the desired treble balance in your music, there are several tips and techniques that can help you achieve the best results. Here are some valuable tips to keep in mind:
- Reference your mix: It’s crucial to regularly reference your mix on various audio devices, such as headphones, speakers, and even car stereo systems. Treble frequencies can be perceived differently on different playback systems. By referencing your mix on multiple devices, you can ensure that the treble balance remains consistent and translates well across different listening environments.
- Use a spectrum analyzer: A spectrum analyzer visualizes the frequency content of your audio in real-time. By using a spectrum analyzer plugin in FL Studio, you can monitor the treble frequencies and ensure they are well-balanced with the rest of the audio spectrum. This tool can help you identify any peaks or dips in the treble range, allowing you to make precise adjustments accordingly.
- Avoid excessive boosting: While it may be tempting to boost the treble frequencies to make certain elements stand out, be cautious not to overdo it. Excessive boosting can lead to harsh and unnatural sounds. Instead, focus on finding the right balance between clarity and smoothness in the treble range.
- Surgical EQ cuts: If you encounter specific problem areas in the treble frequencies, such as harshness or sibilance, you can use surgical EQ cuts to address those issues. Identify the problematic frequency and make a narrow cut to reduce the unwanted resonance or harshness without affecting the overall treble balance.
- Consider the arrangement and mixing techniques: Sometimes, achieving the desired treble balance may require adjustments in the arrangement or mixing techniques. For example, reducing the high frequencies of certain instruments or vocals during the mixing stage can help create a more balanced and cohesive treble response.
- Experiment with different EQs and plugins: FL Studio offers a variety of EQs and plugins with unique characteristics. Don’t be afraid to experiment with different EQs and plugins to find the ones that work best for your tracks. Each plugin may have a slightly different tonal color and response in the treble range.
By following these tips and techniques, you can ensure that the treble balance in your music is precisely tailored to your artistic vision. Remember that achieving the desired treble balance is a subjective process, and it may require some trial and error to find the perfect results for your tracks.
Now that we’ve covered valuable tips for treble balance, let’s conclude our exploration of adjusting treble in FL Studio.
Conclusion
Adjusting treble in FL Studio is a vital skill for achieving a polished and professional sound in your music. By understanding the role of treble and using the various tools and techniques available, you can enhance the clarity, brightness, and presence of your tracks.
In this article, we explored the fundamentals of treble and its significance in music production. We learned how to access the equalizer in FL Studio to adjust treble settings, using both manual adjustments and presets. We also explored the customizable options offered by the Parametric EQ 2 plugin, as well as advanced techniques such as Mid/Side EQ, dynamic EQ, multiband compression, and automation.
To achieve the desired treble balance, we discussed important tips, such as referencing your mix, using a spectrum analyzer, avoiding excessive boosting, making surgical EQ cuts, considering arrangement and mixing techniques, and experimenting with different EQs and plugins.
Remember, achieving the ideal treble balance is a subjective process that requires attention to detail and careful listening. Trust your ears and make adjustments based on what sounds best for your tracks and musical vision.
So, whether you’re a beginner or an experienced producer, harness the power of treble adjustment in FL Studio and take your music to new heights. By mastering the art of treble, you can create tracks that captivate listeners with their clarity, brightness, and definition.
Now go forth and unleash the full potential of treble in your FL Studio productions. Happy music making!