Home>Production & Technology>Metronome>How To Turn On Metronome In Pro Tools
Metronome
How To Turn On Metronome In Pro Tools
Published: January 14, 2024
Learn how to easily activate the metronome feature in Pro Tools. Stay on beat and enhance your music production with the Metronome tool.
(Many of the links in this article redirect to a specific reviewed product. Your purchase of these products through affiliate links helps to generate commission for AudioLover.com, at no extra cost. Learn more)
Table of Contents
Introduction
Pro Tools is a powerful digital audio workstation used by music producers, audio engineers, and musicians worldwide. It provides a wide range of tools and features to create, edit, and mix music. One essential tool in Pro Tools is the metronome, which helps musicians maintain the tempo and rhythm while recording or playing along with a session.
Whether you’re a beginner or a seasoned professional, using the metronome in Pro Tools can greatly enhance your recording and performance experience. In this article, we will guide you through the step-by-step process of turning on the metronome in Pro Tools and adjusting its settings to suit your needs.
If you’ve never used the metronome in Pro Tools before, don’t worry! We’ll start from the basics and gradually delve into more advanced options. By the end of this guide, you’ll be able to confidently use the metronome to keep your recordings and performances in perfect time.
So, let’s dive in and learn how to turn on the metronome in Pro Tools!
Step 1: Opening Pro Tools
The first step in using the metronome in Pro Tools is, of course, opening the Pro Tools software on your computer. If you already have Pro Tools installed, you can simply double-click on the Pro Tools icon to launch the program.
Pro Tools is available for both Windows and Mac operating systems, so make sure you’re using the correct version for your computer.
Once Pro Tools is launched, you will be greeted with the main interface. Take a moment to familiarize yourself with the various sections of the software, such as the menus, toolbar, and edit window. These elements will come in handy as we navigate through the steps of enabling the metronome.
If you don’t have Pro Tools installed yet, you can visit the Avid website to download the software. There are different versions of Pro Tools available, so choose the one that suits your needs.
After downloading and installing Pro Tools, follow the installation instructions to complete the setup. Once installed, you can proceed to open the program and prepare to enable the metronome.
Now that Pro Tools is open and ready to go, let’s move on to the next step: opening a session.
Step 2: Opening the Session
Before we can start using the metronome in Pro Tools, we need to open a session. A session in Pro Tools is where you can record, edit, and mix your music or audio projects.
If you already have a session created, you can open it by going to the “File” menu and selecting “Open”. Browse to the location where your session is saved and select it. Alternatively, you can use the keyboard shortcut “Command + O” (Mac) or “Ctrl + O” (Windows) to open a session.
If you don’t have a session yet, you can create a new one by going to the “File” menu and selecting “New Session”. Enter a name for your session and choose the desired sample rate, bit depth, and session settings. Click “Create” to create a new session.
Once the session is open, you will see the session window with tracks displayed. You can create tracks, import audio, and make all the necessary preparations for your project. But before we start recording or playing any music, let’s enable the metronome to help us keep the tempo and rhythmic accuracy.
Now that you have your session loaded and ready, let’s move on to the next step: navigating to the Transport Window where the metronome controls are located.
Step 3: Navigating to the Transport Window
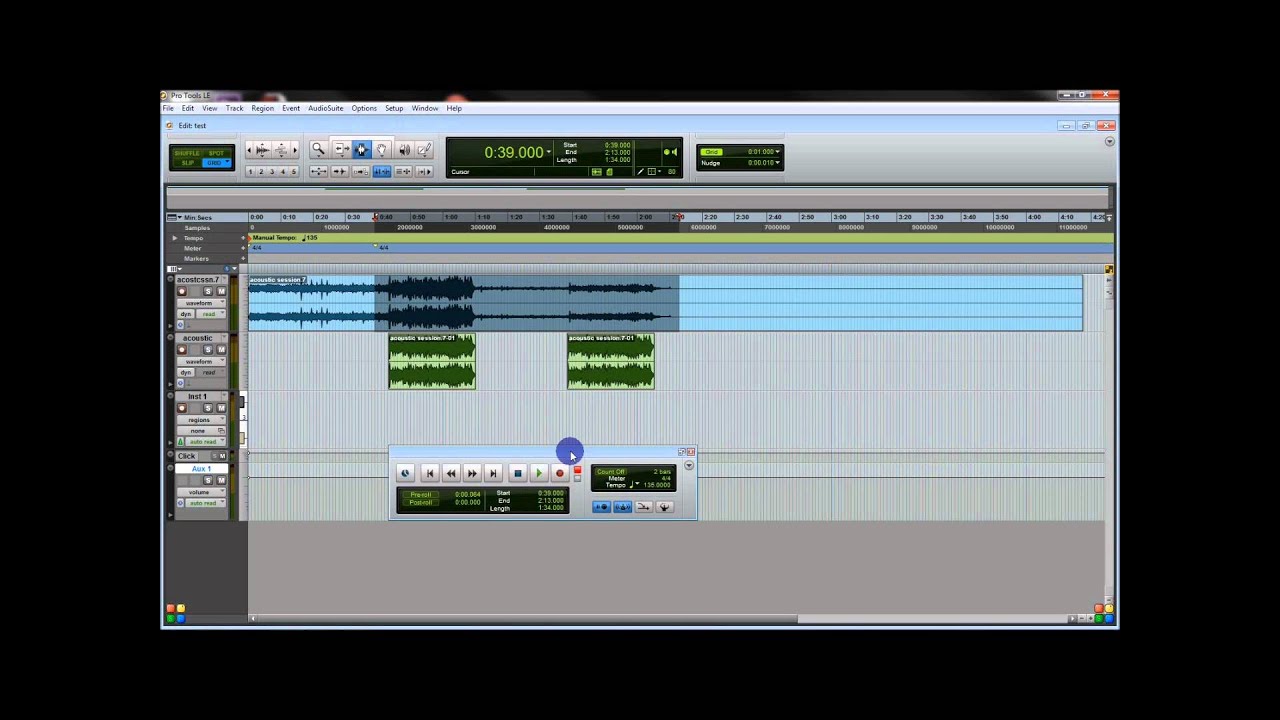
In order to enable the metronome in Pro Tools, we need to navigate to the Transport Window. This is where you can find various transport controls, including the metronome settings.
To access the Transport Window, you can go to the “Window” menu in Pro Tools and select “Transport”. Alternatively, you can use the keyboard shortcut “Command + 1” (Mac) or “Ctrl + 1” (Windows) to open the Transport Window.
Once the Transport Window is open, you will see a range of controls displayed. These controls allow you to play, stop, rewind, and navigate through your session, among other functions.
In the Transport Window, you will find the metronome controls towards the right side of the window. These controls include the metronome on/off switch, tempo field, and other metronome-related settings.
Take a moment to familiarize yourself with the layout of the Transport Window and the location of the metronome controls. This will make it easier for you to quickly enable and adjust the metronome settings as you work on your music.
Now that you’ve located the Transport Window, let’s move on to the next step: enabling the metronome in Pro Tools.
Step 4: Enabling the Metronome
Now that we’ve found the metronome controls in the Transport Window, the next step is to enable the metronome in Pro Tools. Enabling the metronome will allow you to hear the clicks or beats that help you stay in time while recording or playing along with your session.
To enable the metronome, locate the “Click” button in the Transport Window. It is usually represented by a small metronome icon. Click on the “Click” button to toggle the metronome on or off. When the metronome is enabled, the button will turn blue, indicating that it is active.
Now, when you start playback in Pro Tools, you will hear the metronome clicks playing along with your session. This will help you keep a steady tempo and stay on beat as you record or play your instrument.
The metronome in Pro Tools is set to a default tempo of 120 beats per minute (BPM). However, you can adjust the tempo according to the needs of your project. We’ll cover how to change the tempo in the next step.
Enabling the metronome is a crucial step to ensure rhythmic accuracy in your recordings. It provides a consistent reference for you to stay in time and sync with other tracks in your session.
With the metronome enabled, you’re now ready to move on to the next step: adjusting the metronome settings in Pro Tools.
Step 5: Adjusting Metronome Settings
While the default metronome settings in Pro Tools can work for most projects, you may need to adjust them to better suit your specific needs. Pro Tools provides various metronome settings that allow you to customize the click sound, tempo, and other aspects of the metronome.
Let’s explore some of the key metronome settings you can adjust in Pro Tools:
- Tempo: The tempo determines the speed of the metronome clicks. To adjust the tempo, simply click on the tempo field in the Transport Window and enter the desired BPM value.
- Meter: The meter defines the rhythmic structure of your project, such as 4/4 or 6/8. You can set the meter in the Transport Window next to the tempo field.
- Accent Level: The accent level determines the intensity of the downbeat accent in the metronome clicks. You can adjust it in the Transport Window by dragging the accent level slider or entering a percentage value.
- Click Sound: Pro Tools allows you to choose from a variety of click sounds for the metronome. To change the click sound, go to the “Metronome” menu in the top menu bar and select “Click Sounds”. Choose the desired sound from the list.
- MIDI Click: If you prefer, you can use a MIDI instrument as the click sound instead of the built-in sounds. You can set up a MIDI click by going to the “Metronome” menu and selecting “MIDI Click”. Choose the MIDI instrument and adjust other settings if necessary.
These are just a few examples of the metronome settings you can adjust in Pro Tools. Feel free to explore and experiment with different settings to find the ones that work best for your music and workflow.
Once you’ve made the desired adjustments to the metronome settings, you can start playback and listen to the modified metronome in action. Remember, a well-configured metronome can greatly enhance your recordings and ensure tight rhythmic precision.
With the metronome settings customized to your liking, let’s move on to the next step: starting the metronome in Pro Tools.
Step 6: Starting the Metronome
Now that you have enabled the metronome and adjusted its settings in Pro Tools, it’s time to start the metronome and begin using it in your recording or playing session.
Starting the metronome is a simple process. All you need to do is click the play button in the Transport Window or press the spacebar on your keyboard to initiate playback. As soon as playback begins, you will hear the metronome clicks in sync with the tempo you have set.
The metronome serves as your rhythmic guide, providing a steady beat that helps you stay in time while recording or playing your instrument. It acts as a reference point, allowing you to maintain a consistent tempo and ensure that all tracks in your session are synchronized.
As the metronome clicks, you can record your performance, layer additional tracks, or play along with the existing tracks in your session. The metronome acts as a reliable timekeeper, providing a solid rhythmic foundation for your music.
Remember to listen closely to the metronome clicks and play along with them accurately. This will ensure that your recordings are in time and have a professional, polished feel.
If you encounter any issues with the metronome, such as the clicks being too loud or soft, or if it’s not syncing properly with your session, you can always go back to the metronome settings and fine-tune them to your preferences.
With the metronome up and running, you’re ready to join the rhythm and start capturing or playing music in time. Let’s continue to the next step and explore how to change the metronome sounds in Pro Tools.
Step 7: Changing Metronome Sounds
While the default click sound of the metronome in Pro Tools is a simple beep, you have the option to customize and change the metronome sounds to better suit your musical preferences and mood.
Changing the metronome sounds in Pro Tools is a straightforward process. Here’s how you can do it:
- In the Pro Tools menu bar, click on the “Metronome” menu.
- Select “Click Sounds” from the drop-down menu.
- A list of available click sounds will appear. Click on the desired sound to select it.
Pro Tools provides a variety of click sound options, ranging from traditional click sounds to more musical tones and percussive sounds. You can preview each click sound by clicking on it, allowing you to audition different options and choose the one that best matches the style of your music.
Furthermore, Pro Tools offers the flexibility to use a custom click sound if you have a specific sound file you want to use. To do this, simply select “Browse” in the Click Sounds menu and locate the desired sound file on your computer. Once selected, Pro Tools will use that file as the metronome click sound.
Changing the metronome sounds can add a personal touch to your music production process and make it more enjoyable, motivating, and inspiring. Different sounds may evoke different emotions and enhance your creativity as you work on your project.
With the metronome sounds customized to your liking, you’re all set to continue using the metronome in Pro Tools. Let’s move on to the final step: disabling the metronome.
Step 8: Disabling the Metronome
Once you have finished using the metronome in your Pro Tools session, you may want to disable it to remove the click sound and focus solely on your recorded tracks or live performance. Disabling the metronome is a simple and quick process.
To disable the metronome in Pro Tools, follow these steps:
- In the Transport Window, locate the “Click” button.
- Click on the “Click” button to toggle the metronome off.
When the metronome is disabled, the “Click” button in the Transport Window will no longer be highlighted or active. This means that you won’t hear the metronome clicks when you start playback in Pro Tools.
Disabling the metronome can be useful when you are satisfied with your recorded tracks and want to focus on mixing, editing, or adding additional layers to your project without the distraction of the metronome.
If you need to enable the metronome again later in your session, you can simply follow the steps outlined in earlier sections to re-enable it with your preferred settings.
Remember that the metronome is a valuable tool for maintaining rhythmic accuracy and synchronization in your music production. It provides a solid foundation for recording and playing along with your tracks, enhancing the overall quality of your project.
With the metronome disabled, you have successfully completed the process of using the metronome in Pro Tools. Whether you’re a beginner or an experienced user, incorporating the metronome into your workflow can greatly benefit your music production skills.
Now that you have learned how to enable, adjust, change the sounds, and disable the metronome in Pro Tools, you can confidently apply this knowledge to your future recording and performance sessions.
Happy creating, and keep rocking to the beat!
Conclusion
Using the metronome in Pro Tools is a fundamental skill for musicians, music producers, and audio engineers. It helps maintain a steady tempo and precise rhythm during recording and performance sessions. By following the step-by-step guide outlined in this article, you can easily enable, adjust, and customize the metronome settings to enhance your music production workflow.
The metronome in Pro Tools provides a reliable reference point, allowing you to stay in time, synchronize multiple tracks, and create recordings with tight rhythmic precision. Whether you’re recording a band, adding layers to your composition, or practicing with your instrument, the metronome ensures that your music remains locked into a consistent tempo and groove.
Throughout this guide, we covered various steps, including opening Pro Tools, navigating to the Transport Window, enabling the metronome, adjusting its settings, starting and stopping the metronome, and even changing the click sounds. Each step is designed to help you utilize the metronome effectively and creatively in your music production process.
Remember, the metronome is a tool that can greatly contribute to the quality and professionalism of your music. It helps you develop a strong sense of timing, improves your accuracy, and allows you to create recordings that are tight and cohesive.
Whether you’re recording a band, producing electronic music, or working on a film score, the metronome is your trusty ally. Embrace its rhythmic guidance, experiment with different settings and click sounds, and discover how it can elevate your musical creations.
Now that you are equipped with the knowledge to use the metronome in Pro Tools, it’s time to apply these techniques to your own projects and let your creativity flourish. So, fire up Pro Tools, turn on the metronome, and let the beats guide you to musical perfection!