Reggae
How To Make Reggae Music In Garageband
Modified: February 15, 2024
Learn how to create authentic reggae music using Garageband. Discover tips, techniques, and tools to bring the island vibes to your tracks.
(Many of the links in this article redirect to a specific reviewed product. Your purchase of these products through affiliate links helps to generate commission for AudioLover.com, at no extra cost. Learn more)
Table of Contents
Introduction
Welcome to the world of Reggae music! Reggae is a genre born in Jamaica with its roots deeply embedded in the rich cultural heritage of Caribbean music. It is characterized by its laid-back rhythms, soulful melodies, and powerful messages of love, peace, and social justice. Whether you are a musician, a music producer, or simply a fan of reggae, this article will guide you on how to create your own reggae music using Garageband.
Garageband is a popular digital audio workstation (DAW) that allows you to create professional-grade music using your computer or mobile device. It offers a wide range of virtual instruments, loops, and effects that can help you to channel your inner reggae artist and bring your musical ideas to life.
In this article, we will walk you through the process of setting up Garageband for reggae music production, importing reggae instruments, creating the rhythm section, working with drum loops, adding authentic reggae guitar, incorporating bass and keyboard, adding percussion, layering vocal tracks, applying reggae effects and mixing, and finalizing your reggae track. By the end of this article, you’ll have the tools and knowledge you need to create your own authentic reggae music in Garageband.
So, whether you want to jam to some Bob Marley classics, create your own original reggae tunes, or just experiment with the sounds and rhythms of reggae, let’s dive into the world of reggae music production in Garageband. Get ready to feel the groove and experience the irie vibes of reggae!
Setting Up Garageband
Before you begin creating your reggae masterpiece, it’s important to set up your Garageband project with reggae-specific settings. This will help you lay the foundation for an authentic reggae sound. Here’s how:
- Create a New Project: Open Garageband and create a new project by clicking on “New Project” or “File” and selecting “New”. Choose the “Empty Project” option.
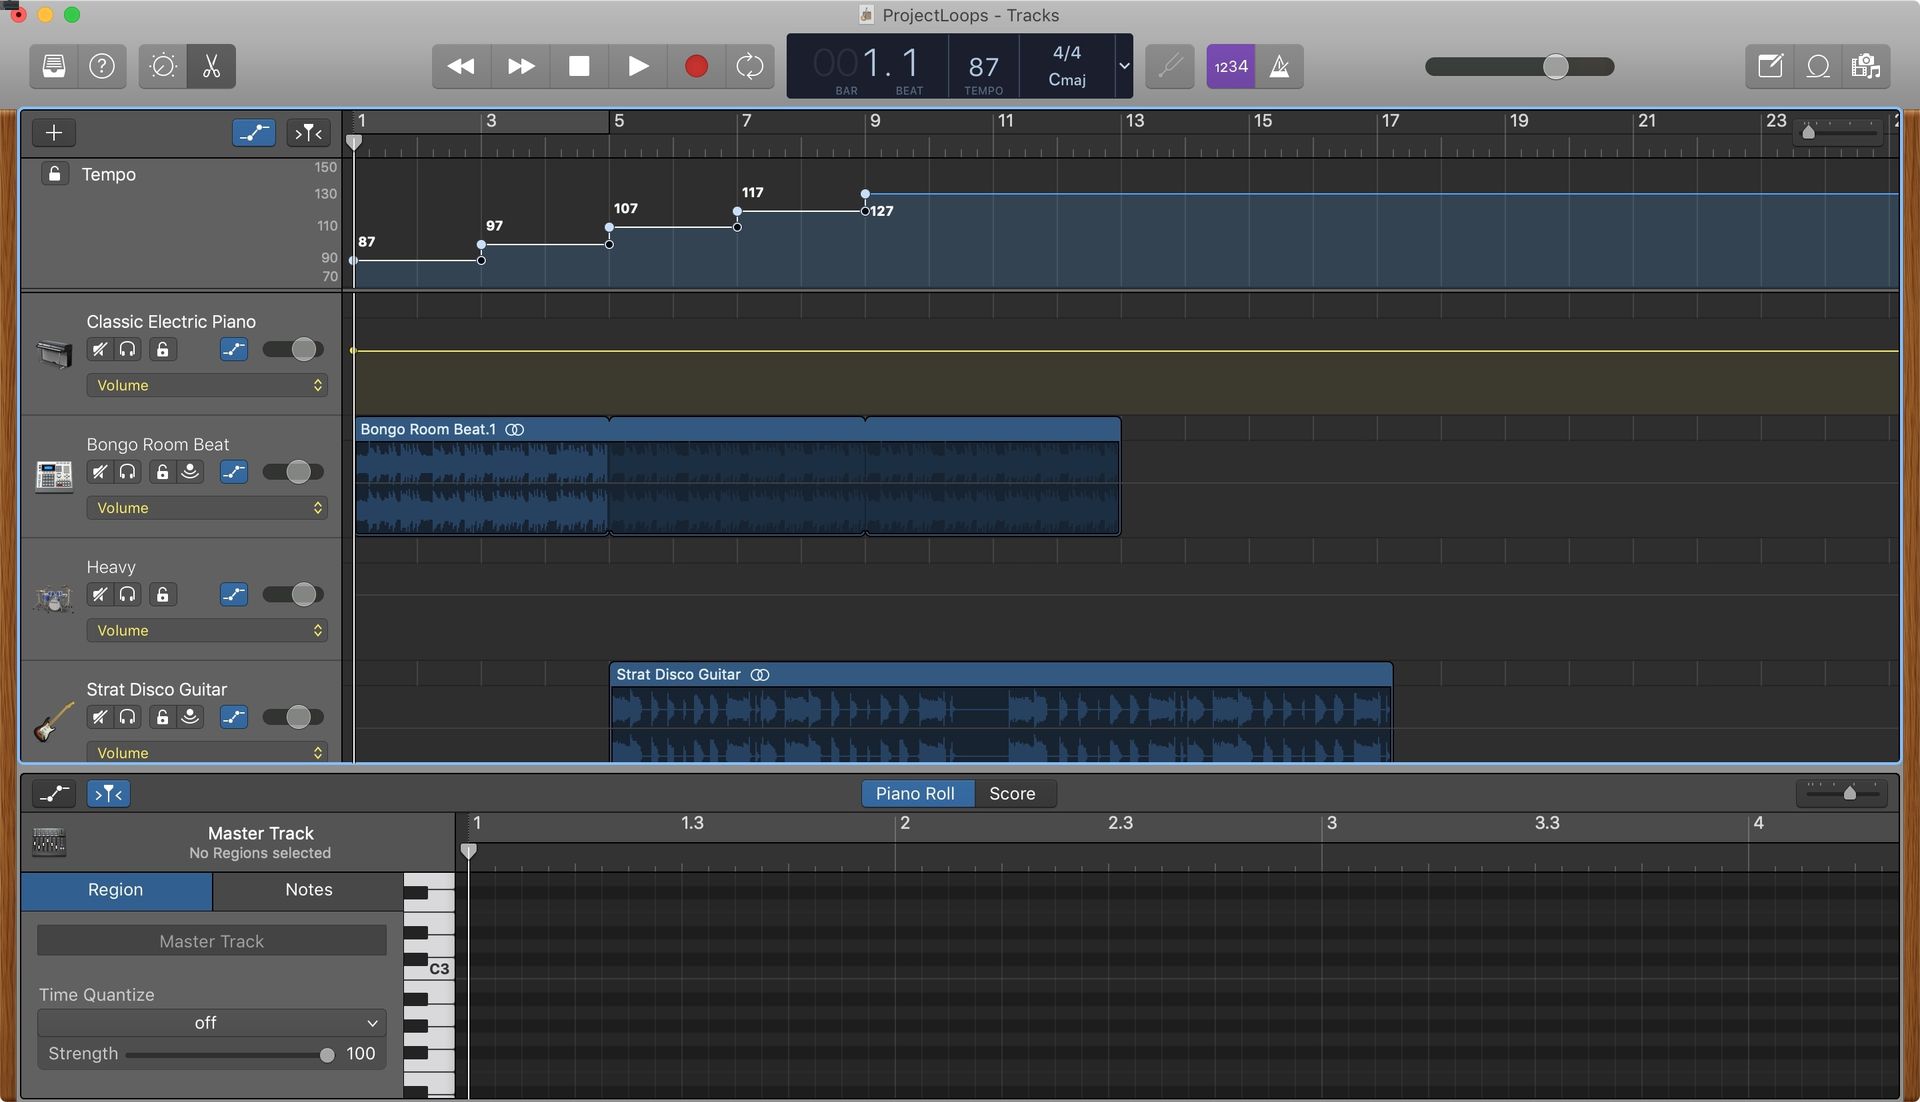
- Choose a Tempo: Reggae music is known for its laid-back feel and steady tempo. Set the tempo of your project to around 80-90 beats per minute (BPM). This will give you a good starting point for creating that classic reggae groove.
- Select a Key: Reggae music often uses minor keys such as D minor or A minor. Choose a key that fits the mood and vibe you want to create.
- Set the Time Signature: Reggae music typically follows a 4/4 time signature. This means there are four beats in each measure. Make sure your project is set to 4/4 time signature.
- Enable the Metronome: The metronome will help you stay in time and maintain a consistent rhythm while recording. Enable it by clicking on the metronome icon in the toolbar.
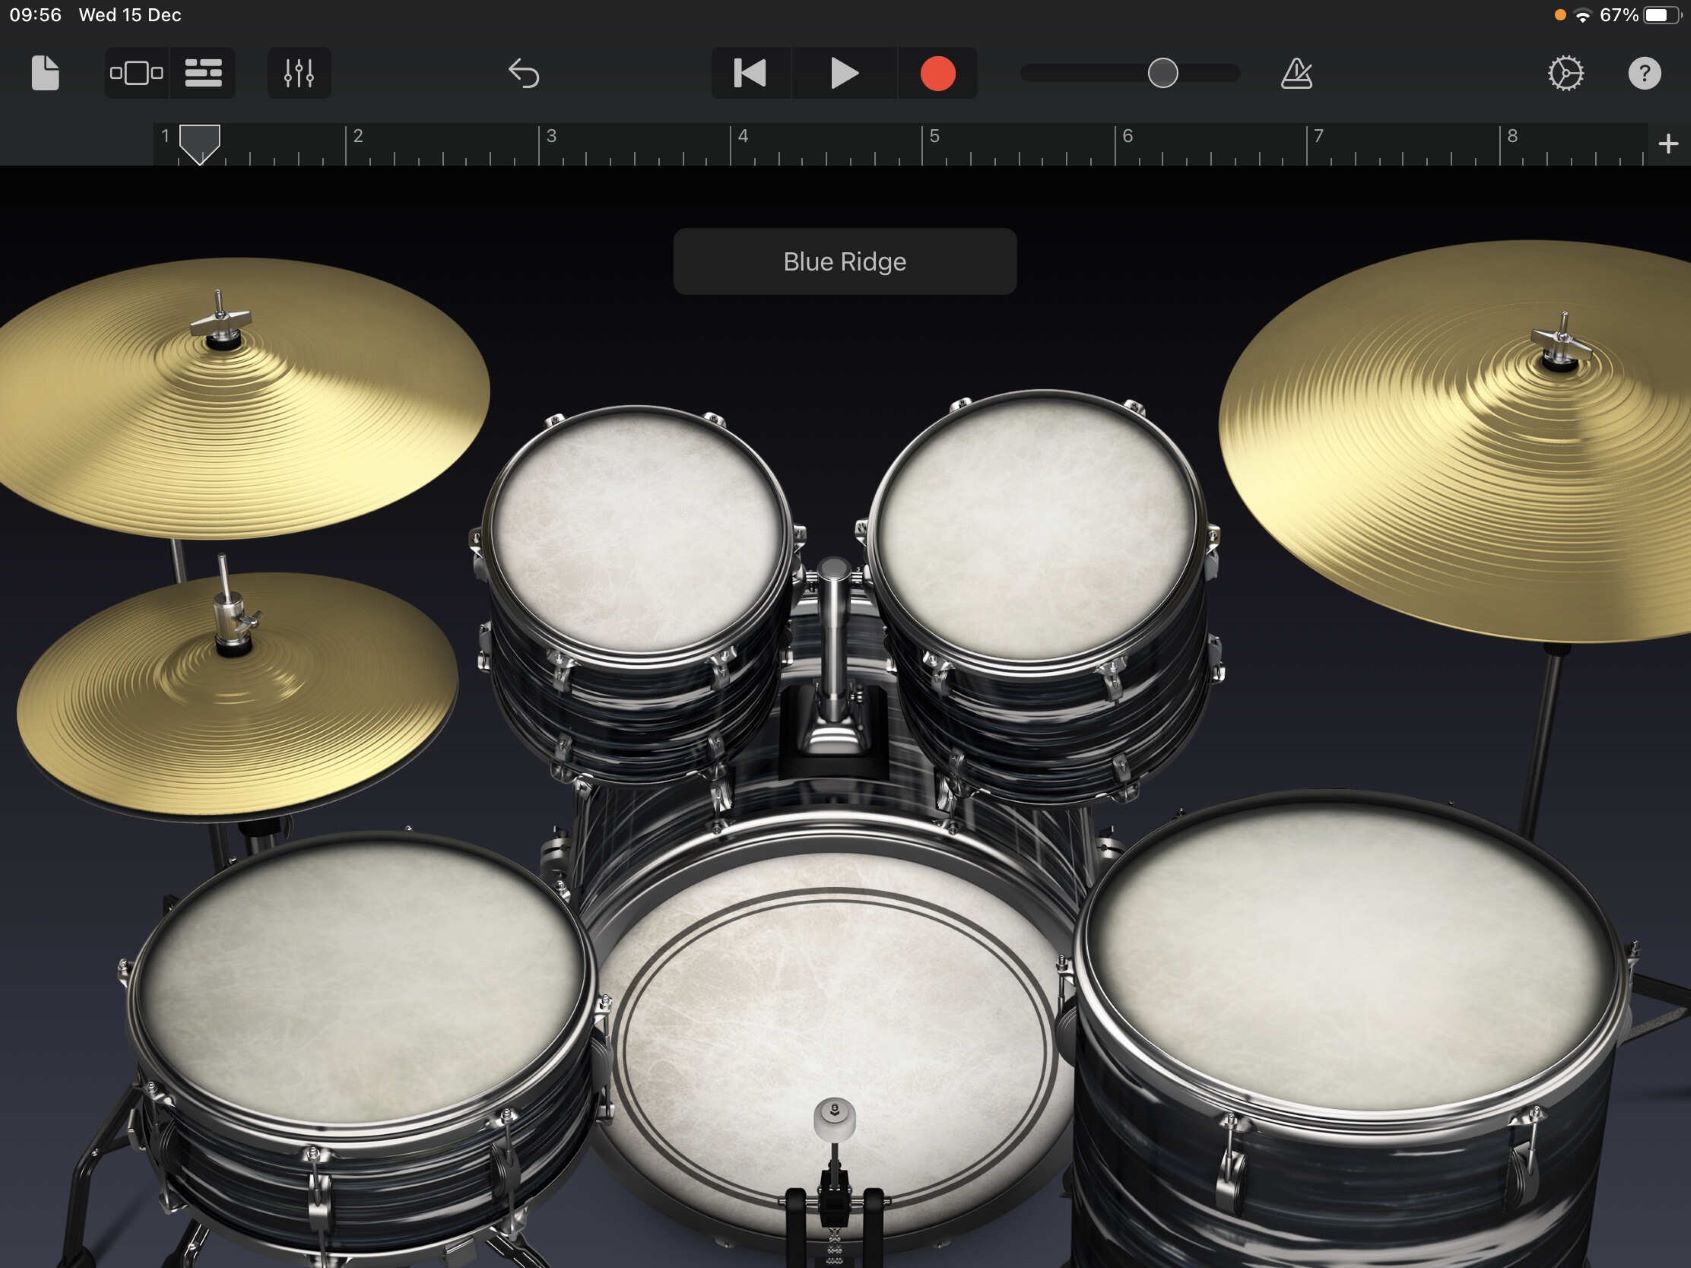
- Choose a Reggae Drum Kit: Garageband offers a variety of drum kits and percussion sounds. Look for a drum kit that has a reggae flavor, with classic instruments like the snare, hi-hat, and kick drum. This will give your rhythm section an authentic reggae sound.
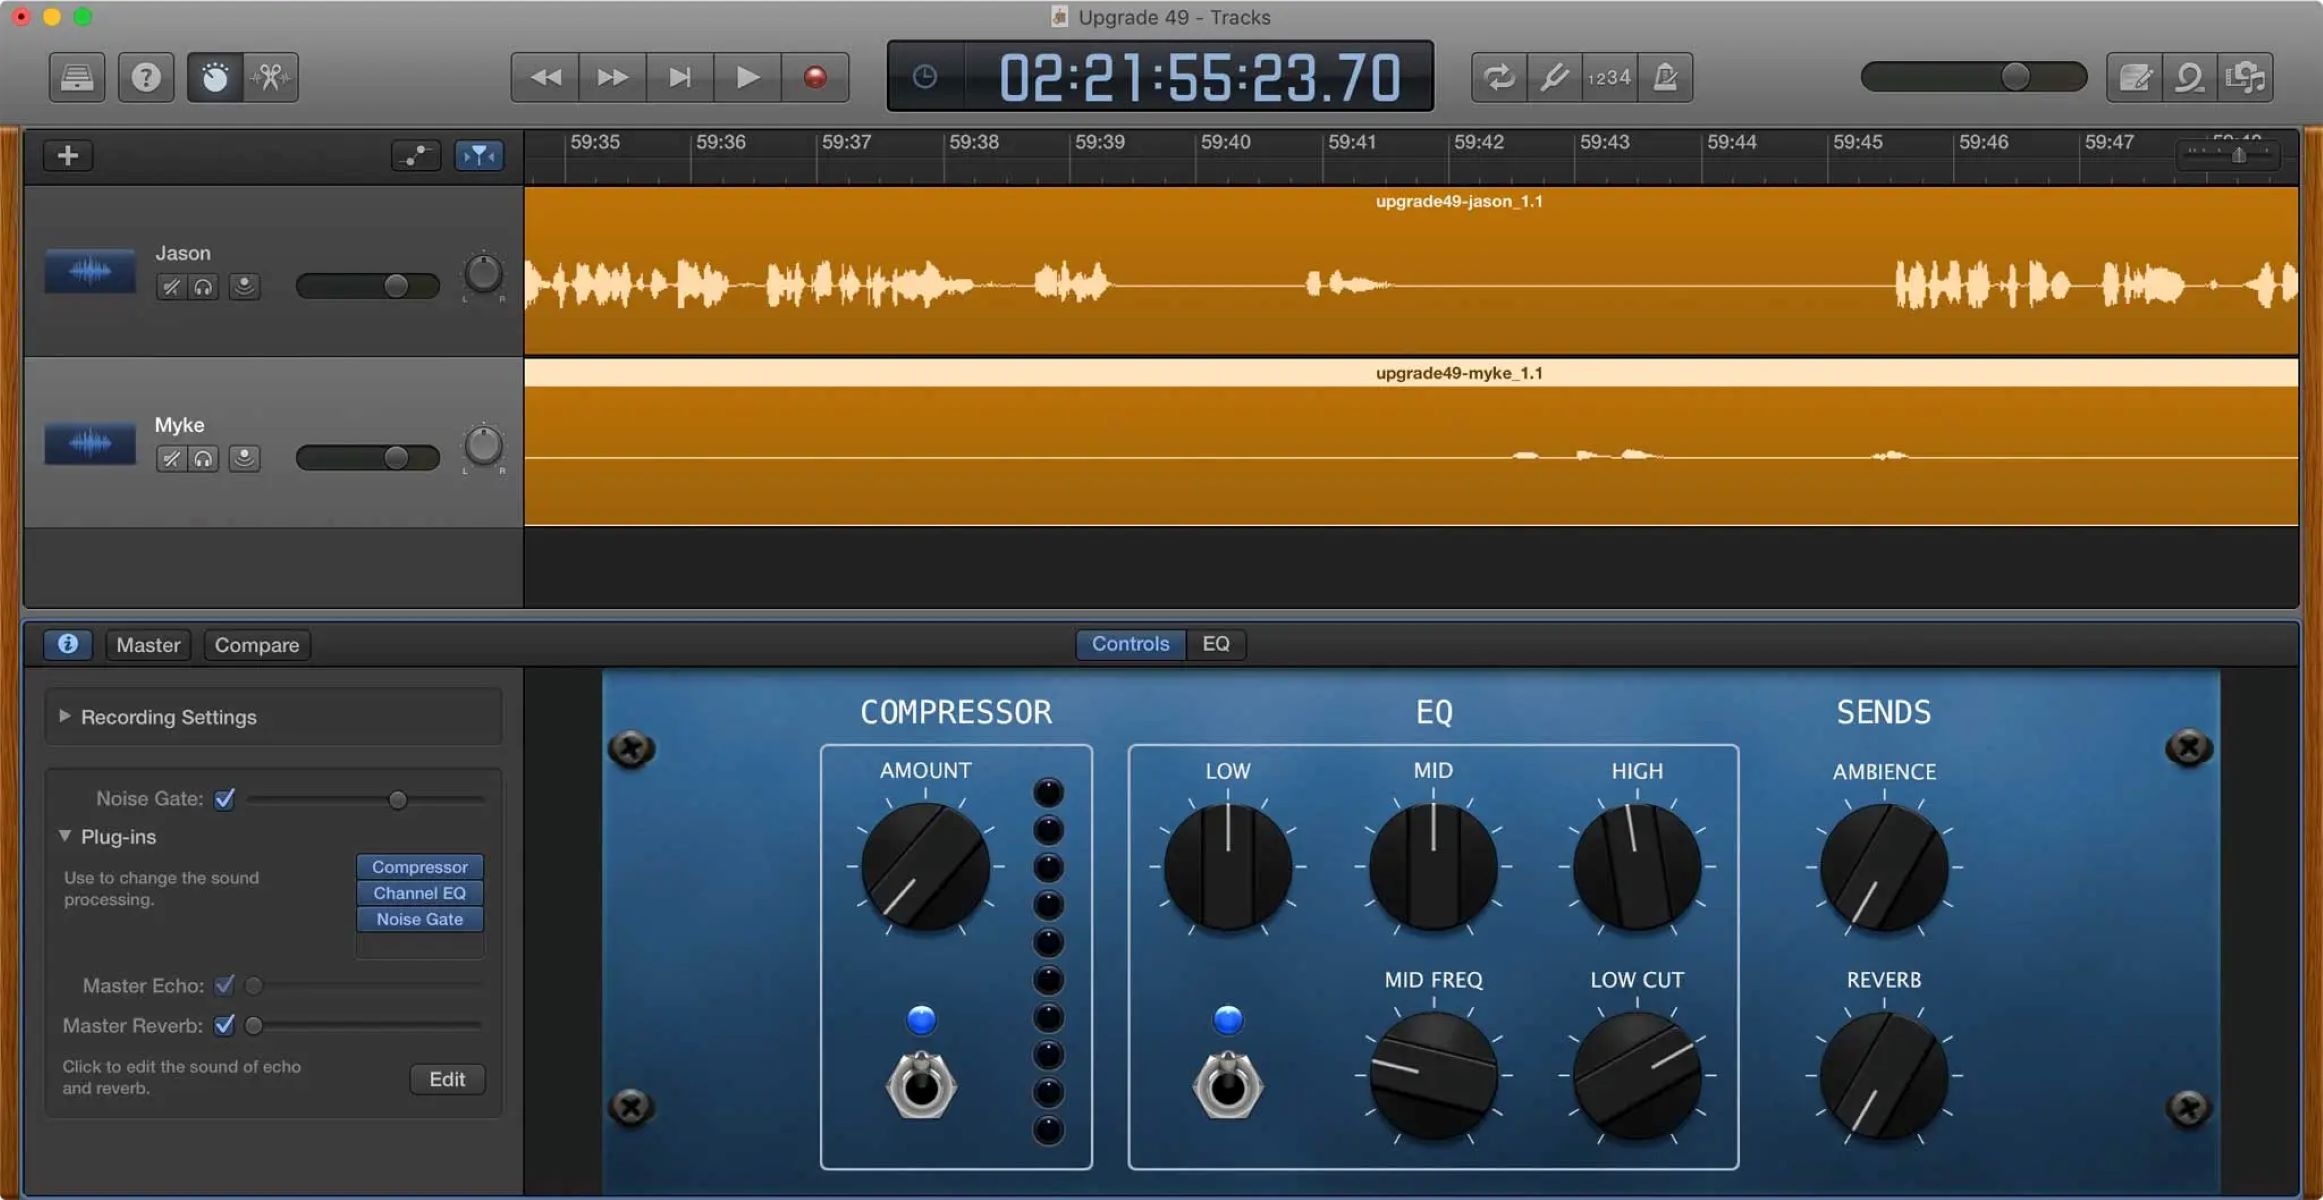
- Adjust the Project Settings: Click on “Project” in the top menu and select “Project Settings”. Here, you can adjust the settings such as the volume, panning, and reverb. Experiment with these settings to create the desired reggae sound.
Once you have set up your Garageband project with these reggae-specific settings, you’re ready to start importing reggae instruments and creating the foundation of your reggae track. So, put on some Bob Marley tunes for inspiration and let’s dive into the world of reggae music production in Garageband!
Importing Reggae Instruments
One of the key elements of reggae music is the unique combination of instruments that come together to create its distinctive sound. Garageband offers a wide range of virtual instruments that you can use to recreate the classic reggae sound. Here’s how to import reggae instruments in Garageband:
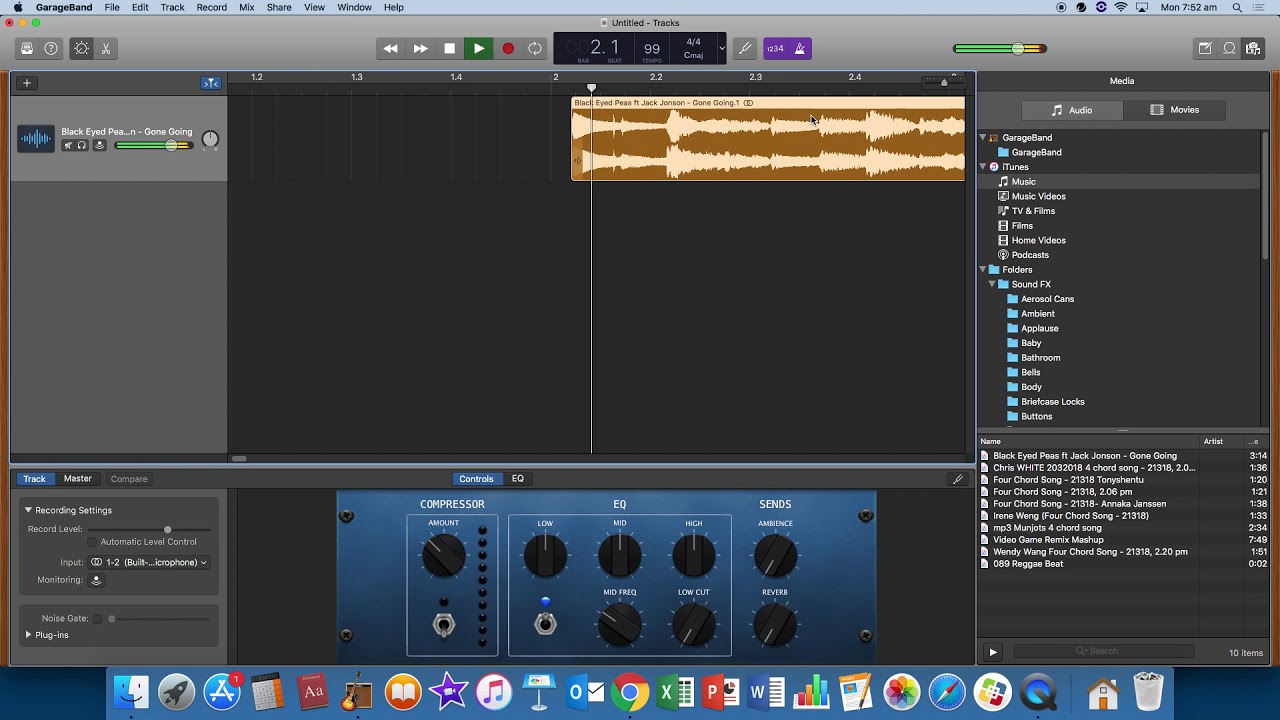
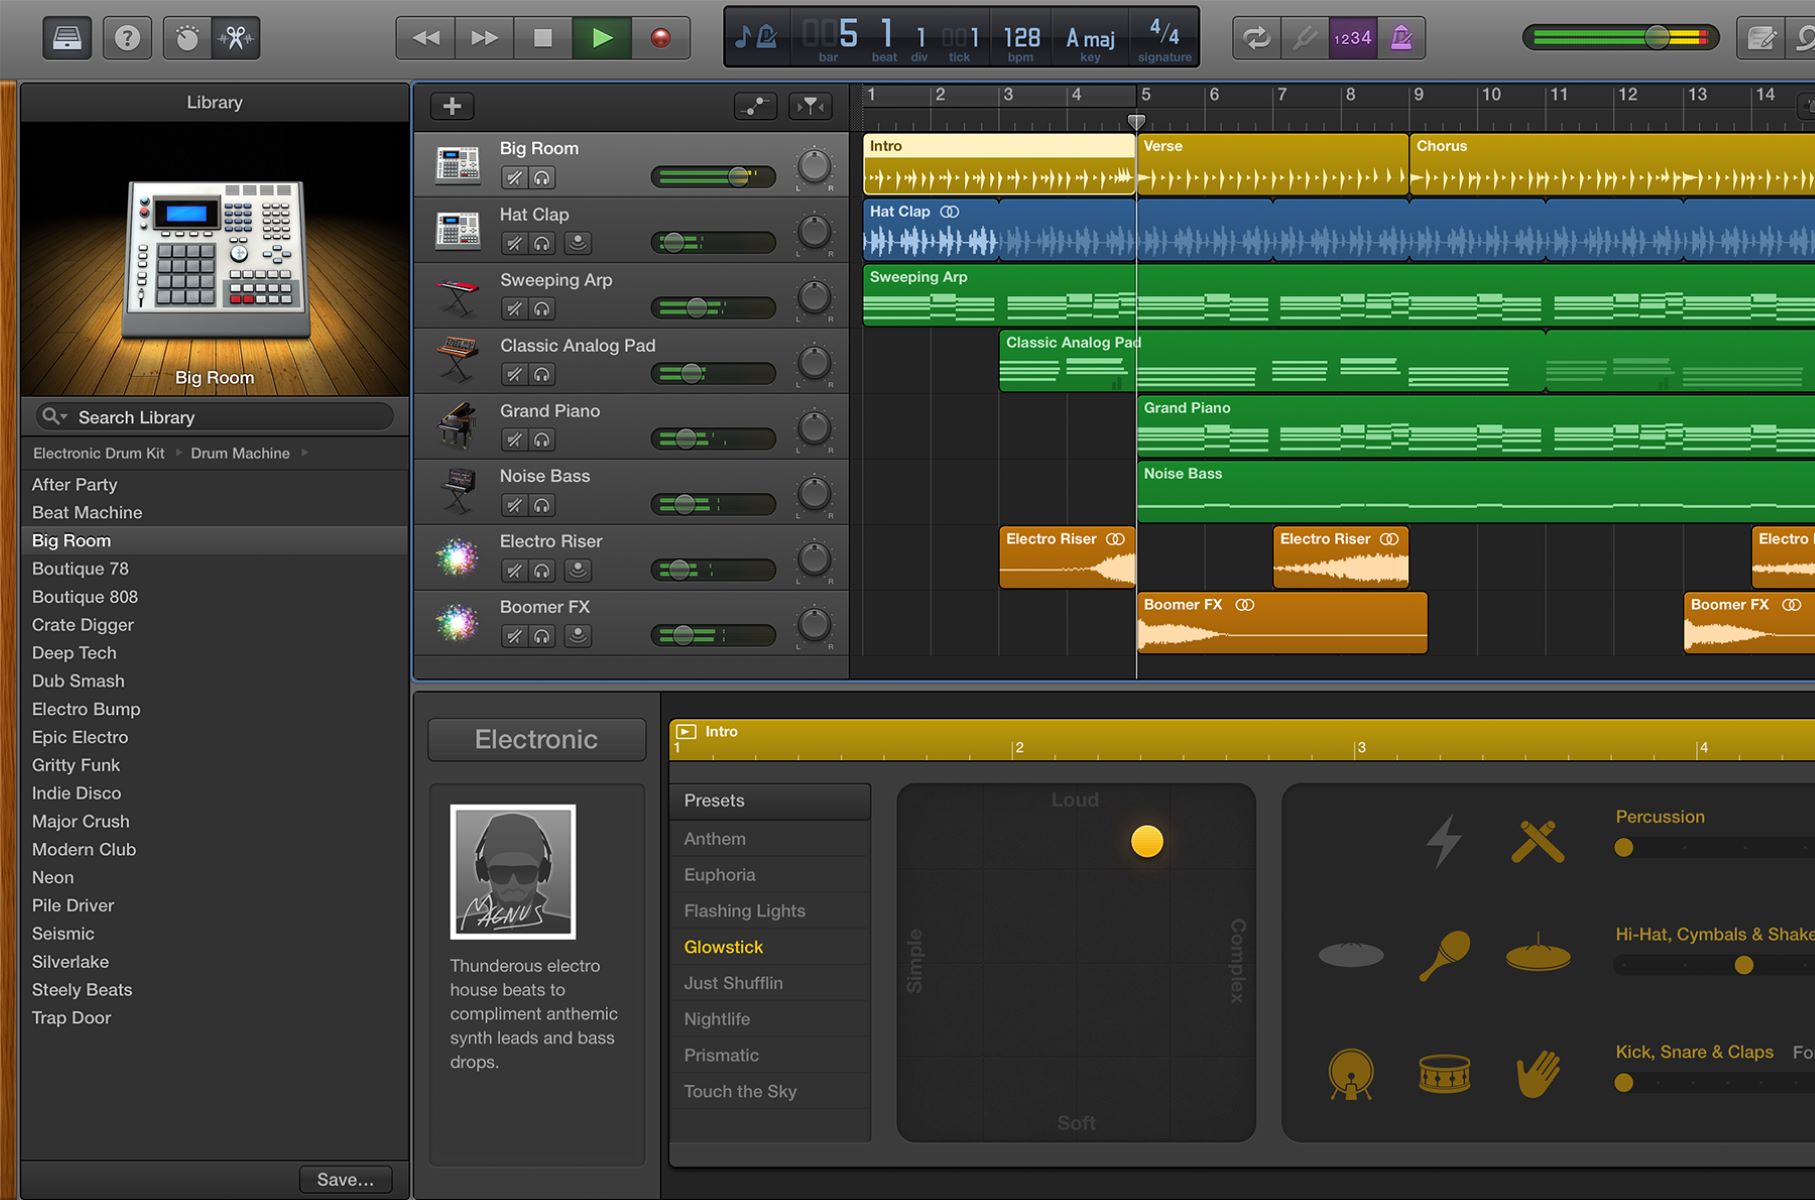
- Open the Sound Library: In Garageband, click on the “View” menu and select “Show Sound Library”. This will open the Sound Library pane on the right side of the Garageband interface.
- Select a Reggae Instrument: Browse through the available instrument categories in the Sound Library to find reggae-specific instruments. Look for instruments like the reggae guitar, bass, keyboards, horns, and percussion. Click on the instrument you want to use, and it will be added to your project.
- Customize the Instrument: Once you have added a reggae instrument to your project, you can customize its settings to achieve the desired sound. Use the instrument’s controls to adjust parameters such as tone, attack, sustain, and release. This will allow you to shape the sound according to your preferences.
- Layer Multiple Instruments: Reggae music often features multiple layers of instruments playing together to create a rich and full sound. Experiment with layering different reggae instruments in your Garageband project to add depth and texture to your reggae track.
- Explore Garageband Loops: In addition to virtual instruments, Garageband offers a vast library of pre-recorded loops that you can use to enhance your reggae track. Look for loops with a reggae or Caribbean flavor, such as drum loops, bass loops, guitar loops, and keyboard loops. Drag and drop these loops into your project to instantly add professional-quality reggae elements to your music.
By importing reggae instruments and utilizing the extensive library of loops available in Garageband, you can bring authentic reggae vibes to your project. So, let’s move on to the next step and start creating the rhythm section for your reggae track.
Creating the Rhythm Section
The rhythm section is the backbone of any reggae track. It sets the groove and provides the foundation for the other instruments and vocals to build upon. In this section, we will explore how to create a solid reggae rhythm section in Garageband.
- Lay Down the Drumbeat: Start by creating an engaging drumbeat using the reggae drum kit or drum loops. Focus on creating a steady rhythm with emphasis on the off-beat (the second and fourth beats of the measure). Use the kick drum on beats one and three, and the snare drum on beats two and four. Experiment with different drum patterns to find the right groove for your reggae track.
- Add the Bassline: The bassline is crucial in reggae music as it adds depth and stability to the overall sound. Use a virtual bass instrument or bass loops to create a melodic and rhythmic bassline that complements the drumbeat. Focus on playing root notes and simple melodic patterns that groove with the rhythm.
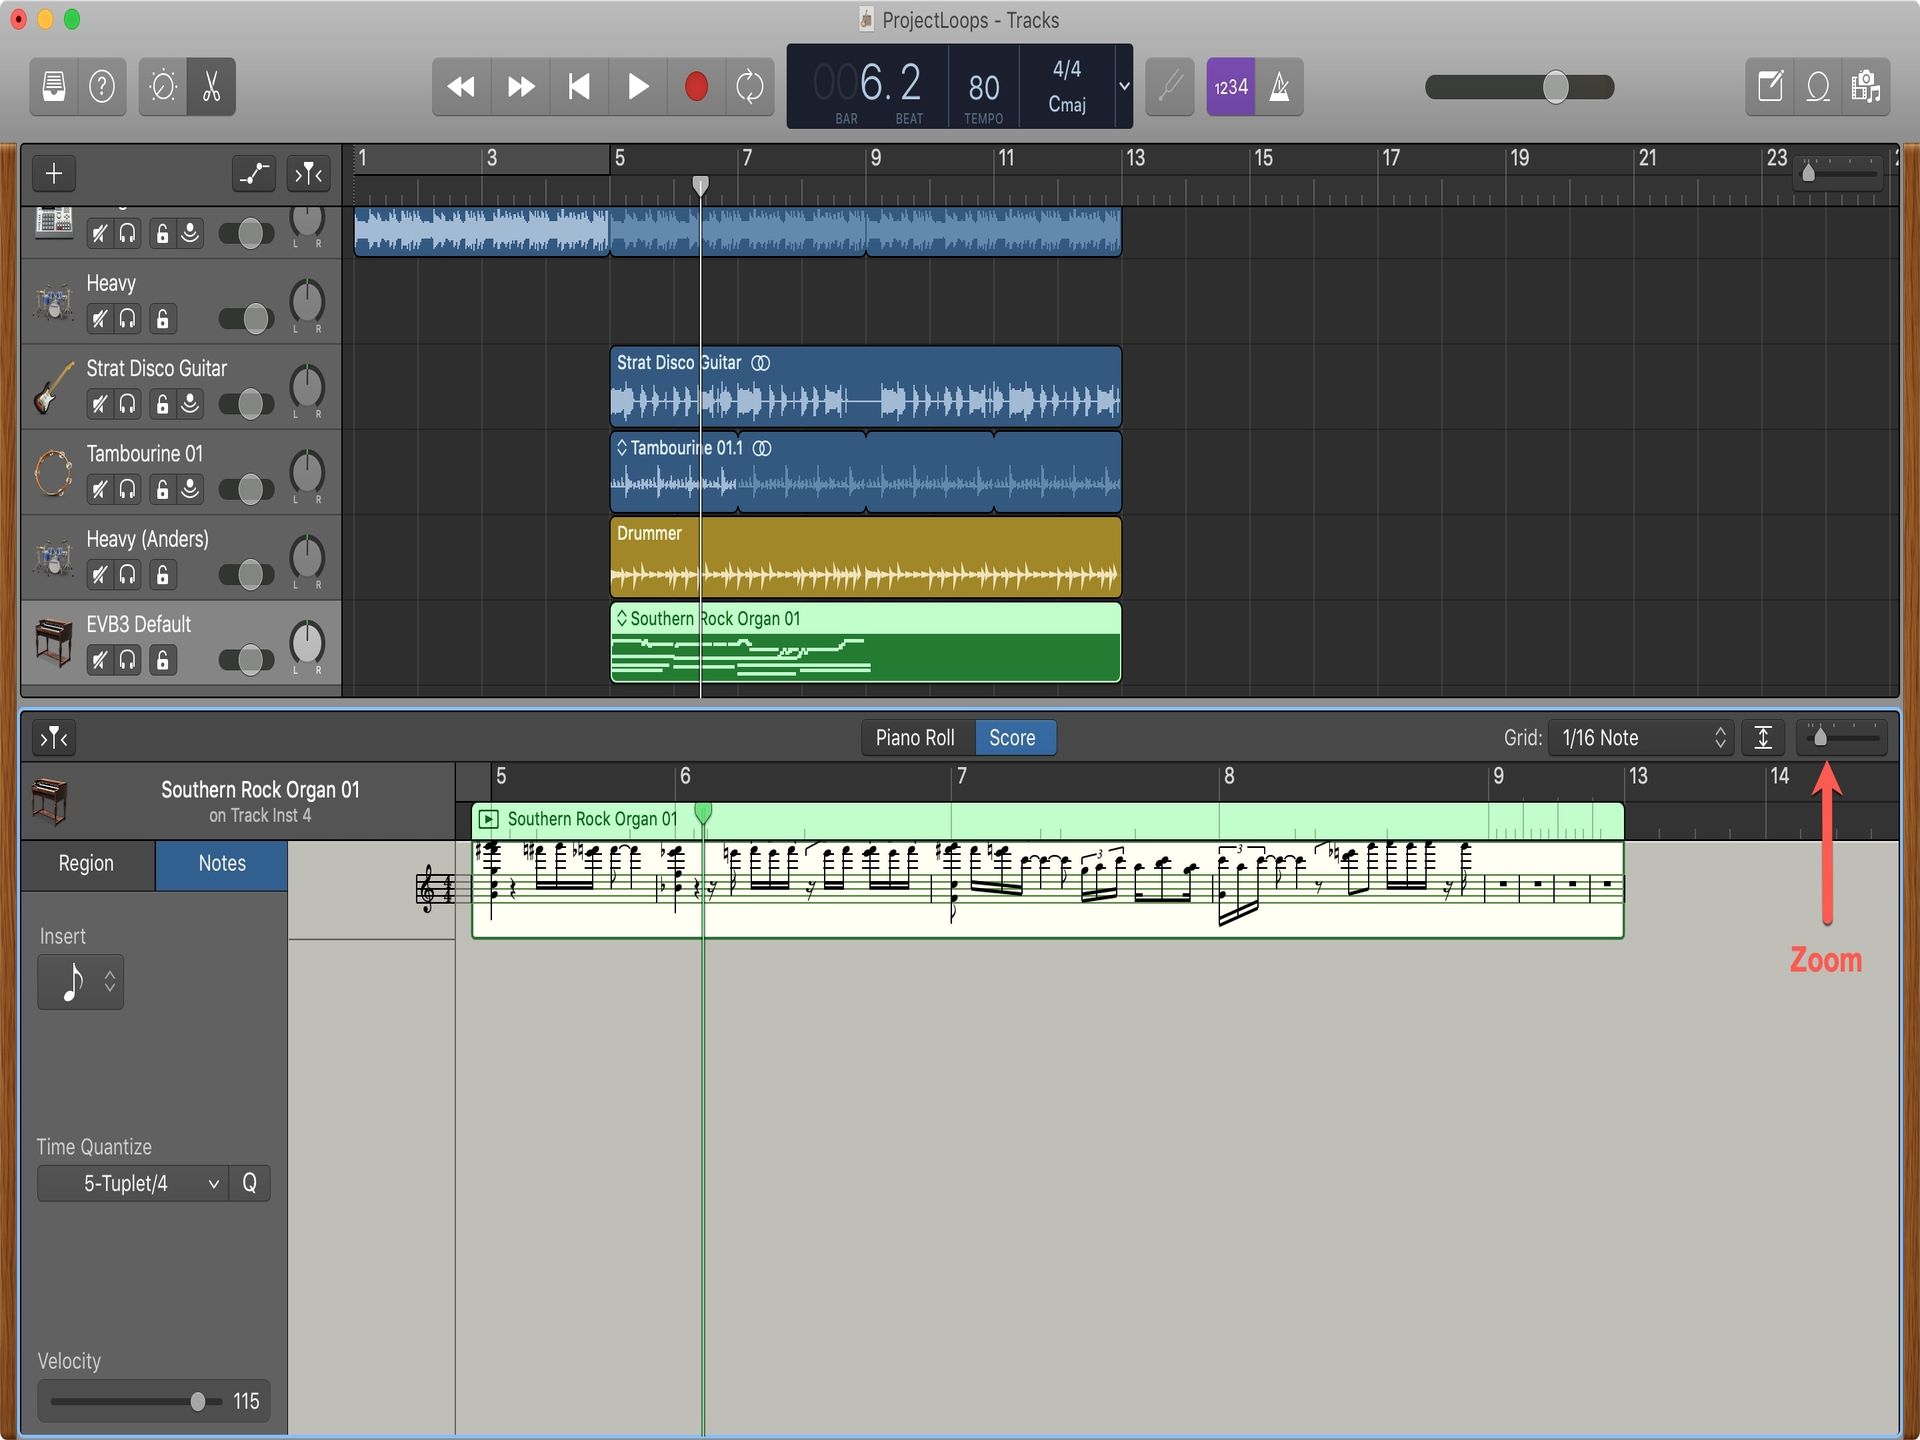
- Integrate the Keyboard: Keyboards, especially the organ, play an important role in reggae music. Add keyboard parts that complement the drumbeat and bassline. Opt for organ sounds, skanking guitar sounds or keyboard loops with a reggae flavor. Experiment with different chord progressions and rhythmic patterns to create a catchy and melodic keyboard part.
- Layer Percussion: To add texture and depth to your reggae rhythm section, consider adding percussion instruments such as shakers, tambourines, or congas. These instruments can be played manually using your MIDI keyboard or by using pre-recorded percussion loops in Garageband. Place these percussive elements strategically throughout your track to enhance the overall groove.
Remember, the key to creating a compelling reggae rhythm section is to find a balance between a solid foundation and subtle variations. Listen to classic reggae tracks for inspiration and pay attention to how the different elements work together harmoniously. With the help of Garageband’s versatile tools and instruments, you can create an authentic and captivating reggae rhythm section for your track.
Now that we have the rhythm section in place, it’s time to explore more specific elements of reggae music production in Garageband, such as working with drum loops and adding authentic reggae guitar. So, let’s continue our journey into the world of reggae music production!
Working with Drum Loops
Drum loops can be a great addition to your reggae track, providing a solid foundation and adding variety to your rhythm section. Garageband offers a wide range of pre-recorded drum loops that you can use to enhance your reggae music. Here’s how to work with drum loops in Garageband:
- Access the Loop Browser: Open Garageband and click on the “Loop Browser” icon located in the bottom-right corner of the interface. This will open the Loop Browser, where you can browse and preview the available drum loops.
- Browse and Search for Reggae Drum Loops: In the Loop Browser, use the search bar and type in keywords like “reggae drums” or “caribbean drums” to filter the results and find reggae-specific drum loops. Listen to the different options available and choose the loop that fits the vibe and style of your track.
- Drag and Drop the Drum Loop: Once you’ve found a suitable drum loop, simply click on it and drag it into the timeline of your Garageband project. The drum loop will automatically sync with the project’s tempo.
- Adjust Length and Arrangement: You can easily adjust the length of the drum loop by trimming its edges in the timeline. You can also duplicate the loop or copy and paste it to create variations and build loops of different lengths to add complexity to your rhythm section.
- Customize the Drum Loop: Garageband allows you to modify drum loops to fit your unique needs. You can change the individual drum sounds within the loop, adjust the levels of each drum element, and apply effects like reverb or delay. Experiment with these modifications to create a unique and personalized drum loop for your reggae track.
- Layer Drum Loops with Virtual Drums: If you want to add more depth and variation to your rhythm section, consider layering the drum loops with virtual drum instruments available in Garageband. This will allow you to add extra fills, accents, or variations to your drumbeat and create a more dynamic and interesting reggae rhythm section.
Working with drum loops in Garageband can save you time and effort, while adding professional-quality drum tracks to your reggae music. Remember to choose loops that complement your overall sound and feel, and don’t be afraid to experiment with different drum loop combinations to find the perfect groove for your track.
Next, we will explore the importance of authentic reggae guitar and how you can incorporate it into your music production using Garageband. So, let’s keep the reggae vibes flowing!
Adding Authentic Reggae Guitar
The reggae guitar plays a vital role in creating the iconic sound and rhythm of reggae music. It adds a melodic and rhythmic element that drives the groove and gives reggae its infectious vibe. Garageband provides various options for incorporating authentic reggae guitar into your tracks. Here’s how to add that authentic reggae guitar sound:
- Choose Your Guitar Sound: Start by selecting the right guitar sound in Garageband. Look for options like “Clean Guitar,” “Reggae Guitar,” or “Skank Guitar” to find the perfect tone for your reggae track. These sounds typically have a bright and percussive quality.
- Create Rhythm Patterns: Reggae guitar often features repetitive rhythmic patterns known as “skanks.” Experiment with different strumming patterns using muted strums on the off-beats (second and fourth beats of the measure) to capture the characteristic reggae feel. Keep it simple and focus on capturing the essence of the reggae rhythm.
- Use Chord Inversions: Reggae guitar frequently uses chord inversions to create a unique sound. Instead of playing standard open chords, try playing the same chords in different positions up the neck of the guitar. This can add variation and interest to your reggae guitar parts.
- Experiment with Palm Muting: Palm muting is another technique commonly used in reggae guitar playing. It involves lightly resting the palm of your strumming hand on the guitar strings near the bridge to create a muted and percussive effect. Add palm muting to your rhythm patterns to achieve that authentic reggae groove.
- Layer Rhythm and Lead Guitar: In addition to the rhythmic skanks, you can also layer lead guitar parts to add melodic elements to your reggae track. Use single-note melodies or short riffs to enhance the overall sound and fill the space between vocal lines or instrumental breaks.
- Experiment with Reggae Guitar Effects: Garageband offers a variety of effects that can help you achieve the desired reggae guitar sound. Explore options like reverb, delay, and chorus to add depth and space to your guitar tracks. Use the effects subtly to maintain the clarity and balance of your overall mix.
Remember, the key to adding authentic reggae guitar is capturing the essence of the reggae rhythm and incorporating the percussive and melodic elements that define the genre. Listen to reggae classics for inspiration and pay attention to how the guitar interacts with the rhythm section and vocals.
With Garageband’s versatile guitar sounds and effects, you have the tools you need to bring that classic reggae guitar sound to your tracks. So, grab your guitar and let’s infuse some authentic reggae vibes into your music!
Next, we’ll explore how to incorporate bass and keyboards to further enhance the reggae sound in your Garageband project. So, let’s keep the grooves going!
Incorporating Bass and Keyboard
Bass and keyboards are essential elements in reggae music, providing depth, harmonic structure, and melodic interest. When incorporated effectively, they can greatly enhance the overall sound of your reggae track. Here’s how you can incorporate bass and keyboards in your Garageband project:
- Adding Reggae Bass: Start by selecting a suitable bass instrument in Garageband that fits the reggae genre. Look for options like “Reggae Bass” or “Electric Bass” with a warm and resonant tone. Focus on locking in with the drumbeat and creating a solid foundation for the other instruments. Play simple root notes or create melodic basslines that complement the rhythm section.
- Layering Keyboard Parts: Keyboards play a crucial role in reggae music, adding melodic hooks, rhythmic accents, and harmonic texture. Choose a keyboard instrument in Garageband that suits the reggae sound, such as organ, clavinet, or piano. Experiment with different chord progressions, skank patterns, or melodic runs to find the right keyboard parts that enhance the reggae feel of your track.
- Creating Dub Effects: Dub effects are an integral part of reggae music and can be applied to both bass and keyboard parts. Garageband offers a range of effects like delay, echo, and reverb that you can use to create the signature spacey and atmospheric dub sound. Be creative in your application of dub effects to add depth and dimension to your reggae track.
- Incorporating Reggae Horn Section: If you want to bring in the classic reggae horn sound, you can do so with Garageband’s virtual horn instruments or by using pre-recorded horn sections. Look for saxophone, trumpet, or trombone sounds and use them sparingly to add punch and energy to specific sections of your track, such as instrumental breaks or chorus phrases.
- Don’t Overdo the Keys: While keyboards are an essential part of reggae music, it’s important not to overpower the mix with excessive keyboard parts. Maintain a balance between the different instruments and ensure that the bass and drums remain the driving force of the rhythm section. Use the keyboards to enhance the overall sound and provide accents rather than dominating the mix.
By incorporating bass, keyboards, and potentially a reggae horn section, you can enhance the reggae sound and create a rich and vibrant musical arrangement in Garageband. Remember to experiment with different sounds, techniques, and effects to achieve the desired reggae vibe for your track.
Next, we will explore the importance of percussion in reggae music production and how you can incorporate it into your Garageband project. So, let the reggae rhythms continue!
Adding Percussion
Percussion is a crucial element in reggae music, adding depth, texture, and a sense of groove to the rhythm section. In this section, we will explore how you can incorporate percussion instruments into your Garageband project to enhance your reggae track:
- Select Percussion Instruments: Garageband provides various options for adding percussion instruments to your reggae track. Look for instruments such as shakers, tambourines, congas, bongos, or even hand claps. These instruments will add extra rhythmic elements to your music and give it an organic and vibrant feel.
- Record Live Percussion: If you have access to physical percussion instruments, consider recording them live to add an authentic touch to your reggae track. Use a microphone to capture the natural sound of the instruments and record them in a quiet environment. Experiment with different playing techniques to create different rhythmic patterns and variations.
- Layer Pre-recorded Percussion Loops: Garageband offers a vast library of pre-recorded percussion loops that you can use to enhance your reggae music. Browse through the available loops, and find ones that fit the reggae genre, such as conga or shaker loops. Drag and drop these loops into your project to instantly add rhythm and energy to your tracks.
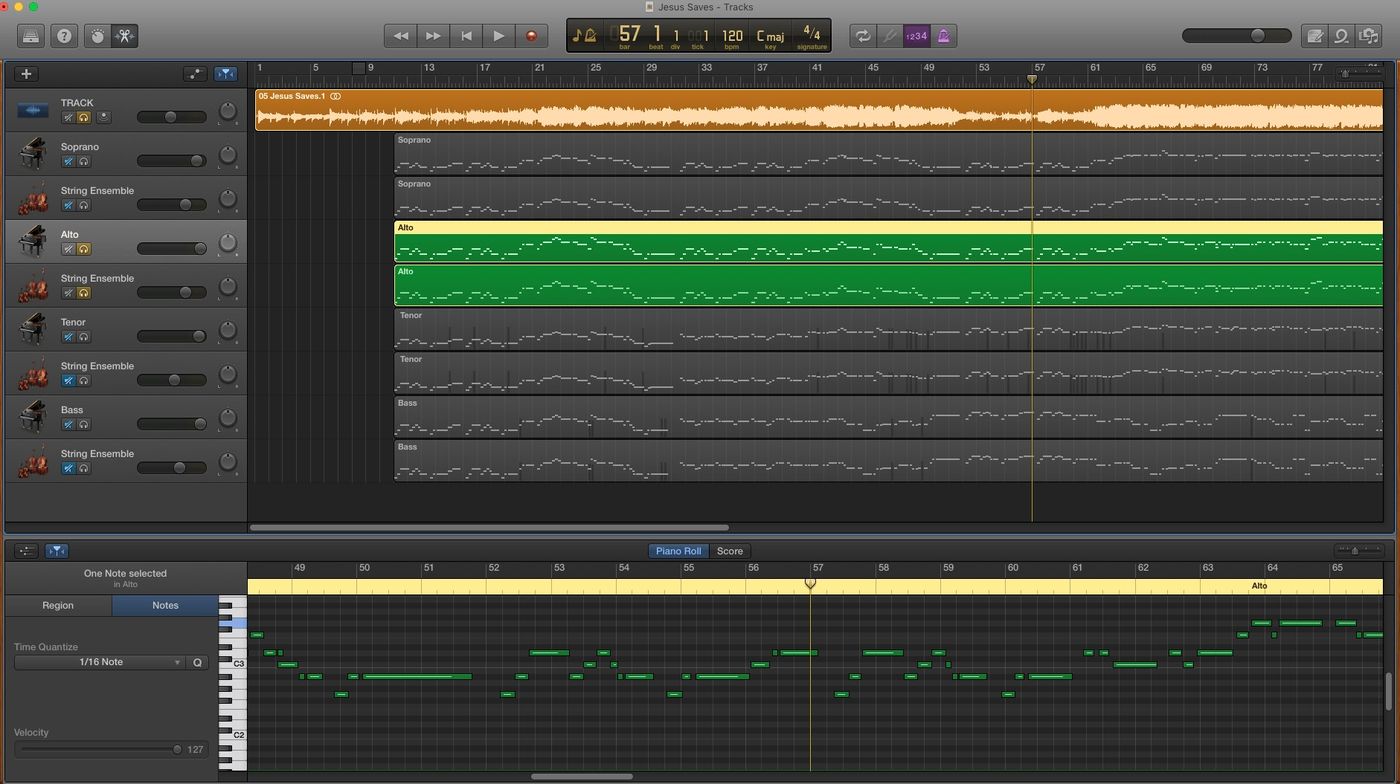
- Manually Program Percussion Parts: If you prefer a more tailored approach, you can manually program percussion parts using MIDI. Use the piano roll editor in Garageband to create patterns for various percussion instruments. Experiment with different rhythms, accents, and fills to create exciting and dynamic percussive sections.
- Experiment with Panning and EQ: Pan the different percussion instruments across the stereo spectrum to create a sense of space and dimension. For example, place the shaker on the left channel and the tambourine on the right channel. Additionally, use EQ to shape the sound of each individual percussion instrument, allowing them to sit well in the mix and complement the other elements in your reggae track.
- Consider Dub Techniques: In reggae music, dub techniques such as dropping out certain percussion elements or applying heavy reverb can add a unique and atmospheric touch. Feel free to experiment with these techniques to create evocative and captivating sections in your reggae track.
By adding percussion instruments and loops to your reggae track, you can enhance the overall rhythm, provide additional layers of groove, and create an engaging and dynamic listening experience. Remember to experiment and find the right balance between the different percussion elements to maintain the reggae feel while allowing the other instruments to shine.
Next, we will delve into layering vocal tracks and the crucial role they play in reggae music production. So, let’s move on to the next stage of our reggae music journey in Garageband!
Layering Vocal Tracks
In reggae music, the vocals are a powerful force, delivering heartfelt lyrics and carrying the uplifting messages that are characteristic of the genre. Layering vocals adds depth, harmony, and a sense of unity to your reggae track. Here’s how you can effectively layer vocal tracks in your Garageband project:
- Create a Lead Vocal Track: Start by recording the main lead vocal track. This will be the focal point of your reggae track, conveying the emotions and storytelling of the song. Ensure that the lead vocals are clear and well-captured, with good microphone technique and proper audio levels.
- Add Harmonies and Backing Vocals: Layering harmonies and backing vocals can provide richness and depth to the vocals, creating a fuller sound. Experiment with different vocal harmonies by recording additional tracks where you sing different notes that harmonize with the lead vocal melody. You can also record backing vocals to add support and emphasize certain phrases or sections of the song.
- Double-track the Lead Vocals: Double-tracking is a technique commonly used in reggae music to create a fuller and more impactful lead vocal sound. Record a second take of the lead vocals and position it slightly off-center in the stereo field. This creates a wider sound and adds thickness to the vocals.
- Apply Vocal Effects: To enhance the reggae vocal sound, experiment with vocal effects available in Garageband. Use light reverb or delay to create a sense of space and depth. Be mindful not to overdo it, as the vocals should remain clear and intelligible.
- Pan Vocals: Pan the different vocal tracks across the stereo spectrum to create separation and a sense of width. Place the lead vocals center-stage and pan the harmonies and backing vocals to the sides. This helps to create a balanced and immersive listening experience.
- Consider Dub-style Techniques: Reggae music often incorporates dub-style techniques, and you can apply this to your vocal tracks as well. Experiment with techniques like echo, delay, or reverberation effects applied to specific vocal phrases or sections. This can add a unique and atmospheric touch to your reggae vocal layers.
Layering vocal tracks in your Garageband project allows you to create a rich and captivating vocal arrangement that complements the music. It adds depth and harmony, enhancing the overall reggae sound of your track. Remember, the key is to find the right balance between the lead vocals, harmonies, and backing vocals to create a cohesive and impactful vocal presence.
Next, we will explore how to apply reggae effects and mixing techniques to further enhance the reggae sound of your track. So, let’s dive into the final stages of our reggae music production journey in Garageband!
Applying Reggae Effects and Mixing
Applying reggae effects and utilizing proper mixing techniques are essential to achieving a polished and professional-sounding reggae track. In this section, we will explore how to apply reggae effects and mix your Garageband project to enhance the reggae sound:
- Use Reverb and Delay: Reverb and delay are crucial effects in reggae music, adding depth, space, and an atmospheric quality to the overall sound. Apply these effects tastefully to instruments, vocals, and even percussion elements to create a sense of ambiance and immersion.
- Balance the Levels: Achieving the right balance between the different elements in your mix is essential. Pay close attention to the levels of each instrument and vocal track to ensure that none overpower the others. Use the faders in Garageband to adjust the volume levels and find the sweet spot for each element in your reggae track.
- EQ for Clarity and Punch: Use EQ to shape the frequency response of each instrument and vocal track. Enhance the lows of your bass and kick drum, bring out the crispness of the snare drum, add presence to the vocals, and ensure that each element sits well in the mix. Be careful not to over-EQ, as it can cause muddiness or unnatural tonal balance.
- Pan Instruments: Pan the different elements in your mix to create separation and width. Place instruments like guitars, keyboards, and percussion at different positions along the stereo field to provide a sense of space and balance. Keep the bass and vocals centered for maximum impact and clarity.
- Apply Compressions: Compression can help control the dynamics of your instruments and vocals, ensuring a more consistent sound and preventing any peaks from overpowering the mix. Apply gentle compression on instruments like drums, bass, and vocals to achieve a polished and balanced result.
- Add Automation: Automation allows you to control various parameters throughout your track, adding dynamic changes and enhancing certain sections. Use automation in Garageband to adjust the levels, panning, or effects parameters of specific instruments or vocal parts during different sections of your reggae track.
- Aim for Clarity and Balance: The overall goal of mixing is to achieve clarity and balance in your reggae track. Ensure that each element is audible and sits well within the mix. Regularly reference your mix on different playback systems to ensure it translates well across various listening environments.
By applying reggae effects and utilizing proper mixing techniques, you can take your reggae track to the next level, giving it a professional and polished sound. Remember to trust your ears and make adjustments accordingly to achieve the desired reggae vibe.
Finally, we’ll move on to the last step of our reggae music production journey in Garageband: finalizing your reggae track. So, let’s put the finishing touches on our reggae masterpiece!
Finalizing Your Reggae Track
After putting in the hard work of creating, arranging, and mixing your reggae track in Garageband, it’s time to bring it to its final form. Here are some important steps to help you finalize your reggae track:
- Take a Break: After spending a significant amount of time working on your track, it’s important to take a break and come back to it with fresh ears. This break allows you to listen to your music from a different perspective and make objective decisions during the finalization process.
- Make Adjustments: Listen through your reggae track and make any necessary adjustments. Pay attention to the overall balance of the instruments, vocals, and effects. Consider if any parts need to be re-recorded or if additional layers or harmonies could enhance certain sections.
- Enhance Transitions: Smooth out any abrupt transitions between sections of your reggae track. Use automation, fades, or crossfades to ensure a seamless flow between verses, choruses, bridges, and instrumental sections. This helps keep the listener engaged and captivated throughout the song.
- Apply Mastering: Mastering is the final step in the production process that brings the finished mix to its fullest potential. Use Garageband’s built-in mastering tools or export your track to a dedicated mastering program to optimize the final sound. This step will ensure your reggae music sounds professional and cohesive across different playback systems.
- Listen and Evaluate: Take the time to listen to your finalized reggae track in various listening environments, such as headphones, speakers, and car stereo systems. This step allows you to evaluate the overall impact and tonal balance of your music, making any last-minute adjustments if necessary.
- Tag and Export: Finally, tag your reggae track with appropriate metadata such as artist name, track title, and genre. This ensures that your music is properly identified when shared or distributed. Then, export your reggae track as a high-quality audio file, ready to be shared with the world!
As you finalize your reggae track, remember that the most important thing is to enjoy the process and trust your creative instincts. It’s an exciting moment to see your hard work and talent come together into a beautiful reggae masterpiece.
Congratulations on completing your reggae track in Garageband! Through setting up the project, importing reggae instruments, creating the rhythm section, working with drum loops, incorporating authentic reggae guitar, adding bass, keyboards, percussion, layering vocal tracks, applying reggae effects and mixing, and finally, the process of finalizing your track, you’ve embraced the essence of reggae music production.
Now, it’s time to share your reggae music with the world. Get ready to spread the positive vibes, soulful melodies, and infectious rhythms of reggae far and wide!
Remember, this guide serves as a starting point, and as you continue to explore and experiment, you’ll develop your own unique approach to reggae music production. So, keep creating, and let your creativity shine through the power of reggae!
Conclusion
Congratulations! You have completed your journey into the world of reggae music production in Garageband. Throughout this guide, we have covered everything from setting up your project to finalizing your reggae track, exploring different elements of reggae music, and incorporating them into your music production process.
Reggae music is more than just a genre. It’s a powerful form of expression and a vehicle for spreading messages of love, peace, and social justice. By creating your own reggae music, you have tapped into the rich cultural heritage and the soulful rhythms that make reggae so beloved around the world.
Remember, the key to creating authentic reggae music lies in capturing the essence of the rhythm, incorporating instruments like drums, bass, keyboards, guitar, and percussion, layering vocals, applying reggae effects, and achieving a balanced mix. Garageband provides you with a vast array of tools to help you bring your reggae vision to life.
Now armed with the knowledge and techniques shared in this guide, it’s time for you to unleash your creativity and create your own reggae masterpieces. Whether you’re paying homage to the legends like Bob Marley, finding inspiration in contemporary reggae artists, or forging a unique path of your own, let the spirit of reggae guide you.
So, fire up Garageband, set the tempo, lay down the drumbeat, groove with the bassline, add in the authentic reggae guitar and keyboard parts, sprinkle in percussion, harmonize with layered vocals, and apply the final touches of reggae effects and mixing. Let your reggae music resonate with the world.
Remember, reggae is about spreading joy and positivity. Share your music with friends, family, and the wider music community. Let the rhythms and melodies of reggae connect people and create memorable experiences.
Thank you for joining us on this reggae music production journey. We hope this guide has inspired and equipped you to create your own amazing reggae tracks in Garageband. Embrace the spirit of reggae, be true to yourself, and let your music spread the infectious groove, love, and positivity that reggae is known for.
Now, it’s time to turn up the volume, embrace the irie vibes, and let your reggae music journey begin. Happy reggae music production!