Home>Instruments>Guitar>How To Connect A Guitar To Garageband
Guitar
How To Connect A Guitar To Garageband
Published: February 12, 2024
Learn how to easily connect your guitar to Garageband and start recording your music. Follow these simple steps to get your guitar set up and ready to play in no time!
(Many of the links in this article redirect to a specific reviewed product. Your purchase of these products through affiliate links helps to generate commission for AudioLover.com, at no extra cost. Learn more)
Table of Contents
Introduction
Playing the guitar is a timeless and rewarding pursuit, allowing individuals to express themselves through music. With the advent of digital recording software, such as Garageband, guitarists can easily connect their instruments to their computers and unleash their creativity. In this comprehensive guide, we will explore the process of connecting a guitar to Garageband, setting up the software, recording, adding effects, and mixing tracks. Whether you’re a seasoned guitarist or a beginner, this article will provide you with the essential know-how to seamlessly integrate your guitar with Garageband, unlocking a world of musical possibilities.
Garageband is a powerful and user-friendly digital audio workstation developed by Apple. It offers a wide array of features for recording, editing, and mixing music, making it an ideal platform for guitarists to bring their compositions to life. By understanding how to connect your guitar to Garageband and leverage its capabilities, you can embark on a musical journey filled with innovation and self-expression.
Throughout this guide, we will delve into the step-by-step process of connecting your guitar to Garageband, configuring the software, recording your guitar tracks, adding effects and plugins, and refining your compositions through editing and mixing. Whether you aspire to create intricate solos, capture the raw energy of a riff, or experiment with diverse tones, Garageband provides the tools to elevate your guitar playing to new heights.
By the end of this article, you will possess the knowledge and confidence to seamlessly integrate your guitar with Garageband, enabling you to unleash your creativity, refine your sound, and share your musical creations with the world. Let’s embark on this enriching journey and unlock the full potential of your guitar and Garageband!
Getting Started
Before diving into the process of connecting your guitar to Garageband, it’s essential to ensure that you have the necessary equipment and a conducive environment for recording. Here are the fundamental steps to get started:
- Gather Your Equipment: To begin, gather your electric or acoustic-electric guitar, a compatible audio interface, and a reliable instrument cable. The audio interface serves as the bridge between your guitar and your computer, converting the analog signal from your instrument into digital data that can be processed by Garageband.
- Prepare Your Workspace: Select a quiet and well-lit space for your recording setup. Ensure that your computer, audio interface, and guitar are easily accessible and properly connected. A clutter-free environment can enhance your focus and creativity during the recording process.
- Install Garageband: If you haven’t already installed Garageband on your Mac, head to the App Store and download this versatile software. Garageband comes pre-installed on most Mac computers, offering a seamless integration with Apple’s hardware and a plethora of features tailored for musicians and audio enthusiasts.
By taking these initial steps, you’ll be well-prepared to embark on your guitar recording journey with Garageband. Ensuring that your equipment is in optimal condition and your recording environment is conducive to creativity will set the stage for a smooth and productive recording experience.
Connecting Your Guitar
Now that you’ve gathered your equipment and prepared your workspace, it’s time to establish the physical connection between your guitar and your computer using an audio interface. Follow these steps to seamlessly connect your guitar to Garageband:
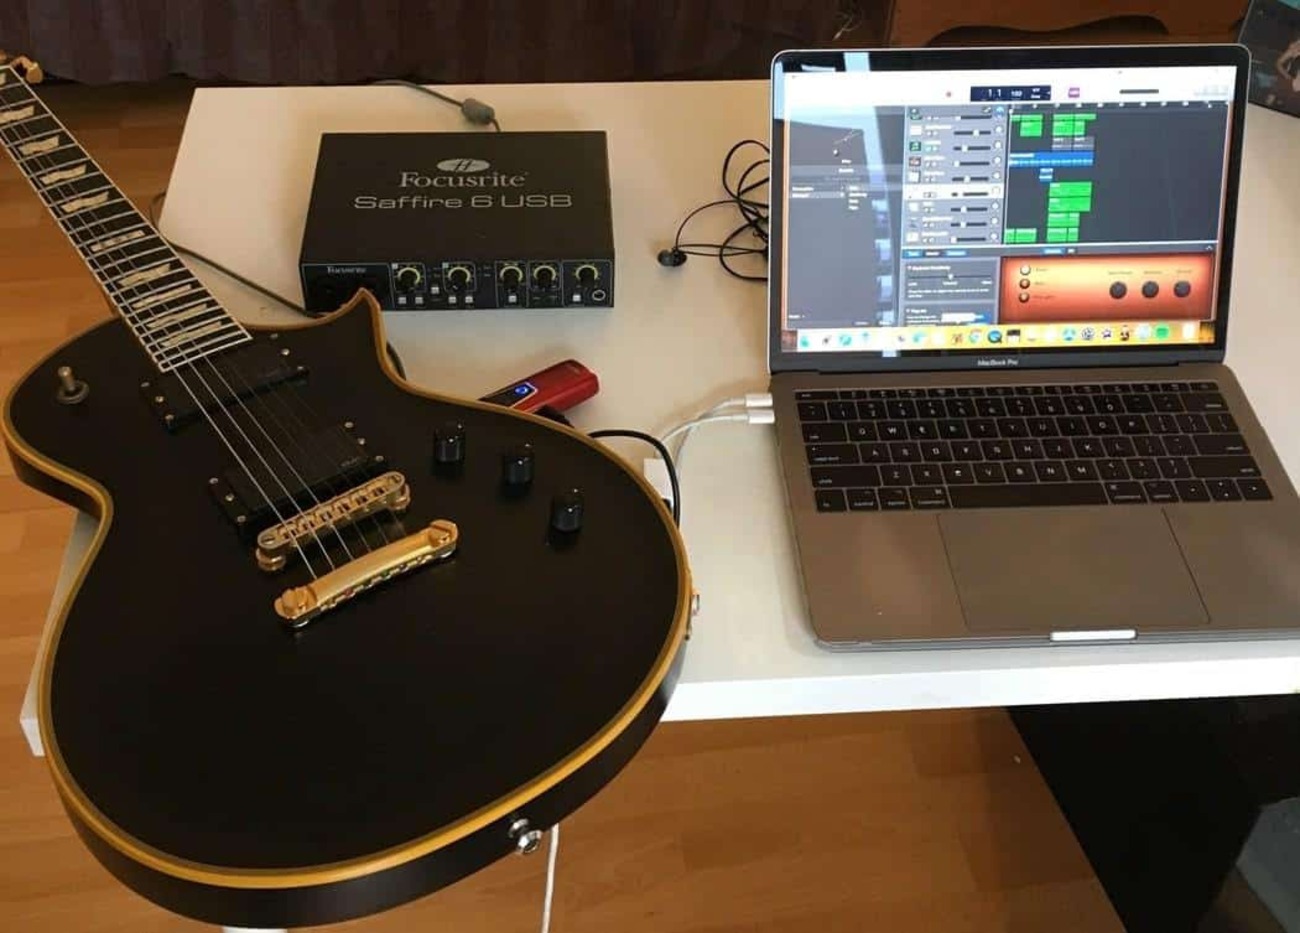
- Selecting an Audio Interface: Choose an audio interface that suits your recording needs and budget. There are various options available, ranging from compact interfaces designed for solo recording to multi-channel interfaces suitable for capturing full band performances. Ensure that the interface is compatible with your computer and offers the necessary inputs for connecting your guitar.
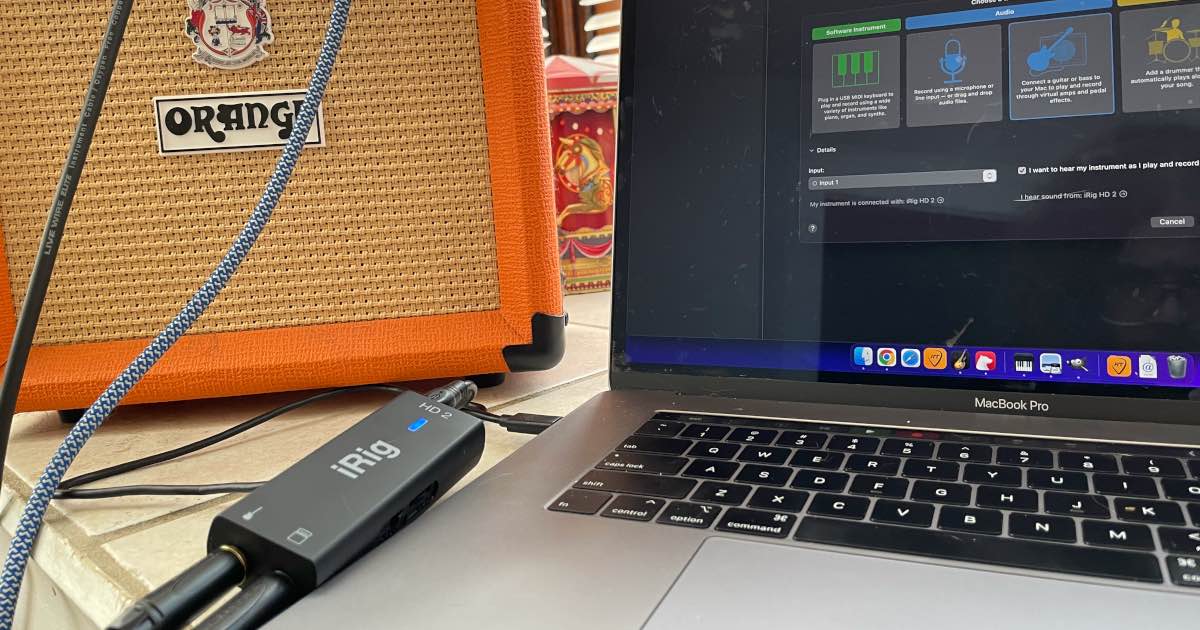
- Connecting Your Guitar: Using a standard instrument cable, plug one end into the output jack of your guitar and the other end into the input of your audio interface. This establishes the physical connection between your instrument and the interface, allowing the analog signal from your guitar to be captured and processed digitally.
- Configuring Input Settings: Once your guitar is connected to the audio interface, launch Garageband and navigate to the preferences or settings menu. Select the audio interface as the input device within Garageband, ensuring that the software recognizes the incoming signal from your guitar. Adjust the input levels on the interface to optimize the signal strength without introducing distortion.
By following these steps, you’ll successfully connect your guitar to Garageband, laying the foundation for capturing your musical ideas and performances with clarity and precision. The seamless integration of your instrument with Garageband via the audio interface empowers you to harness the software’s recording capabilities and unleash your creativity as a guitarist.
Setting Up Garageband
With your guitar connected to the audio interface, it’s time to configure Garageband to recognize and process the incoming signal effectively. Follow these essential steps to set up Garageband for recording your guitar:
- Selecting the Input Source: Upon launching Garageband, create a new project or open an existing one. Navigate to the preferences or settings menu to designate the audio interface as the input source for recording. This ensures that Garageband receives the signal from your guitar via the connected interface.
- Choosing the Input Channel: Within Garageband’s interface, locate the track or input channel designated for recording your guitar. Ensure that the input channel corresponds to the input on your audio interface where the guitar is connected. This step establishes the signal path from your instrument to the software, enabling you to monitor and record your guitar performance.
- Adjusting Monitoring and Latency: Garageband offers options for monitoring your guitar signal in real-time while recording. Configure the monitoring settings to your preference, balancing the input signal level with the playback from Garageband to minimize latency and ensure a responsive playing experience. Lower latency allows for a more natural and immediate feedback when monitoring your guitar through the software.
By following these steps, you’ll effectively set up Garageband to receive and process the signal from your guitar, paving the way for seamless recording and monitoring. The software’s intuitive interface and flexible input settings empower you to focus on your guitar performance while leveraging Garageband’s recording capabilities to capture your musical ideas with precision and clarity.
Recording Your Guitar
With Garageband configured and your guitar seamlessly integrated into the recording setup, you’re ready to capture your musical performances with precision and creativity. Follow these steps to effectively record your guitar in Garageband:
- Creating a New Track: Within your Garageband project, create a new track designated for recording your guitar. Select the appropriate input source corresponding to the audio interface and input channel where your guitar is connected. This sets the stage for capturing your guitar performance within the software.
- Setting Levels and Monitoring: Before recording, ensure that the input levels from your guitar are optimized to prevent clipping or distortion. Garageband provides visual indicators to monitor the input signal strength, allowing you to adjust the levels on your audio interface and within the software to achieve a clean and balanced sound.
- Engaging Record Mode: Once your track is armed for recording and the input levels are set, engage the record mode within Garageband. Prepare yourself for the performance and initiate the recording process. As you play your guitar, Garageband will capture the audio signal and translate it into a digital waveform for further manipulation and refinement.
- Exploring Multiple Takes: Garageband enables you to record multiple takes of your guitar performance, empowering you to experiment with different musical ideas and variations. Take advantage of this feature to explore diverse phrasings, melodies, and improvisations, ultimately refining your guitar parts to perfection.
By following these steps, you’ll harness the recording capabilities of Garageband to capture the essence of your guitar playing with clarity and nuance. The software’s intuitive interface and flexible recording features provide a conducive environment for expressing your musical ideas and preserving your guitar performances with fidelity and depth.
Adding Effects and Plugins
Once you’ve recorded your guitar tracks in Garageband, it’s time to enhance and shape your sound using a diverse array of effects and plugins. Whether you’re aiming for a pristine clean tone, a soaring lead sound, or a gritty, distorted texture, Garageband offers a wealth of tools to sculpt your guitar’s sonic character. Follow these essential steps to explore the world of effects and plugins in Garageband:
- Selecting Effects: Navigate to Garageband’s extensive library of built-in effects, encompassing classic stompbox emulations, studio-quality reverbs, dynamic processors, and amp simulations. Experiment with different effects to embellish your guitar tracks, adding depth, dimension, and character to your playing.
- Exploring Amp Simulations: Garageband features a diverse selection of amp and cabinet emulations, allowing you to craft your guitar tone with precision. From vintage tube amplifiers to modern high-gain stacks, Garageband’s amp simulations cater to a wide spectrum of musical styles and sonic preferences, enabling you to sculpt your guitar’s timbre with authenticity and finesse.
- Utilizing Pedalboard Effects: Garageband’s virtual pedalboard offers a palette of iconic effects pedals, including distortion, overdrive, modulation, and time-based effects. Experiment with different pedal combinations to infuse your guitar tracks with personality and expression, tailoring the sonic characteristics to complement your musical vision.
- Integrating Third-Party Plugins: Garageband supports the use of third-party audio unit plugins, expanding the sonic possibilities for your guitar recordings. Explore a myriad of boutique amp emulations, specialized effects processors, and creative sound-shaping tools to augment your guitar tracks with unique tonal flavors and sonic textures.
By leveraging the diverse effects and plugins within Garageband, you’ll elevate your guitar recordings to new sonic heights, infusing them with richness, dimension, and sonic depth. The software’s comprehensive suite of effects and amp simulations empowers you to sculpt your guitar’s tonal palette with precision and creativity, ultimately shaping a captivating and expressive sonic identity for your musical compositions.
Editing and Mixing
After capturing your guitar performances and refining their sonic character with effects and plugins, it’s time to delve into the realms of editing and mixing within Garageband. These pivotal stages allow you to fine-tune your guitar tracks, sculpt their sonic landscape, and blend them seamlessly within your musical compositions. Here’s how you can effectively edit and mix your guitar recordings in Garageband:
- Arrangement and Comping: Garageband’s intuitive interface enables you to arrange and comp your guitar takes effortlessly. Seamlessly piece together the best segments from multiple recordings, crafting a cohesive and compelling guitar performance that embodies the essence of your musical vision.
- Applying Automation: Garageband empowers you to apply automation to various parameters, allowing you to modulate the volume, panning, and effect settings of your guitar tracks over time. By automating these elements, you can imbue your guitar performances with dynamic movement and expressive nuances, elevating them to new levels of musicality.
- Mixing and EQ: Utilize Garageband’s mixing tools to balance the tonal elements of your guitar tracks within the larger sonic canvas of your compositions. Employ EQ to sculpt the frequency response of your guitar recordings, ensuring that they sit cohesively within the mix while retaining their individual character and presence.
- Adding Spatial Depth: Garageband offers a range of spatial effects and processing tools to imbue your guitar tracks with depth and dimension. Experiment with reverb, delay, and spatial panning to position your guitar within a rich and immersive sonic environment, enhancing the overall impact and emotive resonance of your musical arrangements.
By engaging in meticulous editing and skillful mixing, you’ll refine your guitar recordings into polished and evocative sonic statements that seamlessly integrate within your musical compositions. Garageband’s versatile editing and mixing capabilities empower you to sculpt your guitar performances with precision, creativity, and a keen attention to sonic detail, ultimately shaping captivating and immersive musical experiences for your listeners.
Conclusion
Congratulations on embarking on this enriching journey of connecting your guitar to Garageband and harnessing the software’s powerful capabilities to capture, refine, and express your musical ideas. By following the comprehensive steps outlined in this guide, you’ve gained the essential knowledge to seamlessly integrate your guitar with Garageband, unlocking a world of creative possibilities and sonic exploration.
Through the process of connecting your guitar, setting up Garageband, recording your performances, adding effects and plugins, and engaging in meticulous editing and mixing, you’ve honed your skills as a guitarist and a producer. You’ve learned to leverage Garageband’s intuitive interface, diverse effects, and mixing tools to breathe life into your guitar recordings, shaping them into compelling sonic narratives that resonate with depth and emotion.
As you continue to explore the boundless horizons of music production, remember that Garageband serves as a versatile and empowering platform for realizing your musical vision. Whether you aspire to craft intricate guitar compositions, experiment with diverse tones and textures, or collaborate with fellow musicians, Garageband stands as a steadfast companion, offering the tools and inspiration to fuel your creative endeavors.
Embrace the process of continual learning and experimentation, allowing your guitar and Garageband to serve as conduits for your artistic expression and sonic innovation. As you refine your craft and expand your musical repertoire, may your guitar recordings within Garageband serve as testaments to your creativity, passion, and unwavering dedication to the art of music.
With each strum of the strings and every sonic brushstroke within Garageband, you’re weaving a tapestry of musical experiences that resonate with authenticity and resonance. Embrace the journey ahead, and let your guitar and Garageband be the vessels through which your musical aspirations take flight, inspiring and captivating audiences with the timeless language of music.