Home>Production & Technology>Audio Cable>How To Connect A Headset With Mic With One Audio Cable
Audio Cable
How To Connect A Headset With Mic With One Audio Cable
Modified: January 22, 2024
Learn how to easily connect your headset with a microphone using just one audio cable. Simplify your setup with our step-by-step guide.
(Many of the links in this article redirect to a specific reviewed product. Your purchase of these products through affiliate links helps to generate commission for AudioLover.com, at no extra cost. Learn more)
Table of Contents
- Introduction
- Step 1: Check the compatibility of your headset and audio device
- Step 2: Verify the audio connectors on your headset and audio device
- Step 3: Identify the correct audio cable for connecting your headset with mic
- Step 4: Connect the audio cable to your headset
- Step 5: Connect the other end of the audio cable to your audio device
- Step 6: Test the microphone on your headset
- Step 7: Adjust audio settings on your device for optimal performance
- Conclusion
Introduction
Welcome to our comprehensive guide on how to connect a headset with a microphone using just one audio cable. Whether you’re a gamer, a podcaster, or someone who needs to make hands-free calls, having a headset with a built-in microphone can be incredibly convenient. However, figuring out how to properly connect your headset to your audio device may seem like a daunting task at first.
Fortunately, with the right knowledge and a little guidance, connecting your headset with a microphone using a single audio cable can be a straightforward process. In this article, we will walk you through the steps, providing you with all the necessary information to ensure a successful connection.
Before we dive into the steps, it’s important to note that there are different types of headsets and audio devices, and the specific methods may vary slightly depending on the make and model. However, the general principles outlined here will apply to most setups.
So, if you’re ready to learn how to connect your headset with a microphone using just one audio cable, let’s get started!
Step 1: Check the compatibility of your headset and audio device
Before you begin the process of connecting your headset with a microphone, it is important to first ensure that your headset and audio device are compatible. This includes checking if they use the same audio connectors and if they support the same type of connection.
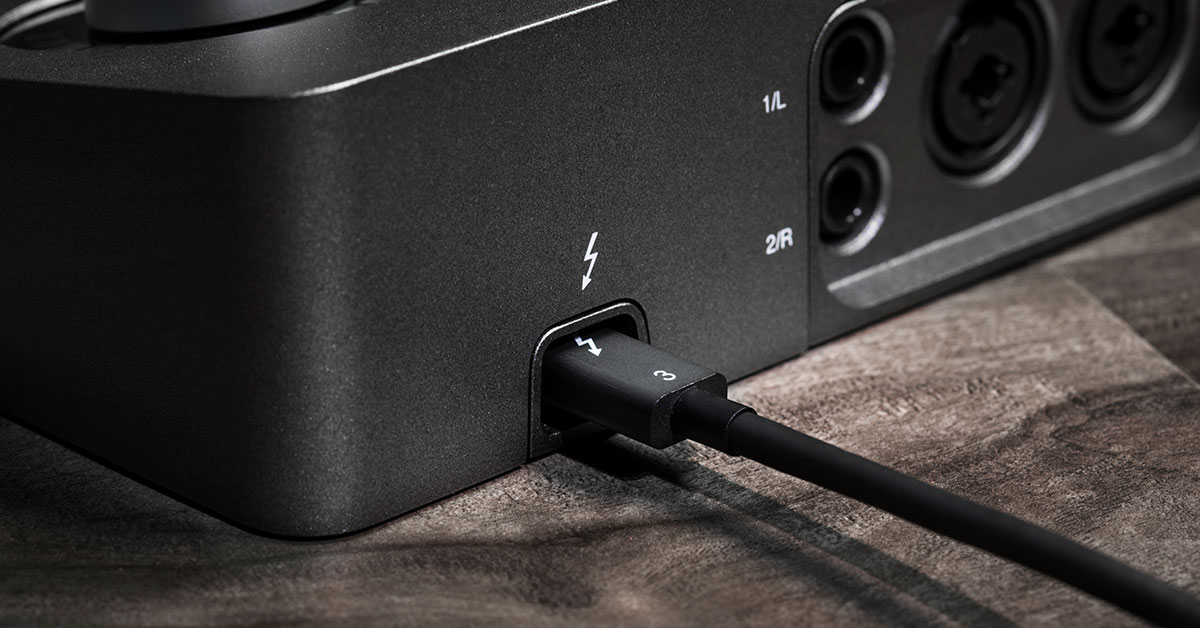
Start by examining the audio connectors on your headset. Most headsets will have either a 3.5mm audio jack or a USB connector. The 3.5mm audio jack is the most common and is widely supported by computers, laptops, smartphones, and gaming consoles. On the other hand, USB connectors are often found on gaming headsets and offer additional functionality such as virtual surround sound or customizable EQ settings.
Next, check the audio device you will be connecting your headset to. This could be a computer, a gaming console, a smartphone, or any other device with an audio output. Look for the audio ports on your device to determine what type of connector it supports. Most devices will have a 3.5mm audio jack, but some may also have USB ports or specific ports designed for gaming headsets.
It is important to make sure that the connectors on your headset and audio device match. If your headset has a 3.5mm audio jack and your device only has a USB port, you will need to use an adapter or find a headset that supports USB connectivity. Similarly, if your headset has a USB connector and your device only has a 3.5mm audio jack, you may need an adapter or a different headset.
Furthermore, check if your headset and audio device support the same type of connection. Some headsets use analog connections, while others may use digital connections. Analog connections transmit audio in its original form, whereas digital connections convert the audio signal into a digital format before transmitting it. Ensure that both your headset and audio device support the same type of connection to ensure compatibility.
By confirming the compatibility of your headset and audio device, you can avoid any connectivity issues and ensure a smooth and hassle-free experience when connecting your headset with a microphone.
Step 2: Verify the audio connectors on your headset and audio device
Once you have checked the compatibility of your headset and audio device in Step 1, the next step is to verify the audio connectors on both devices. This step is crucial to ensure that you have the correct audio cable and adapters, if needed, to make the connection.
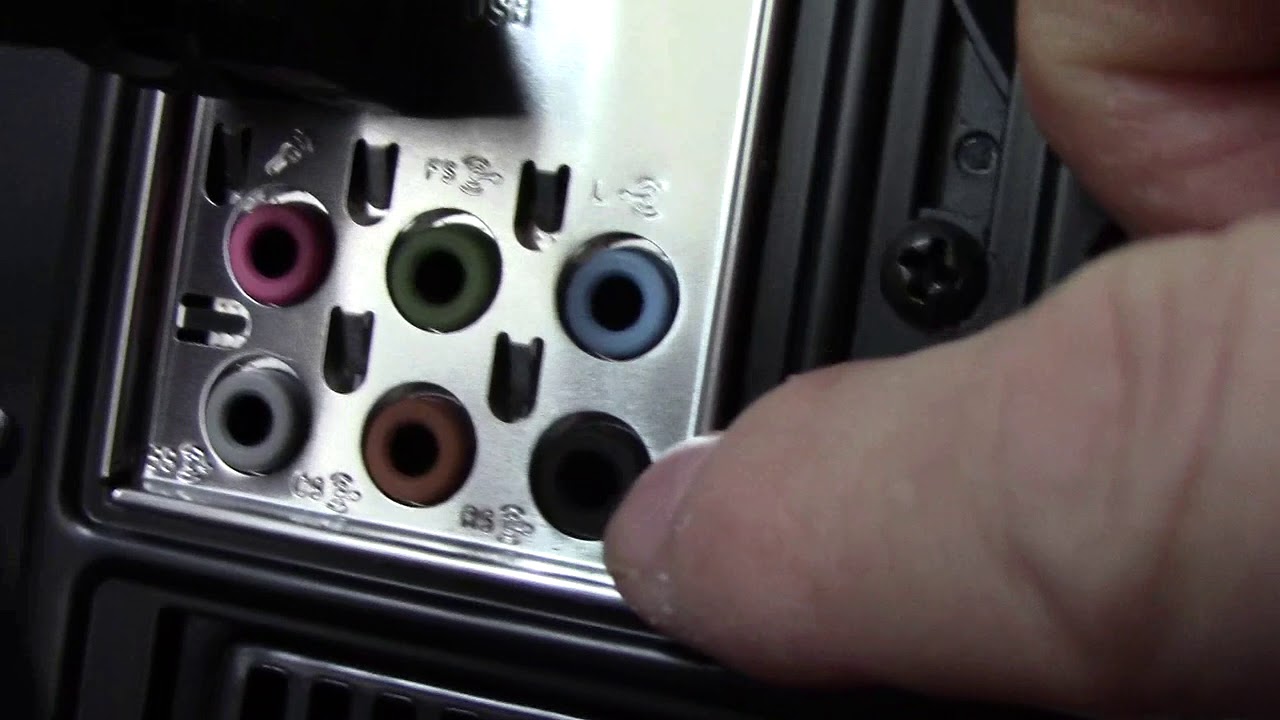
Start by examining the audio connectors on your headset. As mentioned earlier, the most common type of connector on headsets is the 3.5mm audio jack. This small round connector is often color-coded, with a green color indicating the audio output and a pink or red color indicating the microphone input.
Take a close look at the audio device you will be connecting your headset to. Look for the audio ports or jacks on the device and check if they are labeled. The color-coding system may vary depending on the device, but typically the green port is for audio output and the pink or red port is for microphone input.
If your headset and audio device have matching color-coded ports, it’s a good indication that they are compatible. However, it’s important to note that not all devices follow the color-coding standard, especially when it comes to smartphones or gaming consoles. In such cases, you may need to consult the user manual or do some online research to identify the correct ports.
In addition to the 3.5mm audio jack, some headsets may have additional connectors or buttons. These can include USB connectors for power or additional features, mute buttons, or volume control buttons. Familiarize yourself with these features to ensure you know how to use them effectively.
If your audio device does not have the required audio ports to match your headset, you may need to use an adapter. Adapters are available for converting different types of audio connectors, such as USB to 3.5mm, allowing you to connect your headset to devices that don’t have the exact port configuration.
By verifying the audio connectors on your headset and audio device, you will have a clear understanding of what type of cable or adapter you need to make the connection. This will ensure a proper and secure connection between your headset and audio device.
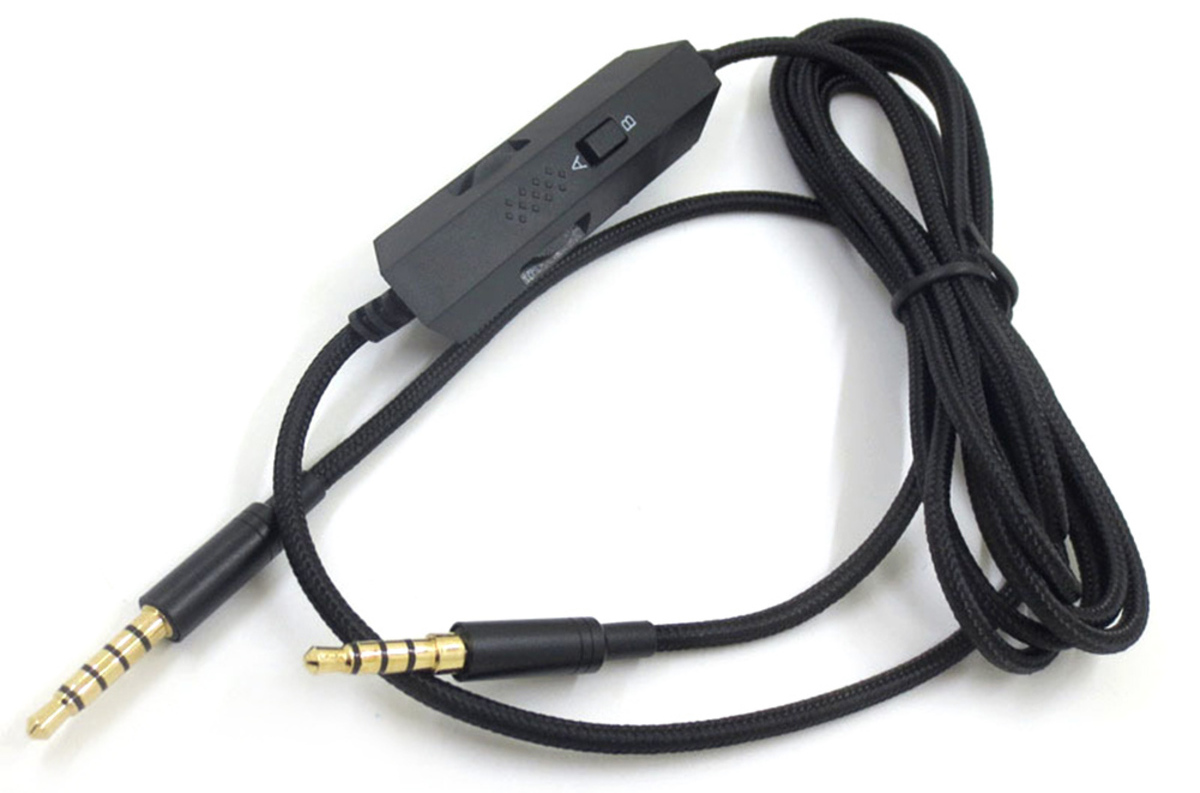
Step 3: Identify the correct audio cable for connecting your headset with mic
Now that you have verified the audio connectors on your headset and audio device, it’s time to identify the correct audio cable to connect them. The type of audio cable you’ll need will depend on the connectors present on your headset and audio device.
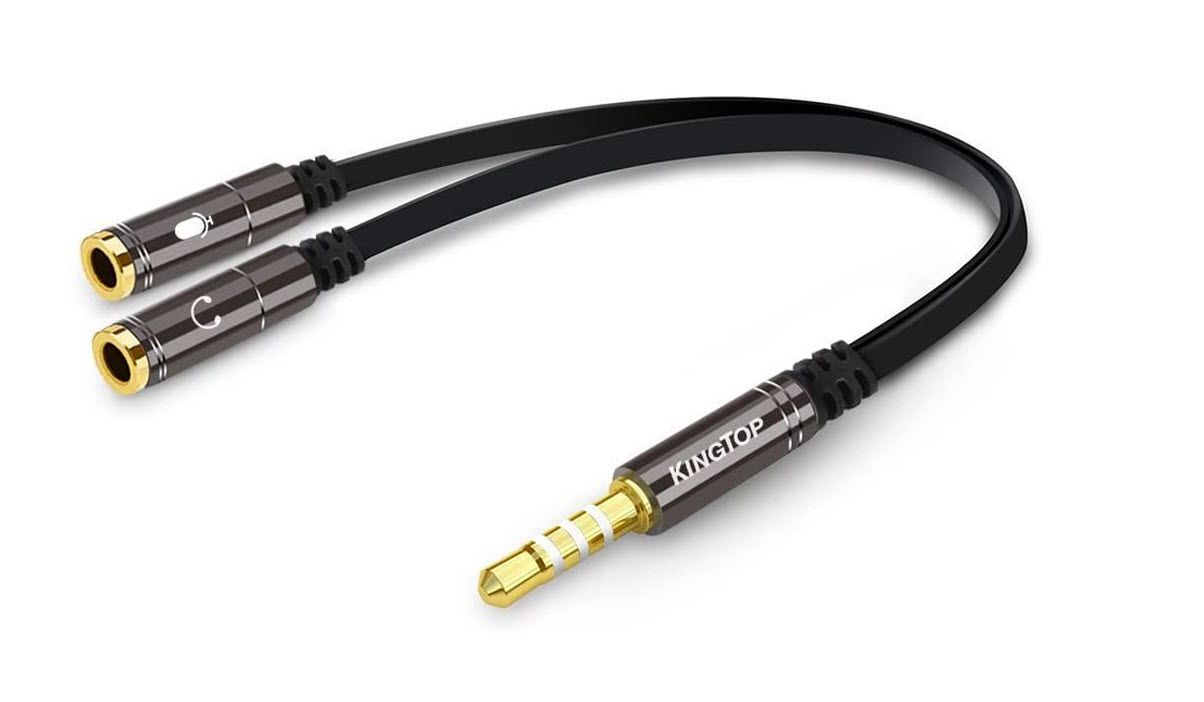
If both your headset and audio device have a 3.5mm audio jack, you’ll need a standard 3.5mm audio cable. This cable typically has a male 3.5mm connector on each end, which you can easily plug into the corresponding ports on your devices.
On the other hand, if your headset has a 3.5mm audio jack and your audio device only has USB ports, you’ll need a USB to 3.5mm adapter cable. This cable usually has a USB connector on one end and a male 3.5mm connector on the other end. The USB end plugs into the USB port on your audio device, while the 3.5mm end connects to the headset.
Alternatively, if your headset has a USB connector and your audio device only has a 3.5mm audio jack, you may need a USB to 3.5mm adapter or a different headset that supports analog connections. This adapter will allow you to connect the USB end of the cable to your audio device and the 3.5mm end to your headset.
It’s important to mention that there are different types of audio cables available, such as TRS (tip-ring-sleeve), TRRS (tip-ring-ring-sleeve), or even multi-purpose cables that support both audio and microphone signals. These cables may have different wiring configurations depending on your specific needs.
If you are unsure about which cable to use, refer to the documentation or user manual that came with your headset and audio device. It will usually provide specific recommendations on the type of cable or adapter that is compatible with your devices.
By identifying the correct audio cable for connecting your headset with a microphone, you will ensure a proper and reliable connection between your headset and audio device. This will enable you to enjoy high-quality sound and communicate effectively using the microphone on your headset.
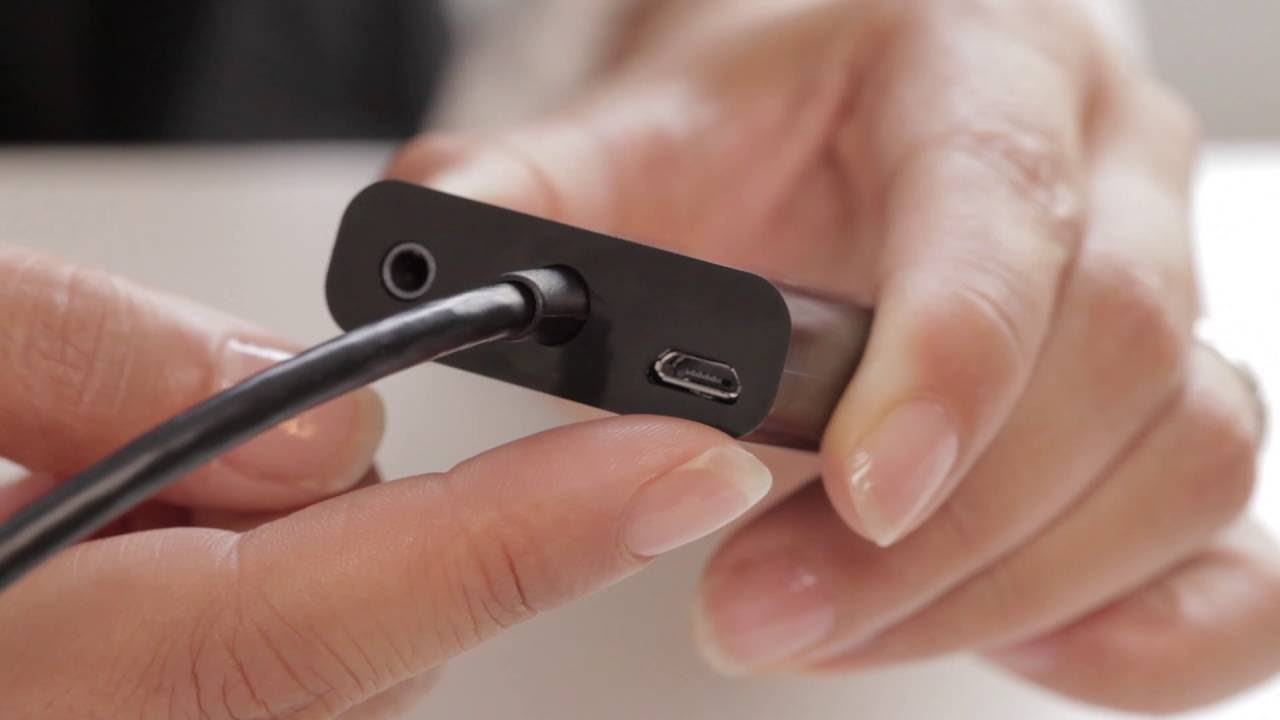
Step 4: Connect the audio cable to your headset
Now that you have the correct audio cable or adapter, it’s time to connect it to your headset. Follow these steps to ensure a secure and proper connection:
- Locate the audio port on your headset. It is usually located on the side of one of the earcups. The port may be labeled with a headphone symbol or an audio icon.
- Take the male end of the audio cable or adapter and insert it into the corresponding audio port on your headset. Make sure it is inserted all the way in, ensuring a snug fit.
- If your audio cable or adapter has a locking mechanism, such as a threaded connector, rotate it clockwise to secure it in place. This will prevent any accidental disconnections during use.
- Gently tug on the cable to ensure it is securely connected to your headset. There should be no wiggling or movement.
Once you have connected the audio cable to your headset, you’re ready to move on to the next step – connecting the other end of the audio cable to your audio device.
It’s worth noting that some headsets may have separate ports for audio output and microphone input, while others may have a single combined port for both. If your headset has separate ports, ensure that you are connecting the audio cable to the correct port based on its labeling or color coding. If your headset has a single combined port, the audio cable will handle both audio output and microphone input.
By properly connecting the audio cable to your headset, you’ll ensure a reliable and uninterrupted audio experience. Your headset is now ready to be connected to your audio device, allowing you to enjoy immersive sound and make use of the built-in microphone.
Step 5: Connect the other end of the audio cable to your audio device
Now that you have connected the audio cable to your headset, it’s time to connect the other end of the cable to your audio device. Follow these steps to ensure a proper and secure connection:
- Locate the audio port on your audio device. This can typically be found on the front, back, or side of the device. The port may be labeled with a headphone symbol or an audio icon.
- Take the other end of the audio cable or adapter and insert it into the corresponding audio port on your audio device. Make sure it is inserted fully and securely.
- If your audio cable or adapter has a locking mechanism, such as a threaded connector, rotate it clockwise to secure it in place.
- Gently tug on the cable to ensure it is firmly connected to your audio device. There should be no looseness or movement.
It’s important to note that depending on the type of audio device, you may have different options for connecting your headset. For example, if you are connecting to a computer, you may have the option to connect to the audio ports on either the front or back of the computer, or even use a USB port if available.
If you are connecting to a gaming console or smartphone, check the device’s user manual or online documentation for specific instructions on connecting external audio devices.
By properly connecting the other end of the audio cable to your audio device, you are ensuring a stable and reliable audio connection. This allows you to fully utilize your headset’s capabilities, whether it be for gaming, listening to music, or making voice calls.
Step 6: Test the microphone on your headset
After successfully connecting your headset, it’s important to test the microphone to ensure it is working correctly. This step will help you determine if the microphone is properly set up and if any adjustments are needed for optimal performance.
- Open the audio settings on your device. Depending on the operating system or application you are using, this can usually be found in the settings menu or audio control panel.
- Select the input or recording devices tab. Look for your headset or the name of the microphone associated with it.
- Speak into the microphone on your headset. You can say a few words or make some noise to generate an audio signal.
- Observe the audio level indicators or input level meters in the audio settings. They should show activity or fluctuation when you speak into the microphone, indicating that it is picking up sound.
- If the input level is too low, adjust the microphone sensitivity or volume settings in the audio settings. Increase the sensitivity or volume if the input level indicators show minimal or no activity. Conversely, decrease the sensitivity or volume if the input level indicators show distortion or clipping.
- You can also listen to the microphone output in real-time through the audio settings or by using any recording or communication application that allows monitoring of the microphone input.
- Make sure to test the microphone in different scenarios, such as recording your voice or participating in a voice call or online meeting, to ensure its performance in different use cases.
If the microphone doesn’t seem to be working or if you encounter any issues, try the following troubleshooting steps:
- Ensure that the microphone is not muted. Check the audio settings and make sure the microphone is not turned off or muted.
- Verify that the physical connection of the audio cable or adapter is secure on both ends.
- Restart your device and try testing the microphone again.
- Consult the user manual or online support resources for your specific headset and audio device for further troubleshooting steps.
By testing the microphone on your headset, you can confirm its functionality and make any necessary adjustments to achieve optimal sound quality for your voice recordings, calls, or online communication.
Step 7: Adjust audio settings on your device for optimal performance
Now that you have tested the microphone on your headset and ensured its functionality, it’s time to fine-tune the audio settings on your device for the best possible performance. By adjusting these settings, you can optimize the audio output and input to suit your preferences and needs.
Here are some key audio settings you can adjust on your device:
- Volume: Adjust the overall volume level of your audio output to a comfortable level. Increase or decrease the volume as needed to achieve the desired listening experience.
- Equalizer settings: Many devices offer equalizer settings that allow you to adjust the specific frequencies of the audio output. Use these settings to enhance bass, treble, or other frequency ranges according to your personal preference.
- Mic sensitivity or gain: Depending on your device and software, you may have the option to adjust the sensitivity or gain of your microphone. This setting determines how sensitive the microphone is to capture sound and can help optimize the input level. Experiment with different levels to find the ideal balance between capturing clear sound and minimizing background noise.
- Noise cancellation: If available, enable noise cancellation or noise reduction features on your device. These features can help minimize background noise, resulting in clearer audio for your voice recordings or calls.
- Sound enhancements: Some devices offer additional sound enhancements such as virtual surround sound or simulated 3D audio. Explore these settings to enhance your audio experience, particularly for gaming or multimedia purposes.
It’s important to note that the availability and specific settings of audio options may vary depending on your device and operating system. Take some time to explore the audio settings menu on your device and familiarize yourself with the available options.
Additionally, consider testing the audio settings while using different applications or software that utilize audio, such as media players, communication platforms, or video conferencing tools. This will allow you to optimize the audio performance specifically for those applications.
Remember to save your adjustments after making changes to audio settings to ensure they are applied consistently whenever you use your headset.
By adjusting the audio settings on your device, you can tailor the audio output and microphone input to your liking, enhancing your overall audio experience when using your headset with a microphone.
Conclusion
Connecting a headset with a microphone using just one audio cable doesn’t have to be a complicated process. By following the steps outlined in this guide, you can ensure a seamless and hassle-free connection between your headset and audio device.
We began by checking the compatibility of your headset and audio device, making sure they have the same audio connectors and support the same type of connection. Next, we verified the audio connectors on both devices to ensure a proper match and identified the correct audio cable or adapter needed for the connection.
We then guided you through the process of connecting the audio cable to your headset and audio device, ensuring a secure and reliable connection. Afterward, we emphasized the importance of testing the microphone on your headset to confirm its functionality and make any necessary adjustments for optimal performance.
Finally, we discussed the significance of adjusting the audio settings on your device to further enhance your audio experience, including volume control, equalizer settings, mic sensitivity, noise cancellation, and other sound enhancements.
Remember, while the steps provided in this guide are generally applicable, it’s essential to consult the user manual or online documentation specific to your headset and audio device for any manufacturer-specific instructions or troubleshooting tips.
Now that you are equipped with the knowledge to connect your headset with a microphone using just one audio cable, you can enjoy immersive sound, crystal-clear communication, and an enhanced audio experience for various purposes like gaming, multimedia, or hands-free calls. So go ahead and connect your headset, and enjoy the power of high-quality audio!