Home>Production & Technology>Audio Cable>Where Do I Put My Audio Cable In My TV
Audio Cable
Where Do I Put My Audio Cable In My TV
Modified: January 22, 2024
Find out where you should insert your audio cable in your TV with our helpful guide. Get the best audio quality for your entertainment setup.
(Many of the links in this article redirect to a specific reviewed product. Your purchase of these products through affiliate links helps to generate commission for AudioLover.com, at no extra cost. Learn more)
Table of Contents
- Introduction
- Understanding Audio Connections
- Common Audio Connection Types
- 5mm Audio Jack
- RCA Audio Cable
- HDMI Audio
- Coaxial Digital Audio
- Optical Digital Audio
- USB Audio Connection
- Audio Outputs on a TV
- Front or Side Panel Audio Outputs
- Rear Panel Audio Outputs
- Troubleshooting Audio Connection Issues
- Conclusion
Introduction
When it comes to connecting audio devices to your TV, finding the right audio cable and knowing where to plug it in can sometimes be confusing. Whether you’re looking to connect speakers, headphones, or a sound system, understanding the different audio connection types and knowing the locations of the audio outputs on your TV are key.
In this article, we’ll provide you with a comprehensive guide on audio cables and how to connect them to your TV. From popular audio connection types to troubleshooting common issues, we’ll cover everything you need to know to ensure optimal audio quality and an immersive entertainment experience.
So if you’ve ever found yourself wondering, “Where do I put my audio cable in my TV?”, read on to explore the various audio connection options available and learn how to navigate the audio output jacks on your TV.
Before we dive into the specifics, it’s essential to understand the different audio connections and their capabilities. This knowledge will help you choose the appropriate audio cable for your needs and ensure compatibility between your TV and audio devices.
Keep in mind that while audio connections can have a significant impact on sound quality, they are only one part of the equation. The quality of your audio devices, such as speakers or headphones, also plays a crucial role in delivering high-fidelity sound.
Now, let’s explore the common audio connection types you’re likely to encounter when connecting audio cables to your TV.
Understanding Audio Connections
Before you can effectively connect your audio devices to your TV, it’s important to have a basic understanding of the different audio connection types available. These connections determine the type of audio signal transmitted and the quality of sound reproduction.
Here are some common audio connection types you need to know:
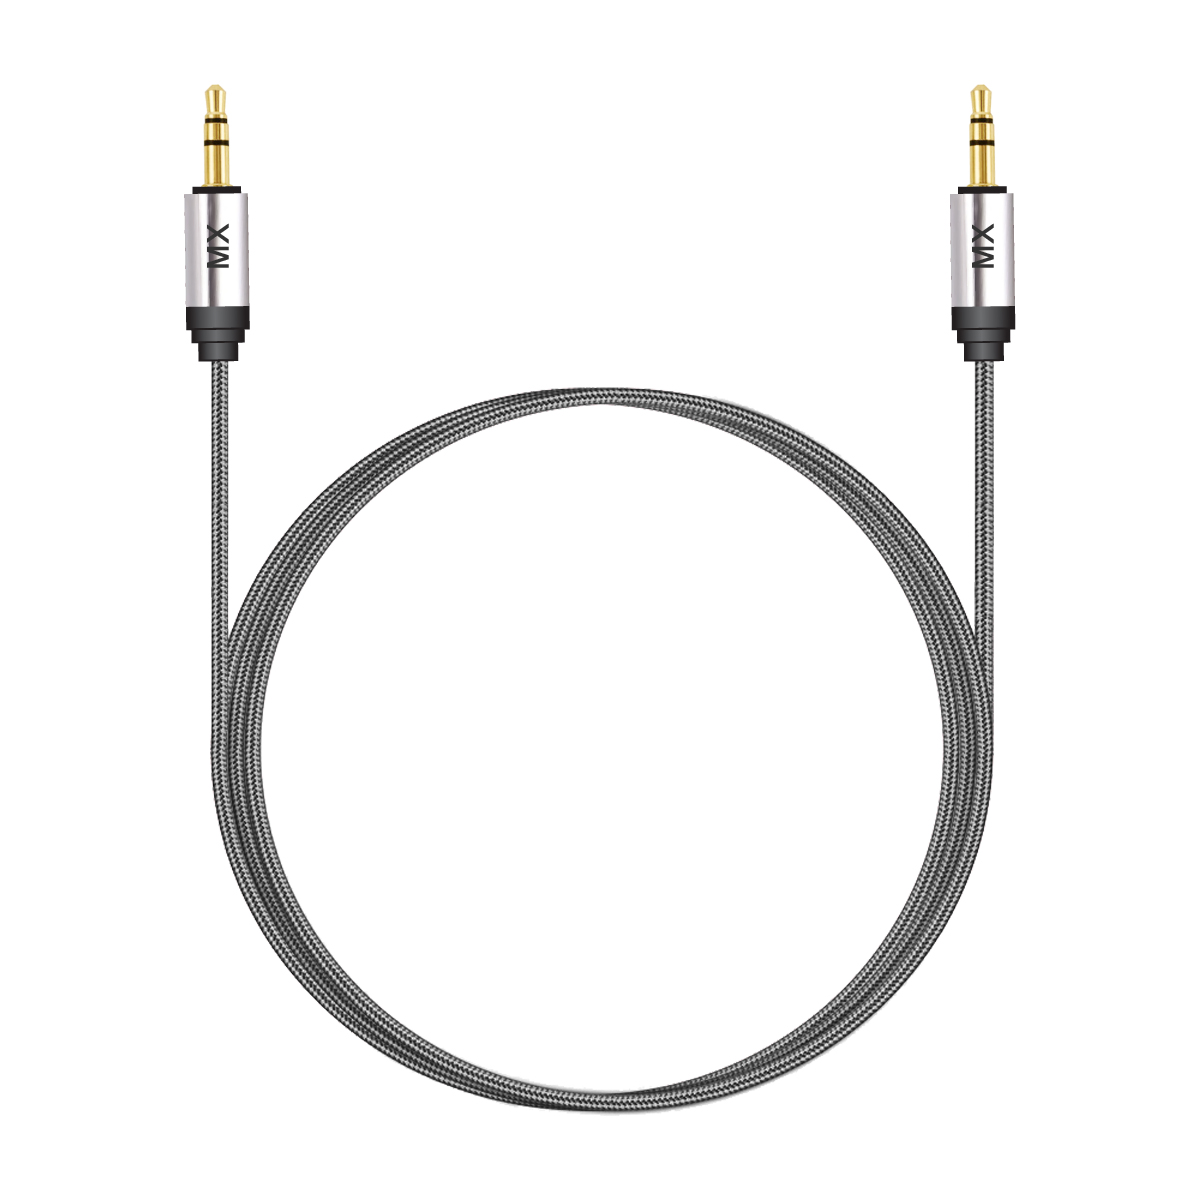
3.5mm Audio Jack:
The 3.5mm audio jack, also known as the headphone jack, is a widely used connection found on most audio devices and TVs. It is a small, round socket typically capable of transmitting stereo audio signals. You can use a 3.5mm audio cable to connect your TV to external speakers, headphones, or other audio devices that have a corresponding 3.5mm audio input.
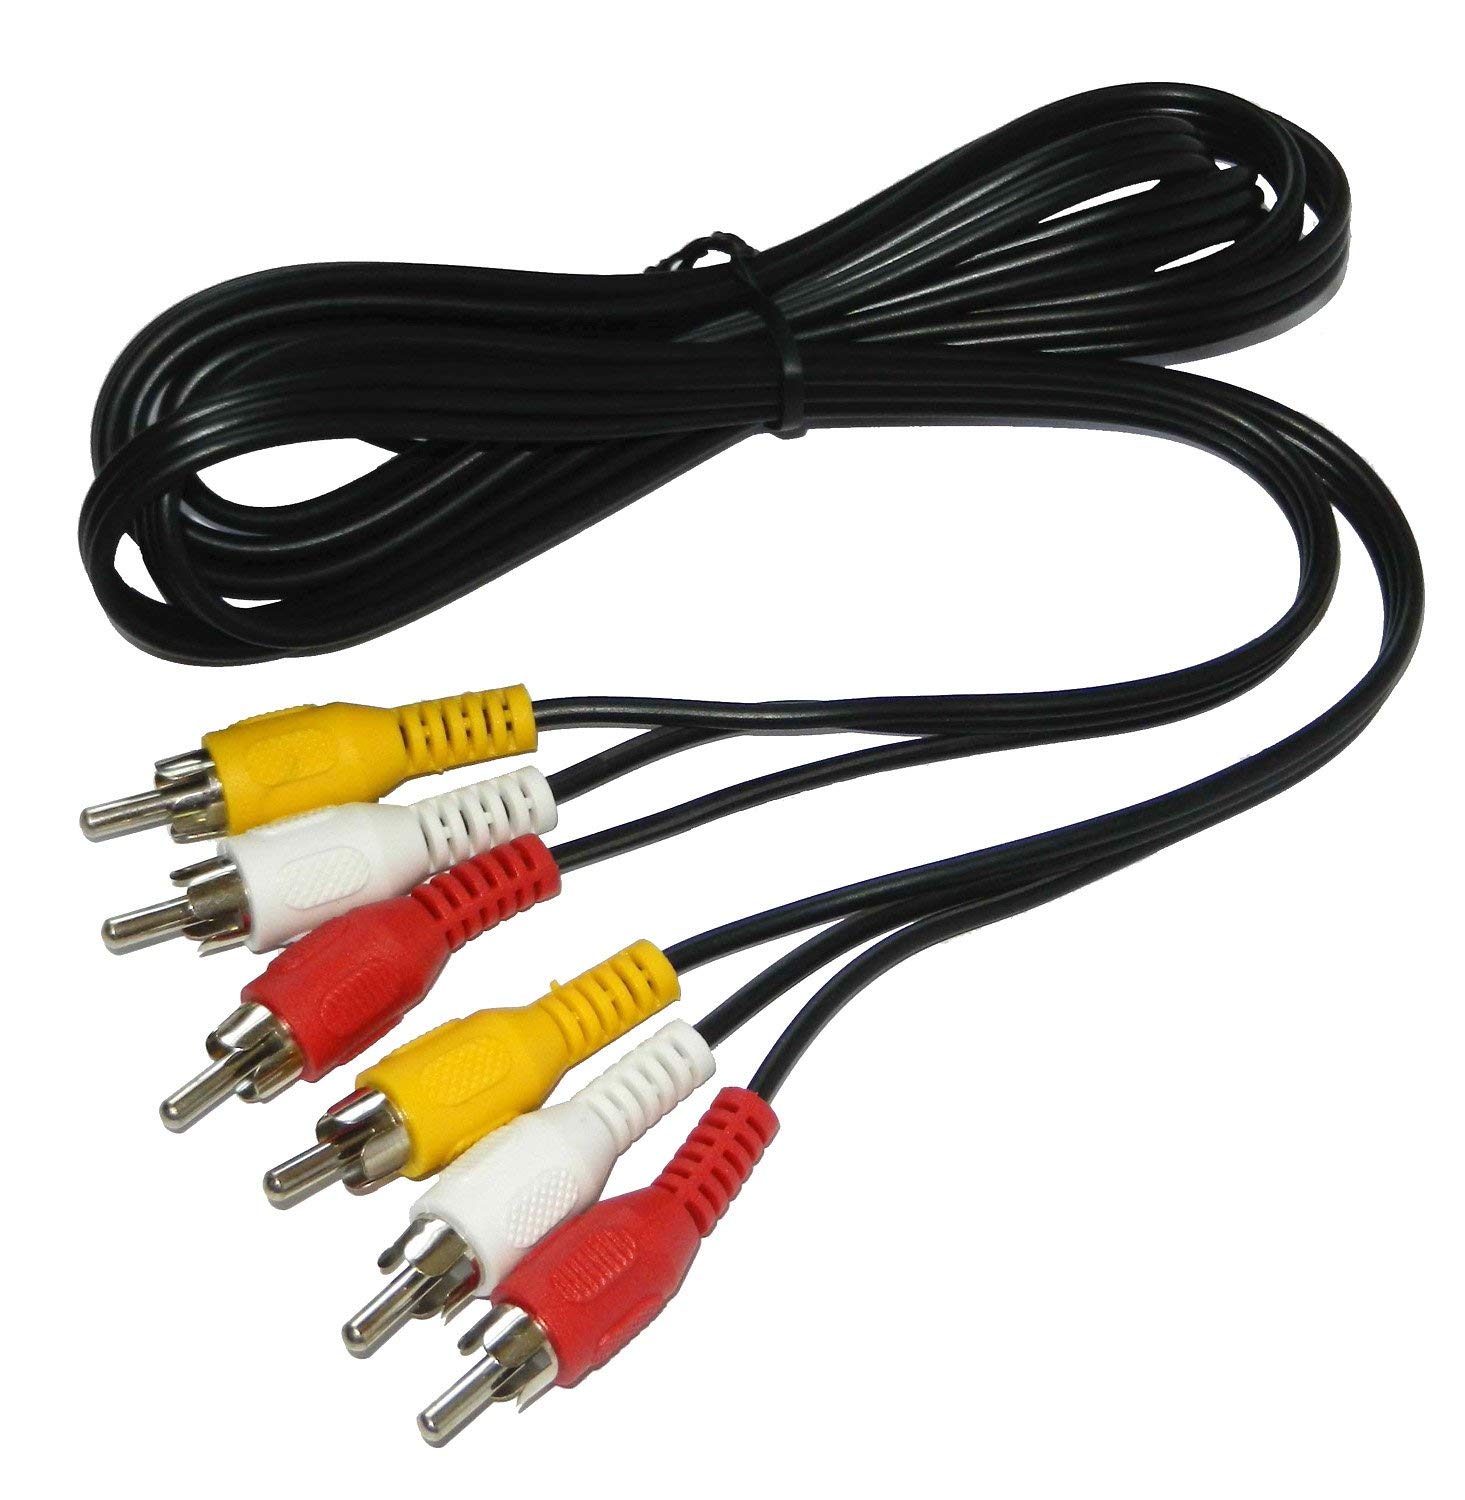
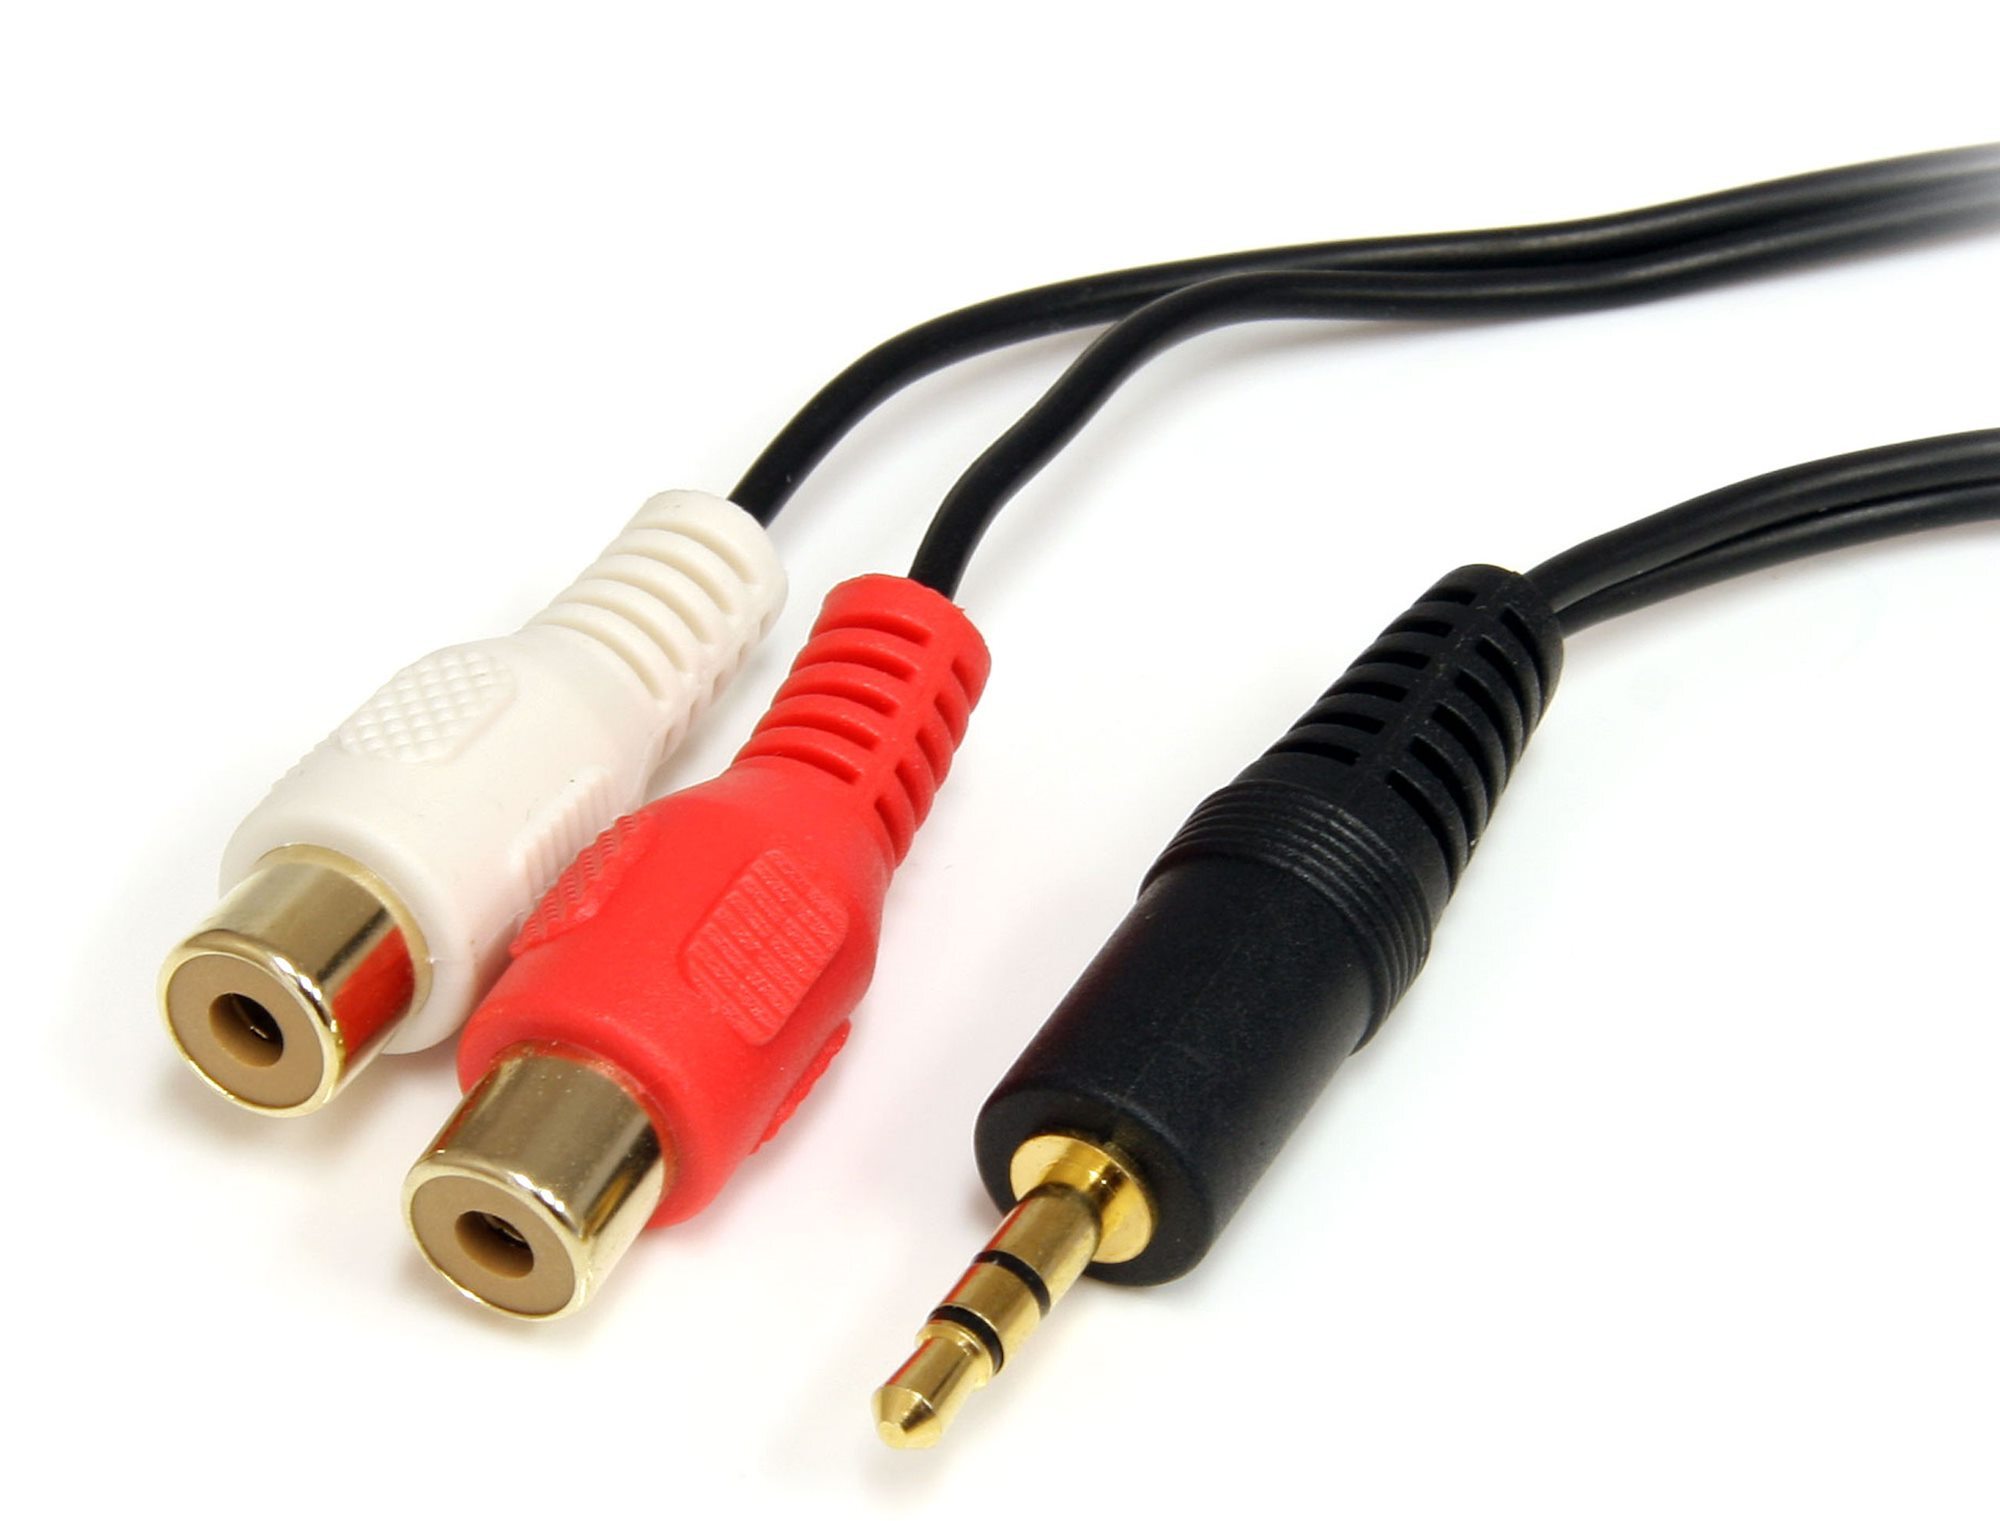
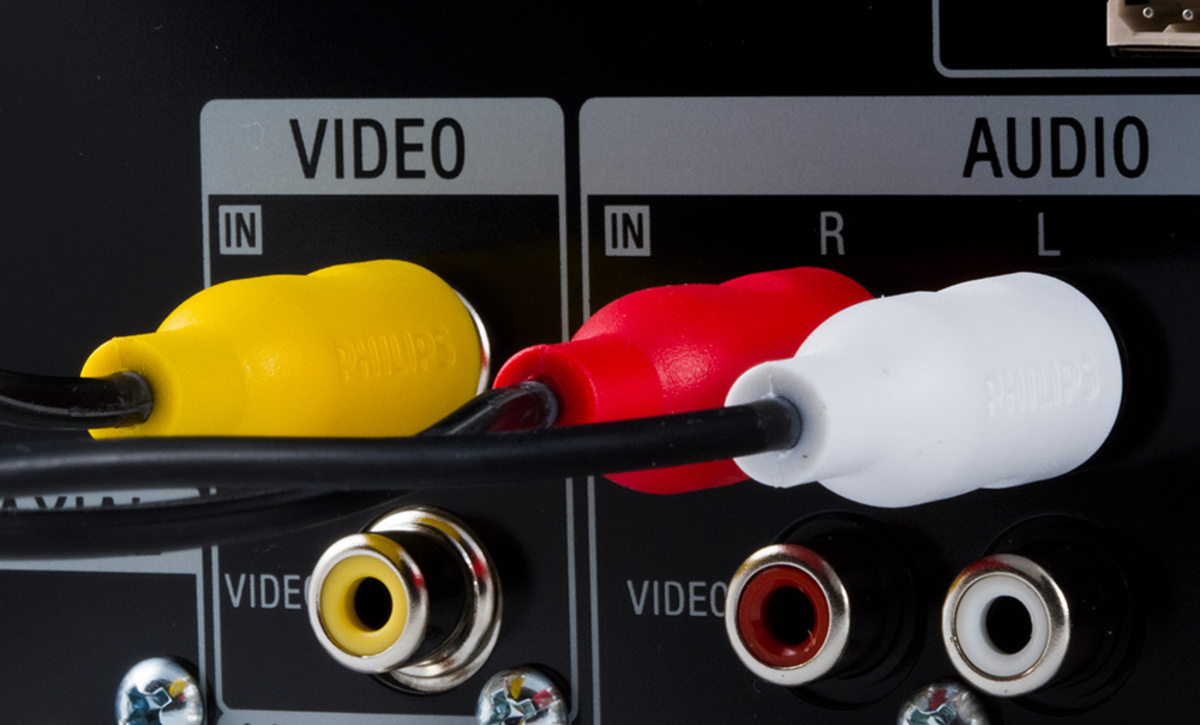
RCA Audio Cable:
The RCA audio cable, sometimes referred to as a “phono” cable, is a common analog audio connection found on older TVs and audio devices. It consists of two or more connectors with distinct colors for left and right audio channels. RCA cables are widely used for connecting speakers, amplifiers, and other audio equipment to a TV.
HDMI Audio:
HDMI (High-Definition Multimedia Interface) is a digital audio/video connection widely used in modern TVs, audio receivers, and various other devices. HDMI cables can transmit both high-definition video and high-quality audio signals. When connecting your TV to an audio receiver or soundbar using HDMI, you can enjoy immersive audio formats like Dolby Digital and DTS.
Coaxial Digital Audio:
Coaxial digital audio cables use a single RCA connector to transmit uncompressed digital audio signals. They are commonly used to connect audio devices, such as DVD players, set-top boxes, or gaming consoles, to TVs or audio receivers that have a coaxial digital audio input.
Optical Digital Audio:
Optical digital audio cables, also known as TOSLINK or SPDIF, transmit digital audio signals using fiber optic technology. They utilize a square-shaped connector with a distinctive red light path. Optical cables are commonly used to connect TVs, audio receivers, soundbars, and other devices that support optical audio connections.
USB Audio Connection:
USB (Universal Serial Bus) is a versatile connection found on many modern TVs, computers, and audio devices. USB cables can transmit both digital audio signals and provide power to compatible devices. They can be used to connect headphones, speakers, and other USB audio devices to your TV.
Understanding these audio connection types will empower you to select the appropriate cable and set up your audio devices with ease. Now that you have a grasp of the different connections available, let’s proceed to explore the locations of audio outputs on your TV.
Common Audio Connection Types
When it comes to connecting audio devices to your TV, there are several common audio connection types you’re likely to encounter. Let’s take a closer look at each one:
3.5mm Audio Jack:
The 3.5mm audio jack, also known as a headphone jack or AUX port, is a universal audio connection found on most TVs. It is typically located on the side or back panel of the TV. You can use a 3.5mm audio cable to connect your TV to external speakers, headphones, soundbars, or other audio devices that have a corresponding 3.5mm audio input. This connection is convenient for personal audio setups and offers stereo sound.
RCA Audio Cable:
RCA audio cables are another common audio connection type often found on older TVs. They consist of two or more connectors with distinct colors for the left and right audio channels. The RCA connectors are color-coded (red and white) and are typically located on the back or side panel of the TV. You can use RCA cables to connect your TV to speakers, amplifiers, or other audio equipment with RCA inputs to enjoy analog audio signals.
HDMI Audio:
HDMI (High-Definition Multimedia Interface) is a digital audio/video connection that offers both high-quality audio and video transmission. Most modern TVs have one or more HDMI ports, typically located on the back or side panel. HDMI cables can transmit audio signals to external devices such as audio receivers, soundbars, or home theater systems, allowing you to experience surround sound and high-fidelity audio formats like Dolby Digital and DTS.
Coaxial Digital Audio:
Coaxial digital audio cables use an RCA connector and transmit uncompressed digital audio signals. The coaxial audio output is usually labeled “Digital Audio Out” or “COAX OUT” and is located on the back panel of the TV. You can connect the coaxial digital audio output to audio receivers, sound systems, or other devices that support coaxial digital audio inputs.
Optical Digital Audio:
Optical digital audio connections are widely used for transmitting digital audio signals with high fidelity. The optical audio output port is typically labeled “Digital Audio Out” or ” OPTICAL OUT” and utilizes a square-shaped connector with a red light path. You can connect the optical output on your TV to soundbars, audio receivers, or other devices with optical audio inputs to enjoy immersive audio experiences.
USB Audio Connection:
Some modern TVs also feature USB ports that can transmit digital audio signals. USB audio connections allow you to connect compatible devices such as headphones or speakers directly to the TV. This connection is convenient for personal audio setups and is usually located on the side or back panel of the TV.
By familiarizing yourself with these common audio connection types and understanding their locations on your TV, you’ll be well-equipped to connect your audio devices and enjoy enhanced sound quality while watching your favorite movies, shows, or gaming experiences.
5mm Audio Jack
The 3.5mm audio jack, also known as the headphone jack or auxiliary (AUX) port, is a commonly used audio connection found on various devices, including TVs, smartphones, laptops, and audio equipment. It is a versatile connection that allows for the transmission of stereo audio signals.
The 3.5mm audio jack is typically a small, round socket located on the side or back panel of a TV. It is labeled with an “Audio Out” or headphone icon. This connection is used to connect external speakers, headphones, soundbars, or other audio devices that have a corresponding 3.5mm audio input.
To use the 3.5mm audio jack, you will need a 3.5mm audio cable. This cable has a plug with a small metal shaft and two black rings on it. One ring represents the left audio channel, while the other represents the right audio channel. The plug is inserted into the 3.5mm jack on the TV, while the other end of the cable connects to the audio input of the desired device.
Using the 3.5mm audio jack allows you to enjoy stereo sound from your TV through external speakers or headphones. This can be particularly beneficial for creating a more immersive audio experience or for private listening when you don’t want to disturb others.
It’s important to note that not all TVs have a 3.5mm audio jack. Some newer models may opt for digital connections like HDMI or optical audio instead. Before purchasing any equipment or cables, it’s recommended to check your TV’s specifications or manual to confirm if it has a 3.5mm audio jack.
Additionally, when using the 3.5mm audio jack, make sure to adjust the audio settings on your TV to route the sound through the external audio device correctly. This can typically be done in the TV’s settings menu, where you can select the audio output to be through the 3.5mm jack.
Overall, the 3.5mm audio jack offers a convenient and widely compatible connection for transmitting stereo audio signals from your TV to external devices. Whether you’re looking to enhance the audio quality of your TV or enjoy a more personalized listening experience, the 3.5mm audio jack provides a practical solution for connecting a variety of audio devices.
RCA Audio Cable
The RCA audio cable, also known as a phono cable, is a common analog audio connection that has been used for many years. It utilizes RCA connectors, which are distinguishable by their red and white color-coding. These cables are often found on older TVs, audio receivers, and various audio equipment.
RCA audio cables are used to transmit analog audio signals, typically in stereo format. The red RCA connector represents the right audio channel, while the white connector represents the left audio channel. By connecting the RCA cables from your TV to external audio devices, such as speakers or amplifiers, you can enjoy enhanced sound quality.
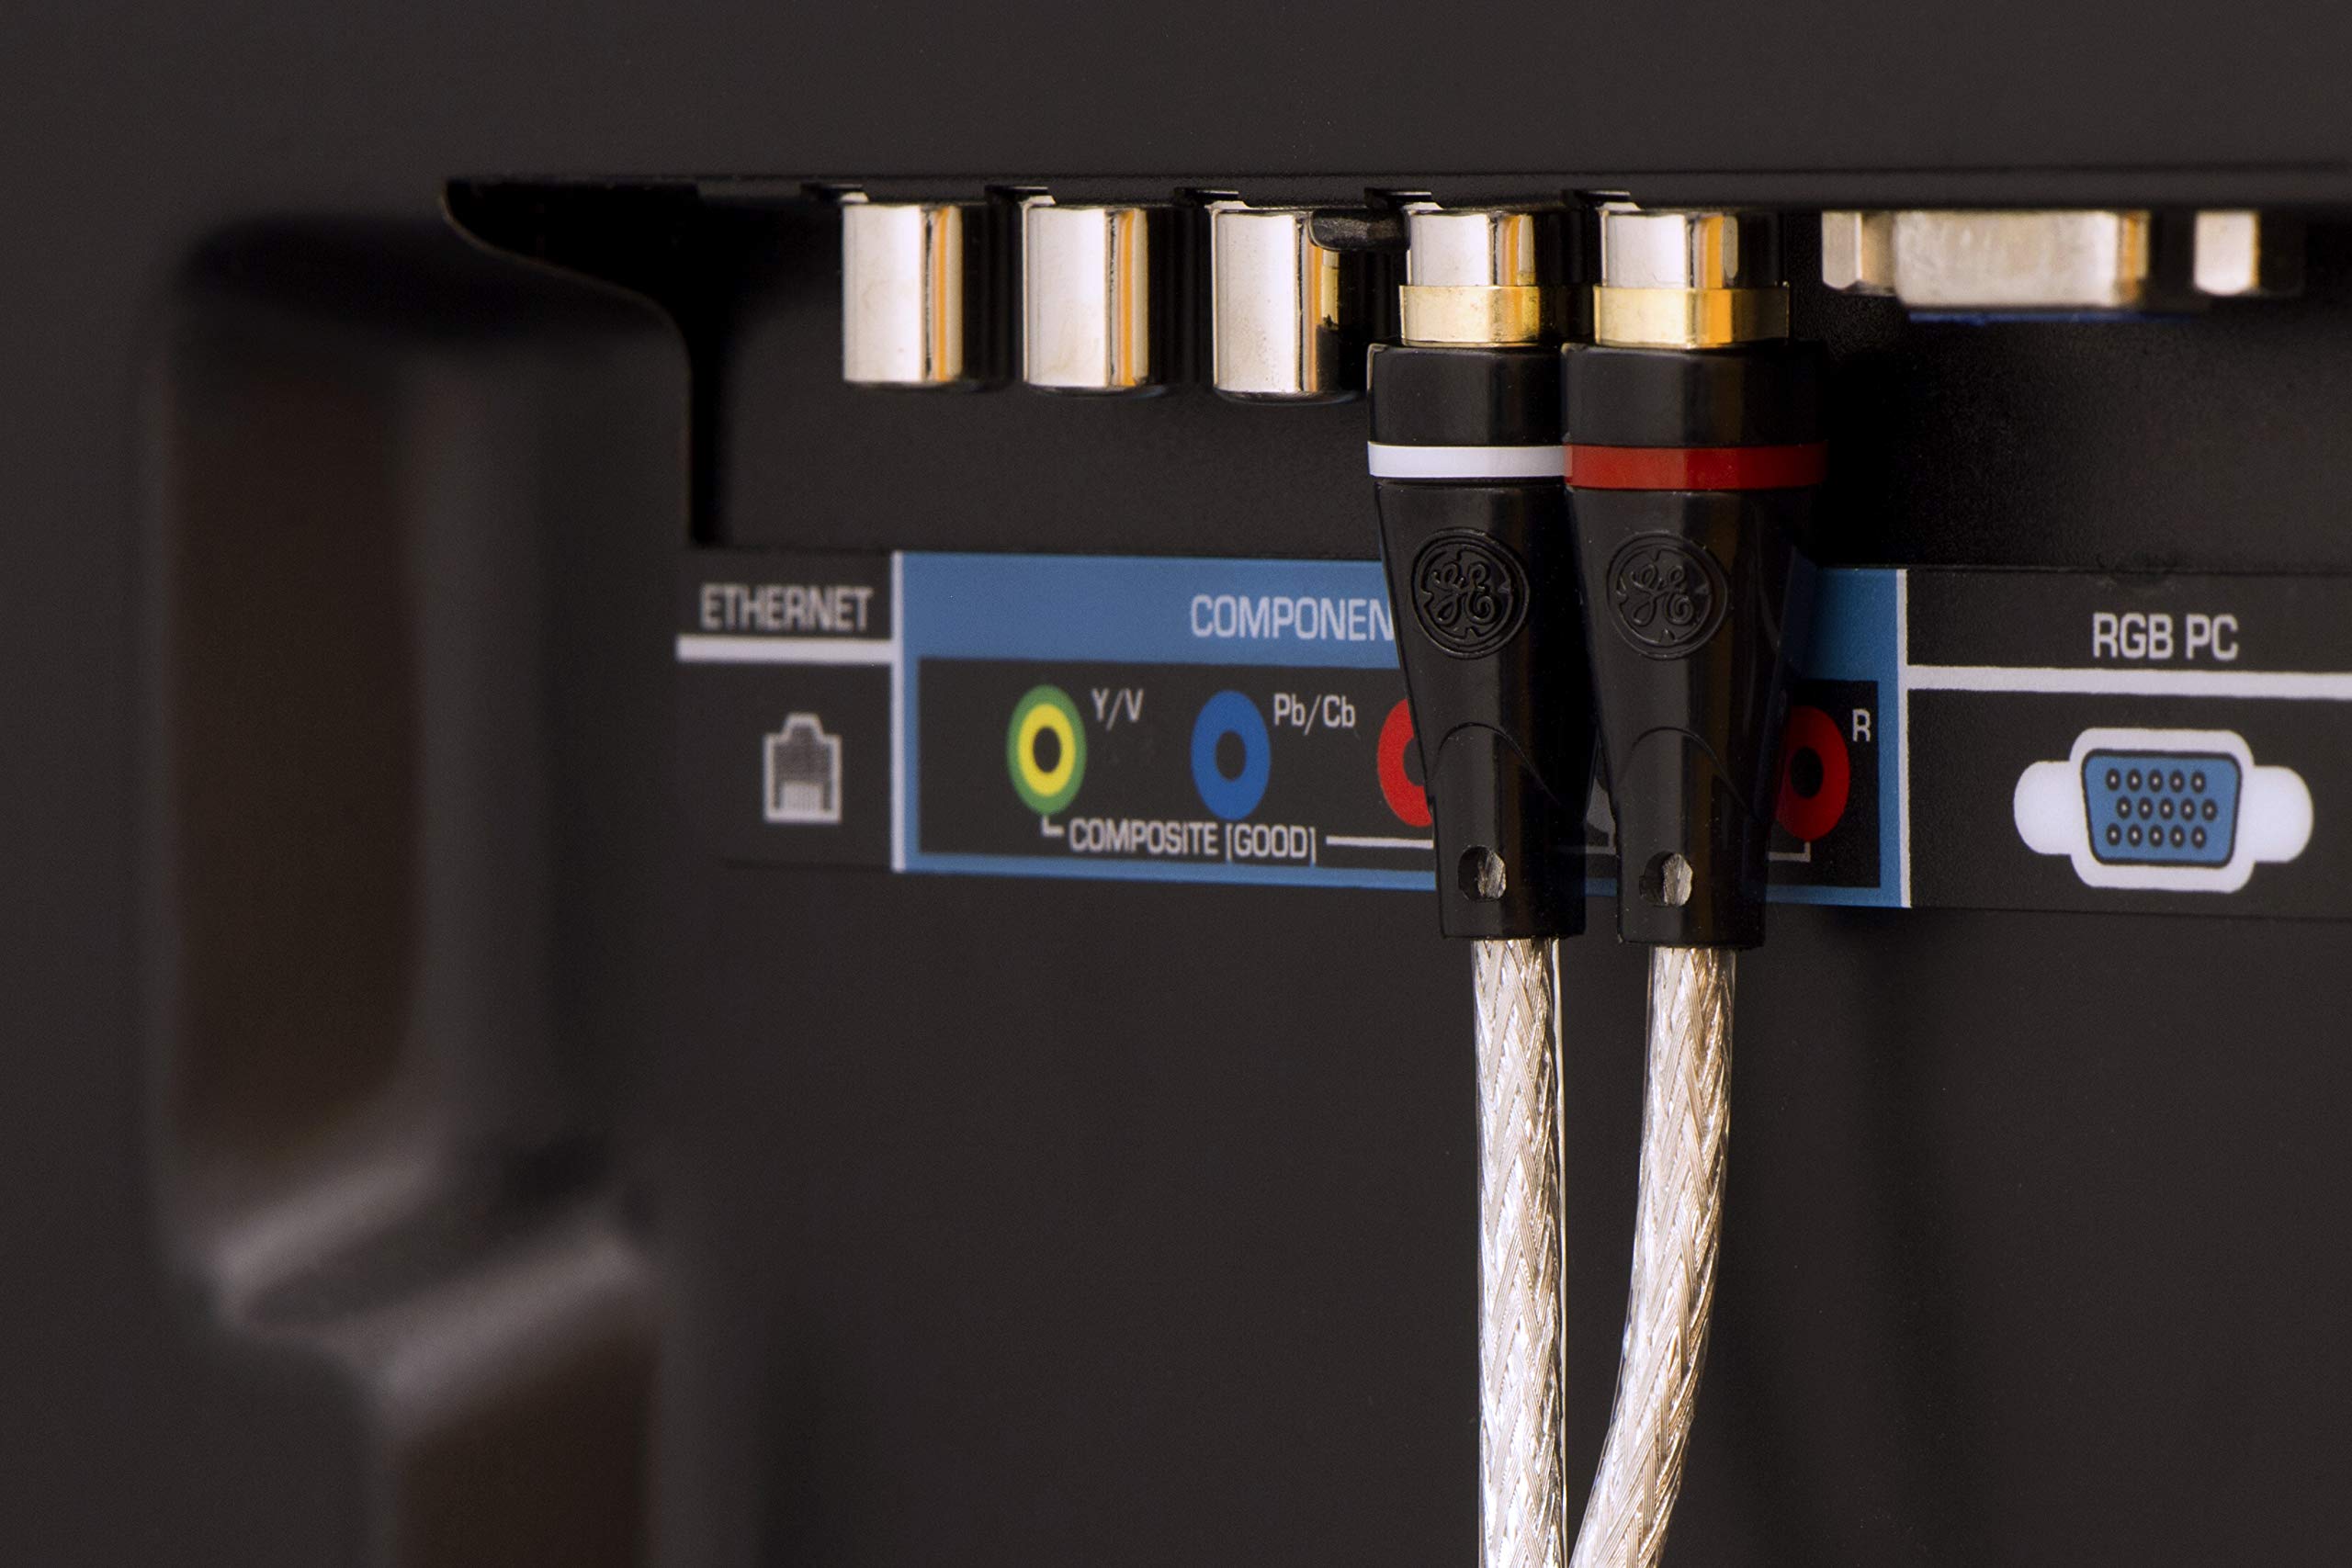
When connecting an RCA audio cable to your TV, locate the audio output jacks on the back or side panel of your TV. These jacks are color-coded to correspond with the red and white RCA connectors. Insert the red plug into the red audio output jack and the white plug into the white audio output jack.
Once the RCA cables are connected, ensure that the audio settings on your TV are configured correctly to output the sound through the RCA audio output. This can usually be done in the TV’s settings menu, where you can select the audio output option. It’s also important to adjust the audio settings on the connected audio device to receive the audio input from the RCA cables.
RCA audio cables are versatile and can be used to connect various audio devices. For example, you can connect your TV to a stereo system, surround sound speakers, or even a subwoofer using RCA cables. This allows you to enjoy a richer and more immersive audio experience while watching movies, shows, or playing games.
It’s worth mentioning that while RCA audio cables are still commonly used, digital audio connections like HDMI and optical have become more prevalent in modern TVs. However, if your TV or audio devices only have RCA connectors, they still provide a reliable and effective way to transmit analog audio signals.
Overall, RCA audio cables are a straightforward and widely used method for connecting your TV to external audio devices. They provide a simple solution for achieving better sound quality and expanding your audio setup without the need for complex configurations or digital connections.
HDMI Audio
HDMI (High-Definition Multimedia Interface) is a popular and versatile digital audio/video connection that is commonly found on modern TVs, audio receivers, and various other devices. HDMI cables not only transmit high-definition video signals but also carry high-quality audio signals.
Most modern TVs have at least one HDMI port, although many models offer multiple ports to accommodate various devices. HDMI cables can transmit audio signals in addition to video, eliminating the need for separate audio connections.
When utilizing HDMI for audio, you can connect your TV to external audio devices, such as soundbars, audio receivers, or home theater systems, to enjoy immersive sound experiences. HDMI supports several audio formats, including standard stereo, Dolby Digital, DTS, and more, depending on the capabilities of your TV and connected audio device.
To connect your TV to an audio device using HDMI, simply plug one end of the HDMI cable into the HDMI output port on your TV, and the other end into the HDMI input port on the audio device. Make sure to select the correct HDMI input on the audio device to route the audio signal properly.
Once connected, you may need to adjust the audio settings on your TV to instruct it to send the audio signal through the HDMI connection. This can typically be done in the TV’s settings menu, where you can select the audio output option. Additionally, some audio devices may require specific settings adjustments to receive the audio input from the HDMI connection.
HDMI offers the advantage of transmitting both high-quality video and audio signals through a single cable, simplifying cable management and reducing clutter. It provides a seamless and convenient solution for connecting your TV to audio devices, delivering immersive sound to complement your visual experience.
Furthermore, HDMI supports advanced audio technologies like Dolby Atmos and DTS:X, which provide multidimensional and immersive sound for a truly cinematic audio experience. If your audio device and TV support these technologies, you can enjoy rich, detailed, and dynamic audio that enhances your favorite movies, shows, or games.
It’s essential to note that not all HDMI ports on your TV may support audio output. Some HDMI ports may be labeled as “Audio Return Channel” (ARC) ports, specifically designed for sending audio from the TV to a connected audio device. These ARC ports allow you to enjoy audio from your TV’s built-in apps or Over-The-Air broadcasts through your audio system without needing a separate audio connection.
In summary, HDMI audio provides a convenient and high-quality solution for connecting your TV to external audio devices. From standard stereo to advanced surround sound formats, HDMI offers a versatile and immersive audio experience to complement your visual entertainment.
Coaxial Digital Audio
Coaxial digital audio cables are a common type of connection used to transmit uncompressed digital audio signals. They utilize a single RCA connector and are typically found on TVs, DVD players, gaming consoles, and other audio devices.
The coaxial digital audio connection allows you to enjoy high-quality digital audio and is particularly useful for devices that don’t have HDMI or optical audio outputs.
To connect your TV to an audio device using a coaxial digital audio cable, locate the digital audio output port on the back of your TV. It is usually labeled as “Digital Audio Out” or “COAX OUT” and has an orange or black color. Insert one end of the coaxial digital audio cable into the digital audio output port on the TV.
Next, connect the other end of the coaxial digital audio cable to the corresponding input port on your audio device, such as an audio receiver or soundbar. Ensure that the input port on the audio device is also labeled as “Digital Audio In” or “COAX IN”.
Once the cable is securely connected, you may need to adjust the audio settings on your TV to direct the audio output through the coaxial digital audio connection. This can typically be done in the TV’s settings menu, where you can select the audio output option. Additionally, ensure that the audio settings on the audio device are configured to receive the digital audio input from the coaxial connection.
Coaxial digital audio cables offer a reliable and straightforward method for transmitting digital audio signals. They are capable of delivering high-fidelity audio and are often used in home theater setups or when connecting audio devices that lack HDMI or optical audio capabilities.
It’s important to note that coaxial digital audio cables transmit digital audio in an uncompressed format. This allows for a lossless transfer of audio signals, ensuring excellent sound quality. However, keep in mind that coaxial digital audio supports stereo and multichannel audio formats, but it may not support advanced audio technologies like Dolby Atmos or DTS:X.
In summary, coaxial digital audio cables provide a convenient way to connect your TV to audio devices that support digital audio input. They offer a reliable method for transmitting high-quality digital audio signals without the need for complex configurations or additional equipment.
Optical Digital Audio
Optical digital audio cables, also known as TOSLINK or SPDIF cables, are a popular digital audio connection used to transmit high-quality audio signals. They utilize fiber optic technology to transmit digital audio data in the form of light pulses. This connection is widely found on TVs, audio receivers, soundbars, and other audio devices.
To connect your TV to an audio device using an optical digital audio cable, locate the digital audio output port on the back of your TV. It is usually labeled as “Digital Audio Out” or “OPTICAL OUT” and has a distinctive square-shaped connector with a red light path. Insert one end of the optical digital audio cable into the digital audio output port.
Next, connect the other end of the cable to the corresponding optical audio input port on your audio device, such as an audio receiver or soundbar. The input port is typically labeled as “Digital Audio In” or “OPTICAL IN”.
Once the cable is securely connected, you may need to adjust the audio settings on your TV to route the audio through the optical connection. This can usually be done in the TV’s settings menu by selecting the appropriate audio output option. Additionally, ensure that the audio settings on the connected audio device are configured to receive the digital audio input from the optical connection.
Optical digital audio cables offer several advantages. Firstly, they provide a high-quality digital audio signal transmission that is immune to interference from electromagnetic sources. This ensures that you receive clean and accurate audio reproduction. Additionally, optical cables support various audio formats, including stereo and surround sound, making them suitable for a wide range of audio setups.
It’s important to note that while optical digital audio cables offer excellent audio quality, they may not support advanced audio formats like Dolby Atmos or DTS:X, which require higher bandwidth. However, they are still capable of delivering immersive audio experiences by supporting formats like Dolby Digital and DTS.
Optical digital audio connections are widely used and compatible with many audio devices, making them a reliable choice for connecting your TV to external audio equipment. So, whether you’re connecting a soundbar, audio receiver, or other devices, utilizing an optical digital audio cable can ensure you enjoy the full potential of your audio system.
In summary, optical digital audio cables offer a reliable and high-quality solution for transmitting digital audio signals. With their immunity to interference and support for various audio formats, they provide an excellent option for creating immersive audio experiences in your home entertainment setup.
USB Audio Connection
USB (Universal Serial Bus) is a versatile connection found on many modern TVs, computers, and audio devices. While USB is commonly used for data transfer, it can also be utilized for transmitting audio signals.
A USB audio connection allows you to connect compatible audio devices, such as headphones, speakers, or soundbars, directly to your TV without the need for additional cables or adapters.
To use a USB audio connection, locate the USB port on your TV. It is typically found on the side or back panel. Plug your USB audio device into the USB port on the TV. Depending on the device, it may require its own power source or draw power from the TV via the USB connection.
Once connected, the TV should automatically recognize the USB audio device and configure the audio output accordingly. However, if necessary, you may need to adjust the audio settings on your TV to ensure the sound is routed through the USB audio connection.
USB audio connections offer several advantages. Firstly, they provide a convenient and clutter-free setup, as a single USB cable takes care of both audio transmission and power supply (if applicable). Additionally, USB supports digital audio signals, which can result in higher audio quality compared to analog connections like RCA.
Furthermore, USB audio connections often support advanced audio formats and technologies like surround sound, making them suitable for enhancing your audio experience while watching movies or playing games.
It’s important to note that not all TVs may support USB audio connections, or they may have limitations on the types of USB audio devices they can recognize. Therefore, it’s recommended to consult your TV’s manual or specification to verify if USB audio is supported and which audio formats are compatible.
USB audio connections are particularly convenient for personal audio setups. For example, you can connect a pair of headphones directly to your TV via USB to enjoy a more immersive and private listening experience.
In summary, USB audio connections offer a convenient and versatile option for connecting audio devices to your TV. With their ability to transmit digital audio signals and support advanced audio formats, USB connections provide a seamless way to enhance your audio experience and enjoy high-quality sound.
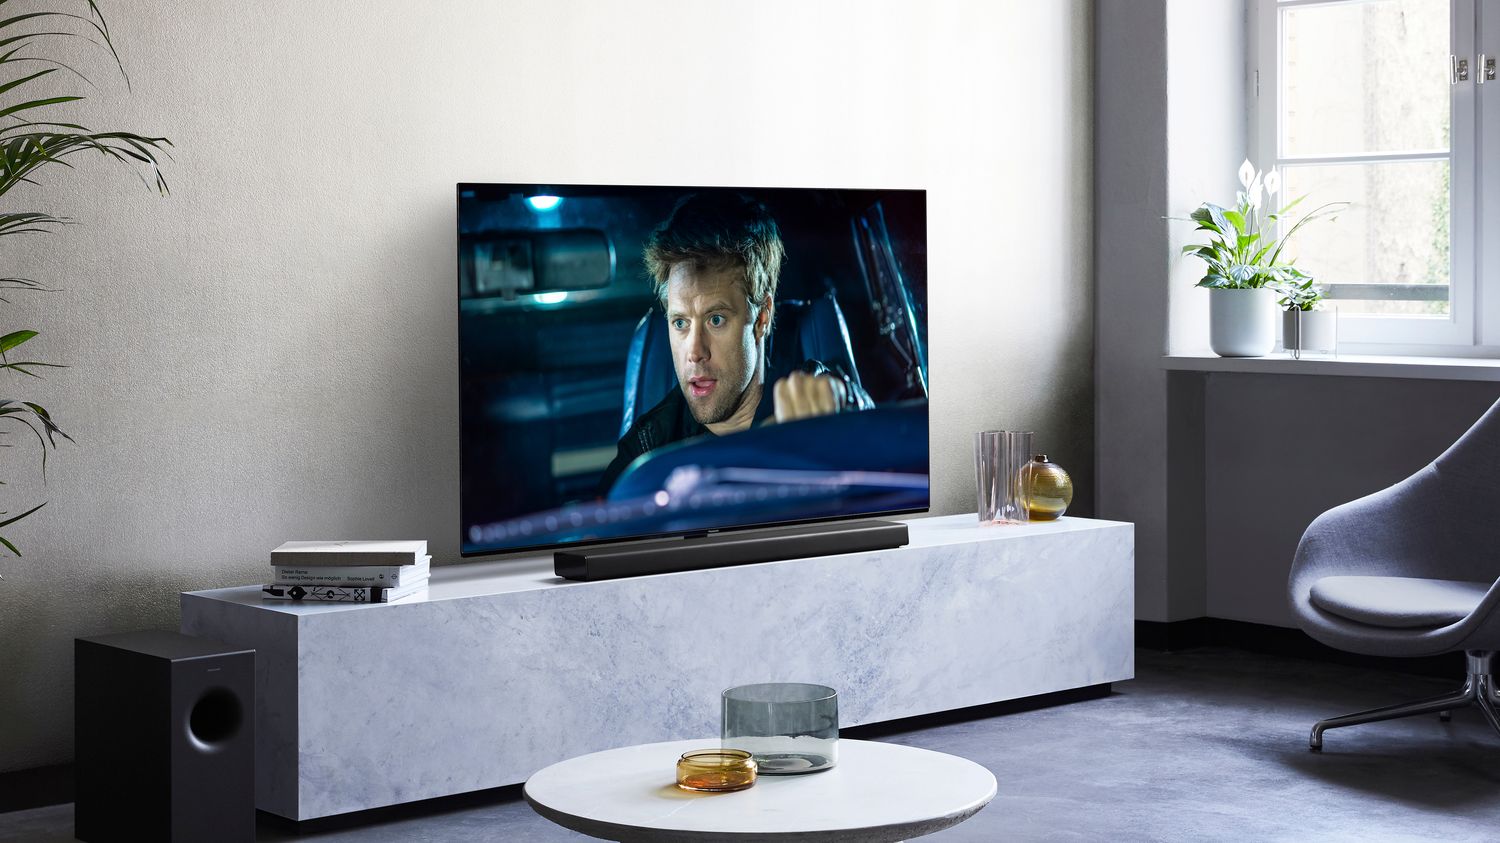
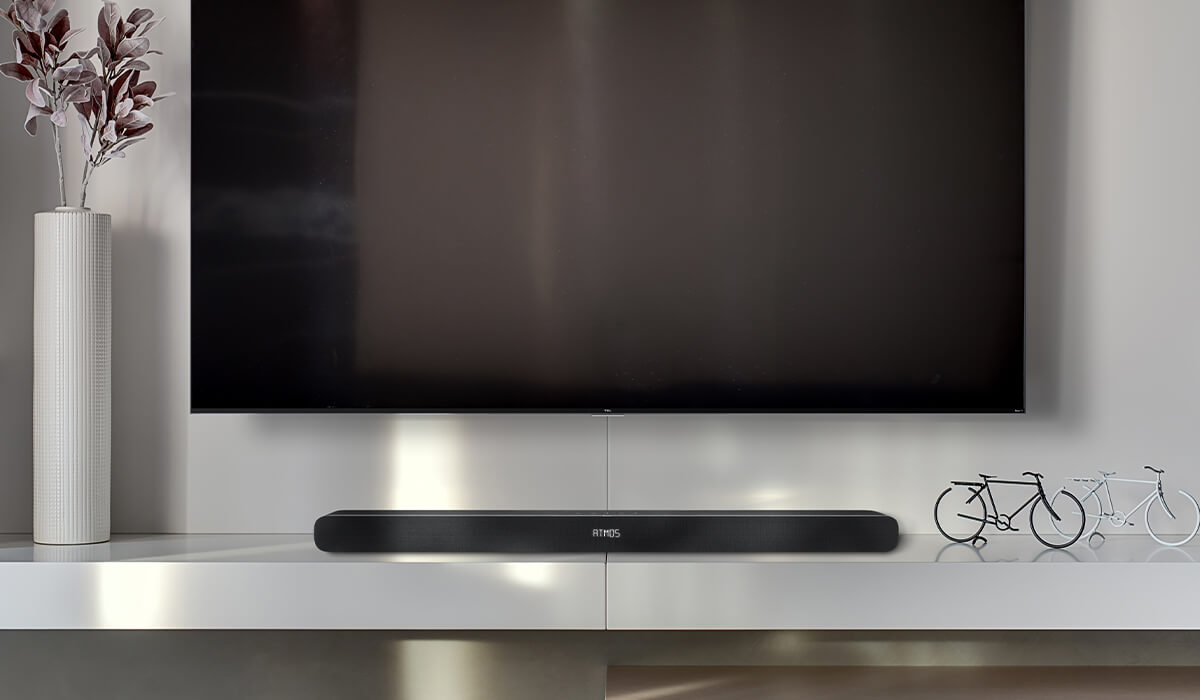
Audio Outputs on a TV
When it comes to connecting audio devices to your TV, it’s important to understand the different audio outputs available on your TV. These outputs allow you to transmit audio signals from your TV to external audio devices such as speakers, headphones, or audio receivers. Let’s explore the two primary categories of audio outputs commonly found on TVs: front or side panel audio outputs and rear panel audio outputs.
Front or Side Panel Audio Outputs:
Many TVs feature audio output options located on the front or side panel for easy access. These outputs are convenient for connecting headphones or small external speakers. The most common audio output found on the front or side panel is the 3.5mm audio jack, which uses a standard headphone plug (also known as an AUX port). This can be used to connect headphones, portable speakers, or other audio devices with a corresponding 3.5mm input. Additionally, some TVs may include a USB port that supports audio output, allowing you to connect compatible USB audio devices directly to the TV.
Rear Panel Audio Outputs:
The majority of audio outputs on TVs are located on the rear panel. These outputs are designed for connecting larger audio systems, soundbars, or audio receivers. The specific types of audio outputs found on the rear panel may vary depending on the TV model. Common options include:
- RCA Audio Outputs: These are typically color-coded red and white and are used for analog audio connections. You can use RCA cables to connect your TV to stereo systems, amplifiers, or other audio devices with RCA inputs.
- HDMI Audio Outputs: HDMI ports can transmit both high-definition video and high-quality audio signals. You can connect your TV to audio receivers, soundbars, or home theater systems using HDMI cables for immersive audio experiences.
- Optical Digital Audio Output: This is a square-shaped port labeled as “Digital Audio Out” or “OPTICAL OUT” that uses fiber optic technology to transmit digital audio signals. You can connect your TV to soundbars, audio receivers, or other devices with optical audio inputs using an optical audio cable.
- Coaxial Digital Audio Output: This is an RCA port labeled as “Digital Audio Out” or “COAX OUT” and is used for transmitting uncompressed digital audio signals. You can connect your TV to audio receivers or sound systems that have coaxial digital audio inputs using a coaxial digital audio cable.
When selecting the appropriate audio output on your TV, consider the type of audio device you are connecting and ensure that its corresponding input matches the TV’s output. It’s also important to configure the audio settings on your TV to direct the audio output through the selected audio output. This can usually be done in the TV’s settings menu by selecting the audio output option.
Understanding the various audio outputs on your TV empowers you to make the right connections and enjoy enhanced audio experiences while watching your favorite content.
Front or Side Panel Audio Outputs
Front or side panel audio outputs are convenient options found on many TVs that allow for easy access to audio connections. These outputs are designed for connecting headphones or small external speakers directly to the TV, providing a personal audio experience without disturbing others in the room.
The most common front or side panel audio output is the 3.5mm audio jack, also known as a headphone jack or AUX port. This is a standard audio connection that uses a small, round socket. You can easily recognize it by the headphone symbol or the “Audio Out” label. The 3.5mm audio jack is compatible with a wide range of audio devices, including headphones, earphones, portable speakers, and amplifiers.
To connect an audio device to the 3.5mm audio jack, simply insert the headphone plug into the corresponding port on the front or side panel of the TV. Once connected, adjust the volume on both the TV and the audio device as desired.
Another audio output option that may be available on the front or side panel of your TV is a USB port. While primarily used for data transfer, some TVs and audio devices support audio playback through USB. By connecting a compatible USB audio device, such as headphones or speakers, to the USB port on your TV, you can enjoy audio without the need for additional cables or converters.
Front or side panel audio outputs on TVs offer practicality and convenience, especially for personal listening experiences. Whether you want to enjoy late-night TV shows without disturbing others or immerse yourself in gaming audio, these outputs allow you to connect headphones or smaller speakers directly to the TV without the need to navigate through the rear panel connections.
When utilizing front or side panel audio outputs, it is important to note that the sound output may be affected by the TV’s internal audio settings. Make sure to adjust the TV’s audio settings to ensure that the audio is directed to the front or side panel output and that it matches the audio device you have connected.
In summary, front or side panel audio outputs on TVs provide accessible connections for headphones or small speakers. The versatile 3.5mm audio jack and, in some cases, a USB port allow for easy integration with a wide range of audio devices, delivering personalized audio experiences that cater to individual preferences.
Rear Panel Audio Outputs
Rear panel audio outputs on TVs offer a variety of options for connecting external audio devices, such as sound systems, amplifiers, or soundbars. These outputs are typically located on the back of the TV and provide versatile audio connectivity options to enhance your audio experience.
Here are some common rear panel audio outputs you may find on your TV:
- RCA Audio Outputs: RCA audio outputs are color-coded red and white or red and black. These analog outputs allow you to connect your TV to stereo systems, amplifiers, or powered speakers using RCA cables. The red connector is designated for the right audio channel, while the white or black connector represents the left audio channel.
- HDMI Audio Outputs: HDMI (High-Definition Multimedia Interface) ports are commonly found on TVs and support both high-definition video and high-quality audio transmission. HDMI audio outputs enable you to connect your TV to audio receivers, soundbars, or home theater systems using HDMI cables, providing immersive audio experiences.
- Optical Digital Audio Output: Optical digital audio outputs, also known as TOSLINK or SPDIF, use fiber optic technology to transmit digital audio signals. These outputs utilize a square-shaped port labeled as “Digital Audio Out” or “OPTICAL OUT.” You can connect your TV to soundbars, audio receivers, or other devices that support optical audio inputs using an optical audio cable.
- Coaxial Digital Audio Output: Coaxial digital audio outputs use an RCA port labeled as “Digital Audio Out” or “COAX OUT” to transmit uncompressed digital audio signals. You can connect your TV to audio receivers or sound systems with coaxial digital audio inputs using a coaxial digital audio cable.
When utilizing rear panel audio outputs, identify the appropriate output type that matches your audio device’s input. Use the corresponding cables (RCA, HDMI, optical, or coaxial) to establish the connection between your TV and the audio device.
It’s important to adjust the audio settings on your TV to ensure that the sound is properly routed to the rear panel audio output you have used. Most TVs allow you to select the audio output option in the settings menu to direct the audio signal appropriately.
Rear panel audio outputs provide flexibility and versatility, enabling you to integrate your TV into a larger audio setup. By utilizing these outputs, you can enjoy enhanced sound quality, immersive audio experiences, and the ability to connect to external audio equipment that complements your viewing experience.
Remember to consult your TV’s manual or specifications to understand the available rear panel audio outputs and ensure compatibility with your desired audio devices.
In summary, rear panel audio outputs on TVs offer various connection options for expanding your audio setup. Whether using RCA, HDMI, optical, or coaxial outputs, these connections enable you to connect your TV to external sound systems, amplifiers, or soundbars, providing an elevated audio experience while enjoying your favorite content.
Troubleshooting Audio Connection Issues
While setting up audio connections between your TV and external audio devices can greatly enhance your audio experience, it is not uncommon to encounter issues along the way. Here are some common audio connection issues you might face and troubleshooting steps to resolve them:
No Sound:
If you’re not hearing any sound from your external audio device, make sure to check the following:
- Ensure that the audio device is powered on and properly connected to the TV.
- Verify that the volume on both the TV and the audio device is turned up and not muted. Also, check the volume settings on any remote controls associated with the audio device.
- Confirm that the correct audio input or output is selected on both the TV and the audio device, aligning with the connected cables or connections.
- Check if the audio cables are securely plugged into the correct ports on both the TV and the audio device, ensuring a tight and stable connection.
Poor Audio Quality or Distorted Sound:
If you’re experiencing audio quality issues, such as static, distortion, or low-quality sound, consider the following steps:
- Make sure that the audio cables are in good condition, without any frayed wires or loose connections. Replace the cables if necessary.
- Verify that all connections, including HDMI, optical, or RCA, are correctly seated and inserted fully into their respective ports to ensure a secure and stable connection.
- Check if the audio settings on both the TV and the audio device are optimized for the type of connection and audio format being used. Some TVs have audio settings that can be adjusted for optimal sound output.
- Ensure that the audio device or speaker system is set to the appropriate audio mode, such as stereo or surround sound, depending on the content and capabilities of the connected devices.
- Test the audio with different sources or devices to determine if the issue lies with a specific audio source or the TV itself.
No Audio from Specific Source or Device:
If you’re not getting audio from a particular source or device connected to your TV, consider the following steps:
- Double-check the cables and connections to ensure they are properly connected and seated securely.
- Confirm that the audio settings on both the TV and the connected device are configured correctly, including selecting the appropriate audio input or output.
- Ensure that the volume on the connected device is turned up and not muted. Some devices may have independent volume controls that need adjustment.
- Try connecting the source or device to a different available audio input or output on the TV to rule out any issues with the specific port or connection being used.
- Check if there are any software updates available for the TV or the audio device. Updating the firmware or software might resolve compatibility issues.
If you’ve gone through the troubleshooting steps and are still experiencing audio connection issues, consulting the user manuals of your TV and audio devices can provide more detailed troubleshooting instructions. Additionally, reaching out to the manufacturer’s support or seeking assistance from a professional technician may be necessary in more complex situations.
By troubleshooting audio connection issues systematically, you can identify and resolve the problems, ensuring that you can enjoy your audio devices to their fullest potential while watching your favorite content on your TV.
Conclusion
Connecting audio devices to your TV can greatly enhance your entertainment experience by delivering immersive sound and crisp audio quality. Understanding the different audio connection types and knowing where to find the audio outputs on your TV are key factors in achieving optimal audio performance.
In this comprehensive guide, we’ve explored various audio connection options, including the 3.5mm audio jack, RCA audio cables, HDMI audio, coaxial and optical digital audio, and USB audio connections. Each of these connections offers unique benefits and compatibility with different audio devices.
We’ve also discussed the front or side panel audio outputs and rear panel audio outputs commonly found on TVs. These outputs allow you to connect headphones, small speakers, and large audio systems, catering to a wide range of audio preferences and setups.
If you encounter any audio connection issues, troubleshooting steps can help you identify and resolve common problems such as no sound, poor audio quality, or issues with specific audio sources or devices. By employing these troubleshooting techniques, you can enjoy seamless audio connections and optimal sound performance.
Remember to consult your TV’s manual or specifications to ensure compatibility with your desired audio devices and to adjust the audio settings on both your TV and connected audio devices for the best audio experience.
With a solid understanding of audio connections and troubleshooting techniques, you can now confidently connect your audio devices to your TV and create a captivating audio experience that complements your visual entertainment.