Home>Production & Technology>Digital>How To Add Music To The Digital MP3 Player

Digital
How To Add Music To The Digital MP3 Player
Published: March 10, 2024
Learn how to easily add music to your digital MP3 player and enjoy your favorite tunes on the go. Follow our step-by-step guide for a seamless experience.
(Many of the links in this article redirect to a specific reviewed product. Your purchase of these products through affiliate links helps to generate commission for AudioLover.com, at no extra cost. Learn more)
Table of Contents
Introduction
Adding music to your digital MP3 player is a fantastic way to carry your favorite tunes with you wherever you go. Whether you're heading out for a jog, embarking on a road trip, or simply relaxing at home, having a personalized playlist at your fingertips can elevate your mood and enhance your overall experience. In this comprehensive guide, we will walk you through the simple and rewarding process of adding music to your digital MP3 player. By following these steps, you'll be able to curate a collection of songs that resonates with your unique taste and enjoy them on the go.
Music has the incredible ability to uplift our spirits, evoke cherished memories, and set the tone for various activities. With the advancement of technology, digital MP3 players have become indispensable gadgets for music enthusiasts. These compact devices offer a convenient way to store and listen to a vast library of songs, making them an essential companion for music lovers of all ages.
Whether you're a fan of upbeat pop anthems, soothing classical melodies, or energetic rock ballads, the process of adding music to your digital MP3 player remains consistent. By connecting your MP3 player to your computer, transferring your favorite music files, and organizing them to suit your preferences, you can create a personalized soundtrack for every occasion. The beauty of this process lies in its simplicity and the endless possibilities it offers for customizing your music collection.
As we delve into the step-by-step instructions, you'll discover how effortless it is to enrich your digital MP3 player with a diverse range of songs. Whether you're a tech-savvy individual or a novice in the digital realm, this guide is designed to be user-friendly and accessible to all. So, let's embark on this musical journey together and unlock the potential of your digital MP3 player as a gateway to a world of captivating melodies and rhythms.
Step 1: Connect the MP3 Player to Your Computer
Connecting your digital MP3 player to your computer is the initial step in the process of adding music to your device. This simple action establishes a seamless connection between your MP3 player and your computer, allowing for the smooth transfer of music files. Here's a detailed guide on how to accomplish this essential first step:
-
Locate the USB Port: Begin by identifying the USB port on your digital MP3 player. This port is typically located on the device's exterior and is used to establish a connection with your computer.
-
Use a USB Cable: Next, retrieve the USB cable that was included with your MP3 player or a compatible one. The USB cable serves as the bridge between your MP3 player and your computer, enabling data transfer.
-
Connect the USB Cable: Insert one end of the USB cable into the USB port on your digital MP3 player. Ensure that the connection is secure to facilitate a stable data transfer process.
-
Connect to Your Computer: With the USB cable attached to your MP3 player, locate an available USB port on your computer. Carefully insert the opposite end of the USB cable into the USB port on your computer, establishing a physical link between the two devices.
-
Device Recognition: Upon connecting your MP3 player to your computer, your computer should recognize the device and initiate the necessary processes to establish a connection. Depending on your computer's operating system, you may receive a notification indicating that a new device has been connected.
-
Wait for Recognition: In some cases, your computer may take a moment to recognize the newly connected MP3 player. Be patient and allow the system to complete the recognition process.
Once your digital MP3 player is successfully connected to your computer, you are ready to proceed to the next step of transferring music files to your device. This seamless connection paves the way for a hassle-free music transfer process, allowing you to curate a personalized collection of songs on your MP3 player.
Step 2: Transfer Music Files to the MP3 Player
Now that your digital MP3 player is successfully connected to your computer, it's time to embark on the exciting process of transferring music files to your device. This pivotal step allows you to curate a personalized collection of songs that resonates with your musical preferences. Here's a detailed guide on how to seamlessly transfer music files to your digital MP3 player:
-
Locate Your Music Library: Begin by accessing your music library on your computer. Whether you have a dedicated folder for your music files or utilize a music management software, ensure that you can easily navigate to the songs you wish to transfer to your MP3 player.
-
Select Your Desired Music Files: Once you've located your music library, browse through your collection and select the specific music files or playlists that you want to transfer to your MP3 player. This step allows you to handpick the songs that will form the soundtrack of your digital MP3 player.
-
Drag and Drop Method: One of the most straightforward ways to transfer music files is by utilizing the drag and drop method. Simply click and hold the selected music files, then drag them to the icon or folder representing your MP3 player, which should be visible in the file explorer on your computer.
-
Copy and Paste: Alternatively, you can opt for the copy and paste method. Right-click on the selected music files, choose the "Copy" option, navigate to the destination folder representing your MP3 player, and then right-click again to select "Paste." This action will initiate the transfer of your chosen music files to your MP3 player.
-
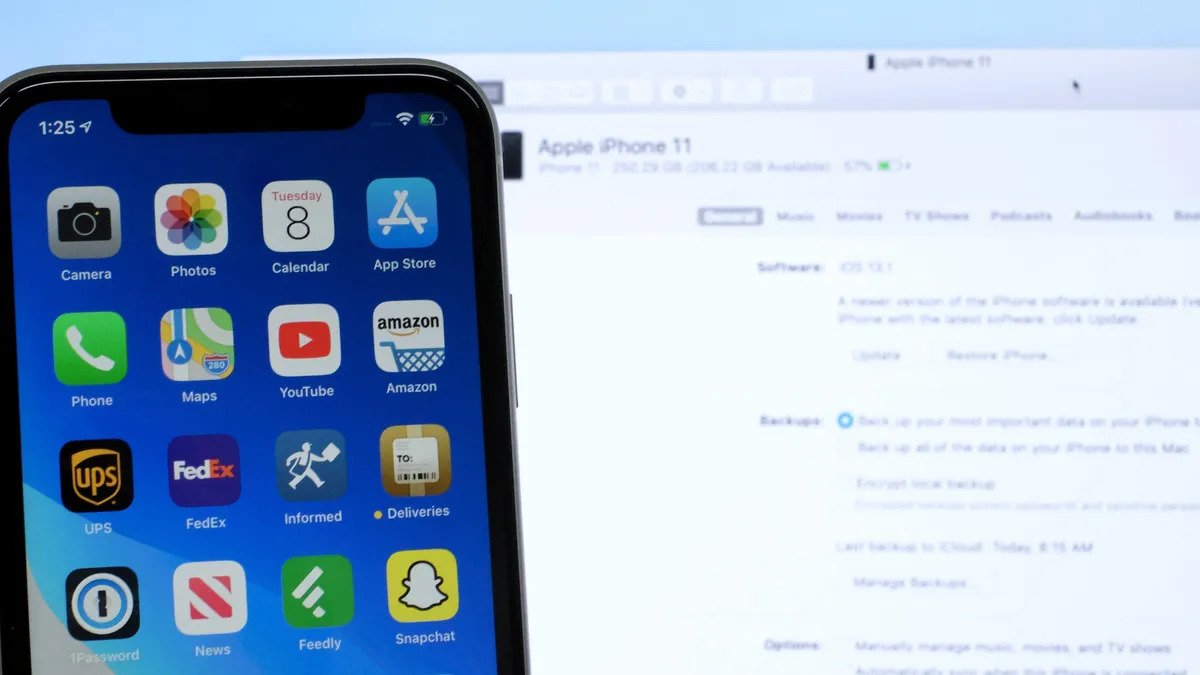
Syncing with Music Management Software: If you use a music management software such as iTunes or Windows Media Player, you can synchronize your music library with your MP3 player. This process involves selecting the desired music files or playlists within the software and initiating the synchronization to transfer the music to your MP3 player.
-
Monitor the Transfer Process: As the music files are being transferred, keep an eye on the progress to ensure that the transfer is completed successfully. Depending on the size of the music files and the transfer speed, this process may take a few moments to complete.
By following these straightforward steps, you can effortlessly transfer your favorite music files to your digital MP3 player, creating a personalized soundtrack that accompanies you on your daily adventures. This seamless transfer process empowers you to curate a diverse and captivating music collection on your MP3 player, ensuring that you always have the perfect song for every moment.
Step 3: Organize Your Music on the MP3 Player
Organizing your music on the MP3 player is a crucial step that allows you to create a seamless and enjoyable listening experience. By arranging your music files in a structured manner, you can easily navigate through your collection and locate your favorite songs with ease. Here's a detailed guide on how to efficiently organize your music on your MP3 player:
-
Create Folders or Playlists: Begin by categorizing your music files into folders or playlists based on your preferences. For example, you can create folders for different genres such as "Pop," "Rock," "Classical," or "Hip-hop," or compile playlists for specific moods or activities such as "Relaxing Evening," "Energetic Workout," or "Road Trip Mix." This organization method allows you to access specific types of music effortlessly.
-
Rename and Tag Your Music Files: To enhance the organization of your music library, consider renaming your music files and adding relevant tags. This can include the artist name, album title, and track number. By standardizing the naming format and adding descriptive tags, you can streamline the process of locating and identifying individual songs.
-
Arrange Music by Artist or Album: If you prefer a more traditional approach, you can organize your music based on the artist or album. This method allows you to browse through your collection based on specific artists or albums, making it convenient to explore the discography of your favorite musicians.
-
Utilize Metadata Editing Software: Consider using metadata editing software to refine the details of your music files. This software allows you to edit and update the metadata, including song titles, artist names, album information, and genre tags. By ensuring accurate and consistent metadata, you can optimize the organization of your music library.
-
Delete Unwanted or Duplicate Files: As you organize your music, take the opportunity to declutter your library by removing any unwanted or duplicate files. This process helps maintain a tidy and efficient music collection, ensuring that you only have the songs you truly enjoy on your MP3 player.
-
Customize Playlist Order: If you've created playlists, take the time to customize the order of songs within each playlist. This allows you to arrange the songs in a sequence that flows seamlessly, creating a cohesive listening experience for each playlist.
By implementing these organizational strategies, you can transform your MP3 player into a well-structured music library that aligns with your musical preferences. This meticulous organization not only enhances the accessibility of your music but also enriches your overall listening experience, allowing you to immerse yourself in a carefully curated selection of songs that resonate with you.
Step 4: Safely Eject the MP3 Player from Your Computer
Safely ejecting your MP3 player from your computer is a crucial final step in the process of adding music to your device. This action ensures that all data transfer processes are completed, and the device is disconnected from your computer without the risk of data corruption or loss. Here's a detailed guide on how to safely eject your MP3 player from your computer:
-
Check for Active Transfers: Before proceeding with the ejection process, ensure that all active transfers of music files to your MP3 player have been completed. This includes verifying that any ongoing synchronization processes or file transfers have finished to prevent data interruption.
-
Close Music Management Software: If you utilized music management software such as iTunes or Windows Media Player for the music transfer process, ensure that the software is closed on your computer. This step prevents any background processes related to the software from interfering with the ejection of your MP3 player.
-
Locate the Eject Option: In your computer's file explorer or desktop, locate the icon representing your MP3 player. Right-click on the icon to reveal a dropdown menu, which typically includes an option to "Eject" or "Safely Remove Hardware." Select this option to initiate the ejection process.
-
Wait for Confirmation: Upon selecting the "Eject" option, your computer will begin the ejection process for your MP3 player. It's essential to wait for the system to confirm that the device can be safely removed. This confirmation indicates that all data transfer processes have been finalized, and it is safe to disconnect the MP3 player from your computer.
-
Physical Disconnection: Once the system provides the confirmation that it is safe to remove the device, carefully disconnect the USB cable from your MP3 player and your computer. Ensure that the disconnection is gentle and avoid applying excessive force to prevent any damage to the USB ports.
-
Store the USB Cable: After safely ejecting your MP3 player, store the USB cable in a secure location for future use. Properly coiling the cable and storing it in a designated area minimizes the risk of damage and ensures that it remains readily available for future connections.
By following these steps to safely eject your MP3 player from your computer, you can conclude the music transfer process with confidence, knowing that your device has been disconnected without compromising the integrity of the data. This final step ensures that your MP3 player is ready to accompany you on your musical journey, filled with the personalized collection of songs that you've curated with care.
Conclusion
In conclusion, the process of adding music to your digital MP3 player is a gratifying endeavor that empowers you to create a personalized soundtrack for every moment of your life. By following the step-by-step guide outlined in this comprehensive article, you have gained the knowledge and confidence to seamlessly enrich your MP3 player with a diverse range of songs that resonate with your unique musical preferences.
The journey begins with the simple act of connecting your MP3 player to your computer, establishing a vital link that facilitates the transfer of music files. This initial step sets the stage for the exciting process of curating a personalized music collection that accompanies you on your daily adventures.
As you transfer your favorite music files to your MP3 player, you have the opportunity to handpick the songs that uplift your spirits, evoke cherished memories, and set the tone for various activities. Whether you opt for the drag and drop method, copy and paste technique, or synchronization with music management software, the transfer process is designed to be user-friendly and adaptable to your preferences.
Once your music files are successfully transferred, the organization of your music library becomes a pivotal aspect of the process. By categorizing your songs into folders, playlists, or arranging them based on artists and albums, you can create a structured music collection that aligns with your musical inclinations. This meticulous organization enhances the accessibility of your music, allowing you to effortlessly navigate through your collection and immerse yourself in the perfect song for every occasion.
Finally, the act of safely ejecting your MP3 player from your computer signifies the completion of the music transfer process. This final step ensures that your device is disconnected without the risk of data corruption, allowing you to embark on your musical journey with confidence and excitement.
As you embrace the process of adding music to your digital MP3 player, you are not merely transferring music files – you are curating a soundtrack that accompanies you through life's moments, big and small. Whether you're seeking motivation during a workout, relaxation during a peaceful evening, or energy during a road trip, your personalized music collection on your MP3 player is poised to elevate your experiences and enrich your daily routines.
In essence, the process of adding music to your digital MP3 player transcends the technical aspects of data transfer – it embodies the art of curating a musical tapestry that reflects your individuality and resonates with your emotions. With each song carefully selected and organized, your MP3 player becomes a vessel of self-expression, carrying the melodies and rhythms that define your unique musical journey.

