Home>Production & Technology>Stereo>How To Solder Car Stereo Wires
Stereo
How To Solder Car Stereo Wires
Modified: January 22, 2024
Learn how to solder car stereo wires with our step-by-step guide. Ensure a secure and reliable connection for your stereo installation. Expert tips and techniques included.
(Many of the links in this article redirect to a specific reviewed product. Your purchase of these products through affiliate links helps to generate commission for AudioLover.com, at no extra cost. Learn more)
Table of Contents
Introduction
Installing a car stereo is an exciting project that can greatly enhance your driving experience. However, to ensure optimal performance and connectivity, it’s essential to properly solder the car stereo wires. Soldering creates a strong and reliable electrical connection, ensuring that the audio signals are transmitted effectively.
Soldering car stereo wires may seem intimidating to some, but with the right tools and techniques, it’s a straightforward process that can be easily accomplished by DIY enthusiasts. In this article, we will guide you through the step-by-step process of soldering car stereo wires, enabling you to achieve a professional and secure connection.
Before we dive into the details, it’s important to note that safety should always be a top priority. Make sure to disconnect the car battery before working on any electrical components to prevent any accidents or damage. Additionally, gather all the necessary tools and materials before starting the soldering process to ensure a smooth and efficient workflow.
So, if you’re ready to upgrade your car audio system and enhance your driving experience, let’s get started on soldering those car stereo wires!
Tools and Materials Needed
Before you begin soldering your car stereo wires, it’s important to gather all the necessary tools and materials. Having everything prepared will ensure a smooth process and help you achieve a professional and secure connection. Here are the essential tools and materials you will need:
- Soldering Iron: Choose a soldering iron with a wattage suitable for automotive wiring. A 40-60 watt soldering iron with a fine tip is recommended.
- Solder: Use rosin-core solder with a diameter of 0.032 inches (0.8mm) or smaller. Make sure to choose solder that is specifically designed for electrical applications.
- Wire Strippers: Get a pair of wire strippers capable of stripping the insulation from the car stereo wires without damaging the underlying conductors.
- Heat Shrink Tubing: Heat shrink tubing provides insulation and protects the soldered connections. Choose tubing with a diameter slightly larger than the wire diameter.
- Heat Gun or Lighter: You will need a heat gun or a lighter to shrink the heat shrink tubing and seal the soldered connections.
- Wire Cutters: Wire cutters will be used to cut the excess wire and ensure a clean and precise connection.
- Electrical Tape: Although optional, electrical tape can provide an additional layer of insulation and protection for the soldered connections.
- Wire Crimpers: In some cases, you may need wire crimpers to secure the soldered connections further. This is especially important if you are working with larger gauge wires.
Make sure that you have a well-ventilated workspace and adequate lighting to ensure safety and accuracy while soldering. It’s also a good idea to have a damp sponge or soldering iron tip cleaner to keep your soldering iron tip clean during the process.
With these tools and materials ready, you’re now equipped to move on to the next steps of soldering your car stereo wires.
Step 1: Prepare the Wires
Before you start soldering, it’s important to prepare the car stereo wires for a clean and secure connection. Follow these steps to properly prepare the wires:
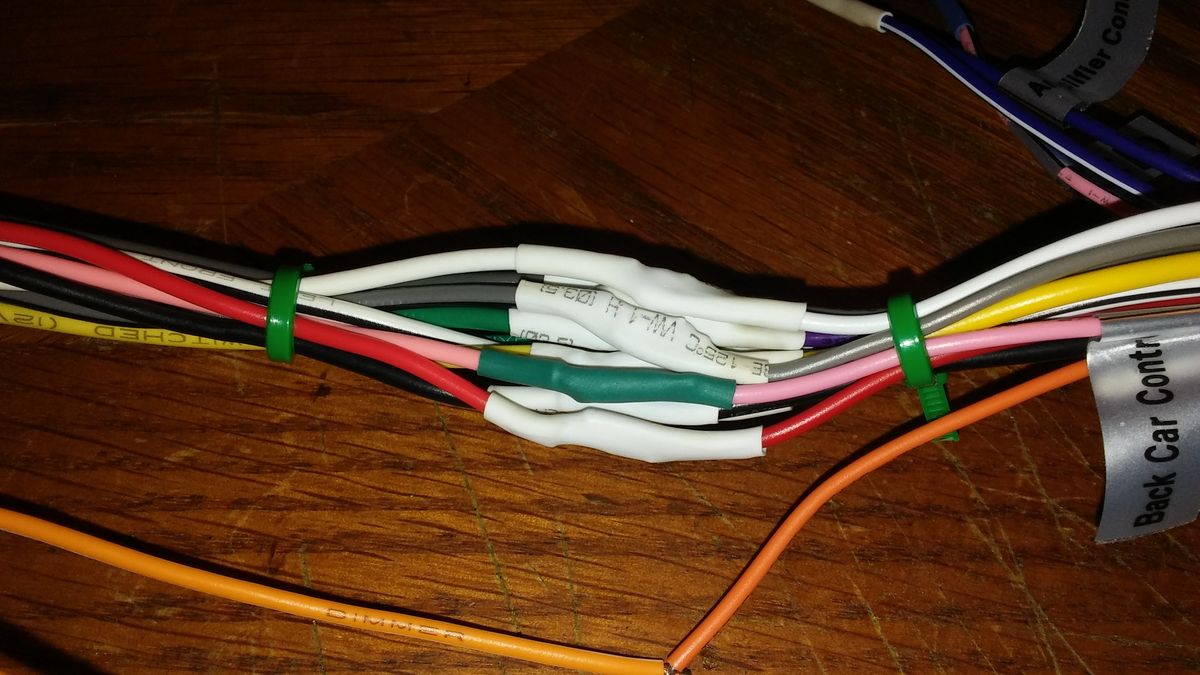
- Identify the wires: Locate the wires coming from both the car stereo and the wiring harness. They are usually color-coded for easy identification. The key here is to match the corresponding wires from both sources.
- Trim the wires: If the wires have any frayed ends or damaged sections, use a pair of wire cutters to trim them. This will ensure a clean connection and prevent any signal loss or short circuits.
- Untangle the wires: Carefully separate and untangle the wires to make them easier to work with. This will minimize the risk of accidentally soldering the wrong wires together.
- Label the wires: If needed, use small adhesive labels or colored markers to label each wire for easy identification later in the process.
- Plan the connections: Study the wiring diagram or instructions provided with your car stereo and wiring harness to understand how the wires need to be connected. Take note of any specific wire connections, such as power, ground, speaker wires, and accessory wires.
By properly preparing the wires, you ensure that the soldering process goes smoothly and that the connections are made accurately. Taking the time to organize and understand the wiring will save you headaches down the line.
Once you have completed these preparatory steps, you are ready to move on to the next step: stripping the wire insulation.
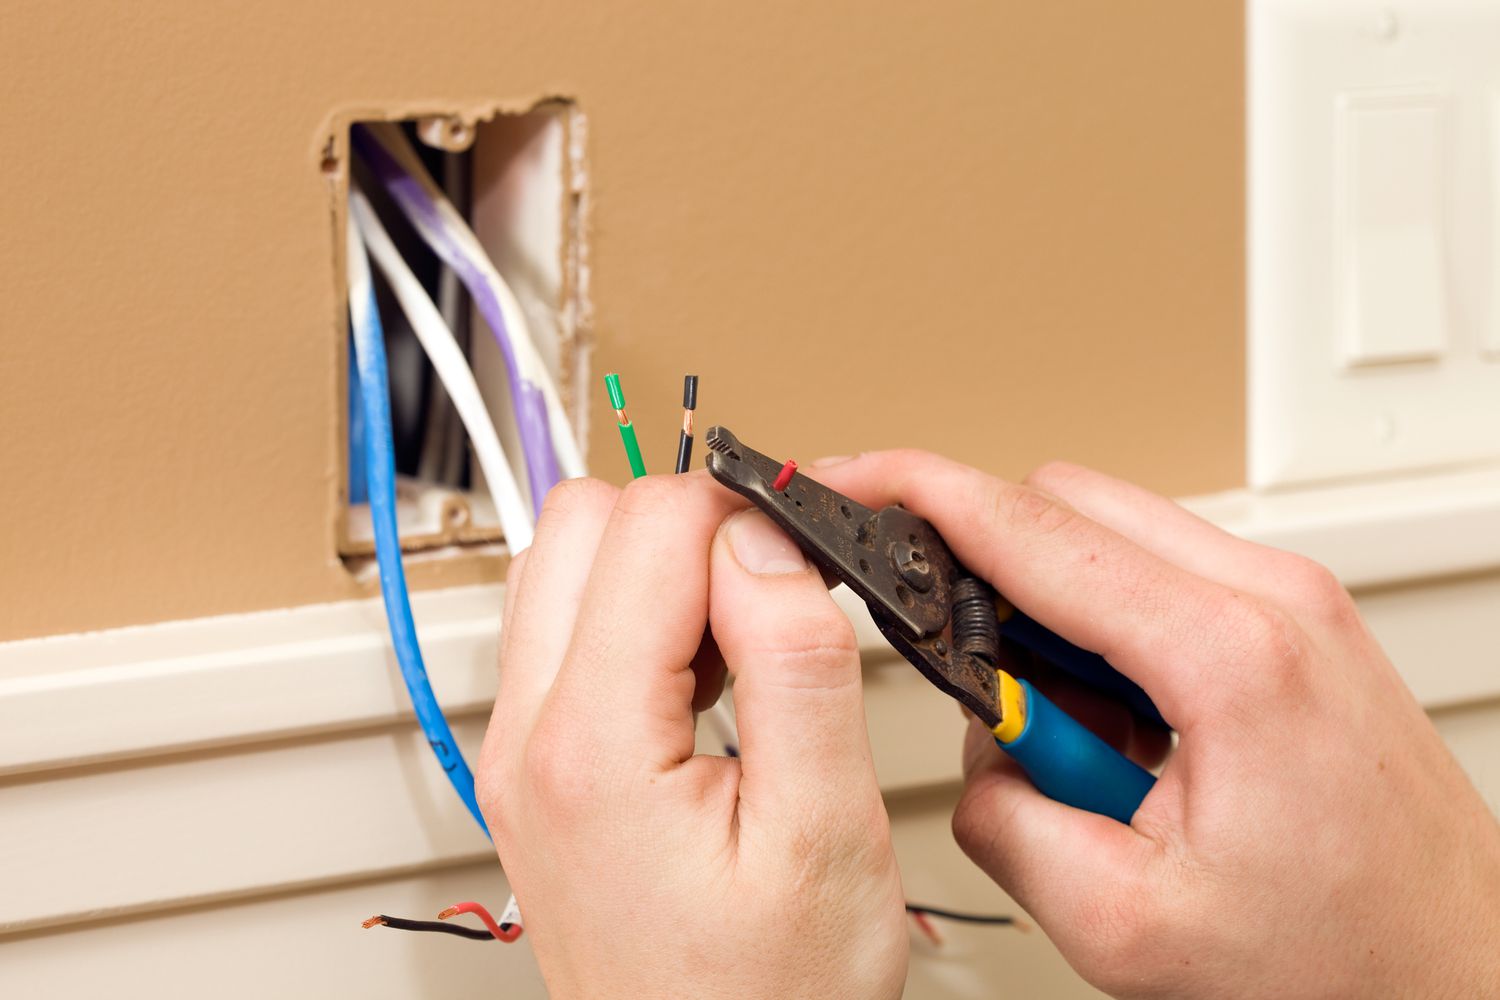
Step 2: Strip the Wire Insulation
Properly stripping the wire insulation is a crucial step in soldering car stereo wires. It allows for a solid electrical connection and ensures that the solder adheres to the conductors effectively. Follow these steps to strip the wire insulation:
- Measure the wire: Determine the length of the exposed wire needed for the soldering connection. Use a ruler or wire strippers with markings to measure accurately.
- Choose the appropriate wire strippers: Select wire strippers that match the gauge of your car stereo wires. They should have a cutting notch and different-sized stripping holes.
- Insert the wire: Place the wire inside the appropriate stripping hole, ensuring that the insulation contacts the notch. Hold the wire and strippers firmly, but without applying excessive force.
- Rotate the strippers: Rotate the strippers around the wire in a circular motion while maintaining a gentle pressure. This will score the insulation without damaging the underlying wire.
- Remove the insulation: Pull the wire stripper towards the end of the wire, away from the insulation side. The insulation should slide off, exposing the clean bare wire underneath. Be careful not to pull too hard or damage the conductor.
- Inspect the stripped wire: Check the stripped section of the wire for any remaining insulation. Use a pair of wire cutters or a wire stripper to remove any remaining insulation, ensuring a clean and exposed wire.
Repeat these steps for each wire that you need to solder. It’s important to strip only the necessary length of wire, as exposing too much can increase the risk of short circuits or unintentional connections.
Once you have stripped the wire insulation, you are ready to move on to tinning the wire ends in the next step.
Step 3: Tin the Wire Ends
Tinning the wire ends is an important step in the soldering process as it pre-coats the wires with solder, making it easier to create a strong and reliable connection. Follow these steps to tin the wire ends:
- Prepare the soldering iron: Plug in the soldering iron and allow it to heat up. Make sure the soldering iron is clean and that the tip is properly tinned.
- Apply flux (optional): If desired, you can apply a small amount of flux to the exposed wire ends. Flux helps improve the flow of solder and enhances the bond between the wires and solder.
- Hold the wire: Hold the wire with a pair of helping hands or a clamp to keep it steady during the tinning process. This will ensure a more precise application of solder.
- Heat the wire: Touch the tip of the soldering iron to the wire near the stripped end. The heat from the soldering iron will transfer to the wire and cause the wire to heat up.
- Apply solder: Once the wire is heated, touch the solder to the exposed wire. The heat will melt the solder, allowing it to flow and coat the wire evenly. Move the solder along the wire, applying enough solder to create a thin, shiny layer.
- Inspect the tinned wire: After applying solder, inspect the tinned wire ends. The solder should evenly coat the exposed wire without any gaps or lumps. If necessary, reapply solder to achieve a smooth and uniform coat.
- Clean the soldering iron: After tinning the wire ends, clean the soldering iron tip by wiping it on a damp sponge or soldering iron tip cleaner. This will remove any excess solder and ensure the tip remains clean for the next step.
Tinning the wire ends prepares them for the soldering process, ensuring a solid and reliable electrical connection. Remember to be careful when using the soldering iron to avoid burns, and always work in a well-ventilated area to minimize exposure to fumes.
With the wire ends properly tinned, you are now ready to move on to the next step: connecting the wires.
Step 4: Connect the Wires
After tinning the wire ends, it’s time to connect the car stereo wires. This step involves joining the corresponding wires from both the car stereo and the wiring harness to establish the electrical connections. Follow these steps to connect the wires:
- Refer to the wiring diagram: Consult the wiring diagram or instructions provided with your car stereo and wiring harness to identify the corresponding wires. Take note of the specific connections such as power, ground, speaker wires, and accessories.
- Match the wires: Match the corresponding wires from the car stereo and wiring harness. Use the labels or color coding you applied earlier to identify the correct wires.
- Twist the wires together: Once you have identified the matching wires, twist them together in a clockwise direction. This will create a secure mechanical connection and ensure there are no loose ends.
- Inspect the connection: After twisting the wires together, visually inspect the connection to ensure that the wires are tightly and securely joined. Make any necessary adjustments to ensure a solid connection.
Connecting the wires is an essential step in the soldering process. It establishes the foundation for a strong and reliable electrical connection, ensuring proper transmission of audio signals.
Once you have connected all the appropriate wires, you are ready to move on to the next step: soldering the wires.
Step 5: Solder the Wires
With the wires securely connected, it’s time to solder them to create a strong and reliable electrical connection. Soldering involves melting solder onto the twisted wire connection, creating a solid bond between the wires. Follow these steps to solder the wires:
- Prepare the soldering iron: Make sure the soldering iron is heated to the appropriate temperature. The tip should be clean and tinned, ready for the soldering process.
- Heat the wire connection: Place the soldering iron tip directly on the twisted wire connection. Allow the heat to transfer to the wires, ensuring they are heated evenly.
- Apply solder: Once the wires are heated, touch the solder to the joint where the wires meet the soldering iron tip. The heat will melt the solder, causing it to flow and coat the wire connection. Apply enough solder to create a smooth, shiny, and uniform fillet around the connection.
- Ensure complete coverage: Move the solder around the joint to ensure complete coverage and optimal electrical conductivity. The solder should fill any gaps between the wires, creating a solid and continuous connection.
- Remove the soldering iron: After soldering, remove the soldering iron from the wire connection. Allow the solder to cool and solidify naturally without disturbing the joint.
It’s important to note that excessive heat or prolonged contact with the soldering iron can damage the wires or melt the insulation. Practice caution and avoid overheating the wires during the soldering process.
Once you have soldered all the wire connections, visually inspect each joint to ensure that the solder is smooth, shiny, and evenly distributed. This will ensure a secure and reliable electrical connection.
With the wires soldered, you are ready to move on to the next step: insulating the connections.
Step 6: Insulate the Connections
Insulating the soldered connections is a crucial step to protect the wires and prevent any short circuits or electrical hazards. Insulation ensures that the connections are secure, provides additional protection against moisture and friction, and helps maintain the integrity of the soldered joints. Follow these steps to properly insulate the connections:
- Cut the heat shrink tubing: Measure and cut a suitable length of heat shrink tubing for each soldered connection. The tubing should be slightly longer than the exposed soldered area.
- Slide the tubing over the connection: Carefully slide the heat shrink tubing over the soldered joint, ensuring that it covers the entire soldered area. Make sure that there is at least 1/4 inch of tubing extending beyond each end of the joint.
- Heat the tubing: Use a heat gun or a lighter to evenly heat the heat shrink tubing. Keep the heat source moving back and forth across the tubing to avoid overheating and ensure even shrinking.
- Allow the tubing to cool: Once heated, allow the tubing to cool and shrink completely. This will create a tight and secure seal around the soldered joint, providing insulation and protection.
Heat shrink tubing is preferred for insulating soldered connections because it forms a reliable and durable seal. As the tubing shrinks, it conforms to the shape of the connection, creating a barrier against moisture and physical damage.
Alternatively, you can use electrical tape to insulate the soldered connections. Wrap the tape tightly and evenly around the joint, ensuring complete coverage and a secure seal. However, keep in mind that electrical tape may not provide the same level of protection as heat shrink tubing.
With the connections properly insulated, you have completed the penultimate step. The only step left is to test the connections to ensure their functionality.
Step 7: Test the Connection
After completing the soldering and insulation process, it’s crucial to test the connections to ensure they are functioning properly before finalizing the installation of your car stereo. Follow these steps to test the connections:
- Reconnect the car battery: If you disconnected the car battery earlier for safety purposes, now is the time to reconnect it.
- Turn on the car stereo: Start your car and turn on the car stereo. Check if the stereo powers on and if the audio is playing correctly.
- Test each function: Test all the functions of your car stereo, including the radio, CD player, auxiliary input, Bluetooth, and any other features unique to your stereo model. Ensure that all functions are working as expected and that the audio quality is satisfactory.
- Check speaker connections: Listen for any distortions, static, or loss of audio quality. If you notice any issues, check the speaker connections and make sure they are securely connected.
- Verify all connections: Inspect all the soldered connections to ensure they are secure and properly insulated. Look for any signs of loose wires, frayed insulation, or exposed solder.
- Make necessary adjustments: If you encounter any issues or notice any abnormalities with the audio or connections, make the necessary adjustments. This may include re-soldering any problematic connections or checking the wiring harness for errors.
Testing the connections ensures that you have successfully soldered and installed your car stereo. It allows you to address any issues or errors before finalizing the installation and ensures optimal performance and functionality.
If you encounter persistent issues that you are unable to resolve yourself, it may be beneficial to seek assistance from a professional car stereo installer or consult the manufacturer’s customer support for further guidance.
Once you have confirmed the functionality and quality of the connections, you can proceed to complete the installation and enjoy your newly upgraded car audio system!
Conclusion
Congratulations! You have successfully learned how to solder car stereo wires, a skill that allows you to upgrade your car audio system and enhance your driving experience. By following the step-by-step process outlined in this article, you have created strong and reliable electrical connections, ensuring optimal transmission of audio signals.
Properly soldering car stereo wires requires attention to detail, the right tools, and a careful approach. From preparing the wires and stripping the insulation to tinning the wire ends and soldering the connections, each step is essential to ensure a secure and long-lasting connection.
Remember to always prioritize safety when working with car electronics. Disconnecting the car battery before starting any electrical work is crucial to prevent accidents or damage to the system.
Testing the connections after soldering is a critical final step. By doing so, you can verify the functionality of your car stereo and address any issues that may arise.
If you encounter difficulties or are unsure about any aspect of the soldering process, it’s always recommended to seek professional assistance. Car audio specialists or professional installers can provide guidance and ensure the best possible outcome.
Now that you have mastered the art of soldering car stereo wires, you can confidently tackle future car audio projects or modifications. Enjoy your upgraded car audio system and the enhanced audio experience it brings while driving!