Home>Production & Technology>Metronome>How To Adjust Maelzel Metronome
Metronome
How To Adjust Maelzel Metronome
Published: January 15, 2024
Learn how to adjust your Maelzel metronome for optimum performance. Improve your music practice with this essential tool.
(Many of the links in this article redirect to a specific reviewed product. Your purchase of these products through affiliate links helps to generate commission for AudioLover.com, at no extra cost. Learn more)
Table of Contents
Introduction
Welcome to this comprehensive guide on how to adjust the Maelzel metronome. Whether you’re a musician, dancer, or performer, a metronome is an invaluable tool for keeping time and maintaining a consistent tempo. The Maelzel metronome, named after its inventor Johann Nepomuk Maelzel, is one of the most iconic and widely used mechanical metronomes.
Adjusting a Maelzel metronome may seem like a daunting task for beginners, but fear not! This guide will walk you through the process step by step, ensuring that you can make the necessary adjustments with ease and precision.
Before we dive into the details, it’s important to understand the significance of the Maelzel metronome. Not only did Maelzel revolutionize the concept of musical timekeeping, but his invention also laid the foundation for modern metronomes that musicians rely on today.
So, whether you’re using a vintage Maelzel metronome or a more contemporary version, understanding how to adjust it will allow you to customize the tempo to your specific needs. Let’s delve into the inner workings of the Maelzel metronome and learn how to make those adjustments.
Understanding the Maelzel Metronome
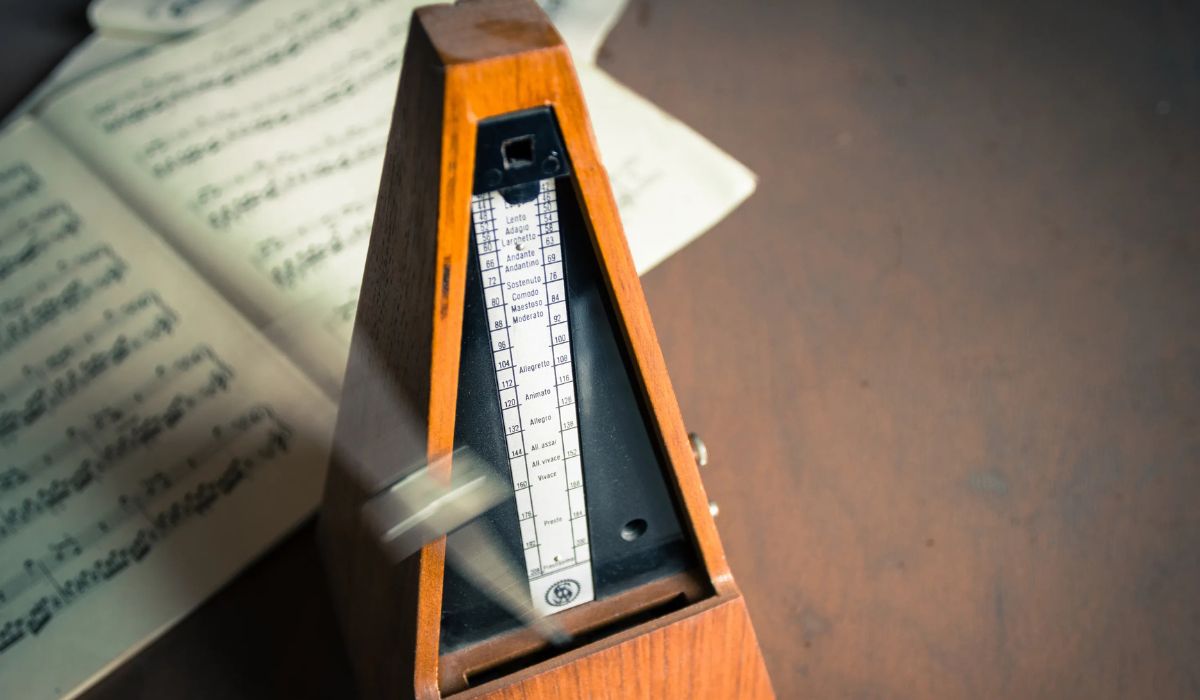
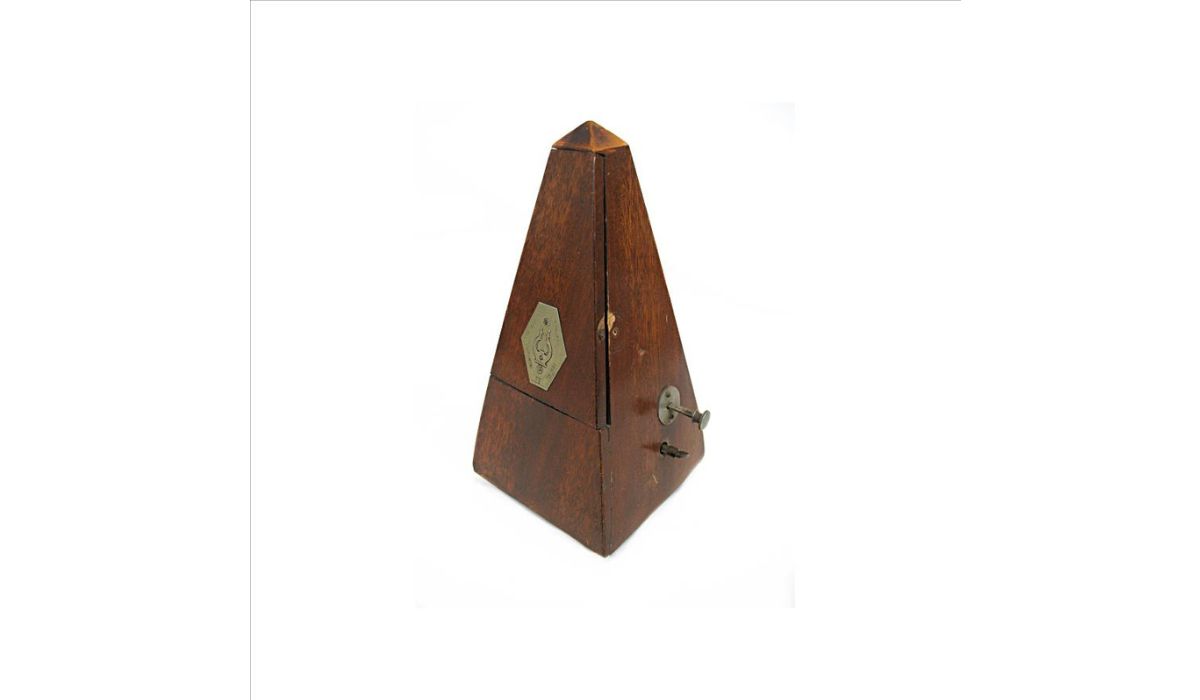
Before we jump into adjusting the Maelzel metronome, it’s essential to have a basic understanding of how it works. The Maelzel metronome consists of a pyramid-shaped wooden case with a pendulum mechanism inside. The pendulum, controlled by a rotating weight, swings back and forth, producing a ticking sound that helps musicians keep time.
One of the key features of the Maelzel metronome is the tempo scale located on the front of the case. This scale allows you to set the desired tempo by aligning the weight with a specific number. The higher the number, the faster the tempo, and vice versa.
It’s important to note that the Maelzel metronome has different tempo ranges depending on the model. Some models have a range of 40 to 208 beats per minute (BPM), while others have a range of 40 to 208 BPM. Make sure to check the tempo range of your specific Maelzel metronome before adjusting it.
Additionally, the Maelzel metronome often features a bell on top, which can be adjusted to ring on specific beats. This helps musicians accentuate certain beats for emphasis, especially in musical compositions where the rhythm is more complex.
Now that we have a basic understanding of the Maelzel metronome let’s move on to the step-by-step process of adjusting it to your desired tempo.
Step 1: Familiarize Yourself with the Parts
Before you can start adjusting the Maelzel metronome, it’s important to become familiar with its various parts. This will ensure that you have a clear understanding of how everything works together and how to make the necessary adjustments.
Let’s take a closer look at the key components of the Maelzel metronome:
- Wooden Case: The pyramid-shaped wooden case houses the inner mechanisms of the metronome. It provides stability and support to the pendulum and weight.
- Pendulum: The pendulum is the swinging arm that controls the tempo of the metronome. It is attached to the rotating weight and swings back and forth, creating the ticking sound.
- Rotating Weight: The rotating weight is a small disc located on the bottom of the pendulum. It can be moved along a scale to adjust the tempo of the metronome. Moving the weight higher on the scale increases the tempo, while moving it lower decreases the tempo.
- Tempo Scale: The tempo scale is a numerical scale located on the front of the metronome case. It is labeled with numbers that correspond to different tempos, typically ranging from 40 to 208 beats per minute (BPM).
- Bell: Some Maelzel metronomes have a bell on top that can be adjusted to ring on specific beats. This is useful for emphasizing certain beats in complex rhythms.
Take a moment to examine each of these parts on your Maelzel metronome. Familiarize yourself with how they function and interact with one another. Understanding the components will make it easier to navigate the adjustment process in the following steps.
Step 2: Setting the Tempo
Once you have familiarized yourself with the parts of the Maelzel metronome, it’s time to set the desired tempo. The tempo is the speed at which the metronome will tick, and it is typically measured in beats per minute (BPM).
To set the tempo on your Maelzel metronome, follow these steps:
- Identify the tempo scale: Look for the numerical scale on the front of the metronome case. This scale is labeled with numbers that correspond to different tempos, ranging from 40 to 208 BPM.
- Select the desired tempo: Determine the tempo you wish to set for your performance. This can depend on the musical piece, your skill level, and personal preference. Locate the corresponding number on the tempo scale.
- Move the rotating weight: Once you have identified the desired tempo on the scale, locate the rotating weight at the bottom of the pendulum. Gently slide the weight up or down the scale to align it with the desired number.
- Lock the weight in place: Some Maelzel metronomes have a locking mechanism to secure the weight in place. If your metronome has a lock, make sure to engage it after setting the tempo to prevent any unintentional movement.
- Test the tempo: After setting the tempo, give the pendulum a gentle push to start the metronome. Listen to the ticking sound and observe the swinging motion of the pendulum. Ensure that the tempo matches your desired speed. If needed, make minor adjustments to the rotating weight to fine-tune the tempo.
By following these steps, you can accurately set the tempo on your Maelzel metronome to align with your performance requirements. Remember to take your time and make any necessary adjustments to achieve the desired tempo before moving on to the next step.
Step 3: Adjusting the Weight
After setting the tempo on your Maelzel metronome, you may find that further adjustments are needed to fine-tune the accuracy and stability of the ticking motion. This is where adjusting the weight comes into play. By manipulating the position of the rotating weight, you can affect the swing and overall performance of the metronome.
To adjust the weight on your Maelzel metronome, follow these steps:
- Identify the rotating weight: Locate the small disc attached to the bottom of the pendulum. This is the rotating weight that can be moved along the scale.
- Observe the swing: Start the metronome and observe the motion of the pendulum. Pay attention to the arc of the swing and the consistency of the ticking sound.
- Move the weight: If you notice any irregularities in the swing or ticking, make small adjustments to the rotating weight. Slide it slightly up or down the scale and observe how it affects the motion and sound of the metronome. Experiment with different positions to find the most stable and accurate setting.
- Test the adjustments: After each adjustment, give the pendulum a gentle push and listen for any changes in the ticking sound. Observe the swing to ensure that it is even and consistent.
- Fine-tune if necessary: If you’re still not satisfied with the performance of the metronome, continue making small adjustments to the weight until you achieve the desired results. Patience and experimentation may be needed to find the optimal position.
Remember, the goal of adjusting the weight is to enhance the stability and accuracy of the metronome’s ticking motion. Take your time, make small adjustments, and test the results to ensure that your Maelzel metronome is functioning at its best.
Step 4: Testing and Fine-tuning
Once you have set the tempo and adjusted the weight on your Maelzel metronome, it’s time to put it to the test. Testing and fine-tuning the metronome will ensure that it is functioning accurately and providing the desired rhythm for your practice sessions or performances.
Follow these steps to test and fine-tune your Maelzel metronome:
- Start the metronome: Give the pendulum a gentle push to start the metronome. Observe the swinging motion and listen to the ticking sound.
- Compare with a reliable timing device: Use another reliable timing device, such as a digital metronome, a smartphone app, or a reference recording, to compare the tempo of your Maelzel metronome. Adjust the rotating weight if necessary to align the ticking sound with the reference timing.
- Listen for consistency: Pay attention to the ticking sound of the metronome. It should be consistent and steady throughout the entire range of tempos. If you notice any inconsistencies, such as skipping beats or variations in speed, make further adjustments to the rotating weight until the metronome remains stable.
- Test with musical passages: Practice playing different musical passages or exercises while following the metronome’s rhythm. Observe your ability to stay in sync with the metronome and make note of any difficulties or discrepancies. Adjust the tempo or weight positioning as needed to improve your accuracy and synchronization.
- Refine your adjustments: Fine-tune the metronome settings based on your personal preferences and the requirements of the music you’re practicing. Experiment with different tempos, accents, and musical styles to find the perfect balance that suits your needs.
Don’t be afraid to make multiple adjustments and test the metronome thoroughly. The goal is to have a reliable and accurate timing device that helps you develop a strong sense of rhythm and precision in your musical performances or practice sessions.
Remember, the process of testing and fine-tuning may require some trial and error. It’s important to remain patient and persistent as you work towards finding the optimal settings for your Maelzel metronome.
Conclusion
Congratulations! You have successfully learned how to adjust the Maelzel metronome. By following the step-by-step process outlined in this guide, you now have the knowledge and skills to set the tempo, adjust the weight, and fine-tune the performance of your metronome.
Using a metronome is an excellent practice tool for musicians of all levels. It helps develop a sense of timing, improves rhythmic accuracy, and enhances musical performances. With your Maelzel metronome properly adjusted, you can confidently practice and perform with precision.
Remember to familiarize yourself with the different parts of the metronome, such as the wooden case, pendulum, rotating weight, tempo scale, and bell (if applicable). Understanding how these components work together will enable you to make the necessary adjustments smoothly.
Setting the tempo on your Maelzel metronome allows you to customize the speed at which it ticks. By aligning the rotating weight with the desired number on the tempo scale, you can achieve the tempo that best suits your musical needs.
Adjusting the weight of the metronome further refines its performance. By experimenting with the position of the weight, you can enhance the stability and accuracy of the ticking motion, ensuring a more reliable and consistent rhythm.
Finally, always thoroughly test and fine-tune your Maelzel metronome. Comparing it with other timing devices, listening for consistency, and practicing with musical passages will help you refine your adjustments and achieve optimal results.
Now that you have mastered the art of adjusting the Maelzel metronome, go ahead and put your newfound knowledge into practice. Enjoy the benefits of enhanced rhythmic precision, improved timing, and a more polished musical performance. Happy practicing!