Home>Devices & Equipment>Yamaha>How To Connect Samsung TV To Yamaha Receiver

Yamaha
How To Connect Samsung TV To Yamaha Receiver
Modified: January 22, 2024
Learn how to easily connect your Samsung TV to your Yamaha receiver. Enhance your audio experience with seamless integration and enjoy high-quality sound.
(Many of the links in this article redirect to a specific reviewed product. Your purchase of these products through affiliate links helps to generate commission for AudioLover.com, at no extra cost. Learn more)
Table of Contents
Introduction
Connecting your Samsung TV to a Yamaha receiver opens up a world of possibilities for enhancing your home entertainment experience. The Yamaha receiver acts as the central hub, allowing you to enjoy immersive sound and access a wide range of audio sources.
Whether you want to enjoy the thrilling surround sound of movies, play your favorite music through high-quality speakers, or simply improve the overall audio performance of your TV, connecting it to a Yamaha receiver is a straightforward process.
In this article, we’ll guide you through the steps to connect your Samsung TV to a Yamaha receiver, ensuring that you can take full advantage of its capabilities. We’ll cover multiple connection options and provide helpful tips to optimize your audio setup.
Before we dive into the steps, it’s important to ensure that your Samsung TV and Yamaha receiver are compatible. Check the model numbers and specifications of both devices to confirm compatibility. It’s also worth noting that the methods described here are applicable to most Samsung TVs and Yamaha receivers, but there may be slight differences depending on the specific models.
Now that we have the basics covered, let’s explore the different ways you can connect your Samsung TV to a Yamaha receiver and elevate your audio experience to new heights.
Step 1: Check the compatibility
Before you begin the connection process, it’s important to ensure that your Samsung TV and Yamaha receiver are compatible with each other. Compatibility ensures proper communication between the devices and optimal audio performance.
To check compatibility, start by identifying the model numbers of your Samsung TV and Yamaha receiver. You can find this information on the respective device’s user manuals or by checking the labels on the back of the devices. Once you have the model numbers, visit the official websites of Samsung and Yamaha to find detailed specifications for each device.
Look for compatibility features such as HDMI ARC (Audio Return Channel) support, HDMI CEC (Consumer Electronics Control), and audio decoding capabilities. HDMI ARC allows the audio signal to be sent from the TV to the receiver through a single HDMI cable, simplifying the setup. HDMI CEC enables control of multiple devices through a single remote control. Audio decoding capabilities determine the types of audio formats that the receiver can handle.
If both your Samsung TV and Yamaha receiver have HDMI ARC and HDMI CEC support, connecting them will be much easier. However, even if your devices don’t have these features, there are other connection options available, such as digital optical or RCA cables.
It’s worth noting that while compatibility is important, it doesn’t necessarily mean that you can’t connect your Samsung TV and Yamaha receiver if they don’t have all the desired features. In such cases, you may need to make certain compromises or use additional adapters to establish the connection.
Once you have confirmed compatibility between your Samsung TV and Yamaha receiver, you can proceed to the next step of the connection process.
Step 2: Connect via HDMI
If your Samsung TV and Yamaha receiver have HDMI ARC (Audio Return Channel) support, connecting them using an HDMI cable is the most convenient and streamlined option. HDMI ARC allows the TV to send audio signals to the receiver, eliminating the need for multiple cables and simplifying the setup process.
To connect via HDMI, follow these steps:
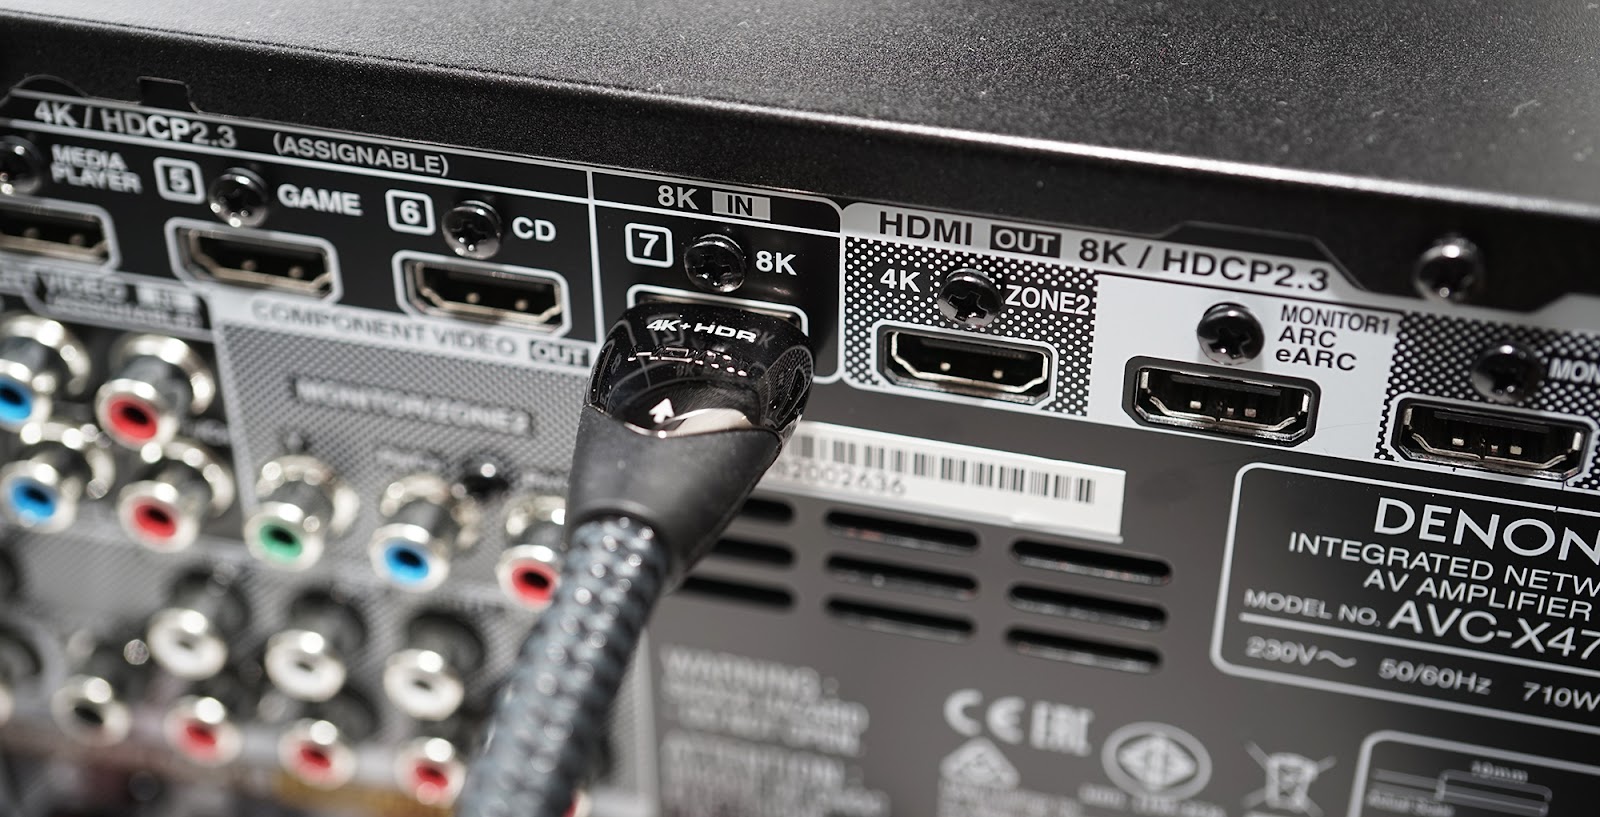
- Locate the HDMI ARC port on both your Samsung TV and Yamaha receiver. This port is usually labeled as “ARC” or “HDMI ARC”.
- Connect one end of a high-quality HDMI cable to the HDMI ARC port on your TV and the other end to the HDMI ARC port on your Yamaha receiver. Ensure that the cable is securely plugged in.
- On your Samsung TV, go to the settings menu and navigate to the audio settings. Look for options related to HDMI and audio output. Enable the HDMI ARC feature if it’s not already turned on.
- Using your TV’s remote control, select the HDMI input that is connected to the Yamaha receiver. This may be labeled as “HDMI ARC” or “Audio System” on your TV’s input menu.
- Power on your Yamaha receiver and switch it to the appropriate input source for the HDMI connection. Some receivers may automatically detect the HDMI ARC input, while others may require manual input selection.
- Once the TV and receiver are connected, the audio output from your TV should now be redirected to the Yamaha receiver. Adjust the volume on the receiver to your desired level and enjoy high-quality sound through your connected speakers.
It’s important to note that not all HDMI ports on your TV may support ARC. Make sure you are using the designated ARC-compatible HDMI port. If you encounter any issues, consult the user manuals of your TV and receiver for specific instructions or troubleshooting steps.
Connecting your Samsung TV to a Yamaha receiver via HDMI ARC is a convenient and efficient method that allows for seamless audio integration. However, if your devices do not have HDMI ARC support, don’t worry. There are alternative connection options that we’ll explore in the upcoming steps.
Step 3: Configure the audio settings
After successfully connecting your Samsung TV to the Yamaha receiver, it’s important to configure the audio settings to ensure optimal sound performance and compatibility.
Here are the steps to configure the audio settings:
- Using your TV’s remote control, access the settings menu and navigate to the audio settings. Look for options related to audio output, sound, or audio format.
- Select the appropriate audio output option. This may be labeled as “External Speakers,” “Audio System,” or “Receiver.” By selecting this option, you direct the audio output of the TV to the connected Yamaha receiver.
- Some TVs allow you to choose the audio format. If your receiver supports advanced audio codecs such as Dolby Atmos or DTS:X, select the highest available audio format for the best audio experience.
- Explore additional audio settings on your TV to further customize the sound output. Adjustments such as equalizer settings, surround sound effects, or volume normalization can enhance your audio experience.
Once you have configured the audio settings on your TV, it’s time to make sure the Yamaha receiver is also set up correctly:
- Access the receiver’s settings menu using the remote control or the front panel display.
- Navigate to the audio settings or setup options of the Yamaha receiver.
- Ensure that the input source is correctly set to the HDMI input connected to your TV.
- Adjust any audio settings on the receiver such as speaker configurations, volume levels, or additional audio processing features according to your preferences.
By configuring both your Samsung TV and Yamaha receiver, you ensure that the audio signals are properly transmitted and processed, resulting in an immersive and optimized audio experience.
Keep in mind that the specific menu options and settings may vary depending on your TV and receiver models. Consult the user manuals or online guides for detailed instructions if you encounter any difficulties during the configuration process.
With the audio settings properly configured, you’re now ready to enjoy the enhanced sound quality and immersive experience provided by the Samsung TV and Yamaha receiver connection.
Step 4: Connect via digital optical cable
If your Samsung TV and Yamaha receiver don’t have HDMI ARC compatibility, or if you prefer an alternative connection method, you can use a digital optical cable to establish the audio connection between the devices.
To connect via a digital optical cable, follow these steps:
- Locate the digital optical output port on your Samsung TV and the digital optical input port on your Yamaha receiver. These ports are typically labeled as “Optical,” “S/PDIF,” or “TOSLINK.”
- Connect one end of the digital optical cable to the digital optical output port on your TV and the other end to the digital optical input port on your Yamaha receiver. Insert the cable firmly into each port to ensure a secure connection.
- On your Samsung TV, access the settings menu and navigate to the audio settings. Look for options related to audio output or audio format. Select the digital optical output option to direct the audio signal to the connected Yamaha receiver.
- Power on your Yamaha receiver and switch it to the appropriate input source for the digital optical connection. This input may be labeled as “Optical,” “S/PDIF,” or “TOSLINK.”
- If necessary, make any adjustments to the audio settings on your TV and Yamaha receiver to optimize the sound output. This may include selecting the appropriate audio format or adjusting volume levels.
Once the digital optical cable is connected and the settings are configured, the audio from your Samsung TV will be transmitted to the Yamaha receiver. The receiver will then process the audio and deliver it to your speakers, resulting in improved sound quality and audio performance.
It’s important to note that a digital optical connection supports standard audio formats such as stereo PCM (pulse-code modulation) and Dolby Digital. However, it does not support advanced audio formats like Dolby Atmos or DTS:X. If you desire these formats, you may need to consider alternative connection options, such as HDMI or RCA cables.
Verify the compatibility and availability of digital optical ports on both your TV and receiver before opting for this method. If either device lacks a digital optical port, consider using a different connection option.
By connecting your Samsung TV to the Yamaha receiver via a digital optical cable, you can enjoy enhanced sound quality and elevate your audio experience.
Step 5: Connect via RCA cables
If your Samsung TV and Yamaha receiver do not have HDMI ARC or digital optical compatibility, another option to establish the audio connection is by using RCA cables.
RCA cables, also known as composite cables, consist of three connectors: red for the right audio channel, white for the left audio channel, and yellow for video (which is not required for audio connection). While RCA cables are not capable of transmitting high-resolution audio formats, they can still provide a reliable connection for stereo audio.
To connect via RCA cables, follow these steps:
- Identify the RCA output ports on your Samsung TV. These are usually color-coded as red and white or labeled as “Audio Out.”
- Locate the RCA input ports on your Yamaha receiver. Again, these are typically color-coded or labeled as “Audio In.”
- Connect the red RCA cable to the red output port on your TV and the corresponding red input port on your Yamaha receiver. Connect the white RCA cable in the same way.
- Ensure that the RCA cables are securely inserted into the ports to establish a stable connection.
- On your Samsung TV, go to the audio settings menu and select the appropriate audio output option to direct the sound to the connected Yamaha receiver.
- Power on your Yamaha receiver and select the corresponding input source that matches the RCA connection.
- If necessary, adjust the audio settings on both your TV and Yamaha receiver, such as selecting the stereo audio mode or adjusting volume levels.
Once the RCA cables are connected and the settings are configured, the audio from your Samsung TV will be transmitted to the Yamaha receiver. The receiver will amplify and deliver the audio to your speakers, providing an improved audio experience.
It’s important to note that RCA cables support basic stereo audio and do not transmit surround sound formats or high-definition audio. If you want to experience more immersive audio formats like Dolby Digital or DTS, consider using alternative connection methods like HDMI or digital optical cables.
Ensure that both your TV and receiver have RCA input and output ports before using this method. If either device lacks these ports, explore other connection options.
By connecting your Samsung TV to the Yamaha receiver via RCA cables, you can still enjoy enhanced sound quality and a more immersive audio experience.
Step 6: Test the connection
After connecting your Samsung TV to the Yamaha receiver using your preferred method – HDMI, digital optical, or RCA cables – it’s essential to test the connection to ensure proper audio transmission and functionality.
Here are some steps to test the connection:
- Ensure that both your Samsung TV and Yamaha receiver are powered on.
- Select an audio source on your TV, such as a DVD player, game console, or streaming device, and play audio content.
- Using the Yamaha receiver remote control, select the input source that corresponds to the connected TV. For example, if you connected the TV to the HDMI ARC input, select that input source on the receiver.
- Adjust the volume on the Yamaha receiver to an appropriate level.
- Verify that audio is being transmitted from the TV to the receiver and that it is playing through the connected speakers. You should hear clear, high-quality sound without any distortion or audio lag.
- If you are using a surround sound system, test all the speakers individually to ensure they are all properly connected and producing sound.
- Experiment with different audio sources, such as movies, music, or TV shows, to ensure that the audio is consistently transmitted and received correctly.
If you encounter any issues during the testing process, such as no sound or poor audio quality, there are a few troubleshooting steps you can try:
- Check that all cables are securely connected and in good condition.
- Ensure that the volume levels on both the TV and Yamaha receiver are properly adjusted.
- Verify that the audio settings on both devices are correctly configured.
- If using HDMI ARC, make sure that the HDMI ARC feature is enabled on both the TV and receiver.
- Refer to the user manuals of your Samsung TV and Yamaha receiver for specific troubleshooting steps and guidance.
By thoroughly testing the connection, you can ensure that your Samsung TV and Yamaha receiver are working seamlessly together, delivering high-quality audio that enhances your home entertainment experience.
Conclusion
Connecting your Samsung TV to a Yamaha receiver opens up a world of audio possibilities, enhancing your home entertainment experience with immersive sound and improved audio performance. By following the steps outlined in this article, you can establish a seamless audio connection between the two devices.
First, ensure compatibility by checking the model numbers and specifications of your Samsung TV and Yamaha receiver. Determine if they have HDMI ARC, digital optical, or RCA compatibility, and select the appropriate connection method.
If your devices have HDMI ARC support, connecting them with an HDMI cable is the most convenient option. Simply plug the HDMI cable into the respective ARC ports, configure the audio settings on the TV and receiver, and enjoy high-quality sound through your connected speakers.
If HDMI ARC is not available, you can opt for a digital optical cable connection. Connect the cable from the optical output on your TV to the optical input on your receiver, and configure the audio settings accordingly.
Alternatively, you can use RCA cables by connecting the red and white plugs from the TV’s audio output to the corresponding input on the Yamaha receiver. Ensure the cables are securely connected, and adjust the audio settings for optimal sound output.
Once the connection is established, configure the audio settings on both devices to ensure proper audio transmission and optimize your audio experience. Finally, test the connection by playing audio content and verifying that sound is coming from the connected speakers without any issues.
By connecting your Samsung TV to a Yamaha receiver, you unlock the full potential of your audio setup, whether it’s enjoying immersive surround sound for movies or listening to your favorite music with enhanced clarity. Select the connection method that suits your devices’ compatibility and preferences, and explore the world of superior audio quality.
Remember, if you encounter any difficulties during the connection process, consult the user manuals of your Samsung TV and Yamaha receiver for specific instructions or troubleshooting steps. With a little patience and attention, you’ll be able to enjoy an exceptional audio experience that brings your entertainment to life.

