Home>Devices & Equipment>Yamaha>How To Connect Klipsch Subwoofer To Yamaha Receiver
Yamaha
How To Connect Klipsch Subwoofer To Yamaha Receiver
Modified: February 18, 2024
Learn how to easily connect your Klipsch subwoofer to your Yamaha receiver for immersive sound. Follow our step-by-step guide and enhance your audio experience today.
(Many of the links in this article redirect to a specific reviewed product. Your purchase of these products through affiliate links helps to generate commission for AudioLover.com, at no extra cost. Learn more)
Table of Contents
- Introduction
- Compatibility between Klipsch Subwoofer and Yamaha Receiver
- Before Connecting the Klipsch Subwoofer to Yamaha Receiver
- Step-by-Step Guide: Connecting Klipsch Subwoofer to Yamaha Receiver
- Adjusting the Settings on Yamaha Receiver for Klipsch Subwoofer
- Troubleshooting Tips for Subwoofer Connectivity Issues
- Conclusion
Introduction
Welcome to our comprehensive guide on how to connect a Klipsch subwoofer to a Yamaha receiver. If you’re an audiophile or a music enthusiast, you know how crucial a subwoofer is for enhancing the low-frequency response of your audio system. Klipsch, a renowned brand in the audio industry, offers a range of powerful and high-quality subwoofers, while Yamaha receivers are known for their exceptional audio performance and versatility.
In this article, we will walk you through the process of connecting your Klipsch subwoofer to a Yamaha receiver, ensuring that you can fully enjoy the immersive audio experience that these two top-notch brands can deliver when combined. We will provide you with a step-by-step guide, as well as tips for adjusting the settings on your Yamaha receiver to optimize the performance of your Klipsch subwoofer.
Before we dive into the technical aspects, it’s important to note that the compatibility between your Klipsch subwoofer and Yamaha receiver will play a vital role in achieving a seamless and efficient connection. It is always recommended to check the specifications and features of both devices to ensure compatibility.
In the sections below, we will cover the necessary preparations you need to make before connecting your Klipsch subwoofer to your Yamaha receiver. We will also guide you through the connection process, step by step, to ensure a hassle-free setup. Additionally, we will provide troubleshooting tips to help you address any connectivity issues that may arise.
So, whether you’re a seasoned audiophile or just starting your journey into the world of high-quality audio, let’s get started on how to connect your Klipsch subwoofer to your Yamaha receiver and unlock a whole new level of audio enjoyment.
Compatibility between Klipsch Subwoofer and Yamaha Receiver
Before connecting your Klipsch subwoofer to your Yamaha receiver, it is essential to ensure compatibility between the two devices. While Klipsch subwoofers and Yamaha receivers are generally designed to work together seamlessly, it is always a good idea to double-check the specifications and features of both devices.
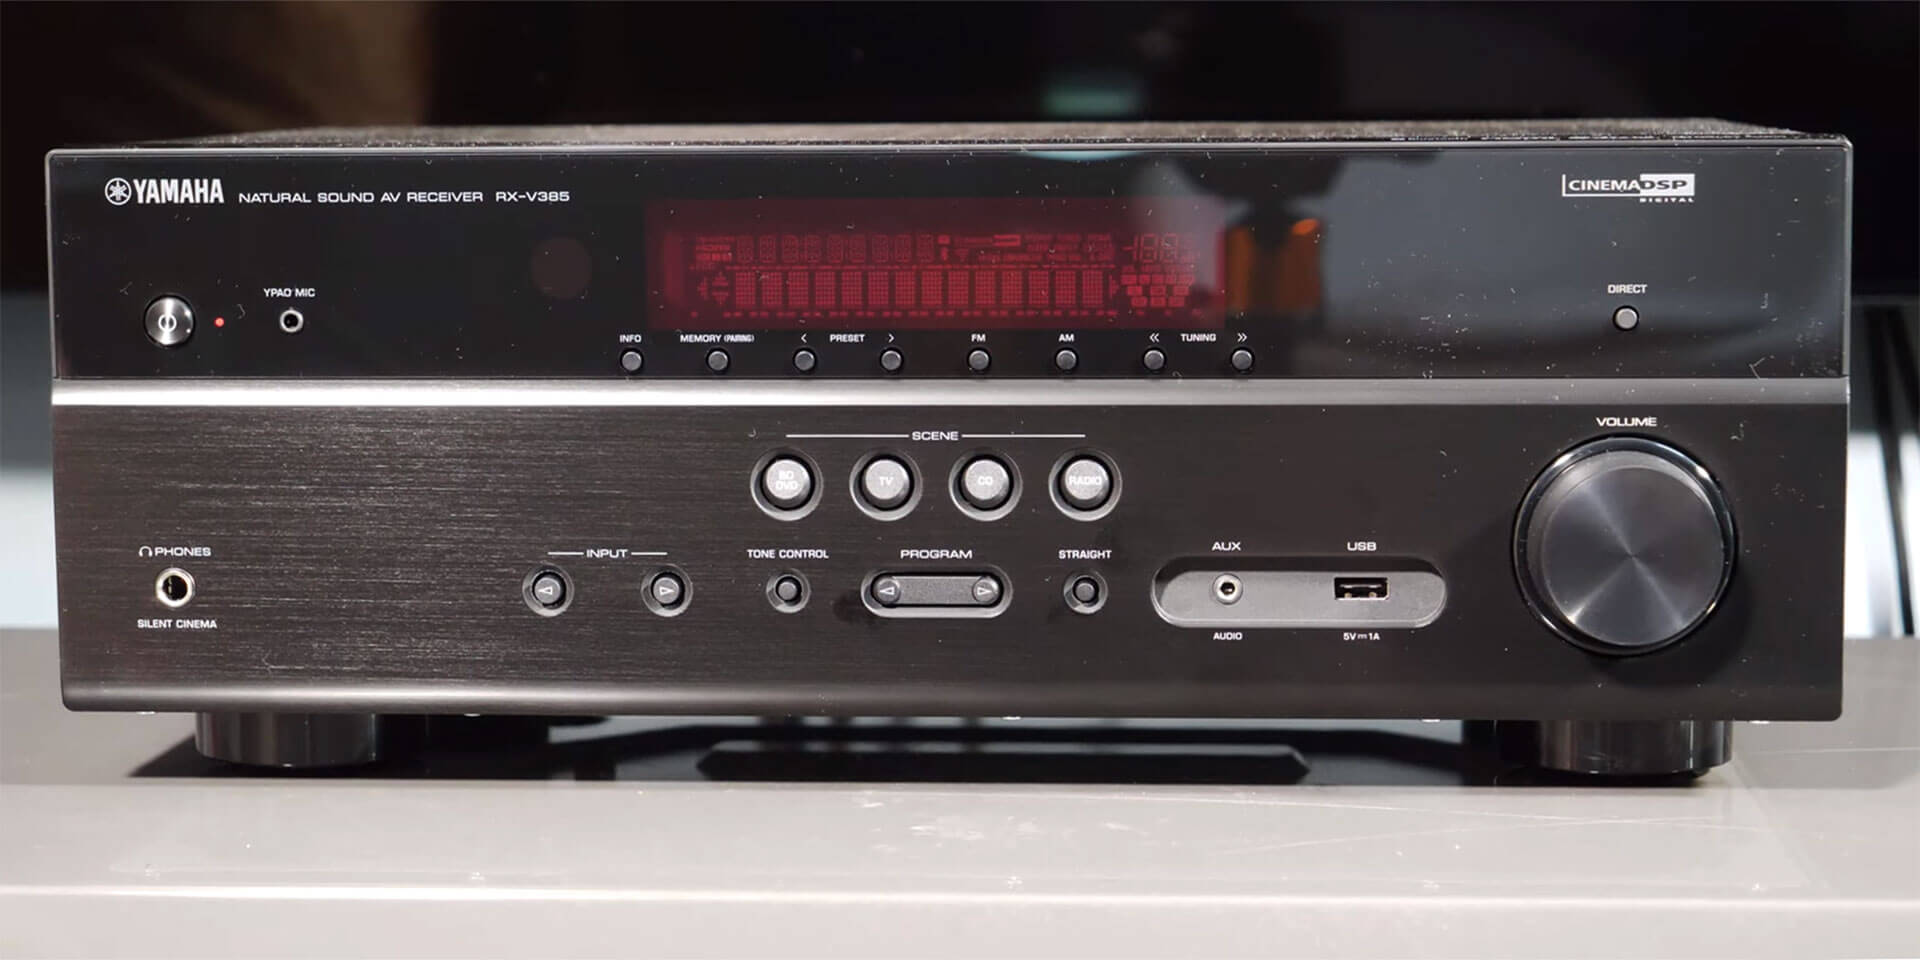
First, make sure that your Yamaha receiver has a dedicated subwoofer output or a preamp output labeled “Sub Out.” This is where you will connect the Klipsch subwoofer. Most Yamaha receivers have this feature, but it’s worth confirming before proceeding.
Next, consider the power requirements of the Klipsch subwoofer and the power output capabilities of your Yamaha receiver. It is crucial to ensure that the receiver can supply adequate power to the subwoofer without compromising the audio quality. Refer to the user manuals of both devices to determine the power compatibility.
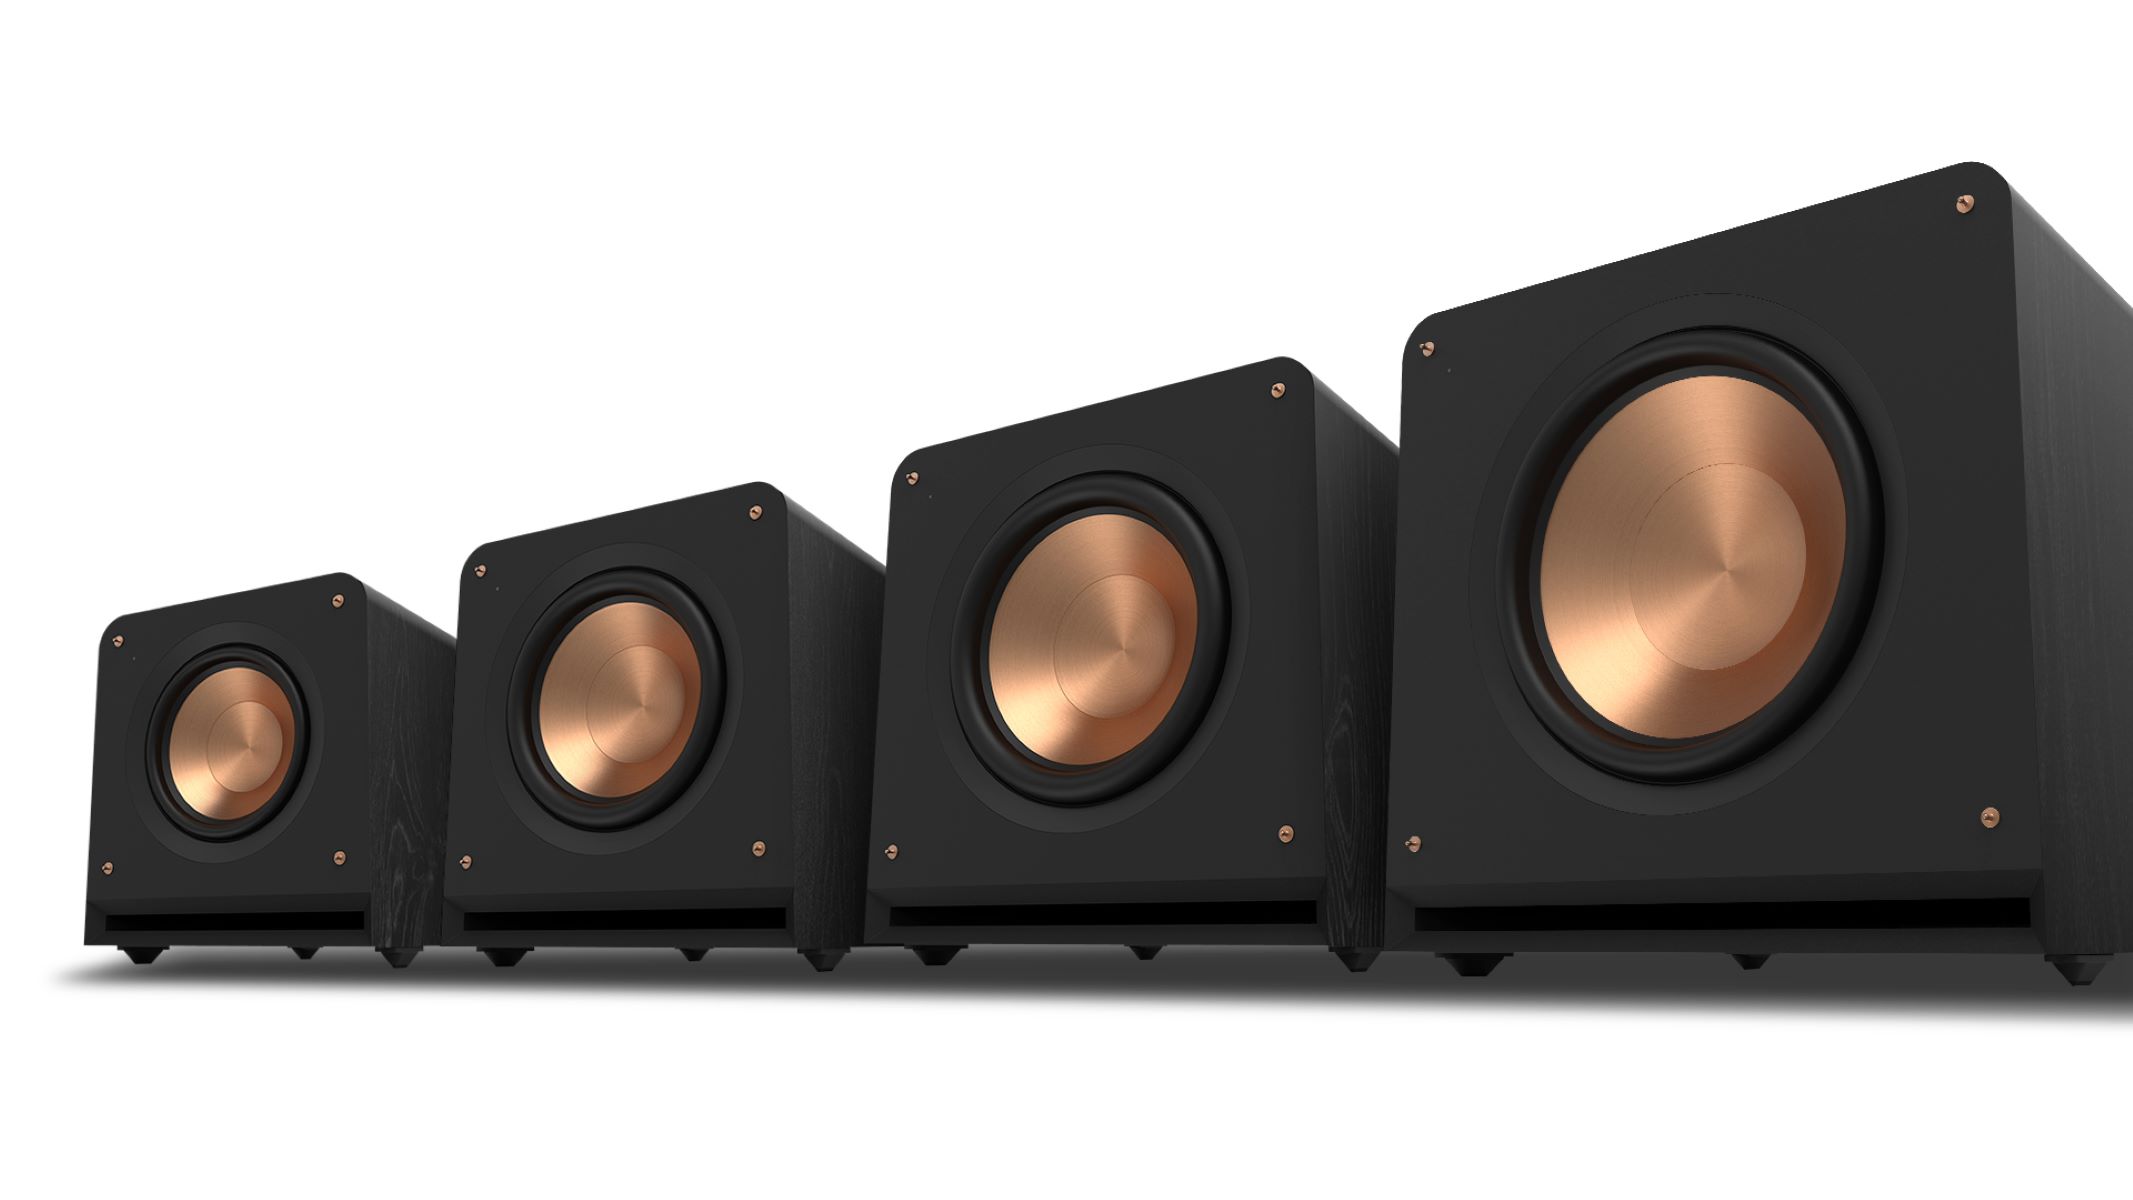
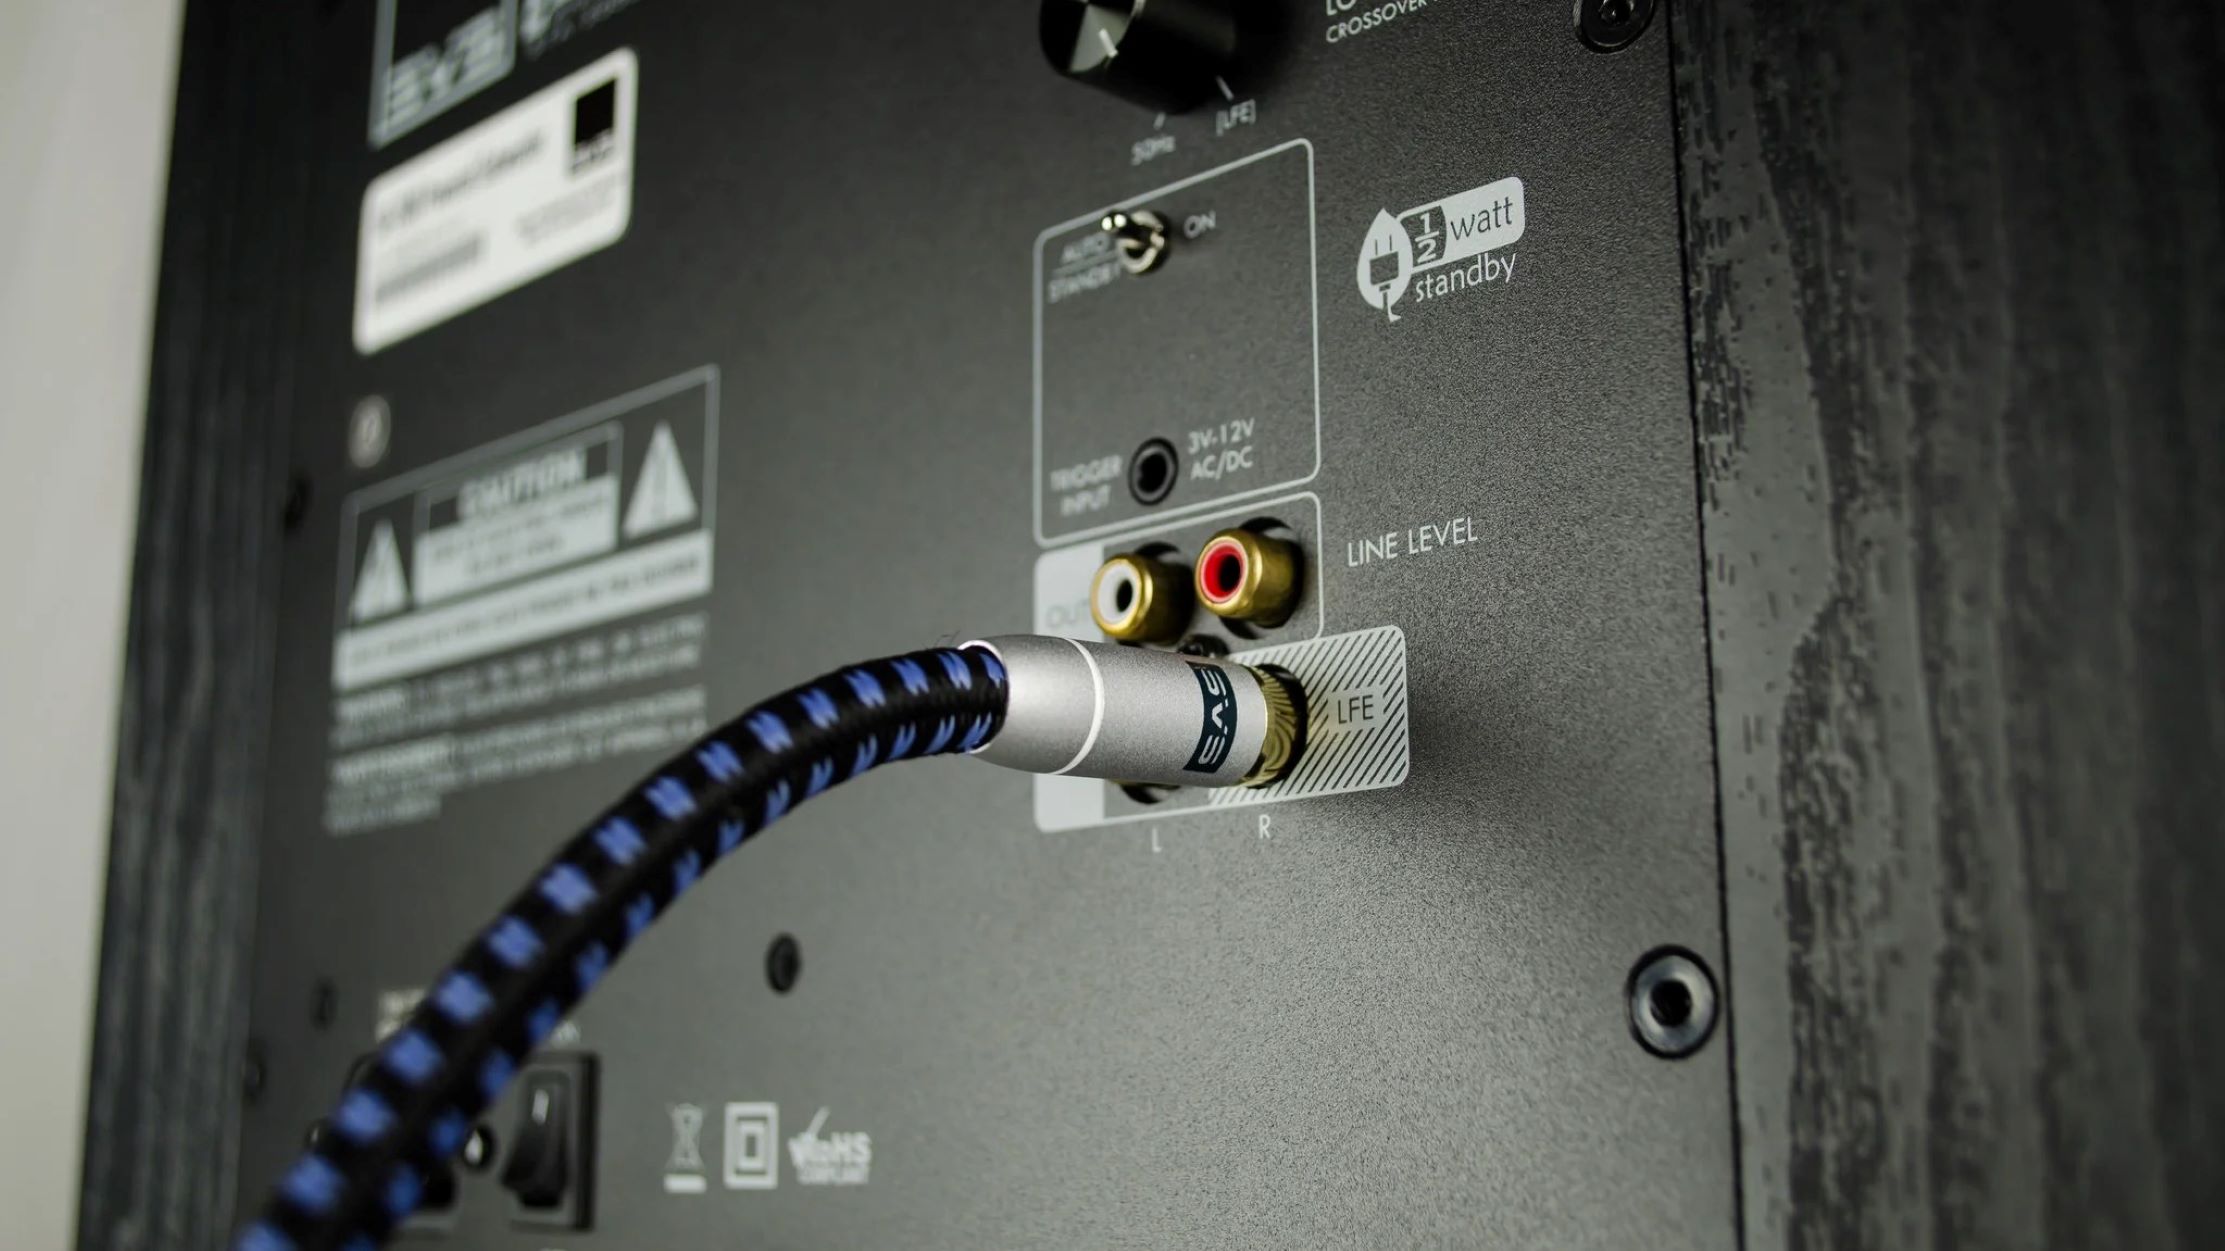
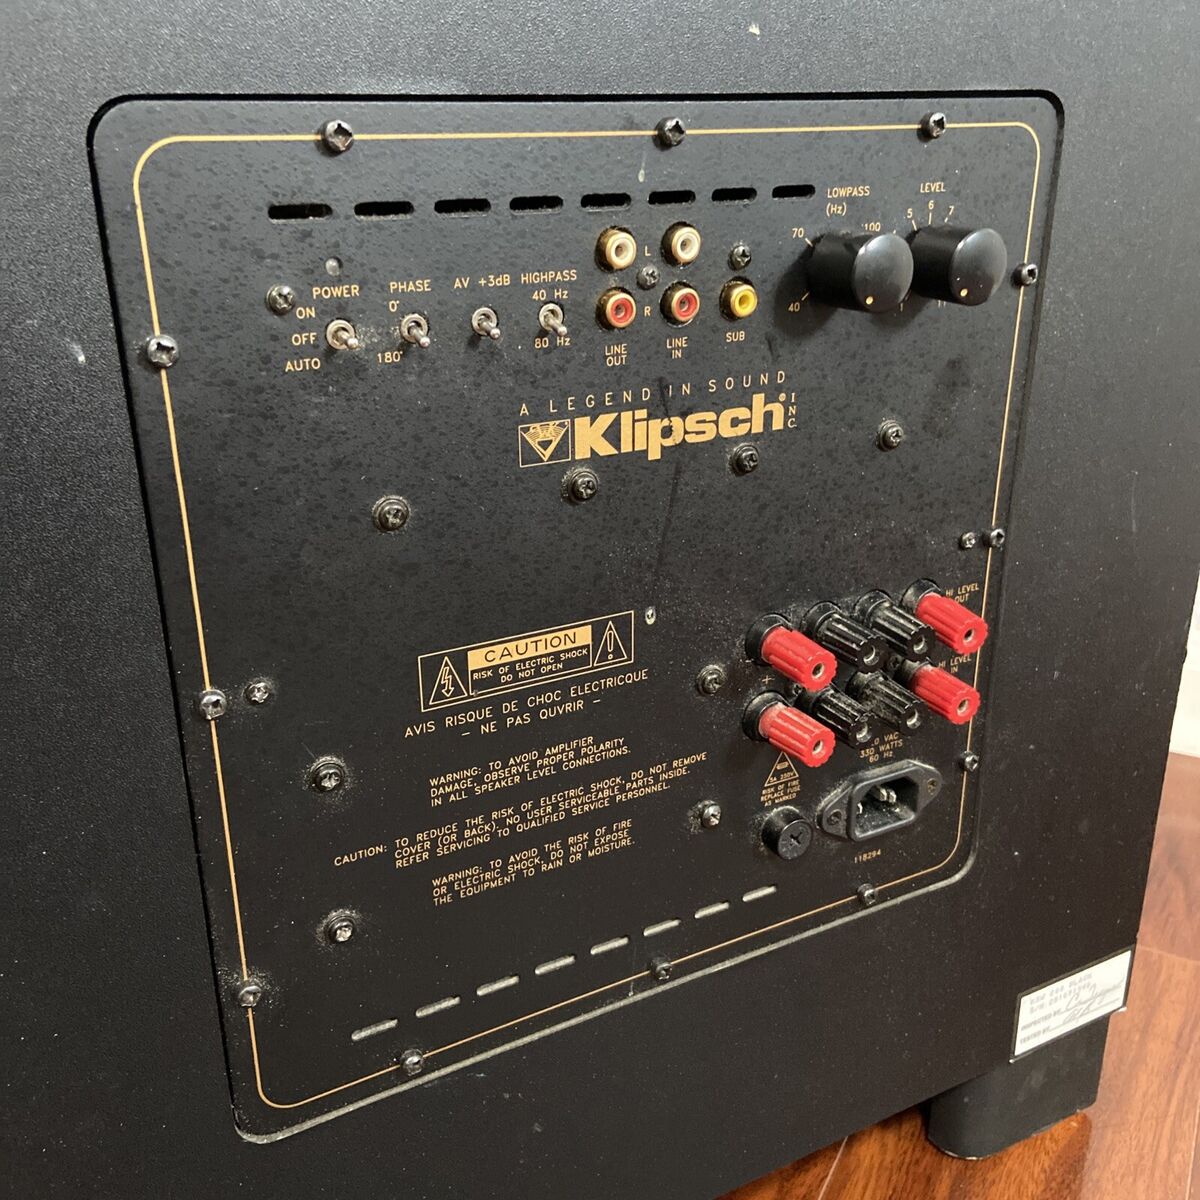
In terms of connectivity options, Yamaha receivers typically offer various types of subwoofer connections, including RCA (phono), LFE (Low-Frequency Effects), or speaker wire connections. Klipsch subwoofers, on the other hand, usually come with RCA line-level inputs or speaker level inputs. Ensure that your Yamaha receiver and Klipsch subwoofer have matching connection options for a seamless integration.
If your Yamaha receiver and Klipsch subwoofer have different connection options, you can use adapters or converters to bridge the gap. However, be aware that using adapters may affect the overall audio quality, so it is advisable to use direct matching connections whenever possible.
Furthermore, consider the size and power handling of your Klipsch subwoofer in relation to your listening room or entertainment area. Make sure that the subwoofer’s dimensions and acoustic capabilities complement the size of your room for optimal bass reproduction.
Lastly, it’s worth mentioning that both Klipsch and Yamaha provide comprehensive support and documentation on their respective websites. Before connecting your subwoofer, check for any firmware updates, software patches, or troubleshooting guides that can help enhance compatibility and resolve any potential issues.
By ensuring compatibility between your Klipsch subwoofer and Yamaha receiver, you can create a harmonious audio setup that delivers powerful bass and immersive sound quality. Now that we have discussed the compatibility aspect, let’s move on to the preparations needed before connecting your Klipsch subwoofer to your Yamaha receiver.
Before Connecting the Klipsch Subwoofer to Yamaha Receiver
Before diving into the process of connecting your Klipsch subwoofer to your Yamaha receiver, there are a few important steps and preparations you need to make. These steps will ensure a smooth and successful connection, allowing you to fully enjoy the enhanced audio experience provided by these two exceptional pieces of audio equipment.
First and foremost, make sure that both your Klipsch subwoofer and Yamaha receiver are powered off and disconnected from the power source. This precautionary measure will help prevent any potential damage to the devices and ensure your safety throughout the setup process.
Next, identify the location for your Klipsch subwoofer. Ideally, place the subwoofer in a position that maximizes its impact on the overall sound performance. The placement of the subwoofer can significantly influence the bass response and overall audio quality. Experiment with different locations in your room to find the optimal spot that produces the best bass reproduction.
Once you have determined the placement of the subwoofer, ensure that the subwoofer’s power cord is easily accessible and can reach a power outlet without any strain or stretching. Avoid using extension cords, as they can lead to power fluctuations and affect the subwoofer’s performance.
Now, let’s focus on the Yamaha receiver. Check if the receiver requires any firmware updates or software patches. Visit the official Yamaha website and navigate to the support section to download and install any available updates for your specific receiver model. Keeping your receiver up to date will ensure compatibility with your Klipsch subwoofer and provide optimal performance.
It’s also essential to familiarize yourself with the manual and control panel of your Yamaha receiver. Take note of the various input and output ports, including the dedicated subwoofer output or preamp output labeled “Sub Out.” This is where you will connect the Klipsch subwoofer. Understanding the layout and features of your receiver will make the connection process easier.
Lastly, if your Klipsch subwoofer offers different adjustment settings, familiarize yourself with these controls before connecting it to your Yamaha receiver. These settings may include volume level, crossover frequency, phase control, and EQ adjustments. Understanding how to optimize these settings will help you fine-tune the subwoofer’s performance and integrate it seamlessly into your audio setup.
With these preparations in place, you are now ready to proceed with the physical connection between your Klipsch subwoofer and Yamaha receiver. In the next section, we will provide you with a step-by-step guide to ensure a successful and efficient connection process.
Step-by-Step Guide: Connecting Klipsch Subwoofer to Yamaha Receiver
Now that you have completed the necessary preparations, it’s time to connect your Klipsch subwoofer to your Yamaha receiver. Follow these step-by-step instructions to ensure a proper and secure connection:
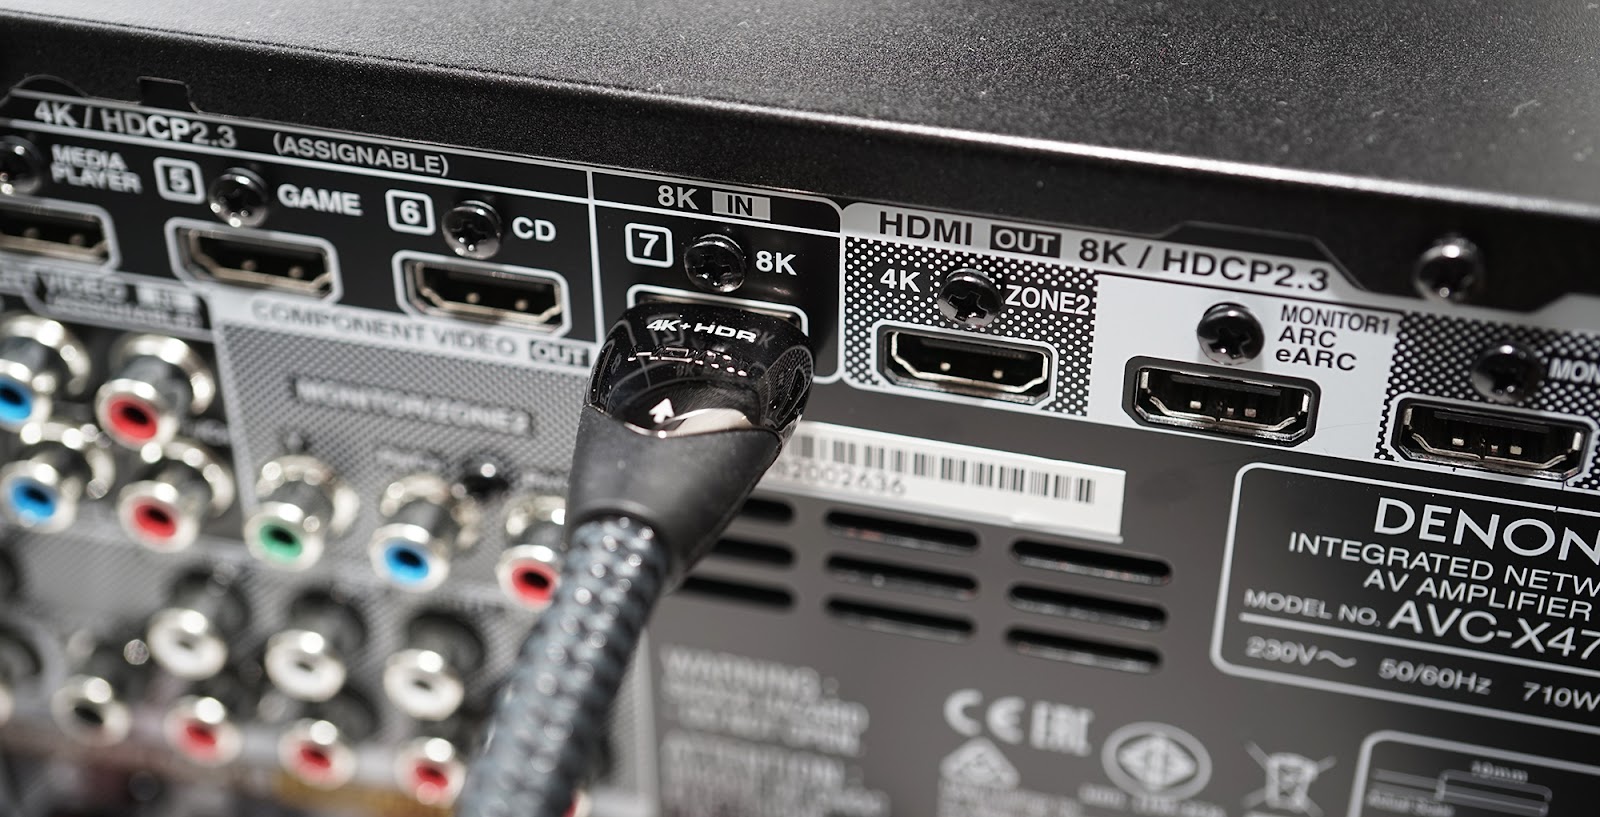
- Locate the subwoofer output or preamp output labeled “Sub Out” on your Yamaha receiver. This is usually located on the back panel of the receiver.
- If your subwoofer has an RCA line-level input, take an RCA cable and connect one end to the “Sub Out” port on the Yamaha receiver. Connect the other end to the corresponding RCA input on the subwoofer.
- If your subwoofer has a speaker level input, use speaker wire to connect the “Sub Out” terminals on the Yamaha receiver to the corresponding input terminals on the subwoofer. Ensure that you maintain polarity by connecting the positive terminal from the receiver to the positive terminal on the subwoofer.
- If your subwoofer has both RCA line-level inputs and speaker level inputs, you can choose the connection method that suits your setup preferences. However, it is generally recommended to use the RCA connection for better signal quality.
- Once the connection is made, double-check that all cables are securely plugged in and tightened to avoid any loose connections.
- Now, power on both the Klipsch subwoofer and the Yamaha receiver. Make sure that the receiver is set to the appropriate audio input mode for your desired source (e.g., CD, DVD, or TV).
- Access the settings menu on your Yamaha receiver and locate the subwoofer settings. Adjust the subwoofer volume, crossover frequency, phase control, and EQ settings according to your preference and room acoustics. Refer to the user manual of both the receiver and the subwoofer for guidance on these settings.
- Test the subwoofer’s performance by playing audio content with a prominent bass presence. Make adjustments to the subwoofer settings if necessary to achieve balanced and impactful bass reproduction.
That’s it! You have successfully connected your Klipsch subwoofer to your Yamaha receiver. Enjoy the enhanced audio experience with deep and powerful bass output.
If you encounter any difficulties or have issues with the connection or audio performance, refer to the troubleshooting tips in the next section for guidance.
Adjusting the Settings on Yamaha Receiver for Klipsch Subwoofer
Once you have connected your Klipsch subwoofer to your Yamaha receiver, it’s important to fine-tune the settings on the receiver to optimize the performance of the subwoofer. Adjusting these settings will help achieve the desired bass response and ensure a seamless integration with your audio system.
Here are some key settings to consider on your Yamaha receiver:
- Subwoofer Volume: Access the audio settings menu on your Yamaha receiver and locate the subwoofer volume control. Adjust this setting to achieve a balanced and immersive audio experience. Increase the volume if you want more pronounced bass, and decrease it if the bass becomes overpowering.
- Crossover Frequency: The crossover frequency determines the point at which low-frequency sounds are redirected from the main speakers to the subwoofer. Adjusting this setting ensures a smooth transition between the main speakers and the subwoofer. Start with the default setting and make small adjustments as needed to find the optimal crossover frequency for your specific setup.
- Phase Control: The phase control setting helps synchronize the subwoofer’s bass output with the main speakers. Experiment with the phase control setting to find the position that produces the most accurate and cohesive sound. Generally, a phase setting of 0 degrees works well, but feel free to adjust it higher or lower based on your listening preferences.
- EQ (Equalization) Settings: Some Yamaha receivers offer built-in EQ options that allow you to adjust the frequency response of your audio system. Use these settings to fine-tune the bass output of your Klipsch subwoofer and ensure that it blends seamlessly with the rest of your audio setup. Follow the instructions in the receiver’s manual to access and adjust the EQ settings.
- Sound Modes: Yamaha receivers often feature different sound modes that can enhance specific types of audio content, such as movies, music, or gaming. Experiment with these sound modes to find the one that provides the best balance of bass and overall sound quality for your listening preferences.
Remember to refer to the user manual of your specific Yamaha receiver model for detailed instructions on accessing and adjusting these settings. Keep in mind that the optimal settings may differ depending on the characteristics of your listening room, personal preferences, and the specific model of your Klipsch subwoofer.
Take the time to listen to a variety of audio content and make subtle adjustments to the settings as you go. The goal is to achieve a well-integrated and immersive audio experience, where the Klipsch subwoofer enhances the low-frequency response without overpowering the rest of the sound spectrum.
By carefully adjusting the settings on your Yamaha receiver, you can unlock the full potential of your Klipsch subwoofer and enjoy a rich and satisfying audio experience.
Troubleshooting Tips for Subwoofer Connectivity Issues
While connecting a Klipsch subwoofer to a Yamaha receiver is a relatively straightforward process, there may be instances where you encounter connectivity issues or experience difficulties in getting the subwoofer to work properly. Here are some troubleshooting tips to help you resolve common problems:
- No Sound or Low Volume from Subwoofer: Ensure that the subwoofer is powered on and that the volume level is properly adjusted both on the subwoofer itself and on the Yamaha receiver. Additionally, check the connection cables to ensure that they are securely plugged into the appropriate ports.
- Poor Bass Response: If you find that the bass from the subwoofer is weak or lacking impact, check the crossover frequency setting on your Yamaha receiver. Adjusting this setting can help redirect the lower frequencies to the subwoofer and improve the overall bass response.
- Incorrect Phase: If you notice a slight delay or cancellation of bass when the subwoofer is playing alongside the main speakers, adjust the phase control setting on the Yamaha receiver. Changing the phase setting by a few degrees can help align the subwoofer’s sound with the rest of the audio system.
- Distorted or Boomy Bass: If the bass from the subwoofer is distorted or overly boomy, check the EQ settings on your Yamaha receiver. Make sure that any bass-boosting features or excessive EQ settings are not causing the distortion. Adjust the EQ settings to achieve a balanced and clean bass response.
- Intermittent Connection: If the subwoofer connection is intermittent or frequently cuts out, check the cables for any damage or loose connections. Swap out the cables if necessary. Additionally, make sure that the power outlet you are using is stable and that there are no power surges affecting the subwoofer’s performance.
- Compatibility Issues: If you are still facing issues with the subwoofer connectivity, double-check the compatibility between your Klipsch subwoofer and Yamaha receiver. Ensure that both devices have matching connection options and sufficient power compatibility. Refer to the user manuals or contact the manufacturer for further assistance.
If you have exhausted these troubleshooting tips and are still experiencing issues, it may be helpful to consult with a professional audio technician or reach out to the customer support teams of Klipsch and Yamaha for additional guidance. They can provide specific troubleshooting steps based on your equipment and setup.
Remember, patience and persistence are key when troubleshooting audio issues. With proper troubleshooting steps and a bit of perseverance, you can overcome connectivity issues and enjoy the seamless integration of your Klipsch subwoofer with your Yamaha receiver.
Conclusion
Connecting a Klipsch subwoofer to a Yamaha receiver can greatly enhance your audio experience, providing deep and powerful bass that complements the overall sound performance. By following the steps outlined in this guide, you can successfully connect and optimize the performance of your Klipsch subwoofer with your Yamaha receiver.
Before starting the connection process, ensure that there is compatibility between the Klipsch subwoofer and the Yamaha receiver in terms of power requirements and connectivity options. This will ensure a seamless integration and prevent any compatibility issues.
Preparations, such as powering off the devices, finding the ideal location for the subwoofer, and checking for firmware updates on the Yamaha receiver, are essential steps to facilitate a smooth connection process.
Once connected, adjust the settings on the Yamaha receiver, such as subwoofer volume, crossover frequency, phase control, and EQ settings, to achieve optimum sound performance and suit your personal preferences.
If you encounter any connectivity issues or audio problems, utilize the provided troubleshooting tips to identify and resolve the issues. Remember, patience and persistence are essential when troubleshooting to ensure a successful connection and optimal sound quality.
By following this comprehensive guide, you can create a harmonious audio setup with your Klipsch subwoofer and Yamaha receiver, immersing yourself in a world of deep, impactful, and high-quality audio reproduction.
Enjoy your newfound audio experience and embrace the power of the Klipsch-Yamaha combination!