Home>Devices & Equipment>Yamaha>How To Turn On Arc On Yamaha Receiver
Yamaha
How To Turn On Arc On Yamaha Receiver
Published: October 27, 2023
Learn how to turn on the ARC (Audio Return Channel) feature on your Yamaha receiver and enhance your audio experience. Discover the steps and settings required for seamless connectivity and improved sound quality.
(Many of the links in this article redirect to a specific reviewed product. Your purchase of these products through affiliate links helps to generate commission for AudioLover.com, at no extra cost. Learn more)
Table of Contents
Introduction
Welcome to this comprehensive guide on how to turn on ARC (Audio Return Channel) on your Yamaha receiver. If you’re a proud owner of a Yamaha receiver and want to enjoy the convenience of ARC, you’ve come to the right place.
ARC is a feature that allows audio to be sent from your TV back to your receiver through a single HDMI cable, eliminating the need for additional audio connections. By enabling ARC, you can simplify your home theater setup and enjoy high-quality audio without the hassle of multiple cables.
In this article, we will walk through the process of checking for ARC compatibility, connecting your Yamaha receiver to a TV with ARC support, and enabling ARC on your receiver. We’ll also address common issues you might encounter and provide troubleshooting tips to help you get the most out of your Yamaha receiver’s ARC feature.
Whether you’re a seasoned audio enthusiast or a beginner in the world of home theater systems, this guide will equip you with the knowledge and steps needed to unleash the power of ARC on your Yamaha receiver.
So, let’s dive in and learn how to activate ARC on your Yamaha receiver and elevate your audio experience.
What is ARC?
Arc, short for Audio Return Channel, is a feature that allows audio to be sent from your TV back to your Yamaha receiver through a single HDMI cable. This eliminates the need for separate audio cables and simplifies your home theater setup. With ARC, you can enjoy high-quality audio without the hassle of multiple connections.
ARC was introduced as part of the HDMI 1.4 specification and is found on most modern TVs and receivers, including Yamaha models. It enables a two-way communication between your TV and receiver, allowing audio to be transmitted from the TV’s built-in tuner or streaming apps to the receiver.
One of the primary benefits of ARC is its ability to transmit audio from your TV’s internal apps, such as Netflix or Hulu, directly to your receiver. This means you can enjoy a more immersive audio experience when streaming movies or TV shows without the need for additional audio cables.
In addition to streaming apps, ARC also allows you to utilize the audio capabilities of your TV’s built-in tuner. This means you can send audio from broadcast TV channels directly to your receiver, enhancing the sound quality of your favorite shows or sporting events.
It’s important to note that ARC requires both the TV and receiver to support the feature. Not all HDMI ports on a TV support ARC, so it’s crucial to check your TV’s specifications to ensure compatibility. Additionally, not all Yamaha receivers support ARC, so confirm that your receiver is equipped with this capability.
Now that you have a better understanding of what ARC is and its benefits, let’s move on to the next section to check if your Yamaha receiver and TV are compatible with ARC.
Checking for ARC Compatibility
Before you can start enjoying the benefits of ARC on your Yamaha receiver, it’s important to ensure that both your receiver and TV support this feature. Here’s how you can check for ARC compatibility:
- Check your Yamaha receiver’s specifications: Refer to the user manual or visit the Yamaha website to find the specifications of your receiver. Look for information regarding ARC support. If your receiver is equipped with ARC, you’ll be able to proceed with the setup.
- Check your TV’s specifications: Refer to the user manual or visit the manufacturer’s website to find the specifications of your TV. Look for information regarding ARC support. In most cases, the HDMI port that supports ARC will be labeled with “ARC” or “Audio Return Channel.” If you find this label, you can proceed with the setup.
- Verify HDMI version compatibility: ARC is supported on HDMI 1.4 or later versions. Check the HDMI ports on both your receiver and TV to ensure they are HDMI 1.4 or higher. This will ensure that they are capable of transmitting audio through the ARC feature.
If both your Yamaha receiver and TV are compatible with ARC, you’re ready to move on to the next step: connecting your Yamaha receiver to a TV with ARC support. If compatibility is an issue, you may need to explore alternate options for connecting your audio sources.
Now that you’ve confirmed the compatibility of your Yamaha receiver and TV, let’s proceed to the next section to learn how to connect the two devices and enable ARC.
Connecting your Yamaha receiver to a TV with ARC support
Now that you’ve confirmed the compatibility of your Yamaha receiver and TV, it’s time to connect the two devices. Follow these steps to establish the ARC connection:
- Power off your Yamaha receiver and TV: Before making any connections, ensure that both your receiver and TV are turned off. This will prevent any potential damage to the devices.
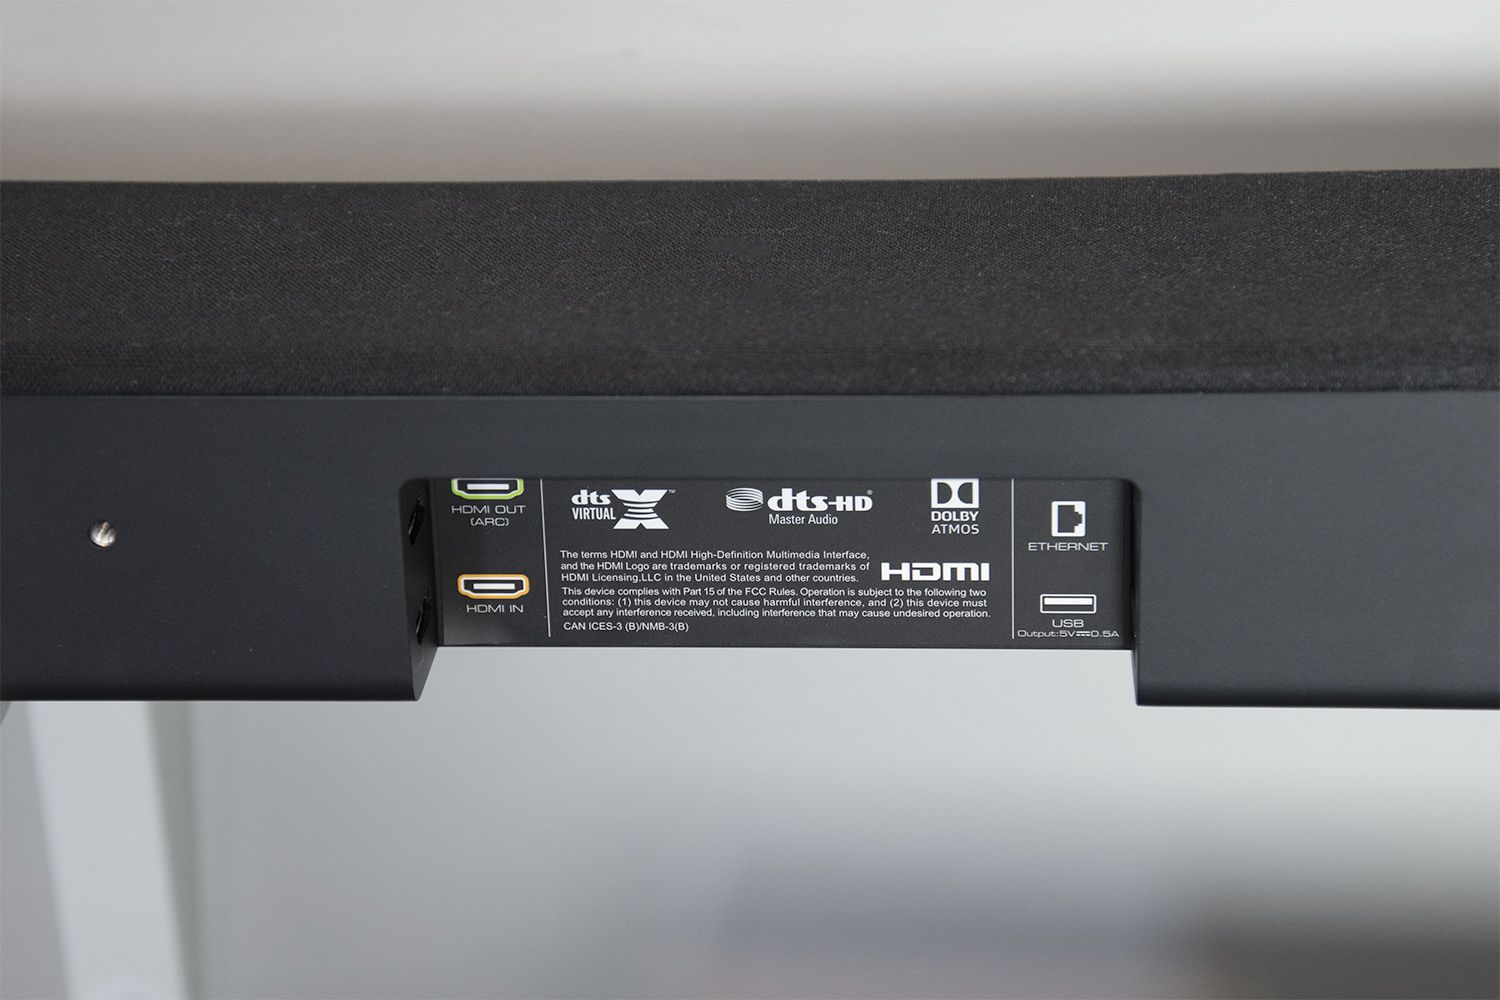
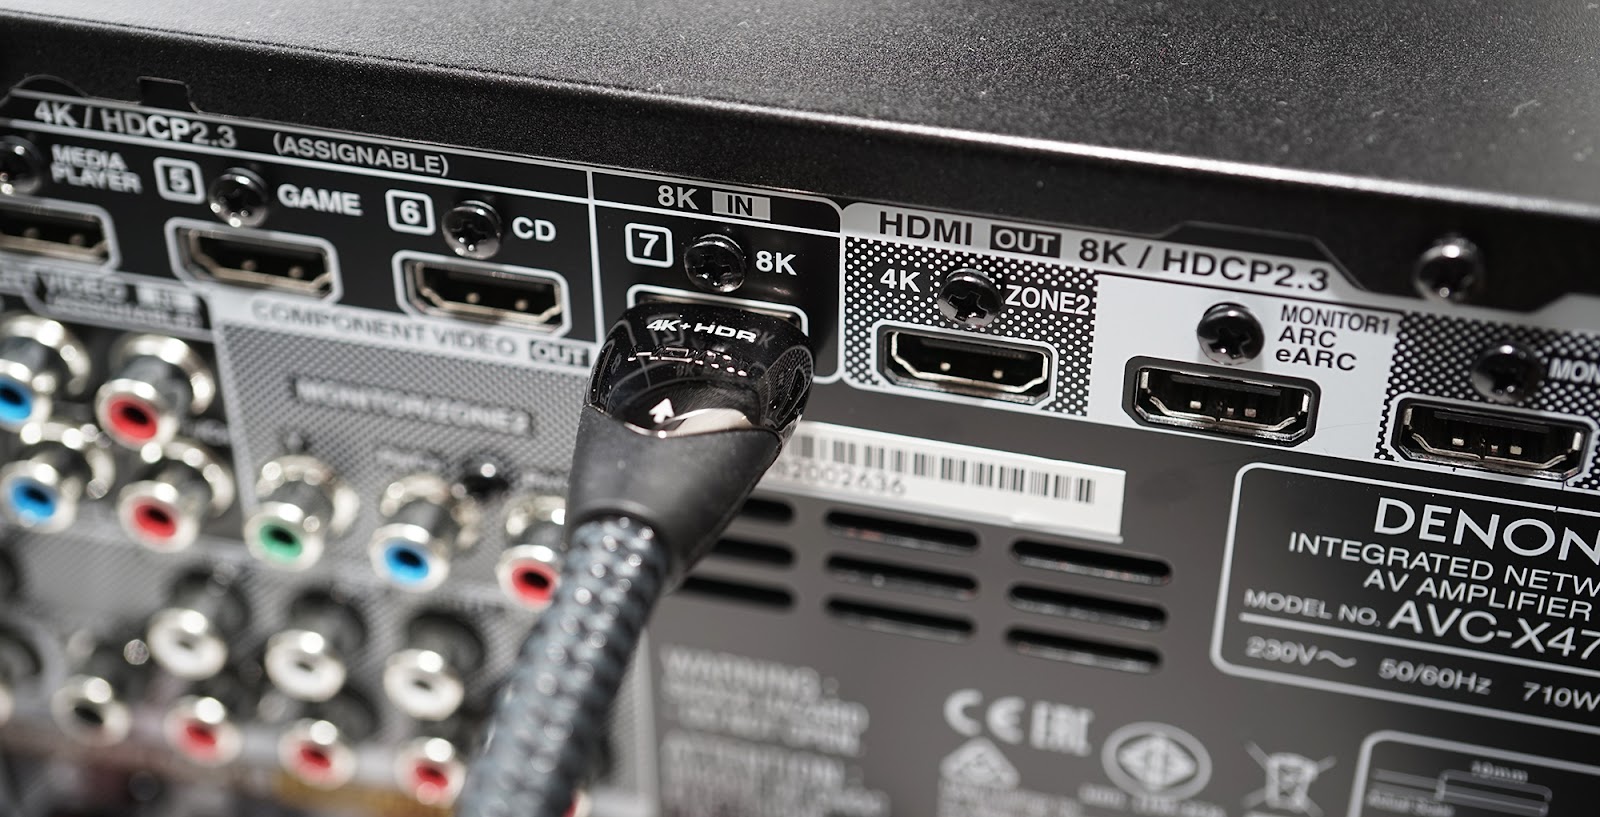
- Locate the HDMI ARC port: On your TV, locate the HDMI port that supports ARC. It is usually labeled as “ARC” or “Audio Return Channel.” Make note of the port number.
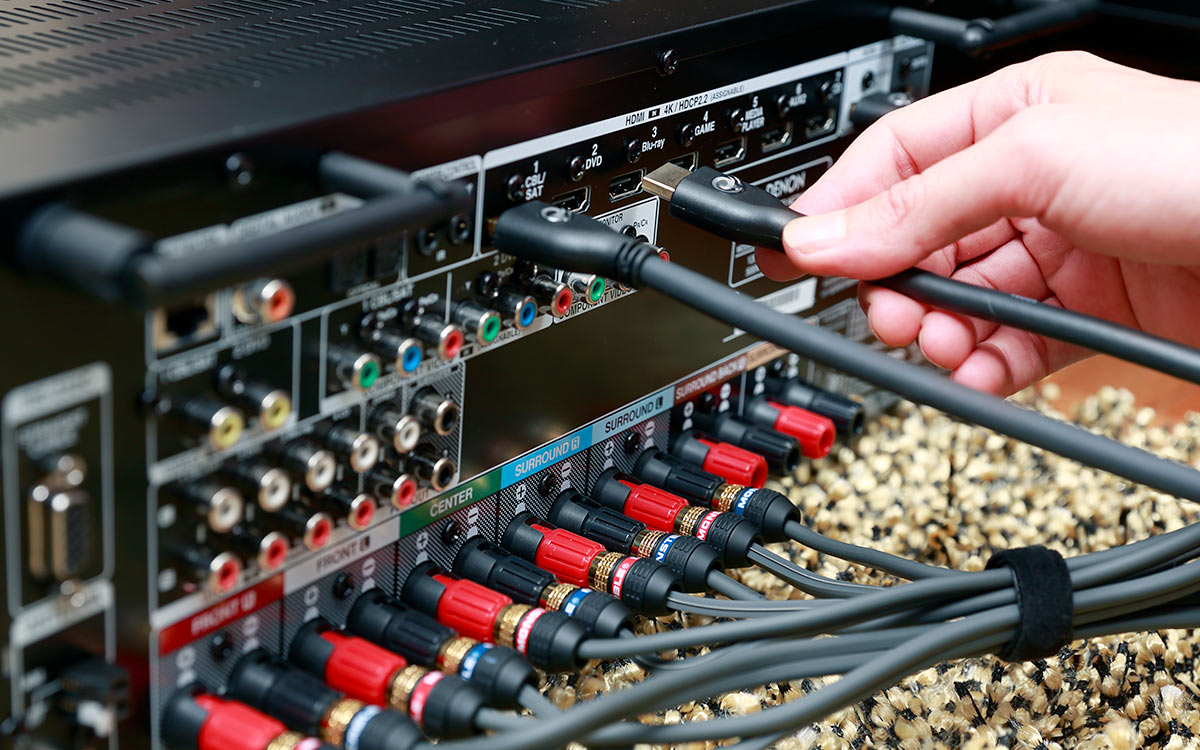
- Connect the HDMI cable: Take an HDMI cable and connect one end to the HDMI ARC port on your TV. Connect the other end to the HDMI ARC input on your Yamaha receiver.
- Power on the devices: Turn on both your TV and Yamaha receiver. Allow them to fully power up and establish a connection.
- Configure the HDMI settings: On your TV, access the settings menu and navigate to the HDMI settings. Look for an option to enable ARC or HDMI control. Enable this feature to allow the audio signal to be sent from your TV to the receiver.
- Select the ARC input on the receiver: On your Yamaha receiver, select the input source that corresponds to the HDMI ARC connection. This will ensure that the audio signal is correctly routed from the TV to the receiver.
- Perform a sound test: To ensure that the ARC connection is working properly, play a video or audio file on your TV and check if the sound is being outputted through your Yamaha receiver. Adjust the volume and other audio settings as desired.
Congratulations! You have successfully connected your Yamaha receiver to a TV with ARC support. The audio from your TV should now be transmitted to the receiver, providing a seamless and simplified audio experience.
If you encounter any issues or the ARC connection isn’t working as expected, proceed to the next section for troubleshooting tips and solutions.
Enabling ARC on your Yamaha receiver
Once you have connected your Yamaha receiver to a TV with ARC support, the next step is to enable ARC on your receiver. Here’s how you can do it:
- Access the receiver settings: Use the remote control or front panel buttons to access the settings menu of your Yamaha receiver. The exact method may vary depending on the model, so refer to the user manual if needed.
- Navigate to HDMI settings: Within the settings menu, look for the HDMI settings or audio settings section. This is where you’ll find the configuration options for ARC.
- Enable ARC: In the HDMI settings, locate the option to enable ARC. It may be labeled as “HDMI Control,” “Audio Return Channel,” or something similar. Select this option to activate ARC on your receiver.
- Configure other settings: While in the HDMI settings, you may have additional options to customize the ARC functionality. Take the time to explore these settings and adjust them according to your preferences.
- Save and exit: Once you have enabled ARC and configured the desired settings, save the changes and exit the settings menu of your Yamaha receiver.
With ARC enabled on your receiver, it is now ready to receive audio signals from your TV through the HDMI ARC connection. Make sure to keep your TV’s audio output set to ARC or HDMI for the sound to be properly routed to the receiver.
It’s worth noting that some Yamaha receivers may require a firmware update to enable ARC functionality. Check the Yamaha website or consult the user manual for instructions on how to update the firmware if necessary.
Congratulations! You have successfully enabled ARC on your Yamaha receiver. You can now enjoy the convenience of high-quality audio transmitted directly from your TV to your receiver.
In the next section, we will address common issues that you may encounter while using ARC and provide troubleshooting tips to help you resolve them.
Troubleshooting common issues with ARC
While ARC is a convenient feature that simplifies your audio setup, there might be times when you encounter issues. Here are some common problems with ARC and troubleshooting tips to help you resolve them:
- No sound through the receiver: If you’re not hearing any audio from your Yamaha receiver when using ARC, check the following:
- Ensure that the HDMI cable is securely connected to both the receiver’s ARC input and the TV’s ARC output.
- Check that your TV’s audio output is set to ARC or HDMI. Some TVs have the option to choose between internal speakers, external speakers, or ARC.
- Verify that your Yamaha receiver is set to the correct input source for the ARC connection.
- Make sure that the receiver’s HDMI output is connected to the ARC-enabled HDMI input on your TV.
- Inconsistent audio or audio dropouts: If you experience intermittent audio or audio dropouts when using ARC, you can try the following:
- Check for firmware updates for your Yamaha receiver. Sometimes, firmware updates include fixes for ARC-related issues.
- Power cycle both your TV and receiver by turning them off, unplugging their power cords, waiting for a few minutes, and then plugging them back in and powering them on again.
- Consider using an optical audio cable as an alternative for audio transmission between your TV and receiver, bypassing the ARC feature.
- Unstable HDMI-CEC control: HDMI-CEC (Consumer Electronics Control) allows your TV remote to control your Yamaha receiver. If you experience issues with HDMI-CEC control, try the following:
- Check that HDMI-CEC is enabled on both your TV and Yamaha receiver. The specific name for HDMI-CEC differs based on the manufacturer (e.g., Samsung calls it Anynet+, Sony calls it Bravia Sync).
- Ensure that the HDMI-CEC settings are correctly configured on both devices. Some devices may have additional HDMI-CEC settings that need to be enabled for proper operation.
- If HDMI-CEC issues persist, you can try disabling it on either the TV or the receiver to see if the problem resolves.
If you have tried the troubleshooting tips above but are still experiencing issues with ARC, it may be helpful to consult the user manual for your specific Yamaha receiver model or contact Yamaha customer support for further assistance.
With these troubleshooting tips, you should be able to resolve common ARC-related issues and enjoy uninterrupted audio transmission between your TV and Yamaha receiver.
In the final section, we’ll conclude this guide on how to turn on ARC on your Yamaha receiver.
Conclusion
Congratulations! You have successfully learned how to turn on ARC (Audio Return Channel) on your Yamaha receiver. By enabling ARC, you can simplify your home theater setup and enjoy high-quality audio transmitted from your TV back to your receiver through a single HDMI cable.
We began by understanding what ARC is and its benefits in enhancing your audio experience. We then discussed how to check for ARC compatibility on your Yamaha receiver and TV. After confirming compatibility, we walked through the steps of connecting your Yamaha receiver to a TV with ARC support and enabling ARC on your receiver.
Furthermore, we covered some common issues you may encounter with ARC and provided troubleshooting tips to help you resolve them. Remember, if you’re still encountering difficulties, it’s always a good idea to consult the user manual of your Yamaha receiver or reach out to Yamaha customer support for further assistance.
Now that you’re equipped with the knowledge and steps necessary to activate ARC on your Yamaha receiver, you can enjoy a seamless and immersive audio experience while reducing cable clutter and simplifying your setup.
So go ahead, sit back, and enjoy your favorite movies, TV shows, and games with the enhanced audio quality that ARC brings to your home theater system. Happy listening!