Home>Events & Info>Playback>How To Listen To Audio Playback On Studio One
Playback
How To Listen To Audio Playback On Studio One
Modified: January 22, 2024
Learn how to easily listen to audio playback on Studio One. Discover step-by-step instructions and tips for seamless playback in your music production.
(Many of the links in this article redirect to a specific reviewed product. Your purchase of these products through affiliate links helps to generate commission for AudioLover.com, at no extra cost. Learn more)
Table of Contents
- Introduction
- Step 1: Launching Studio One
- Step 2: Importing Audio Files
- Step 3: Setting Up Audio Devices
- Step 4: Configuring Audio Playback Options
- Step 5: Playing Audio Files
- Step 6: Adjusting Volume and Panning
- Step 7: Applying Effects to Audio Playback
- Step 8: Fine-tuning Audio Playback Settings
- Conclusion
Introduction
Welcome to the world of Studio One, a professional digital audio workstation (DAW) that provides musicians, producers, and audio engineers with powerful tools to create and refine their music. One fundamental aspect of working with Studio One is the ability to listen to audio playback, which allows you to hear your recorded tracks, virtual instruments, and effects in real-time.
Audio playback is crucial for several reasons. It allows you to assess the quality of your recordings, identify any issues or errors, and make necessary adjustments. Moreover, it enables you to experience your music as it will be heard by others, helping you make informed decisions regarding the mixing, arrangement, and overall production of your tracks.
In this article, we will guide you through the process of listening to audio playback on Studio One, covering everything from launching the software to fine-tuning your audio playback settings. Whether you are new to Studio One or looking to enhance your current workflow, this comprehensive guide will provide you with the knowledge and tools necessary to get the most out of your audio playback experience.
Before we dive into the specifics, it’s important to note that Studio One offers a user-friendly interface and intuitive features, making it accessible to both beginners and experienced professionals. So, whether you’re a singer-songwriter, a beat-maker, or a sound engineer, Studio One has got you covered.
Now, let’s get started and explore the steps required to listen to audio playback on Studio One!
Step 1: Launching Studio One
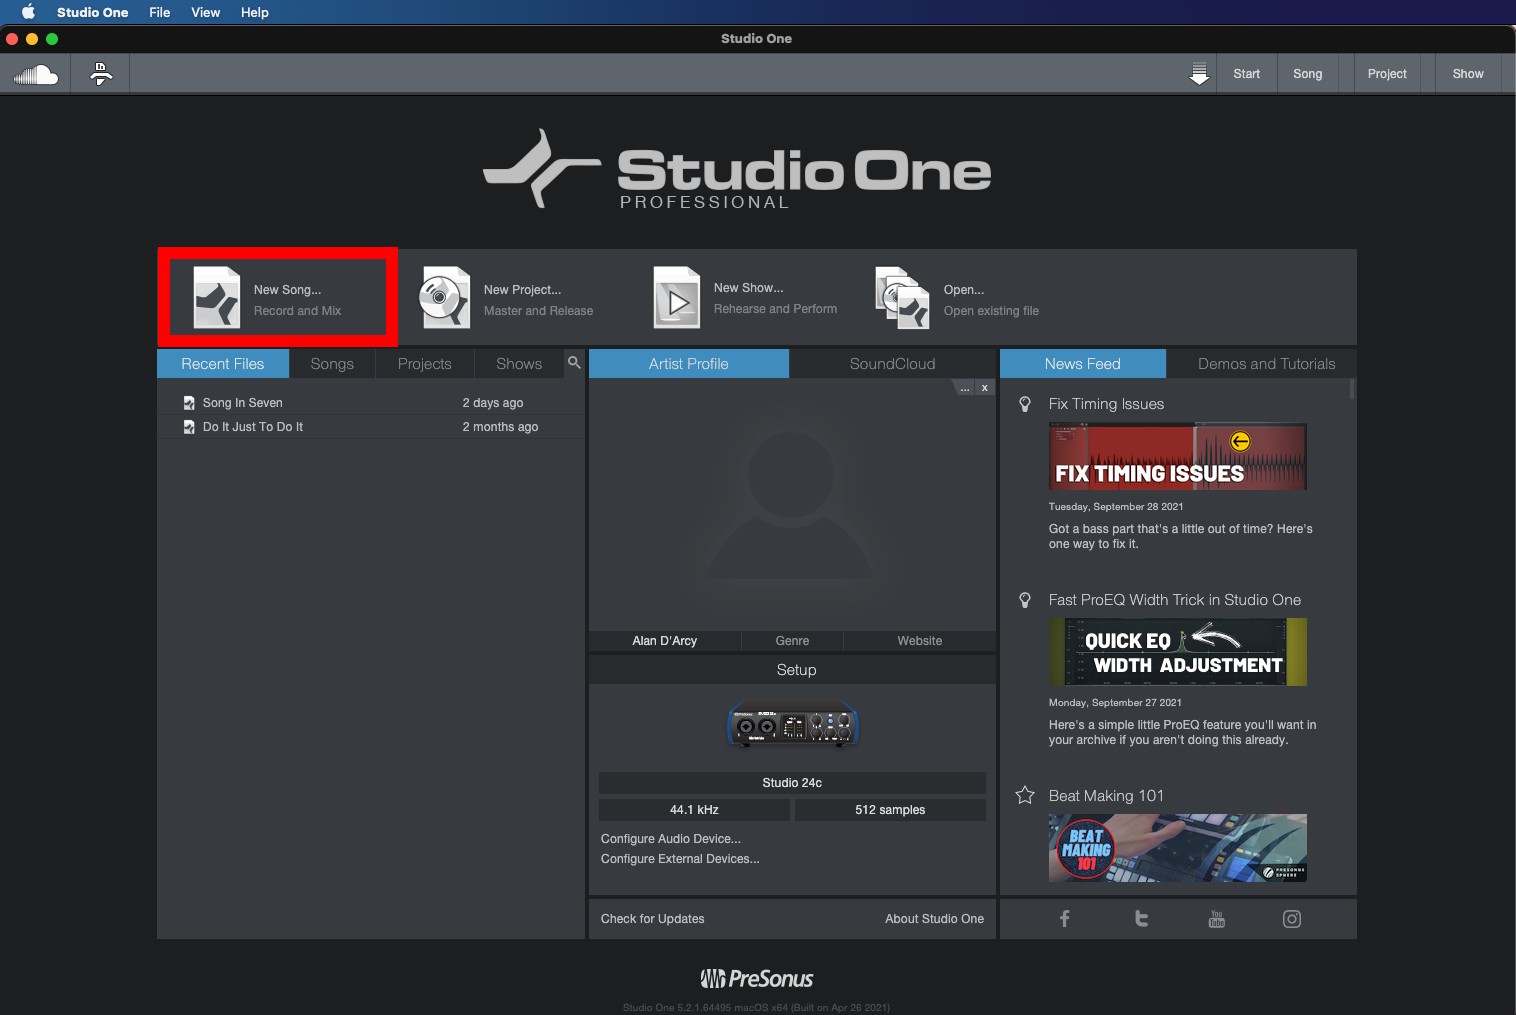
The first step in listening to audio playback on Studio One is, of course, launching the software. After installing Studio One on your computer, locate the application icon and double-click it to open the program.
Once Studio One is open, you will be greeted by the Start page. The Start page offers various options, such as creating a new song, opening a recent file, or accessing online resources for tutorials and updates. Take a moment to familiarize yourself with the Start page and its features.
To create a new song, click on the “New Song” button or select “File” from the menu bar and choose “New Song” from the dropdown menu. This will open a new project where you can begin your audio production journey.
If you already have an existing song that you want to work on, you can choose to open a recent file from the Start page. Simply click on the file name in the “Recent Files” section to open it.
If you prefer to start with a blank template or have specific project requirements, you can select “Empty Song” from the Start page or “File” from the menu bar, followed by “New Song” and “Empty Song.” This will provide you with a fresh canvas to build your audio masterpiece.
Remember to save your project before proceeding. To do this, click on “File” in the menu bar, select “Save As,” and choose a location on your computer to save the project file.
Now that you have launched Studio One and created or opened a song project, it’s time to move on to the next step: importing audio files.
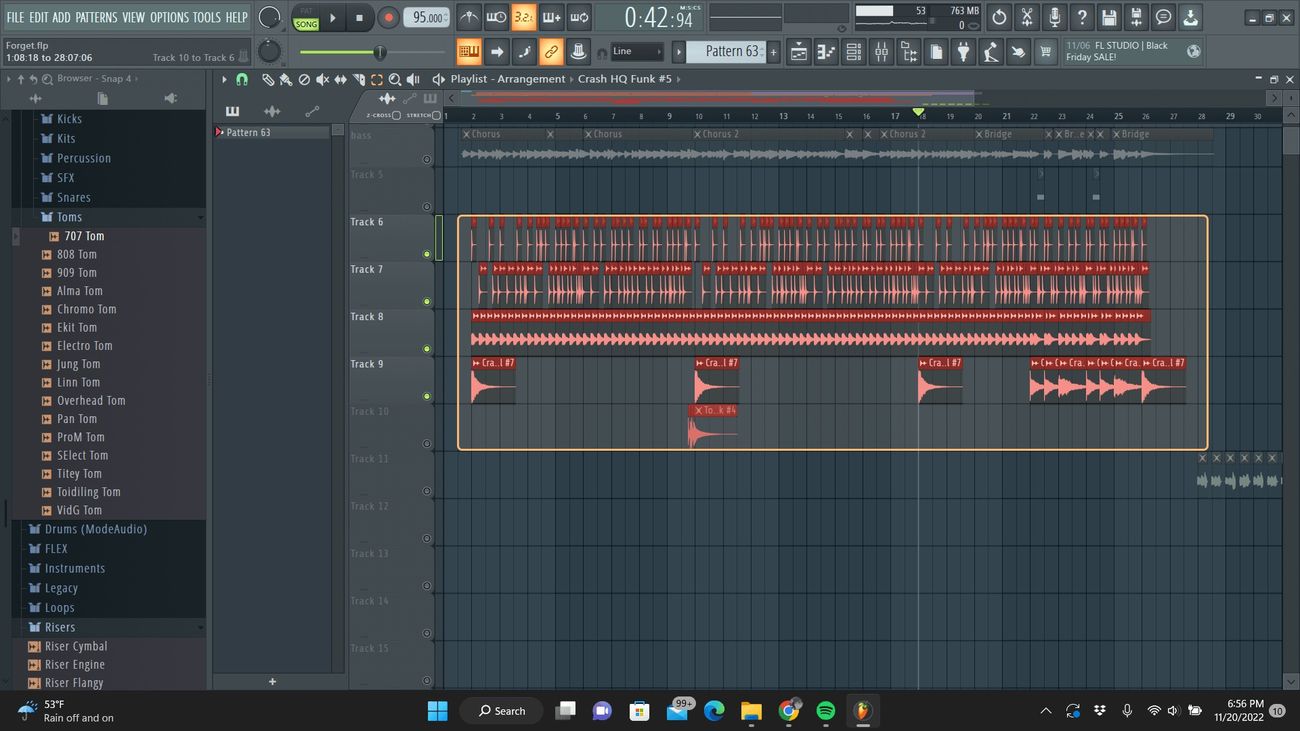
Step 2: Importing Audio Files
Once you have launched Studio One and set up your project, the next step is to import audio files into your project. Whether you have recorded audio from external sources or have existing audio files that you want to work with, Studio One provides a straightforward process for importing them.
To import audio files, follow these steps:
- Click on the “Browser” tab located in the bottom panel of the Studio One interface. The Browser tab allows you to access your computer’s file system and navigate to the location where your audio files are stored.
- Browse through your computer’s folders to locate the audio files you want to import. You can use the search bar or file filters to narrow down your search.
- Once you have found the audio files, simply drag and drop them from the Browser tab into the Arrangement view or the Track List view of your project.
- You can also right-click on the desired track in the Arrangement or Track List view and select “Import File…” to browse and select the audio file you want to import.
- Studio One supports various audio file formats, including WAV, AIFF, MP3, FLAC, and more. The imported audio files will be displayed as audio tracks in your project, ready for playback and editing.
It’s worth noting that Studio One allows for multiple audio files to be imported simultaneously. By selecting multiple files in the Browser tab and dragging them into the project, Studio One will create individual tracks for each imported audio file, making it easy to work with multiple recordings or samples at once.
Additionally, Studio One provides advanced options during the import process, such as automatically analyzing the tempo of the imported audio files or applying specific audio processing to them. These options can be accessed by right-clicking on the imported audio file in the Arrangement or Track List view and selecting “Audio > Edit with Melodyne” or “Audio > Edit with SampleOne XT.”
Once you have imported your audio files, you’re ready to move on to the next step: setting up audio devices for playback.
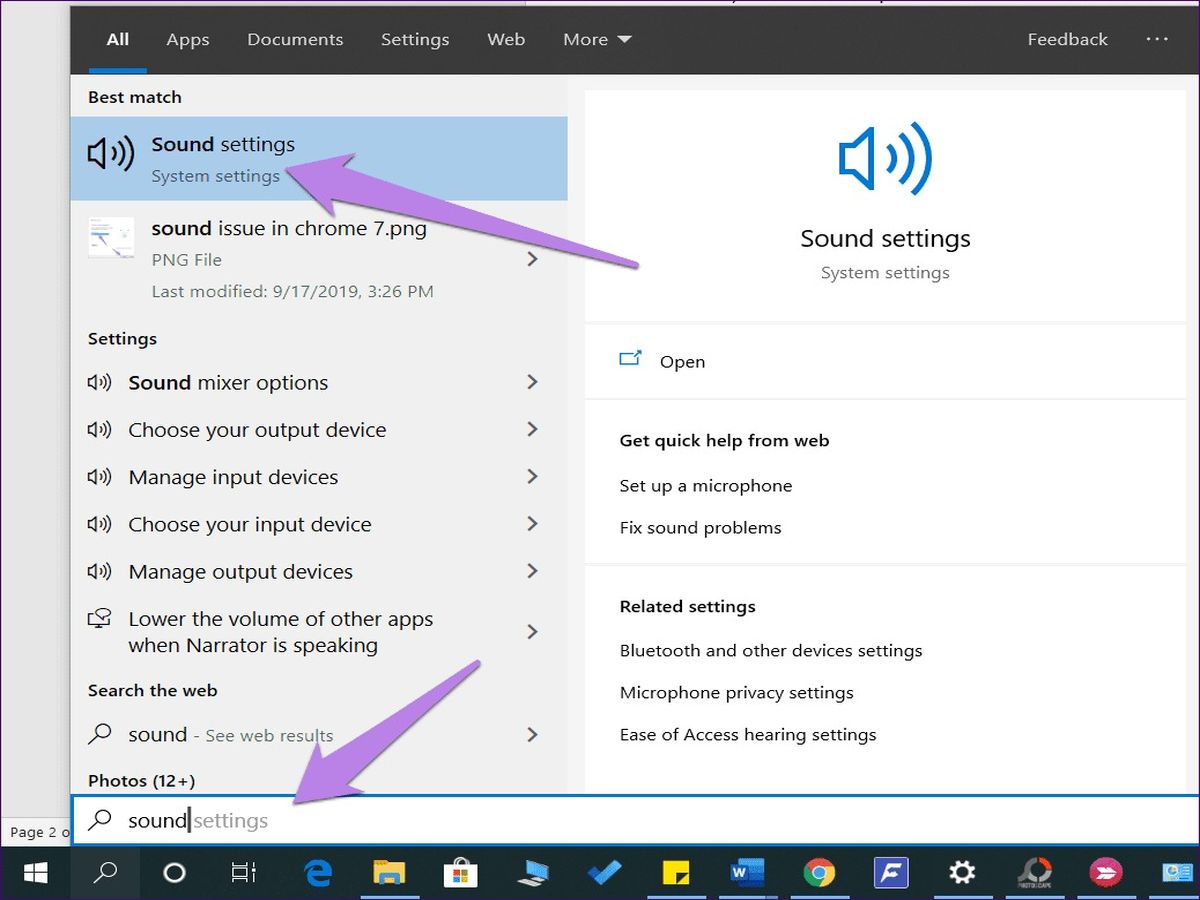
Step 3: Setting Up Audio Devices
Before you can start listening to audio playback in Studio One, it’s crucial to properly configure your audio devices. Studio One allows you to choose the audio interface and options that best suit your needs.
Follow these steps to set up your audio devices:
- Click on “Studio One” in the menu bar and select “Options” from the dropdown menu. This will open the Studio One Preferences window.
- In the Preferences window, click on the “Audio Setup” tab. Here, you will find a list of available audio devices connected to your computer.
- Select the audio interface you want to use for audio playback from the dropdown menu under the “Audio Device” section.
- Choose the sample rate and buffer size that matches your requirements. Higher sample rates provide better audio quality but require more processing power. Adjust the buffer size according to your system’s capabilities and the desired balance between low latency and system stability.
- If you’re using an external audio interface, make sure it is properly connected to your computer and powered on.
- Click on the “Configure Speakers” button to set up your monitoring setup. This will allow you to select the speakers or headphones you want to use for audio playback in Studio One.
- In the Speaker Configuration window, choose the appropriate options based on your speaker setup. You can specify the number of speakers, set up stereo or surround sound configurations, and adjust speaker volumes if necessary.
- Click OK to save your settings and close the Preferences window.
By setting up your audio devices correctly, you ensure that Studio One communicates efficiently with your hardware, providing you with optimal audio playback quality and performance.
It’s worth noting that Studio One also offers the option to use the built-in audio drivers of your computer. However, if you’re looking for lower latency, higher audio quality, and more advanced capabilities, investing in an external audio interface is recommended.
Once you have set up your audio devices, you’re ready to move on to the next step: configuring audio playback options in Studio One.
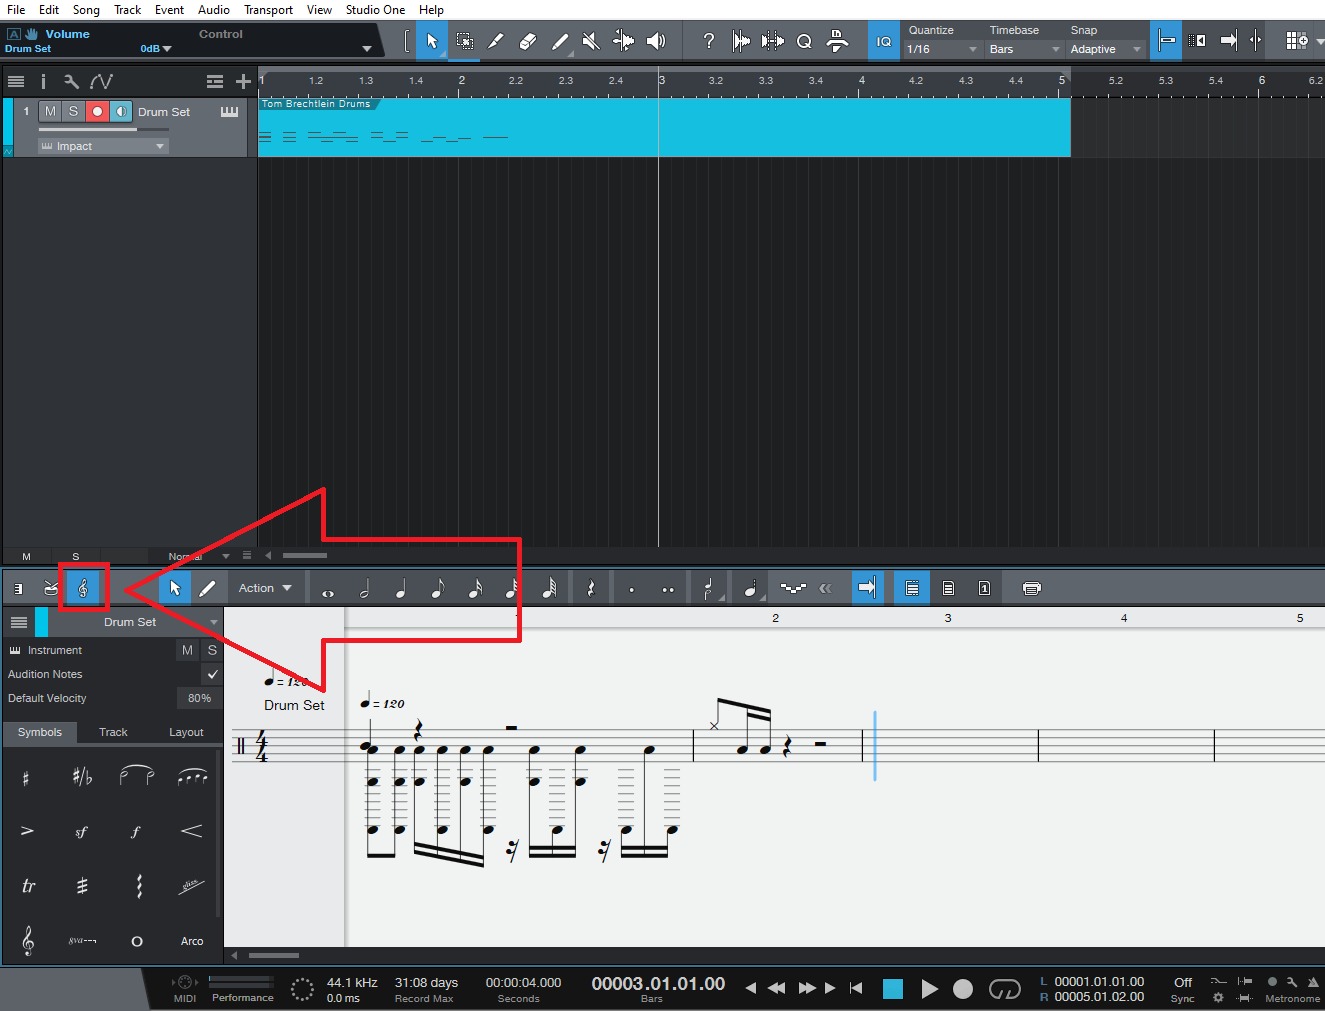
Step 4: Configuring Audio Playback Options
Configuring audio playback options in Studio One allows you to customize your listening experience to suit your preferences and project requirements. Whether you need to adjust the playback settings for a specific track or make global changes that affect all audio playback, Studio One provides extensive options for fine-tuning.
Here are some key ways to configure your audio playback options in Studio One:
- Track Settings: To configure audio playback options for a specific track, select the track in the Arrangement or Track List view, then navigate to the Inspector panel on the left side of the screen. Here, you can adjust a range of settings such as volume, panning, solo/mute, and audio effects. You can also apply specific processing options to enhance the playback of individual tracks.
- Mix Console: The Mix Console in Studio One allows you to control the audio playback options for multiple tracks simultaneously. By clicking on the Mix Console button in the toolbar at the bottom of the screen, you can access a comprehensive mixer interface where you can adjust levels, apply effects, and route audio in real-time. This is particularly useful for balancing the overall mix and ensuring a cohesive audio playback experience.
- Audio Routing: Studio One offers flexible audio routing options, allowing you to direct the audio playback of individual tracks to different destinations. This can be useful when using external hardware or routing audio to specific outputs for monitoring or recording purposes. You can access the audio routing options by right-clicking on a track in the Arrangement or Mix Console view and selecting “Output Channel” or by accessing the Outputs tab in the Console view.
- Click and Cue Options: If you need to add a click track or cue mix to your audio playback, Studio One has built-in options to accommodate these needs. By accessing the Click and Cue options in the transport panel, you can customize the click sound, adjust its volume, and route it to specific outputs. This is particularly helpful during recording sessions or live performances where timing and synchronization are crucial.
- Metronome Settings: Studio One’s metronome offers various settings to enhance the audio playback of the click track. You can access the metronome settings by clicking on the metronome icon in the toolbar or by going to the Studio One menu, selecting “Options,” and choosing “Metronome” from the dropdown menu. Here, you can customize the click sound, time signature, and other metronome-related parameters.
By exploring and customizing these audio playback options in Studio One, you can achieve the desired sound, balance, and performance for your projects. Remember to experiment and make adjustments based on your specific needs and creative vision.
Now that you have configured your audio playback options, it’s time to move on to the next step: playing audio files in Studio One.
Step 5: Playing Audio Files
Now that you have imported your audio files and configured the audio playback options in Studio One, it’s time to start playing your music. Studio One offers various methods for playing audio files, giving you flexibility and control over the playback process.
Here are the different ways to play audio files in Studio One:
- Transport Controls: The transport panel, located at the top of the Studio One interface, contains the main playback controls. You can use the play button to start playing the audio from the current position or use the stop button to halt playback. Additionally, you can use the rewind and fast forward buttons to navigate through the audio file.
- Keyboard Shortcuts: Studio One provides a range of keyboard shortcuts that allow for efficient control over audio playback. For example, you can press the spacebar to start or stop playback, the right arrow key to move the playback cursor forward, or the left arrow key to move it backward.
- Arrangement or Track List: To play a specific audio file, navigate to the Arrangement view or Track List view and locate the track you want to play. Click on the play button located in the track header to start playing the audio. You can also click and drag the playback cursor to a specific position within the track to play from that point onwards.
- Looping: Studio One allows you to loop a section of your audio file for repeated playback. Simply select the desired portion of the track in the Arrangement or Track List view, then click on the loop button in the transport panel. This will continuously play the selected section until you disable the loop feature.
- Timeline Navigation: Studio One offers a timeline ruler at the top of the Arrangement view, displaying the duration of your audio file. You can click on any point on the ruler to move the playback cursor to that specific position. This allows you to quickly navigate through the audio file and play specific sections as needed.
By utilizing these playback methods in Studio One, you can easily play and navigate through your audio files, ensuring a seamless and efficient workflow.
Remember to monitor your audio levels while playing. Use the volume faders in the Mix Console or the track settings in the Arrangement view to adjust the volume levels of individual tracks. It’s essential to maintain a balanced mix and prevent any clipping or distortion during playback.
Now that you know how to play audio files, it’s time to explore the next step: adjusting volume and panning.
Step 6: Adjusting Volume and Panning
One of the key aspects of audio production is controlling the volume and panning of individual tracks. Studio One provides intuitive tools for adjusting the volume level and positioning the audio within the stereo field, allowing you to create a balanced and spatially immersive audio mix.
Here’s how you can adjust volume and panning in Studio One:
- Volume Control: To adjust the volume level of a specific track, locate the volume fader in the Mix Console or the track settings in the Arrangement view. Drag the fader up or down to increase or decrease the volume of the track. You can also use automation to create dynamic changes in volume over time, adding depth and expression to your audio.
- Panning Control: Studio One allows you to position the audio within the stereo field using the panning control. In the Mix Console or the track settings, locate the pan knob or control. Drag the knob left or right to adjust the panning position of the track. This enables you to create a sense of width and separation in your audio mix, enhancing the overall spatial experience.
- Automation: Studio One’s automation feature allows you to automate volume and panning changes throughout the duration of your audio file. By enabling automation mode and drawing automation curves, you can create precise and dynamic control over the volume and panning parameters. This is especially useful for creating fades, transitions, and immersive movement in your audio mix.
- Grouping Tracks: Studio One offers track grouping options that allow you to control the volume and panning of multiple tracks simultaneously. By grouping related tracks together, any volume or panning adjustments applied to one track will be applied to all the tracks in the group. This simplifies the process of balancing and positioning multiple elements in your mix.
- Bus Sends and Returns: Studio One’s bus routing system allows you to create auxiliary tracks or buses where you can apply additional processing or effects to multiple tracks. By sending tracks to a bus, you can control the volume and panning of the entire bus, affecting all the tracks routed to it. This enables you to create cohesive and consistent sound characteristics for specific groups of tracks.
By mastering the art of adjusting volume and panning in Studio One, you can create a well-balanced mix that highlights key elements, conveys depth and space, and enhances the overall listening experience.
Now that you have mastered volume and panning, it’s time to explore the next step: applying effects to audio playback.
Step 7: Applying Effects to Audio Playback
Adding effects to your audio playback in Studio One can significantly enhance the overall sound and bring your tracks to life. Studio One offers a wide range of built-in effects, including equalizers, compressors, reverb, delay, and more, allowing you to shape and sculpt your audio to fit your creative vision.
Here’s how you can apply effects to audio playback in Studio One:
- Insert Effects: To apply effects to a specific track, select the track in the Mix Console or the Arrangement view. Locate the “Inserts” section and click on an available slot to open the plug-in browser. Browse through the available effects categories or search for a specific effect. Once you find the desired effect, double-click on it to insert it into the slot. Adjust the effect parameters to achieve the desired sound.
- Send and Return Effects: Studio One allows you to apply effects to multiple tracks using send and return channels. Select the tracks you want to send to a specific effect and right-click to access the “Add Bus Channel” option. Create a new bus channel and insert the desired effect on the bus channel insert slots. Adjust the send level from each track to the bus channel to control the amount of effect applied. This technique is particularly useful for creating a cohesive sound by applying effects to multiple tracks.
- Channel Strip: Studio One’s channel strip provides an all-in-one solution for applying effects to a track. The channel strip combines EQ, compression, saturation, and other processing effects into a single interface. To access the channel strip, open the Inspector panel for the desired track and click on the channel strip tab. Adjust the different parameters to shape the sound of your audio playback.
- Automation: Just like volume and panning, effects parameters can also be automated in Studio One. Enable automation mode and draw automation curves for specific effect parameters to create dynamic changes over time. This allows you to add movement, intensity, and variation to your audio playback.
- Third-Party Plug-ins: In addition to the built-in effects, Studio One allows you to use third-party plug-ins to expand your creative possibilities. Install and activate third-party plug-ins, then insert them into the desired tracks or bus channels to apply their unique effects. Studio One supports VST, VST3, and AU plug-in formats.
With Studio One’s extensive collection of effects and the ability to automate and combine them, you have the tools to shape, transform, and experiment with your audio playback to achieve your desired sound.
Now that you have added effects to your audio playback, let’s move on to the final step: fine-tuning audio playback settings for optimal performance.
Step 8: Fine-tuning Audio Playback Settings
After you have imported audio files, set up audio devices, configured playback options, adjusted volume and panning, and applied effects, it’s time to fine-tune the audio playback settings in Studio One for optimal performance and quality. These settings will help ensure that your audio playback is accurate, reliable, and tailored to your specific needs.
Here are some important audio playback settings to consider:
- Latency: Latency refers to the delay between when you play a sound in Studio One and when you hear it through your speakers or headphones. It’s important to find the ideal balance between low-latency for real-time monitoring and high-latency for system stability. In the Studio One Preferences, adjust the buffer size to optimize latency based on your computer system’s capabilities.
- Sample Rate and Bit Depth: The sample rate and bit depth determine the resolution and accuracy of your audio playback. Studio One supports various sample rates and bit depths. It’s recommended to set these settings according to the quality of your audio files and the capabilities of your audio interface. Higher sample rates and bit depths generally yield better audio quality but may require more processing power.
- Playback Options: Studio One offers a range of playback options that you can fine-tune to meet your specific needs. In the Preferences, you can adjust options such as automatic solo defeat, pre-roll and post-roll settings, playback behavior during recording, and more. Customize these settings based on your workflow preferences and project requirements.
- Track Freeze: If you’re working with a large number of tracks and processing-intensive plug-ins, Studio One offers a “Track Freeze” option to free up your computer’s processing power. Track Freeze temporarily renders tracks with their effects to decrease CPU load. You can freeze and unfreeze tracks as needed, allowing you to focus on other aspects of your audio production without sacrificing performance.
- Monitoring Setup: Studio One provides flexible monitoring options to ensure accurate and reliable audio playback. In the Preferences, you can configure monitoring settings such as input monitoring mode, cue mix options, and direct monitoring. Adjust these settings to match your recording and monitoring setup, ensuring clear and precise audio playback during recording and mixing sessions.
By fine-tuning these audio playback settings in Studio One, you can optimize your workflow, increase productivity, and achieve the best possible audio quality in your projects.
It’s important to regularly save your project to avoid any data loss. Studio One offers auto-save options, and it’s recommended to make use of them to safeguard your work.
Congratulations! You have now successfully learned how to listen to audio playback on Studio One. By following these steps and exploring the various features and tools, you can unlock the full potential of Studio One and take your audio production to new heights.
Now, it’s time to jump in, experiment, and let your creativity soar with Studio One!
Conclusion
Congratulations on completing the journey of learning how to listen to audio playback on Studio One. Throughout this article, we have covered the essential steps, from launching the software to fine-tuning the audio playback settings. By following these steps, you are now equipped with the knowledge and tools to confidently work with audio playback in Studio One.
Studio One offers a powerful and intuitive platform for musicians, producers, and audio engineers to craft their music with precision and creativity. By understanding how to import audio files, set up audio devices, configure playback options, adjust volume and panning, apply effects, and fine-tune settings, you have unlocked the full potential of Studio One’s audio playback capabilities.
Remember to experiment and tailor your audio playback to suit your unique artistic vision and project requirements. Studio One provides a versatile range of tools and options for customization, allowing you to create a rich and immersive audio experience.
To further enhance your audio production skills, continue exploring Studio One’s other features, such as recording, editing, mixing, and mastering. The more you dive into Studio One’s comprehensive toolkit, the more possibilities you will uncover for bringing your musical ideas to life.
Lastly, don’t forget to regularly save your projects and back up your audio files to prevent any potential data loss. Studio One offers convenient project management options to ensure your work remains secure.
Now that you have mastered the art of audio playback in Studio One, it’s time to unleash your creativity and embark on new sonic adventures. Whether you are a beginner or an experienced user, Studio One offers endless possibilities for crafting professional, captivating, and high-quality music.
So, plug in your instruments, load up your virtual instruments, and let the inspiring world of audio playback in Studio One be your guide on your musical journey!