Home>Events & Info>Playback>How To Start Playback Where Cursor Is In Logic
Playback
How To Start Playback Where Cursor Is In Logic
Modified: January 22, 2024
Learn how to start playback exactly where the cursor is in Logic. Master the art of seamless audio playback with this comprehensive guide.
(Many of the links in this article redirect to a specific reviewed product. Your purchase of these products through affiliate links helps to generate commission for AudioLover.com, at no extra cost. Learn more)
Table of Contents
Introduction
Welcome to the world of Logic Pro, a powerful digital audio workstation (DAW) that is widely used by music producers, sound engineers, and musicians. If you’re new to Logic Pro, you may have already noticed its vast array of features and tools, which can be a bit overwhelming at first. But fear not, because in this article, we’re going to focus on one specific aspect: starting playback where the cursor is positioned.
Playback is an essential function in any DAW, allowing you to listen to your project and make necessary adjustments. By default, Logic Pro starts playback at the beginning of the project, but there may be times when you want to start playback from a specific point, such as where the cursor is currently located. This can be particularly useful when editing or fine-tuning certain sections of your project.
In this article, we’ll guide you through the process of starting playback where the cursor is in Logic Pro. Whether you’re a seasoned user looking for a refresher or a beginner eager to learn, these step-by-step instructions will help you achieve seamless playback control.
Overview of Logic Pro
Logic Pro is a professional music production software developed by Apple Inc. Known for its powerful capabilities and intuitive interface, Logic Pro is a go-to choice for professionals in the music industry. With its comprehensive set of tools and features, Logic Pro provides users with a complete solution for recording, editing, mixing, and mastering music.
One of the standout features of Logic Pro is its extensive collection of virtual instruments and audio effects. From synthesizers and drum machines to guitars and pianos, Logic Pro offers a wide range of high-quality sounds to fuel your creativity. Additionally, with support for third-party plugins, you can expand your sonic palette even further.
Logic Pro also excels in its editing capabilities. With its advanced audio and MIDI editing tools, you can manipulate and fine-tune your recordings with precision. From correcting pitch to adjusting timing, Logic Pro gives you the flexibility to polish your tracks to perfection.
The mixing and mastering process is made seamless with Logic Pro’s powerful audio processing tools. The software provides a comprehensive mixer interface, allowing you to balance the levels of different tracks, apply EQ and compression, and add various audio effects to create a well-rounded mix. Additionally, Logic Pro offers support for mastering plugins, making it easy to add the final touches to your project.
Logic Pro’s workflow is enhanced by its intuitive user interface. The software provides a customizable workspace where you can arrange and organize different elements of your project to fit your preferences. Whether you prefer working with a traditional mixer view or a more visual arrangement view, Logic Pro offers the flexibility to adapt to your workflow.
With its professional-grade features and user-friendly interface, Logic Pro is a powerful tool for both beginners and experienced producers. Whether you’re creating music for film, television, or your own personal projects, Logic Pro has everything you need to bring your ideas to life with precision and creativity.
Navigating the Logic Pro Interface
Before we dive into the specifics of starting playback where the cursor is in Logic Pro, let’s take a moment to familiarize ourselves with the software’s interface. Understanding the layout and navigation options will make it easier to locate and utilize the playback controls.
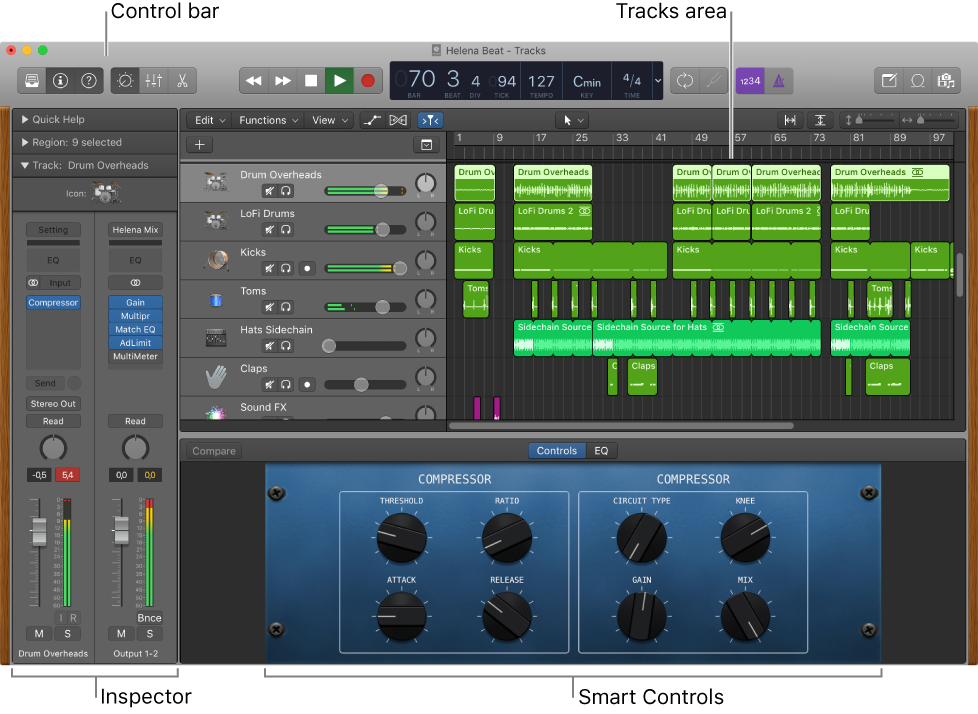
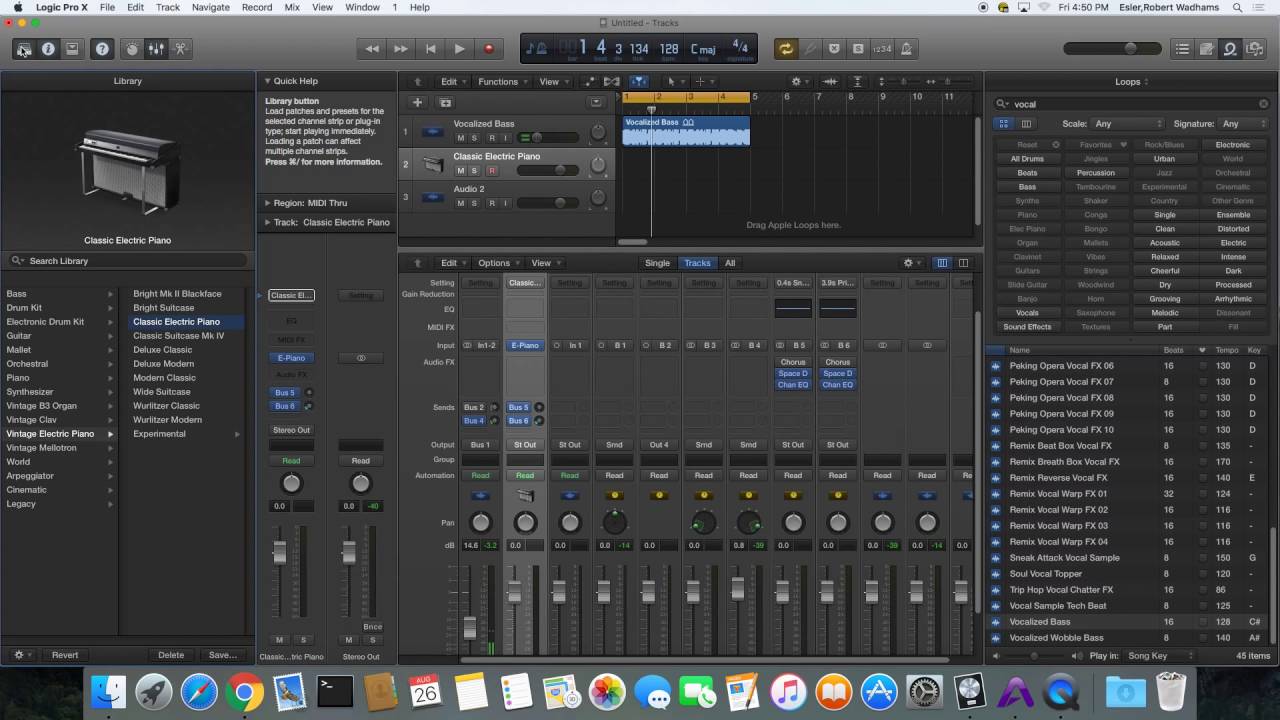
When you launch Logic Pro, you’ll be greeted with a comprehensive workspace that consists of various windows and panels. The main window, known as the Arrange window, is where you arrange and edit your music tracks. Here, you’ll find the tracks area, which displays your audio and MIDI regions, as well as the transport bar at the top, which contains playback controls.
Located in the upper part of the transport bar, you’ll find the main transport controls. These include the play, stop, rewind, and fast forward buttons, as well as the cycle and metronome buttons. The play button is particularly important for starting and stopping playback in Logic Pro.
In addition to the main transport controls, Logic Pro also provides various other methods to navigate and control playback. One such option is the use of key commands or keyboard shortcuts. These shortcuts allow you to start and stop playback without the need to manually click on the play button.
Another helpful feature of the Logic Pro interface is the use of markers. Markers are useful for marking specific points in your project, such as the beginning of a chorus or a key change. They act as navigation points and can be used to quickly jump to different sections of your project during playback.
Additionally, Logic Pro offers a customizable control bar that can be accessed from the View menu. The control bar provides quick access to various functions and can be customized to display the playback controls, among other options.
By familiarizing yourself with the Logic Pro interface and the available navigation options, you’ll be better equipped to locate and utilize the playback controls. This will make it easier to start playback where the cursor is positioned, as we’ll explore in the next section.
Understanding the Playhead and Cursor
When working in Logic Pro, it’s essential to understand the concepts of the playhead and cursor. These two elements play a crucial role in determining the playback position and navigating through your project.
The playhead is a vertical line that moves horizontally across the tracks area of the Arrange window as your project plays. It represents the current playback position and indicates where you are in your composition. The playhead helps you visualize the progress of your music and provides a reference point when making edits or adjustments.
The cursor, on the other hand, is a horizontal line that follows the movements of your mouse or trackpad. It represents the current position where your actions, such as clicking or making selections, will take effect. The cursor allows you to interact with different elements of your project, such as regions, notes, and markers.
It’s important to note that the playhead and cursor are separate entities, but they are interconnected. As you move the cursor, the playhead follows suit, ensuring that the playback position aligns with the cursor’s current location. This synchronization allows you to precisely control where the playback starts and stops in relation to the cursor’s position.
Understanding the playhead and cursor relationship is crucial when it comes to starting playback where the cursor is positioned. By leveraging this connection, you can easily initiate playback from any point within your project, even while making edits, additions, or adjustments.
Now that we have a solid understanding of the playhead and cursor in Logic Pro, let’s move on to the step-by-step instructions on how to start playback where the cursor is positioned.
Starting Playback Where the Cursor Is Positioned
Starting playback where the cursor is positioned in Logic Pro is a straightforward process that can be done using various methods. Whether you prefer using keyboard shortcuts or using the mouse, there are multiple options available to initiate playback from the cursor’s current location.
Here are the step-by-step instructions to start playback where the cursor is positioned in Logic Pro:
- Using the Spacebar: The simplest method is to use the spacebar on your keyboard. With your project open and the cursor placed at the desired position, simply press the spacebar to start playback from that point. Press the spacebar again to stop playback. This method is quick and convenient, allowing for seamless control over playback.
- Clicking the Play Button: If you prefer using the mouse, you can use the play button in the transport bar. Position the cursor at the desired location, then click the play button to start playback from that point. Click the stop button to halt playback.
- Using Key Commands: Logic Pro provides customizable key commands that allow you to perform various functions, including starting and stopping playback at the cursor’s current position. By assigning a specific key command to the Play function, you can easily start playback from wherever the cursor is located. Consult Logic Pro’s documentation or preferences to configure this option.
- Utilizing the Control Bar: If you have the control bar enabled, you can also use it to start playback where the cursor is positioned. The control bar typically contains a play button that can be clicked to initiate playback from the cursor’s location.
- Using the Numeric Keypad: Logic Pro allows you to customize key commands using the numeric keypad on your keyboard. By assigning a key to the Play from Selection function, you can start playback from wherever the cursor is placed, even if a specific region or selection is highlighted.
By utilizing any of these methods, you can easily start playback where the cursor is positioned in Logic Pro. This gives you greater control and flexibility, allowing you to focus on specific sections of your project and make precise adjustments.
Now that you know how to start playback where the cursor is, you can take full advantage of Logic Pro’s playback capabilities and streamline your workflow.
Step-by-Step Instructions
Starting playback where the cursor is positioned in Logic Pro is a valuable skill that can enhance your workflow. Here are step-by-step instructions on how to achieve this:
- Open your Logic Pro project and locate the cursor in the desired playback position.
- If you want to use the spacebar to start playback, simply press the spacebar on your keyboard. The playback will initiate from the cursor’s current position. Press the spacebar again to stop playback.
- If you prefer using the mouse, navigate to the transport bar located at the top of the Arrange window. Locate the play button and click it to start playback from the cursor’s position. Click the stop button to halt playback.
- Alternatively, you can customize key commands in Logic Pro by going to the Preferences menu and selecting Key Commands. Assign a specific key command to the Play function to start playback from the cursor’s location using the keyboard. Use the assigned key to start and stop playback.
- If you have enabled the control bar in Logic Pro, look for the play button within the control bar. Clicking this button will initiate playback from the cursor’s current position.
- If you prefer using the numeric keypad on your keyboard, you can assign a key to the Play from Selection function. This option allows you to start playback from wherever the cursor is located, even when a specific region or selection is highlighted. Check Logic Pro’s documentation for instructions on customizing key commands using the numeric keypad.
By following these step-by-step instructions and choosing the method that suits your preference, you can easily start playback where the cursor is positioned in Logic Pro. This allows for more precise editing, fine-tuning, and control over your music production process.
Now that you have mastered the art of starting playback from the cursor’s location, you are equipped with another valuable tool to enhance your productivity and creativity in Logic Pro.
Conclusion
Starting playback where the cursor is positioned in Logic Pro is a simple yet powerful technique that can greatly enhance your music production workflow. By being able to initiate playback from any desired point in your project, you have greater control and flexibility when editing, arranging, and fine-tuning your music.
In this article, we explored the fundamentals of Logic Pro, including its extensive features and user-friendly interface. We delved into the concepts of the playhead and cursor, understanding how they are interconnected and crucial in determining the playback position in your project.
We then provided step-by-step instructions on how to start playback where the cursor is positioned. Whether you prefer using keyboard shortcuts, mouse clicks, or the control bar, Logic Pro offers multiple methods to seamlessly begin playback from the cursor’s current location.
By mastering this technique, you can focus on specific sections of your project, making precise edits and adjustments with ease. Whether you’re a beginner or a seasoned Logic Pro user, starting playback where the cursor is positioned will undoubtedly improve your productivity and efficiency in music production.
So, why wait? Take the knowledge and instructions you’ve gained from this article and apply them to your own projects in Logic Pro. Start exploring the possibilities of precise playback control and unlock your creativity in the world of music production.