Home>Production & Technology>Audio Interface>How To Switch From My Pc Internal Audio Interface To Mine
Audio Interface
How To Switch From My Pc Internal Audio Interface To Mine
Modified: February 19, 2024
Learn how to switch from your PC's internal audio interface to your own audio interface easily with our step-by-step guide. Upgrade your audio experience now!
(Many of the links in this article redirect to a specific reviewed product. Your purchase of these products through affiliate links helps to generate commission for AudioLover.com, at no extra cost. Learn more)
Table of Contents
Introduction
Welcome to the world of audio interfaces! If you’re looking to upgrade your audio setup and switch from your PC’s internal audio interface to an external one, you’re in the right place. In this article, we’ll guide you through the process of choosing the right external audio interface, preparing your setup, connecting it to your PC, adjusting audio settings, configuring software, and troubleshooting any issues that may arise.
An audio interface is a crucial piece of equipment for anyone working with sound, whether you’re a musician, podcaster, content creator, or just someone who loves high-quality audio. While your PC’s internal sound card may be sufficient for basic everyday use, an external audio interface offers superior performance and flexibility, allowing for professional-grade audio recording and playback.
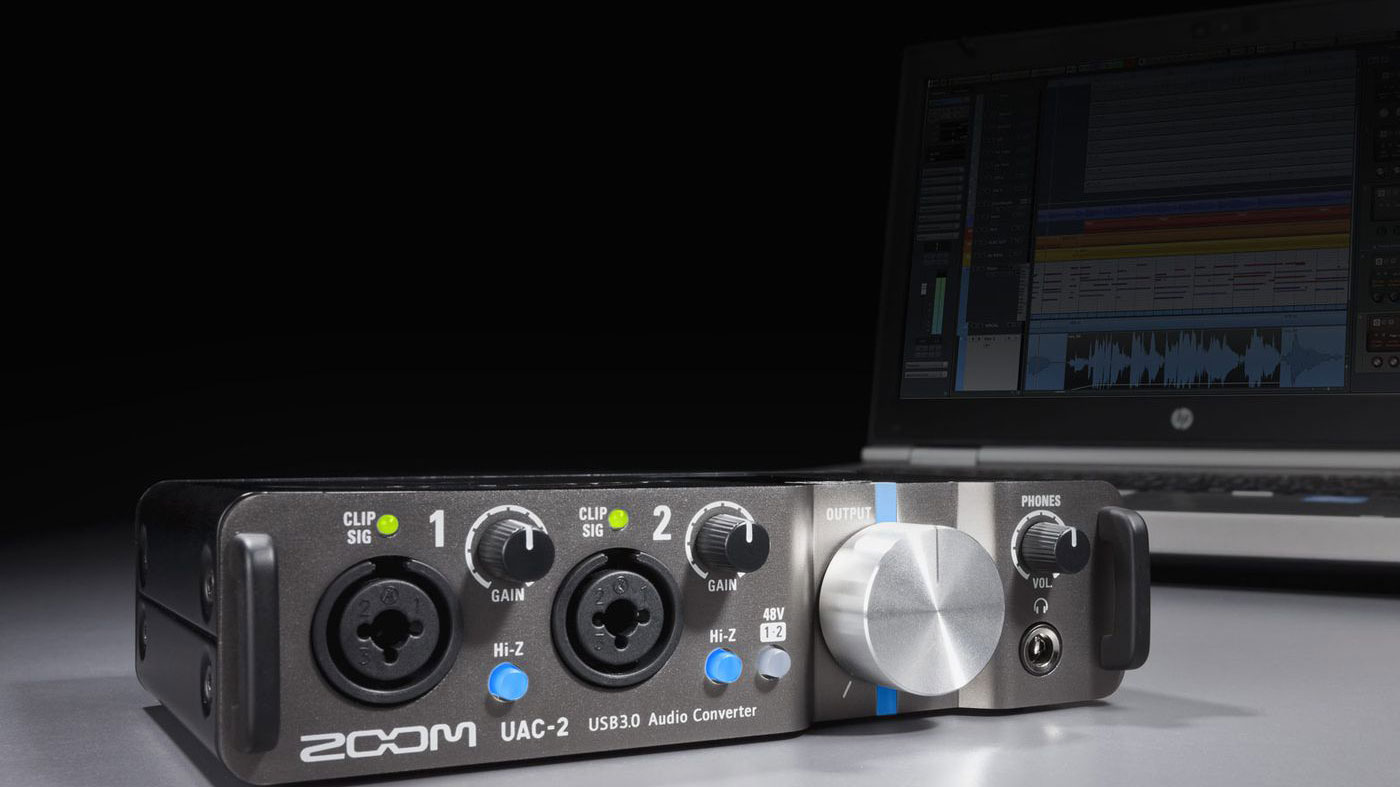
So why make the switch? External audio interfaces provide several advantages over internal sound cards. They typically have higher quality analog-to-digital and digital-to-analog converters, resulting in better sound quality and lower latency. They also offer various input and output options, such as XLR and TRS connections, MIDI ports, and headphone outputs, allowing you to connect microphones, instruments, speakers, and other audio equipment to your PC.
Additionally, external audio interfaces often come with software that offers advanced control over your audio settings, including sample rate, buffer size, and input gain. This level of control is vital for achieving optimal audio performance in different recording or playback scenarios.
Before you switch to an external audio interface, it’s essential to understand the different options available and choose the right one for your needs. Factors to consider include the number and type of inputs and outputs, the desired sample rate and bit depth, and compatibility with your operating system and software.
In the following sections, we’ll delve into the details of selecting the right external audio interface, preparing your setup, connecting it to your PC, adjusting audio settings, configuring software, and troubleshooting common issues.
By the end of this article, you’ll be ready to make the switch from your PC’s internal audio interface to your very own external interface, unlocking a world of possibilities for your audio production endeavors.
Understanding Internal Audio Interfaces
Before we dive into the process of switching to an external audio interface, let’s take a moment to understand what an internal audio interface is and how it differs from its external counterpart.
In simple terms, an internal audio interface, also known as a sound card, is a component integrated into your computer’s motherboard that handles audio input and output. It is responsible for converting analog audio signals from microphones or instruments into digital data that can be processed by the computer, and vice versa. While internal audio interfaces offer basic audio functionality for everyday use, they may not meet the demands of professional audio production.
Internal audio interfaces are typically designed with basic inputs and outputs, such as a line-in or microphone input and a line-out or headphone output. They often have limited sample rates and bit depths, resulting in lower audio quality compared to external interfaces. Additionally, internal interfaces may have higher latency, which can cause delays between audio input and output.
Furthermore, internal audio interfaces are often susceptible to electrical interference from other components within the computer, leading to unwanted noise in audio recordings or playback. This interference can be a significant limitation when striving for high-quality audio production.
On the other hand, external audio interfaces are dedicated devices that connect to your computer via USB, Thunderbolt, or PCIe. They offer a wide range of features and capabilities, not found in internal sound cards. External interfaces provide superior audio quality, lower latency, and more extensive input and output options.
By switching to an external audio interface, you can bypass the limitations of your internal sound card and unlock a world of possibilities for your audio production endeavors. Whether you’re a musician recording instruments, a podcaster capturing vocals, or a content creator seeking professional-grade audio, an external audio interface is an essential tool.
In the next section, we’ll explore how to choose the right external audio interface to meet your specific needs and requirements.
Choosing the Right External Audio Interface
When it comes to choosing the right external audio interface, there are several factors to consider. The following considerations will help you narrow down your options and find the interface that best suits your needs:
- Number and type of inputs and outputs: Determine how many audio inputs and outputs you require for your projects. Consider the types of connections you need, such as XLR, TRS, MIDI, or digital inputs and outputs.
- Sample rate and bit depth: Higher sample rates and bit depths offer better audio quality and accuracy. Choose an interface that supports the sample rate and bit depth you need for your specific projects.
- Compatibility: Ensure that the interface you choose is compatible with your operating system (Windows, macOS, Linux) and any software you plan to use. Check for driver availability and software compatibility.
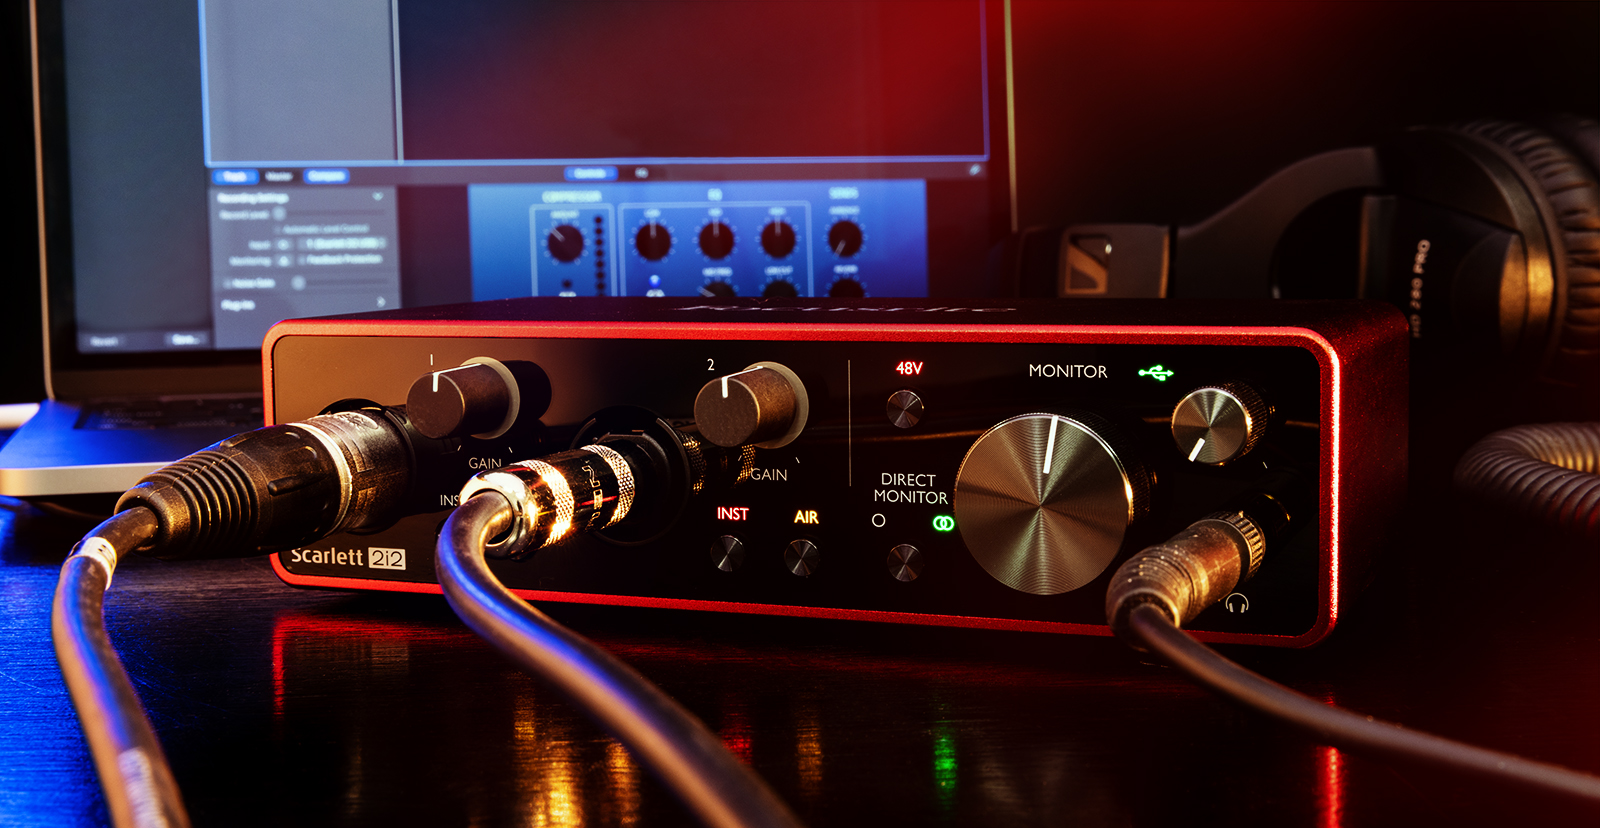
- Preamps and gain control: If you plan to use microphones, consider the quality of the preamps built into the interface and the availability of gain control to adjust input levels. Good preamps will ensure clean and accurate recordings.
- Phantom power: If you work with condenser microphones, make sure the interface provides phantom power. This feature is necessary to power the microphones and enable them to function properly.
- Portability: If you need to take your audio interface on the go or work in different locations, consider the size, weight, and bus-powered capabilities of the interface. Some interfaces are compact and USB-powered, making them ideal for portable setups.
- Price range: Set a budget for your audio interface and consider the price range of the options available. Remember that higher-priced interfaces often offer better quality and more features, but there are also affordable interfaces that can meet your needs.
- Reviews and recommendations: Read reviews and seek recommendations from professionals or fellow audio enthusiasts to get insights into the reliability, performance, and overall user experience of different interfaces.
Taking these factors into account will help you narrow down your options and choose an external audio interface that aligns with your requirements. Remember, the interface you select should not only meet your current needs but also allow room for future growth and expansion in your audio production setup.
Once you have chosen your new external audio interface, it’s time to prepare your setup for the switch. In the next section, we’ll guide you through the necessary steps to set the foundation for a seamless transition.
Preparing Your Setup
Before you make the switch to your new external audio interface, there are a few steps you should take to prepare your setup:
- Back up your data: It’s always a good idea to back up your important files and data before making any significant changes to your computer setup. This ensures that you have a safe copy of your files in case anything goes wrong during the transition.
- Update your drivers and software: Check for any updates to your operating system, drivers, and audio software. It’s crucial to have the latest versions installed to ensure compatibility and optimal performance with your new external audio interface.
- Organize cables and connections: Take the time to tidy up your cables and connections. Label them if necessary, so you can easily identify which cables are connected to your internal audio interface and prepare to connect them to your new external interface.
- Free up USB or PCIe ports: If your new external audio interface connects via USB or PCIe, make sure you have available ports to accommodate the connection. Disconnect any unnecessary devices or consider adding additional USB ports or a PCIe expansion card if needed.
- Make space on your workspace: Ensure that you have enough space on your desk or workspace to accommodate the new external audio interface. Clear away any clutter or reorganize your setup to make room for the interface and any additional equipment you plan to connect.
- Gather necessary accessories: Depending on your new external interface, you may need additional cables, adapters, or accessories. Make a list of any items you need to purchase or gather them beforehand to ensure a smooth setup process.
By taking these preparatory steps, you can minimize any potential issues and ensure a smooth transition from your internal audio interface to your new external interface. Once your setup is ready, it’s time to connect your external audio interface to your PC. In the next section, we’ll guide you through the necessary steps to establish this connection successfully.
Connecting Your External Audio Interface
Now that your setup is prepared, it’s time to connect your external audio interface to your PC. Follow these steps to establish a successful connection:
- Review the interface’s manual: Take a moment to familiarize yourself with the connectors and ports on your external audio interface. Refer to the manual or manufacturer’s website for specific instructions on how to connect the interface.
- Power off your PC: Before making any physical connections, shut down your computer to ensure safe handling of the equipment.
- Connect the interface to your PC: Depending on the interface, you may connect it via USB, Thunderbolt, or PCIe. Follow the specific instructions for your interface to establish the connection. USB interfaces typically require a USB cable, while Thunderbolt or PCIe interfaces may require specialized cables or cards.
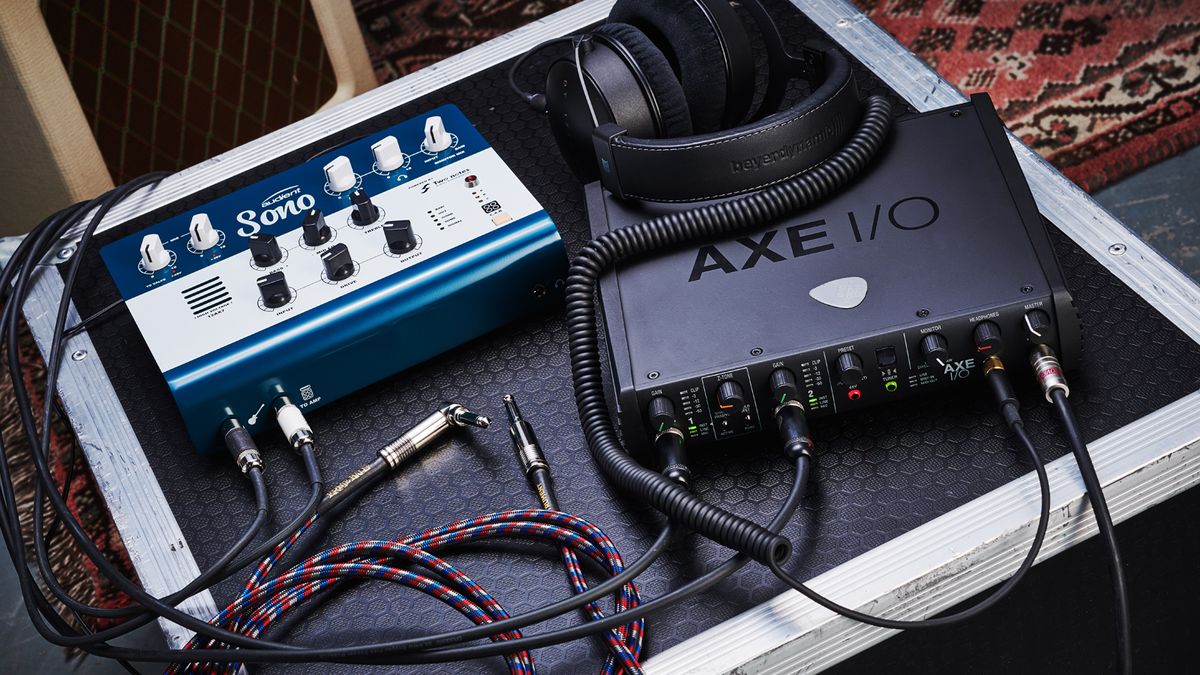
- Connect audio devices: If you plan to connect microphones, instruments, speakers, or other audio devices to your interface, now is the time to do so. Ensure that you use the appropriate cables and connectors for each device. XLR cables are common for microphones, while TRS or TS cables may be used for instruments and speakers.
- Power on your external audio interface: Once all the connections are made, power on your external audio interface. Follow the interface’s manual for any additional steps required to initialize or configure the interface.
- Power on your PC: After powering on the interface, you can now switch on your computer. Allow your operating system to recognize and install any necessary drivers for the interface. If prompted, follow the on-screen instructions to complete the driver installation.
- Check for proper connection: Once your PC is booted up, check the interface’s LED lights or control panel to ensure that it’s detected and connected correctly. Test the audio input and output to verify that sound passes through the interface without any issues.
It’s important to note that the specific steps may vary depending on the interface and operating system you are using. Always refer to the user manual provided by the manufacturer to ensure correct setup and connection.
Now that your external audio interface is connected to your PC, you’ll need to adjust the audio settings on your computer to optimize the performance of the interface. In the next section, we’ll explore how to adjust these settings for the best audio experience.
Adjusting Audio Settings on Your PC
After connecting your external audio interface to your PC, it’s important to adjust the audio settings to ensure optimal performance. Follow these steps to adjust the audio settings on your computer:
- Open the Sound settings: On Windows, right-click the speaker icon in the system tray and select “Open Sound settings.” On macOS, go to “System Preferences” and click on “Sound.”
- Select the external audio interface: In the Sound settings, navigate to the “Playback” and “Recording” tabs. From the available options, select your external audio interface as the default device for both playback and recording.
- Set the sample rate and bit depth: Look for an option to set the sample rate and bit depth in the Sound settings. Match these settings to the capabilities of your external audio interface, as specified in its documentation. Higher sample rates and bit depths generally offer better audio quality, but make sure they are supported by your equipment.
- Adjust the volume levels: Use the volume sliders or knobs in the Sound settings to adjust the input and output volume levels. You may need to test different levels to find the appropriate balance for your audio setup.
- Configure audio enhancements (if needed): Some systems offer additional audio enhancements or effects, such as equalizers or virtual surround sound. Adjust these settings according to your preferences and the requirements of your audio projects.
- Test the audio input and output: Use the Test button or play a sample audio file to ensure that the audio is passing through the external audio interface correctly. Verify that there are no issues with the sound quality, latency, or any unexpected noise.
It’s worth noting that the steps and options for adjusting audio settings may vary depending on your operating system version and audio configuration software. Explore the settings thoroughly and consult the documentation for your operating system if you encounter any difficulties.
Now that you’ve adjusted the audio settings on your PC, the next step is to configure any audio software or digital audio workstations (DAWs) you plan to use. In the next section, we’ll guide you through this process to ensure seamless integration of your external audio interface with your preferred software.
Configuring Audio Software
Configuring your audio software or digital audio workstation (DAW) is crucial to utilize the full potential of your external audio interface. Follow these steps to configure your audio software:
- Open your audio software/DAW: Launch the software you will be using for audio recording, editing, or production. Common examples include Pro Tools, Ableton Live, Logic Pro, FL Studio, or Reaper.
- Access the audio settings: Locate the audio settings or preferences section within your software. This is typically found in the “Settings,” “Options,” or “Preferences” menu.
- Select the external audio interface: In the audio settings, look for an option to choose the audio interface or device. Select your external audio interface from the available options. It should match the one you configured as the default device in your computer’s sound settings.
- Configure sample rate and buffer size: Adjust the sample rate and buffer size settings within your audio software. Set them to match the specifications of your external audio interface for optimal performance. These settings affect both audio quality and latency, so finding the right balance is important.
- Configure inputs and outputs: If your software allows for manual configuration of inputs and outputs, ensure that you assign the correct channels from your external audio interface. This step is essential if you have multiple input sources or wish to use specific outputs for monitoring or playback.
- Test input and output signals: Record or play audio tracks in your software to verify that the input and output signals are passing through your external audio interface accurately. Monitor the levels and check for any issues such as latency, distortion, or noise.
- Explore additional settings and features: Take the time to explore other audio-related settings and features within your software. This may include options for recording quality, automatic latency compensation, effects plugins, or routing configurations. Familiarize yourself with these features to enhance your workflow and optimize your audio production.
Keep in mind that each audio software/DAW has its own interface and settings layout, so the steps and terminology may vary. Consult the software’s documentation or online resources if you need specific instructions for your chosen application.
With your audio software configured to work seamlessly with your external audio interface, you’re now ready to start recording, editing, or producing with improved audio quality and flexibility.
However, if you encounter any issues or face challenges during the setup and configuration process, don’t worry. In the next section, we’ll explore some common troubleshooting tips to help you overcome any obstacles that may arise.
Testing and Troubleshooting
Testing your setup and troubleshooting any issues is an important step to ensure smooth operation with your new external audio interface. Here are some tips to help you test and troubleshoot:
- Test audio input and output: Verify that the audio is passing through your external audio interface correctly. Record some audio or play a sample file while monitoring the input and output levels. Listen for any distortion, latency, or unexpected noise.
- Check cable connections: Ensure that all cables are securely connected to their respective ports. Loose or improper connections can cause audio dropouts or other issues. Try disconnecting and reconnecting the cables to ensure a tight and stable connection.
- Update drivers and firmware: Check the manufacturer’s website for any available driver or firmware updates for your interface. Updating to the latest versions can often resolve compatibility issues and improve performance.
- Check power supply: If your external audio interface requires its own power source, double-check that it is connected properly and receiving power. Make sure that the power cable and adapter are in good condition.
- Verify software settings: Review the settings in your audio software/DAW to ensure they are configured correctly. Confirm that the sample rate, buffer size, input/output assignments, and audio preferences align with your external interface and desired audio quality.
- Test with different software and devices: Try using your external audio interface with different audio software or devices to isolate the problem. If you can replicate the issue across multiple software or devices, it may indicate an issue with the interface itself.
- Consult the user manual and support resources: Refer to the user manual provided with your external audio interface for troubleshooting guidance specific to your device. Manufacturers often offer online support resources, forums, or FAQs where you can find solutions to common issues.
- Contact customer support: If all else fails, don’t hesitate to reach out to the customer support team of your external audio interface manufacturer. They can provide valuable assistance and help resolve any technical problems you may encounter.
Remember, troubleshooting issues with your external audio interface may require some patience and trial and error. Persistence and thoroughness can go a long way in identifying and resolving any challenges you may face during the testing process.
Once you have completed testing and troubleshooting, you should be ready to unleash the full potential of your external audio interface in your audio production workflow. In the final section, we’ll provide some closing thoughts and reflections.
Final Thoughts
Congratulations on successfully switching from your PC’s internal audio interface to your very own external interface! By making this transition, you have unlocked a world of possibilities for your audio production endeavors. With higher audio quality, lower latency, and expanded input and output options, you are now equipped to create professional-grade audio recordings, podcasts, music, and more.
Throughout this article, we explored the importance of understanding internal audio interfaces, the factors to consider when choosing the right external interface, and how to prepare your setup for the switch. We guided you through the process of connecting your external audio interface, adjusting audio settings on your PC, configuring your audio software, and testing and troubleshooting any issues that may arise.
Remember, finding the right external audio interface for your specific needs and workflow is crucial. Consider factors such as the number and type of inputs and outputs, sample rate and bit depth capabilities, compatibility with your software and operating system, and your budget. By choosing wisely, you can maximize the potential of your audio production setup.
As you continue to work with your new external interface, take the time to explore its features and experiment with different audio settings. This will help you optimize your audio quality and customize your production workflow to suit your preferences and requirements.
Should you encounter challenges or have questions during the process, don’t hesitate to seek support. Consult the user manual, reach out to customer support, or connect with online communities and forums for assistance and insights from fellow audio enthusiasts.
Now that you have successfully switched to your external audio interface, it’s time to unleash your creativity and take your audio production to new heights. Whether you’re recording music, podcasting, creating videos, or any other audio-related endeavor, your new external audio interface will be an invaluable tool in achieving professional-quality results.
Happy creating and may your audio journey be filled with sonic excellence!