Home>Production & Technology>Audio Interface>How To Use My Audio Interface In Discord
Audio Interface
How To Use My Audio Interface In Discord
Published: February 4, 2024
Learn how to use your audio interface for crystal-clear sound in Discord. Get step-by-step instructions on setting up and optimizing your setup for the best audio quality.
(Many of the links in this article redirect to a specific reviewed product. Your purchase of these products through affiliate links helps to generate commission for AudioLover.com, at no extra cost. Learn more)
Table of Contents
Introduction
Welcome to the world of audio interfaces! An audio interface is a crucial tool for recording and producing high-quality audio on your computer. Whether you’re a musician, podcaster, or content creator, having a reliable audio interface can greatly enhance your audio recording and streaming capabilities.
In this article, we will guide you on how to use your audio interface in Discord, the popular communication platform for gamers, communities, and professionals. By integrating your audio interface with Discord, you can ensure crystal clear audio during voice chats, game streaming, and online meetings.
Before we dive into the steps, let’s briefly discuss why using an audio interface in Discord is beneficial. Built-in computer audio devices often lack the necessary features and circuitry to deliver professional-grade audio quality. Audio interfaces, on the other hand, are designed specifically for audio recording and playback, offering better sound reproduction, low latency, and various input/output options.
By using your audio interface in Discord, you’ll be able to capture and transmit high-quality audio, enhance your voice clarity, and eliminate background noise and audio artifacts. Whether you’re communicating with teammates during an intense gaming session or participating in a virtual meeting, using an audio interface can make your voice sound more professional and polished.
Now that we understand the benefits, let’s get started with the steps to use your audio interface in Discord. Keep in mind that the specific instructions may vary depending on your audio interface model and your computer’s operating system. However, the general principles and settings should be similar across different devices.
Before proceeding, make sure your audio interface is properly connected to your computer and powered on. Once you’ve confirmed the connection, let’s move on to the next step: checking compatibility.
Step 1: Checking Compatibility
Before using your audio interface in Discord, it’s important to ensure that your device is compatible with the platform. Most modern audio interface models are compatible with Discord, but it’s always a good idea to double-check.
Here are a few things you can do to confirm compatibility:
- Check the documentation: Refer to the user manual or specifications sheet that came with your audio interface. Look for any mentions of compatibility with communication platforms or software.
- Visit the manufacturer’s website: Head over to the manufacturer’s website and navigate to the product page for your audio interface. Look for any compatibility information or software updates that might enhance compatibility.
- Community forums: Search online forums or communities dedicated to audio interfaces. Other users might have already shared their experiences and compatibility with Discord.
By conducting these checks, you can ensure that your audio interface is supported by Discord and minimize any potential compatibility issues that might arise.
If you discover that your audio interface is not officially supported by Discord, don’t worry just yet. Some users have found workarounds or alternative configurations that allow their devices to function with Discord. You can also try reaching out to Discord’s support team for further guidance or to request compatibility updates.
Once you’ve confirmed that your audio interface is compatible with Discord, it’s time to move on to the next step: connecting your audio interface to your computer.
Step 2: Connecting your audio interface to your computer
Now that you have confirmed the compatibility of your audio interface with Discord, it’s time to connect it to your computer. Follow these steps to ensure a proper connection:
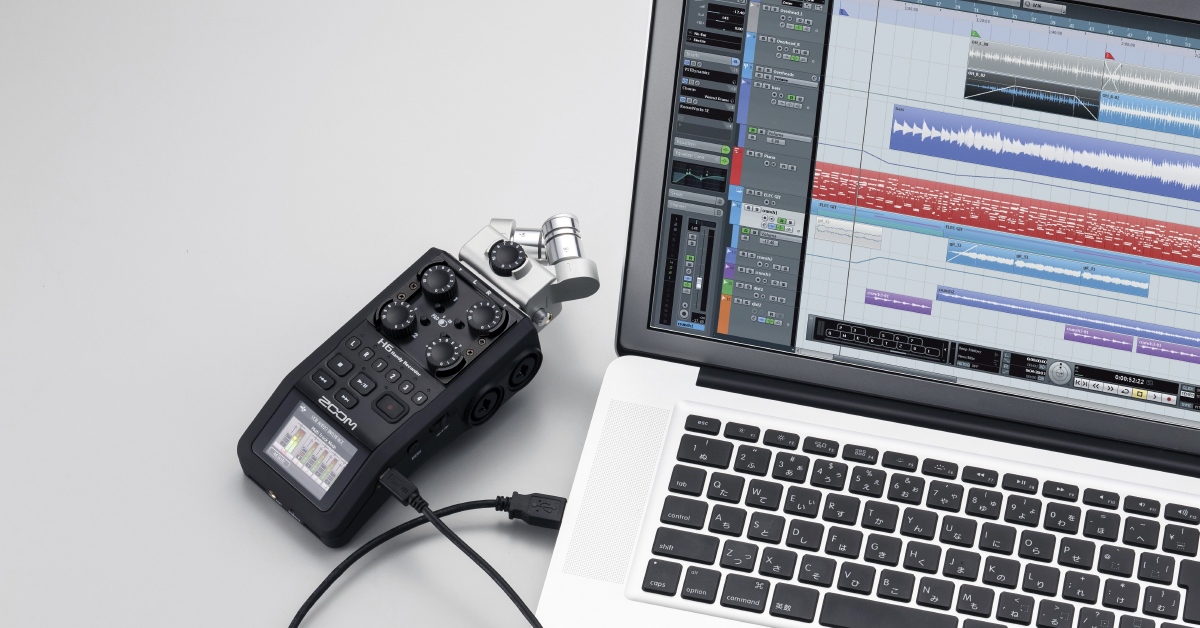
- Choose the right cables: Depending on your audio interface, you may need to use USB, Thunderbolt, or Firewire cables to connect it to your computer. Refer to the user manual or the manufacturer’s instructions to determine the appropriate cables.
- Connect the audio interface: Plug one end of the cable into the corresponding port on your audio interface. The port might be labeled as “USB”, “Thunderbolt”, or something similar. Then, connect the other end of the cable to an available USB or Thunderbolt port on your computer. Make sure the connection is secure.
- Power up the audio interface: Most audio interfaces require a power source. Ensure that your audio interface is plugged into a power outlet or is receiving power through an external power supply.
- Install necessary drivers (if applicable): Some audio interfaces require specific drivers to be installed before they can function properly on your computer. Check the manufacturer’s website for any available driver downloads, and follow the installation instructions provided.
- Verify the connection: Once your audio interface is connected and powered up, your computer should detect it automatically. You can check if the connection is successful by going to your computer’s audio settings or device manager and looking for the audio interface as an available input/output device.
It’s worth noting that the specific steps may vary depending on your audio interface model and your computer’s operating system. Refer to the user manual or the manufacturer’s instructions for any specific details related to your device.
Now that your audio interface is successfully connected to your computer, it’s time to configure the Discord settings for optimal audio performance. Let’s move on to the next step.
Step 3: Configuring Discord Settings
After connecting your audio interface to your computer, it’s important to configure the settings in Discord to ensure that it recognizes and utilizes your audio interface correctly. Follow these steps to configure Discord settings:
- Open Discord: Launch Discord on your computer and log in to your account.
- Access User Settings: Click on the gear icon at the bottom left corner of the Discord window to access the User Settings menu.
- Select Voice & Video: In the User Settings menu, click on the “Voice & Video” tab located on the left sidebar.
- Choose the correct input and output devices: Under the “Input Device” section, select your audio interface as the preferred microphone input device. Similarly, under the “Output Device” section, choose your audio interface as the preferred audio playback device.
- Enable/disable noise suppression and echo cancellation: Discord offers built-in audio processing features like noise suppression and echo cancellation. Depending on your personal preferences and the capabilities of your audio interface, you can toggle these features on or off to enhance your audio quality.
- Adjust input sensitivity: Discord provides an option to automatically determine input sensitivity, which adjusts microphone sensitivity based on your voice volume. Alternatively, you can manually adjust the input sensitivity slider to optimize it for your audio interface and recording environment.
- Test your audio settings: After configuring the settings, click on the “Let’s Check” button in the “Voice & Video” tab to test your audio input and output. Discord will guide you through a microphone input test and a speaker output test to ensure that everything is working properly.
By following these steps, you can properly configure Discord to recognize and utilize your audio interface. This will ensure that your audio quality is optimized and that Discord is using your audio interface as the primary input and output device.
Once you have completed the configuration, you can further adjust the audio settings in Discord to suit your preferences. Let’s explore the options for adjusting audio settings in the next step.
Step 4: Selecting your audio interface as the input/output device in Discord
Now that you have configured the basic settings in Discord, it’s time to select your audio interface as the input and output device within the application. This will ensure that Discord uses your audio interface for all voice communication.
- Open Discord: Launch Discord and log in to your account.
- Access User Settings: Click on the gear icon at the bottom left corner of the Discord window to access the User Settings.
- Select Voice & Video: In the User Settings menu, click on the “Voice & Video” tab located on the left sidebar.
- Choose the correct input and output devices: Under the “Input Device” section, select your audio interface as the preferred microphone input device. Similarly, under the “Output Device” section, choose your audio interface as the preferred audio playback device.
- Save changes: Once you have selected your audio interface as the input and output device, make sure to click on the “Save Changes” button at the bottom of the “Voice & Video” tab to save your settings.
By selecting your audio interface as the input and output device in Discord, you ensure that all audio communication, including your voice and the audio playback from other participants, is routed through your audio interface. This helps maintain the high-quality audio that your audio interface is designed to deliver.
Keep in mind that if you ever disconnect or switch audio interfaces, you’ll need to revisit the Voice & Video settings in Discord to update the input and output devices accordingly.
Now that you have successfully selected your audio interface as the input and output device in Discord, you can move on to the next step: adjusting audio settings to further optimize your audio experience.
Step 5: Adjusting audio settings in Discord
After selecting your audio interface as the input and output device in Discord, you can further optimize your audio experience by adjusting additional audio settings. These settings allow you to fine-tune the audio quality and performance according to your preferences and the capabilities of your audio interface.
Here are some key audio settings you can adjust in Discord:
- Voice Activity or Push to Talk: Discord offers two primary modes for transmitting your voice – Voice Activity and Push to Talk. Voice Activity enables your microphone to transmit whenever it detects sound, while Push to Talk requires you to hold a designated key to transmit your voice. Choose the mode that best suits your needs and preference.
- Input sensitivity: Adjust the input sensitivity slider to control the microphone’s activation threshold in Voice Activity mode. Increasing the sensitivity may pick up more background noise, while decreasing it may not capture quieter audio. Find the right balance to eliminate unwanted noise without cutting off your voice.
- Attenuation: Attenuation is a feature that automatically lowers the volume of other participants when someone speaks with priority. You can adjust the attenuation slider to determine the amount of volume reduction during conversations, ensuring that important dialogue is easily heard.
- Advanced audio options: Discord also provides advanced audio options for users who want more control over their audio settings. These options include applying audio effects, adjusting individual user volumes, enabling or disabling noise suppression and echo cancellation, and fine-tuning input/output levels.
- Test and experiment: It’s essential to test your audio settings and make adjustments while in a voice chat with others. Ask your friends or fellow Discord users to provide feedback on your audio quality and adjust settings accordingly to enhance your voice clarity.
Be sure to explore these audio settings in Discord to customize your audio experience to your liking. Every audio interface and personal preference is different, so take the time to experiment and find the optimal balance for your specific needs.
With your audio settings now adjusted, it’s time to move on to the final step: testing and troubleshooting to ensure everything is functioning smoothly.
Step 6: Testing and Troubleshooting
Once you have configured and adjusted the audio settings in Discord for your audio interface, it’s crucial to test them and troubleshoot any potential issues that may arise. Testing your setup ensures that your audio interface is working properly and that all the settings are optimized for the best audio experience.
Here are some steps to follow for testing and troubleshooting your audio setup in Discord:
- Join a voice chat: Join a voice chat with a friend or create a private voice channel to test your audio setup.
- Speak and listen: Test your microphone by speaking and ask your friend to provide feedback on your voice clarity and volume. Likewise, listen to your friend’s voice to ensure that the audio playback from other participants is clear and not distorted.
- Monitor background noise: Pay attention to any background noise or interference coming through your microphone. If you notice excessive background noise, you may need to adjust the input sensitivity or enable noise suppression features in Discord.
- Confirm sound playback: Ensure that the audio playback from other participants is being properly routed through your audio interface. If the sound is not coming through your audio interface, double-check your Discord settings and ensure that your audio interface is selected as the output device.
- Troubleshoot common issues: If you encounter any issues during the testing process, such as no sound or distorted audio, try the following troubleshooting steps:
- Check all cable connections and ensure they are securely plugged in.
- Restart your audio interface and Discord application.
- Update your audio interface drivers to the latest version.
- Verify that your audio interface is functioning correctly by using it with other applications.
- Consult the support resources provided by the manufacturer for further assistance.
- Continue refining settings: Based on the testing results, make any necessary adjustments to your audio settings in Discord to further improve the audio quality. This could include adjusting input sensitivity, fine-tuning volume levels, or enabling additional audio effects if desired.
By testing and troubleshooting your audio setup in Discord, you can ensure that your audio interface is working as intended and that your voice communication is clear and optimized for a seamless experience.
Congratulations! You have successfully learned how to use your audio interface in Discord. Enjoy clear and professional audio during your voice chats, gaming sessions, and virtual meetings.
If you encounter any persistent issues or have specific questions related to your audio interface or Discord, don’t hesitate to reach out to the official Discord support or consult the documentation provided by the audio interface manufacturer for further guidance.
Now, go ahead and have fun utilizing your audio interface to its full potential in Discord!
Conclusion
Using an audio interface in Discord is a game-changer when it comes to your voice communication experience. By following the steps outlined in this guide, you have learned how to seamlessly integrate your audio interface with Discord and optimize your audio settings for clear and professional-grade sound.
Throughout this process, you confirmed the compatibility of your audio interface with Discord, connected it to your computer using the appropriate cables, and configured the settings in Discord to recognize and utilize your audio interface as the input and output device. You also learned how to adjust audio settings and troubleshoot any potential issues to ensure smooth operation.
By utilizing your audio interface in Discord, you can enjoy advantages such as enhanced audio quality, noise reduction, and improved voice clarity. Whether you’re engaging in voice chats during gaming sessions, participating in virtual meetings, or streaming content, your audio interface will help deliver a superior audio experience.
Remember to regularly test your audio setup, make necessary adjustments, and troubleshoot any issues that may arise. This will ensure that your audio interface continues to function optimally and that your voice communication in Discord remains flawless.
Now that you have a comprehensive understanding of how to use your audio interface in Discord, you can enhance your online interactions and make your voice heard in the best possible way. Enjoy the seamless integration of high-quality audio into your Discord experience!