Home>Production & Technology>MIDI>How To Render MIDI To Audio In Cubase
MIDI
How To Render MIDI To Audio In Cubase
Modified: March 9, 2024
Learn how to easily render MIDI to audio in Cubase and enhance your music production. Convert MIDI to high-quality audio with this step-by-step guide.
(Many of the links in this article redirect to a specific reviewed product. Your purchase of these products through affiliate links helps to generate commission for AudioLover.com, at no extra cost. Learn more)
Table of Contents
Introduction
MIDI, which stands for Musical Instrument Digital Interface, has revolutionized music production since its inception in the 1980s. This versatile protocol allows musicians and producers to control various aspects of sound and composition, offering a wide range of creative possibilities. One of the key features of MIDI is its ability to control virtual instruments and synthesizers, enabling users to compose and arrange music with unparalleled flexibility and precision. However, while MIDI provides a powerful platform for musical expression, it is often necessary to convert MIDI data into audio for final production and distribution.
In this comprehensive guide, we will explore the process of rendering MIDI to audio in Cubase, a popular digital audio workstation (DAW) known for its robust MIDI capabilities. By following the steps outlined in this tutorial, you will learn how to seamlessly transform your MIDI compositions into high-quality audio files, ready for mixing, mastering, and sharing with the world.
Whether you are a seasoned music producer or a budding enthusiast, mastering the art of rendering MIDI to audio is a crucial skill that can elevate the quality and professionalism of your musical projects. Throughout this tutorial, we will delve into the essential techniques and best practices for setting up MIDI tracks, assigning instruments, adjusting MIDI performance, and ultimately rendering MIDI to pristine audio in Cubase. By the end of this guide, you will have gained valuable insights into the seamless integration of MIDI and audio within the context of modern music production.
So, without further ado, let's embark on this enlightening journey into the realm of MIDI rendering, where creativity meets technical prowess in the vibrant landscape of digital music production.
Setting up MIDI tracks
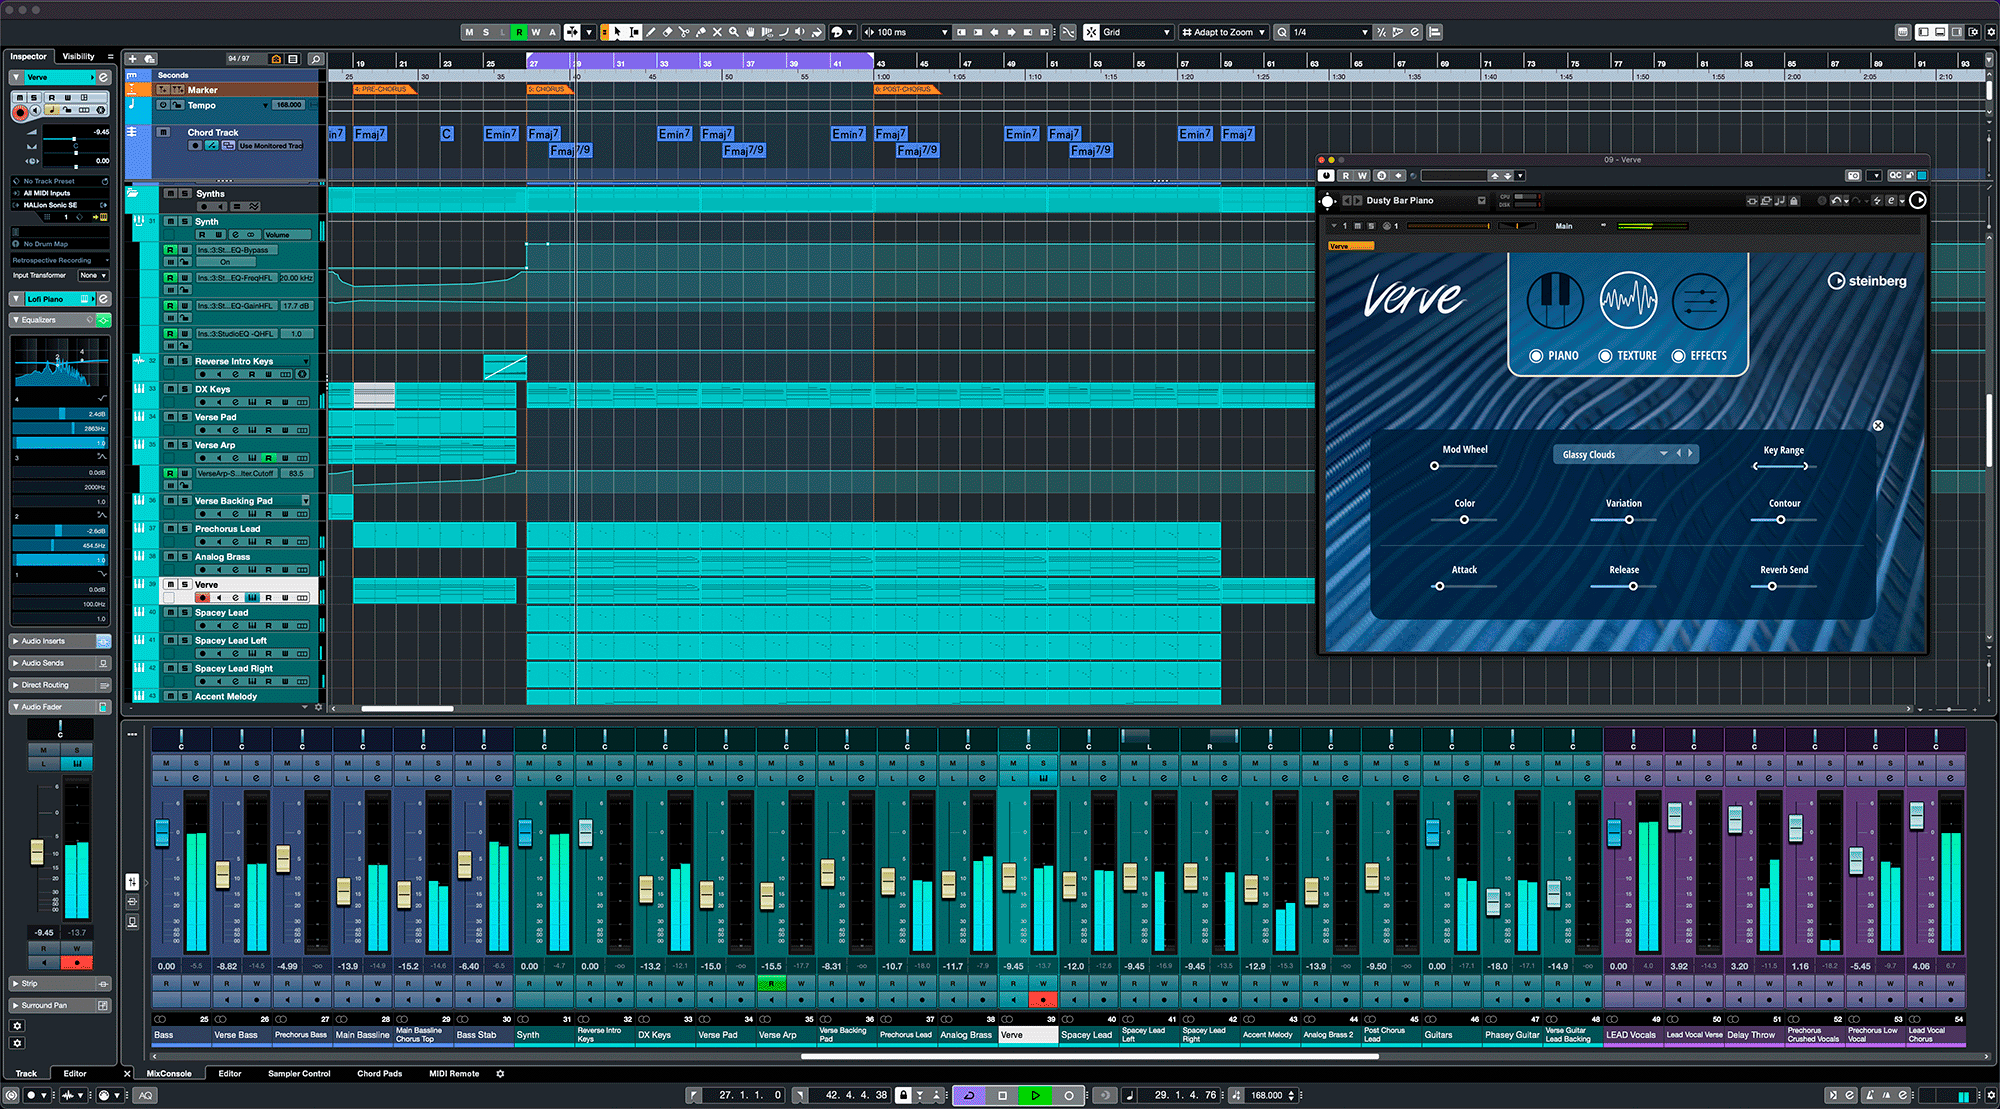
Setting up MIDI tracks is the foundational step in the process of rendering MIDI to audio in Cubase. This crucial phase lays the groundwork for the entire composition, providing the framework within which musical ideas will be developed and refined. To begin, launch Cubase and create a new project or open an existing one where you intend to work with MIDI.
-
Creating MIDI Tracks: Once inside your project, navigate to the track creation interface within Cubase. Select the option to add a new MIDI track, which will serve as the canvas for your musical expressions. It's important to consider the number of MIDI tracks you'll need based on the complexity of your composition. Whether it's a single instrument melody or a multi-layered orchestral arrangement, Cubase offers the flexibility to accommodate your creative vision.
-
Naming and Organizing: After adding MIDI tracks, it's advisable to assign clear and descriptive names to each track, reflecting the instruments or musical elements they will represent. This simple yet effective practice fosters organization and streamlines the workflow, allowing you to easily identify and manage different components of your composition. Additionally, consider color-coding MIDI tracks to visually distinguish between them, enhancing the visual clarity of your project.
-
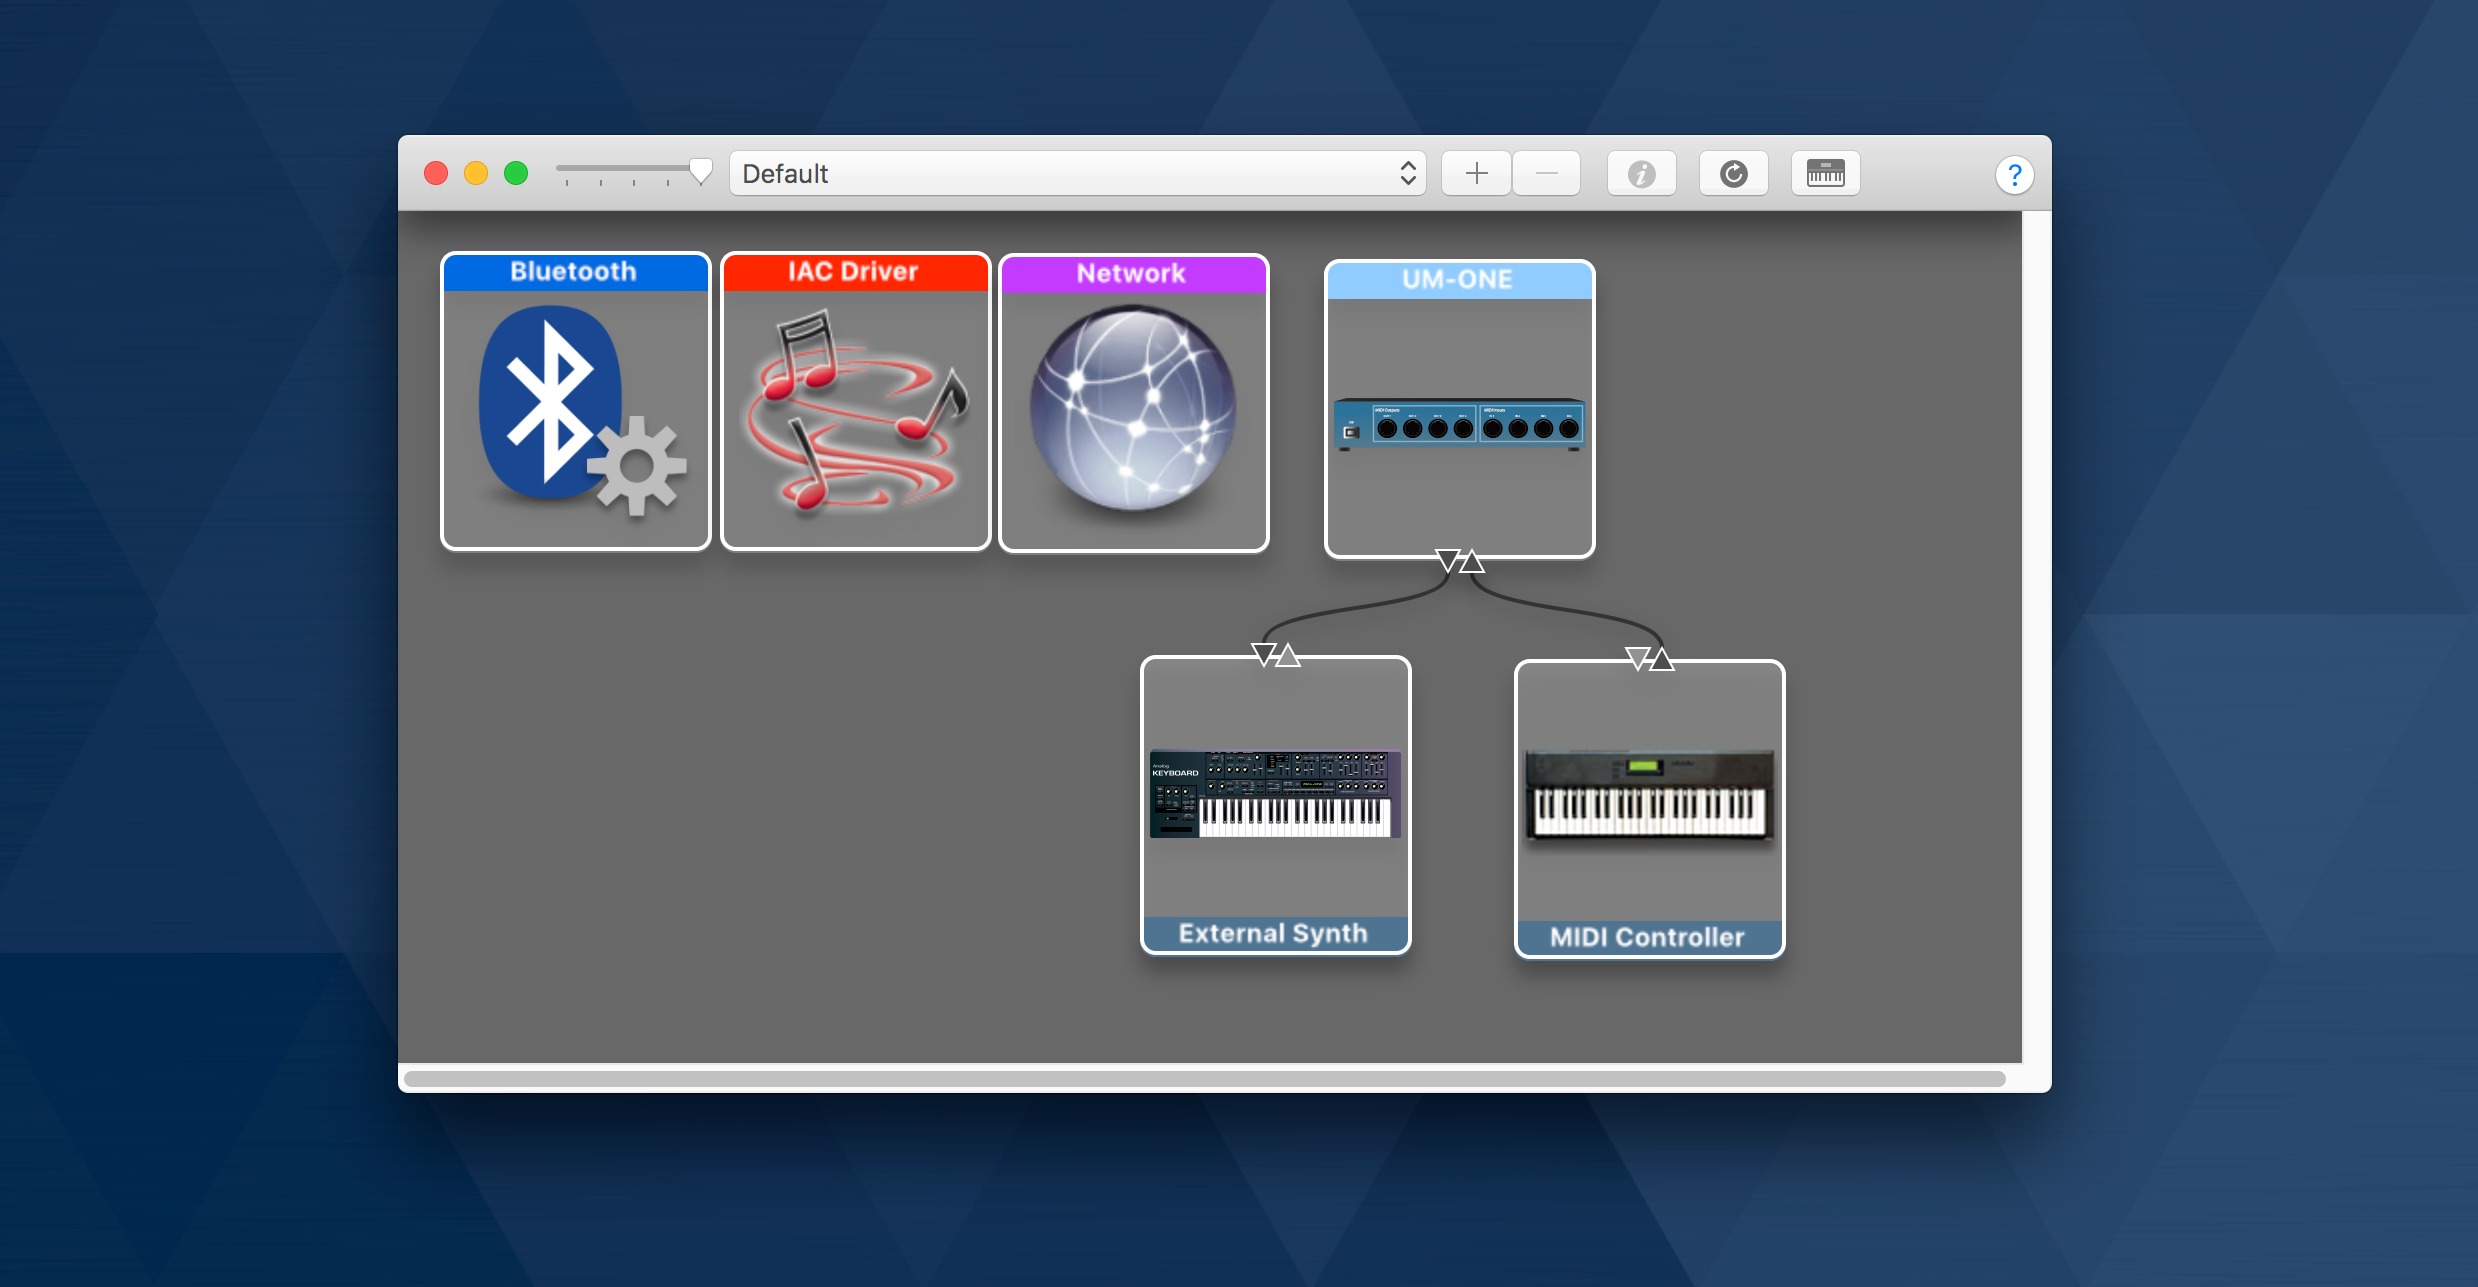
Setting MIDI Channels and Ports: Cubase provides the option to specify MIDI channels and ports for each track, enabling precise control over the routing and communication of MIDI data. By configuring these parameters, you can ensure that MIDI signals are transmitted and received accurately, facilitating seamless interaction with external MIDI devices and virtual instruments.
-
Adjusting Track Parameters: Before proceeding, take a moment to customize the parameters of each MIDI track according to your specific requirements. This may include adjusting the tempo, time signature, and other global settings that influence the behavior of MIDI data within the project. Additionally, consider setting the input and output routing for MIDI tracks to establish the desired signal flow.
By meticulously setting up MIDI tracks in Cubase, you establish a solid foundation for the subsequent stages of the MIDI rendering process. This initial preparation sets the stage for creativity to flourish, empowering you to craft compelling musical arrangements that will ultimately be transformed into pristine audio through the rendering process.
Assigning instruments to MIDI tracks
Once the MIDI tracks are set up, the next pivotal step in the process of rendering MIDI to audio in Cubase involves assigning instruments to the MIDI tracks. This fundamental task bridges the gap between the digital representation of musical notes and the sonic characteristics of real or virtual instruments. Cubase offers a diverse array of virtual instruments, including synthesizers, samplers, and emulations of traditional acoustic instruments, providing a rich palette of sounds to choose from.
-
Selecting Virtual Instruments: Within Cubase, navigate to the instrument rack or the VST Instruments panel, where you can access a comprehensive selection of virtual instruments. These instruments encompass a wide spectrum of sounds, ranging from classic pianos and orchestral strings to cutting-edge synthesizers and exotic world instruments. Choose the virtual instrument that best aligns with the musical vision for each MIDI track.
-
Loading and Configuring Instruments: Once you've chosen the desired virtual instrument, proceed to load it onto the corresponding MIDI track. Cubase allows seamless integration of virtual instruments, enabling you to effortlessly assign specific instruments to individual MIDI tracks. Upon loading the virtual instrument, you may have the opportunity to configure its parameters, such as articulations, effects, and performance settings, tailoring the sound to suit the nuances of your composition.
-
Exploring Sound Libraries: Cubase boasts an extensive library of high-quality sound presets and instrument libraries, offering a diverse range of timbres and sonic textures. Delve into this treasure trove of sounds to explore different sonic possibilities and experiment with various instrument combinations. Whether you seek the warmth of a grand piano, the expressiveness of a solo violin, or the ethereal ambience of a synthesizer pad, Cubase's sound libraries cater to a myriad of musical genres and creative preferences.
-
Customizing Instrument Parameters: Beyond selecting instruments, Cubase empowers you to customize and fine-tune the parameters of each virtual instrument. This level of control enables precise shaping of the instrument's tonal characteristics, dynamics, and expressive nuances, allowing you to sculpt the sonic identity of your MIDI tracks with meticulous attention to detail.
By adeptly assigning instruments to MIDI tracks in Cubase, you infuse your compositions with lifelike timbres and expressive qualities, laying the groundwork for a compelling sonic journey. As you navigate this pivotal phase of the MIDI rendering process, the seamless integration of virtual instruments elevates your musical creations, transforming raw MIDI data into vibrant, evocative audio that resonates with depth and authenticity.
Adjusting MIDI performance
Once the MIDI tracks are set up and instruments are assigned, the focus shifts to refining the performance of MIDI data within Cubase. This crucial phase involves fine-tuning the expressive elements of the MIDI tracks to imbue them with the nuances and dynamics characteristic of live instrumental performances. By adjusting MIDI performance, you can breathe life into your compositions, infusing them with a sense of realism and emotional depth.
Expressive MIDI Editing
Cubase offers a robust suite of MIDI editing tools that enable precise manipulation of note velocities, durations, and articulations. By adjusting the velocity of individual notes, you can emulate the natural ebb and flow of dynamics found in acoustic performances, adding a human touch to the MIDI data. Furthermore, refining note durations and articulations allows for the creation of nuanced phrasing and rhythmic variations, enhancing the overall musicality of the composition.
Controller Data Manipulation
In addition to note-based editing, Cubase provides extensive capabilities for manipulating MIDI controller data, such as modulation, pitch bend, and expression. These control parameters play a pivotal role in shaping the tonal and timbral characteristics of virtual instruments, enabling you to craft emotive and expressive musical passages. By meticulously adjusting controller data, you can achieve a level of sonic authenticity that transcends the limitations of traditional MIDI playback.
Quantization and Humanization
Quantization serves as a valuable tool for aligning MIDI notes to a precise rhythmic grid, ensuring tight and consistent timing within the composition. However, excessive quantization can strip the performance of its natural feel. Cubase's humanization features offer a solution by introducing subtle timing variations and velocity fluctuations, simulating the imperfections inherent in live musical performances. This delicate balance between precision and humanization contributes to the organic and engaging nature of the rendered audio.
Dynamic Marking and Articulation Mapping
Dynamic markings and articulation mapping play a pivotal role in shaping the expressive qualities of MIDI performances. Cubase facilitates the integration of dynamic markings, allowing for the seamless interpretation of musical nuances, such as crescendos, diminuendos, and accents. Furthermore, articulation mapping empowers you to assign specific playing techniques and articulations to MIDI data, enabling the faithful reproduction of intricate musical gestures and embellishments.
By meticulously adjusting the performance of MIDI data within Cubase, you elevate the expressive potential of your compositions, transcending the confines of traditional MIDI playback. This meticulous attention to detail culminates in a rich and emotive musical experience, laying the groundwork for the seamless transition from MIDI to audio in the final stages of the rendering process.
Rendering MIDI to audio
With the MIDI tracks meticulously set up, instruments artfully assigned, and MIDI performance expertly refined, the stage is set for the pivotal process of rendering MIDI to audio in Cubase. This transformative phase marks the culmination of creative expression and technical finesse, as the intricate layers of MIDI data coalesce into vibrant, sonorous audio representations. The rendering process in Cubase seamlessly transmutes the richness of MIDI compositions into high-fidelity audio files, ready to be mixed, mastered, and shared with the world.
Preparing for Rendering
Before embarking on the rendering process, it is essential to ensure that all MIDI tracks and virtual instruments are configured to deliver the desired sonic characteristics. Take a moment to review the settings and parameters of each MIDI track, verifying that the assigned instruments, performance adjustments, and expressive nuances align cohesively with the overarching musical vision. Additionally, consider consolidating and organizing the MIDI data within the project to streamline the rendering process, ensuring a structured and efficient workflow.
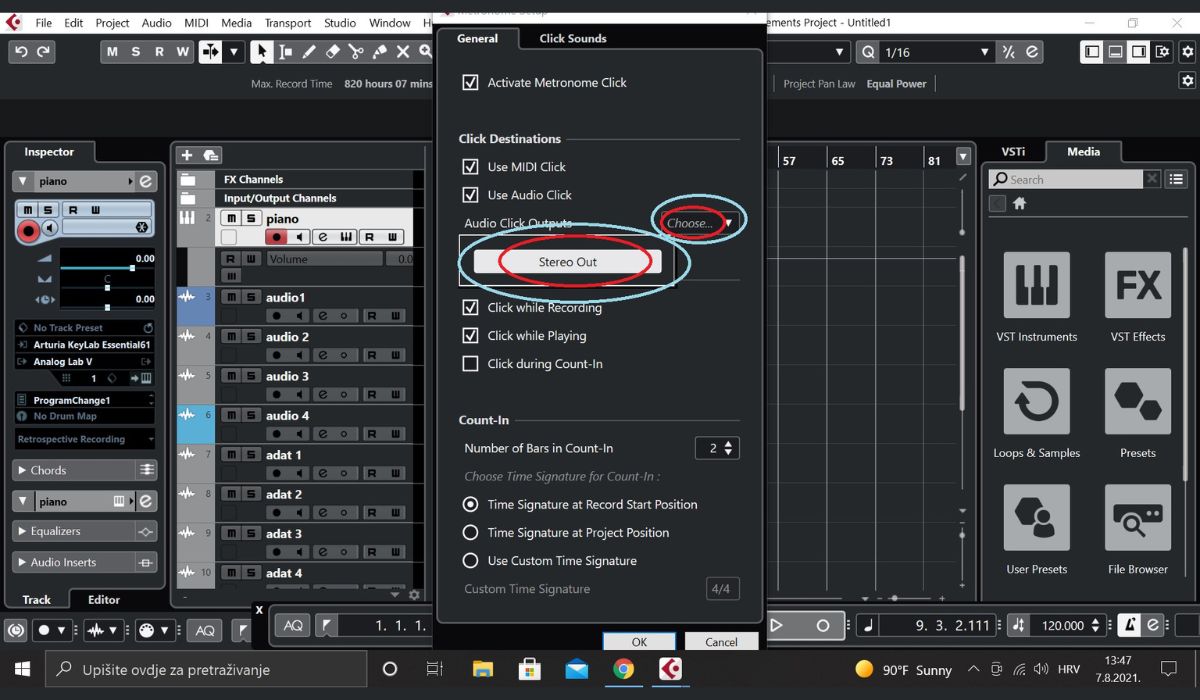
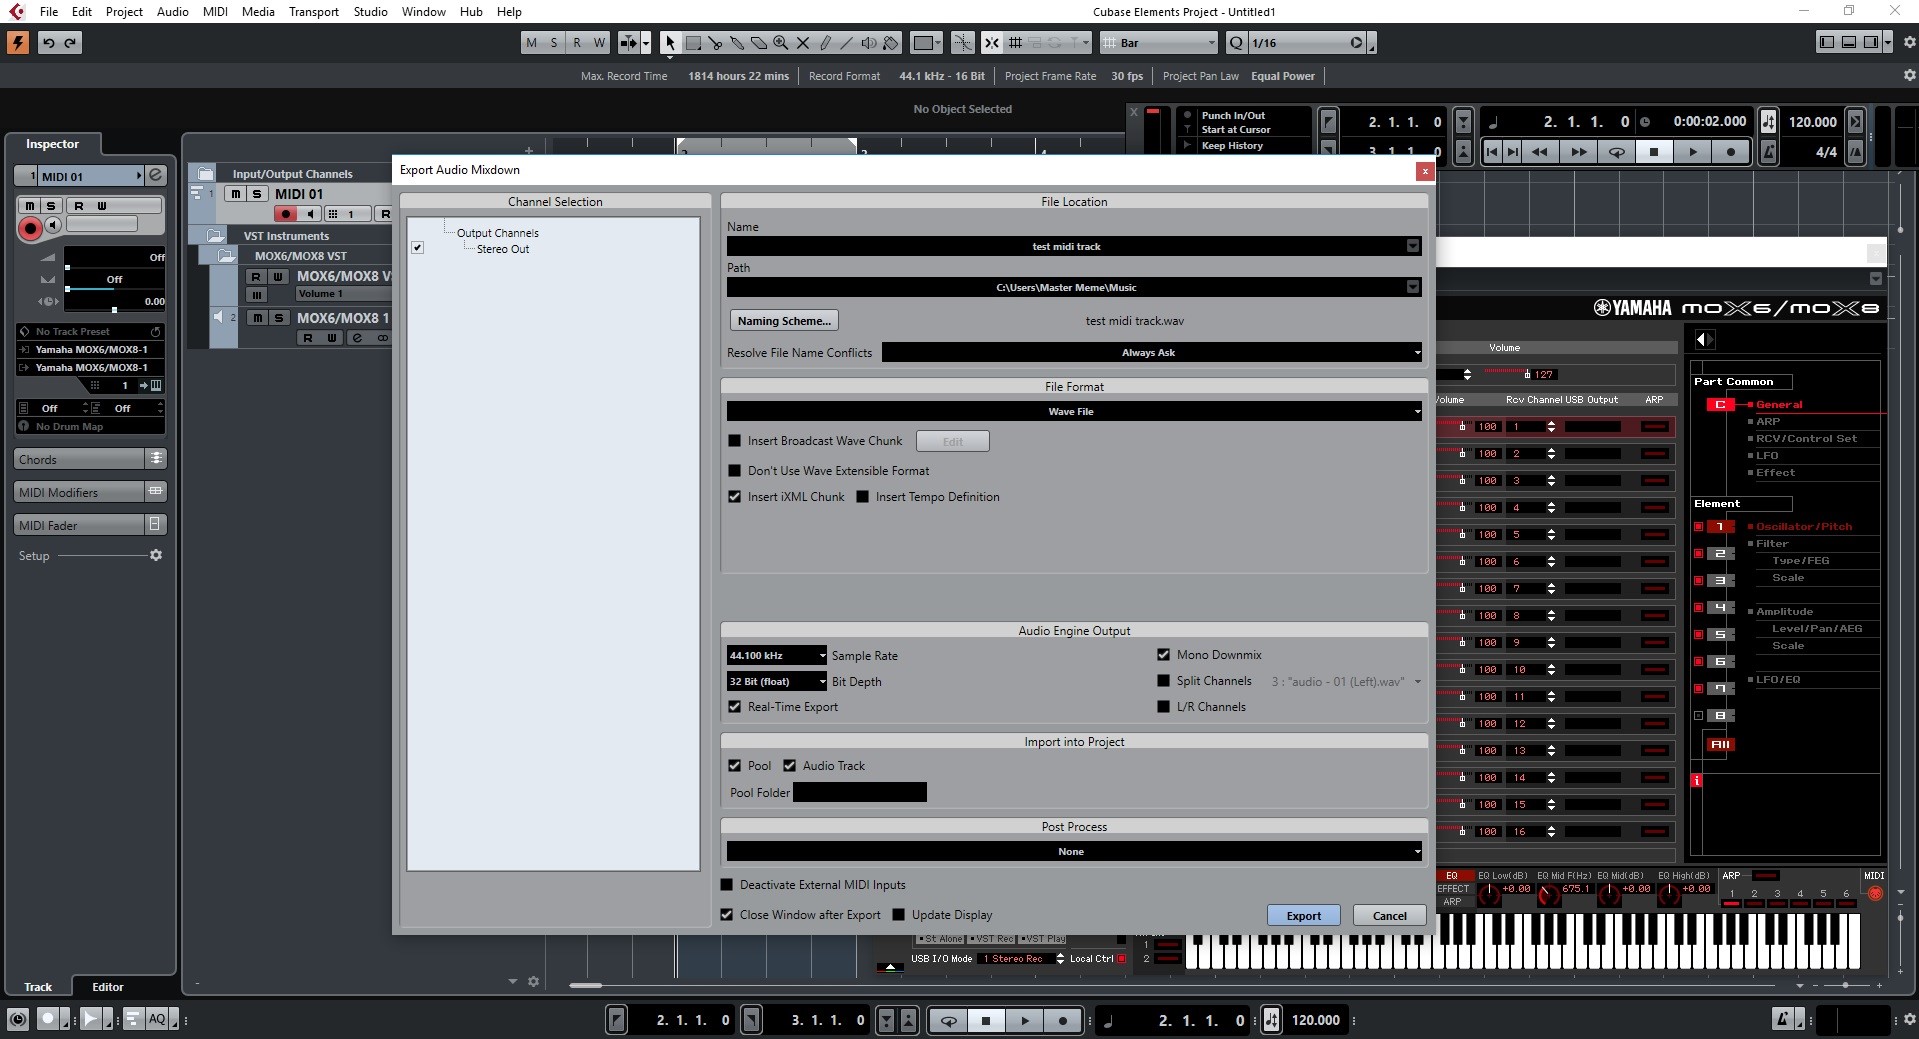
Initiating the Rendering Process
Cubase simplifies the process of rendering MIDI to audio with intuitive tools and streamlined workflows. To initiate the rendering process, navigate to the designated rendering interface within Cubase, where you will encounter a range of options and settings tailored to the conversion of MIDI data into audio. Select the desired parameters for the rendering process, including audio format, sample rate, bit depth, and file naming conventions, customizing the output to meet the specific requirements of your project.
Real-time and Offline Rendering
Cubase offers the flexibility of real-time and offline rendering, catering to diverse production scenarios and performance preferences. Real-time rendering allows for the live playback and capture of MIDI performances in real time, generating audio files that faithfully mirror the nuances and dynamics of the original MIDI data. Conversely, offline rendering expediently processes MIDI tracks into audio files without real-time playback, offering a swift and efficient means of converting MIDI compositions into pristine audio representations.
Post-rendering Considerations
Upon completion of the rendering process, take a moment to audition and evaluate the rendered audio files within Cubase. Verify the fidelity, dynamics, and tonal characteristics of the rendered audio, ensuring that it authentically reflects the essence of the original MIDI compositions. Furthermore, consider organizing and labeling the rendered audio files within the project, fostering clarity and accessibility during subsequent stages of the production workflow.
Embracing the Transformative Power of MIDI Rendering
As the final step in the journey from MIDI to audio, the rendering process in Cubase encapsulates the transformative power of digital music production. Through meticulous preparation, thoughtful customization, and seamless execution, the rendering process breathes life into MIDI compositions, unveiling them in the resplendent realm of audio. This seamless integration of MIDI and audio within Cubase culminates in a harmonious convergence of creativity and technical precision, underscoring the boundless possibilities of modern music production.
This comprehensive guide has illuminated the essential techniques and best practices for rendering MIDI to audio in Cubase, empowering you to navigate this transformative process with confidence and artistry. With a firm grasp of the rendering process, you are poised to elevate your musical endeavors, infusing them with the depth, richness, and authenticity that define the seamless transition from MIDI to audio in the vibrant landscape of digital music production.
Conclusion
In the realm of digital music production, the process of rendering MIDI to audio in Cubase represents a pivotal juncture where creativity converges with technical finesse. Throughout this comprehensive guide, we have embarked on an enlightening journey, delving into the intricacies of MIDI rendering and uncovering the essential techniques for seamlessly transitioning from MIDI compositions to pristine audio representations.
As we conclude this exploration, it is evident that the art of rendering MIDI to audio transcends mere technical conversion. It embodies the harmonious fusion of musical expression and technological prowess, where the vibrant tapestry of MIDI compositions is transmuted into vibrant, evocative audio that resonates with depth and authenticity.
By meticulously setting up MIDI tracks, assigning instruments, and refining MIDI performance, we lay the groundwork for a compelling sonic journey, infusing compositions with lifelike timbres and expressive qualities. The culmination of these preparatory phases sets the stage for the transformative process of rendering MIDI to audio, where the richness of MIDI data is transposed into high-fidelity audio files, ready to be mixed, mastered, and shared with the world.
As we embrace the transformative power of MIDI rendering, we recognize that this process represents more than a technical conversion—it embodies the essence of artistic realization. The seamless integration of MIDI and audio within Cubase culminates in a harmonious convergence of creativity and technical precision, underscoring the boundless possibilities of modern music production.
Armed with a firm grasp of the rendering process, you are poised to elevate your musical endeavors, infusing them with the depth, richness, and authenticity that define the seamless transition from MIDI to audio. With each rendered audio file, a symphony of creative expression comes to life, resonating with the passion and ingenuity that define the artistry of digital music production.
In closing, the journey from MIDI to audio in Cubase is a testament to the transformative potential of technology in the realm of music creation. It is a celebration of creative vision, technical acumen, and the seamless marriage of art and innovation. As you embark on your own ventures in MIDI rendering, may this guide serve as a beacon, illuminating the path to sonic excellence and artistic fulfillment in the vibrant landscape of digital music production.