Home>Production & Technology>Audio Interface>How To Use Audio Interface With Cubase

Audio Interface
How To Use Audio Interface With Cubase
Modified: March 11, 2024
Learn how to use an audio interface with Cubase to enhance your music production. Improve sound quality and take control of your recording process with this comprehensive guide.
(Many of the links in this article redirect to a specific reviewed product. Your purchase of these products through affiliate links helps to generate commission for AudioLover.com, at no extra cost. Learn more)
Table of Contents
- Introduction
- Understanding Audio Interfaces
- Choosing the Right Audio Interface for Cubase
- Connecting Your Audio Interface to Cubase
- Configuring Audio Settings in Cubase
- Recording Audio with an Audio Interface in Cubase
- Monitoring and Playback with an Audio Interface in Cubase
- Troubleshooting Tips for Audio Interface Issues in Cubase
- Conclusion
Introduction
Welcome to the world of audio production with Cubase! If you’re passionate about music and creating your own recordings, you’ve come to the right place. One essential tool that you’ll need to bring your musical ideas to life is an audio interface.
An audio interface is a device that helps you connect your analog audio sources, such as microphones and instruments, to your computer. It acts as the bridge between the physical world of sound and the digital realm of your recording software, in this case, Cubase.
In this comprehensive guide, we’ll take you through everything you need to know about using an audio interface with Cubase. Whether you’re a beginner exploring the world of music production or an experienced musician looking to upgrade your setup, we’ve got you covered.
We’ll start by explaining the basics of audio interfaces, including their role and how they work. Then, we’ll delve into the process of choosing the right audio interface for Cubase, considering factors such as your recording needs and budget.
Once you have your audio interface in hand, we’ll show you step-by-step instructions on how to connect it to Cubase. You’ll learn about the different types of connections and cables required, ensuring a seamless integration between your audio interface and the software.
Configuring your audio settings in Cubase is another critical step. We’ll walk you through the various parameters that need to be set up correctly to ensure optimal audio recording and playback. From sample rates to buffer sizes, we’ll demystify these technical aspects, making it easier for you to navigate.
Recording audio is at the heart of music production, and with Cubase and your audio interface, you’ll have everything you need to capture your performances in pristine quality. We’ll guide you through the process of setting up and recording audio tracks, empowering you to unleash your creativity.
Monitoring and playback are equally important aspects of the recording process, and we’ll show you how to set up your audio interface to monitor your recordings and listen to playback with crystal clarity. You’ll also learn about routing options and headphone monitoring to create an optimal workflow.
As with any technology, there may be challenges along the way. That’s why we’ll provide troubleshooting tips for audio interface issues in Cubase. From dealing with latency to resolving driver conflicts, we’ll help you overcome common hurdles and keep your creative flow uninterrupted.
So, whether you’re a solo artist, a band member, or a producer who wants to take their recordings to the next level, this guide will equip you with the knowledge and skills to make the most of your audio interface with Cubase. Let’s dive in and unleash your musical potential!
Understanding Audio Interfaces
Before we dive into using audio interfaces with Cubase, it’s crucial to have a solid understanding of what an audio interface is and how it functions. Essentially, an audio interface is the hardware that connects your analog audio equipment to your computer, allowing you to record and playback audio with high quality and low latency.
At its core, an audio interface converts analog audio signals from sources like microphones, guitars, and keyboards into digital data that can be processed by your computer. It also performs the opposite function, converting digital audio from your computer back into analog signals that can be played through your speakers or headphones.
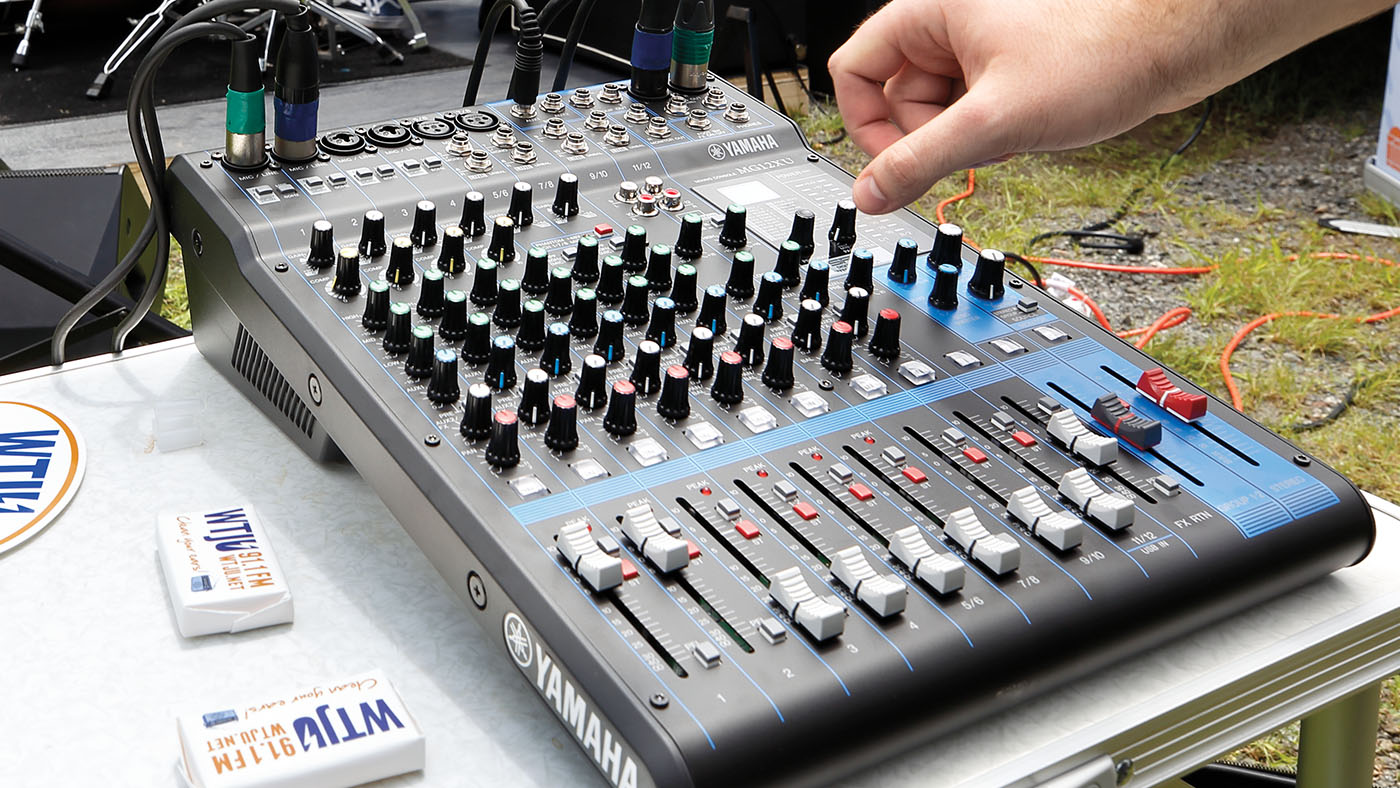
Audio interfaces come in various forms and feature a multitude of inputs and outputs to accommodate different recording setups. Most audio interfaces offer XLR inputs for microphones, 1/4″ inputs for instruments, and additional line inputs for connecting external devices such as synthesizers or mixers.
In addition to inputs, audio interfaces also have outputs, allowing you to connect studio monitors or headphones for monitoring and playback. These outputs can be in the form of balanced 1/4″ outputs or XLR outputs, depending on the model and specifications of the interface.
One of the most critical factors to consider when choosing an audio interface is its connectivity options. USB is the most common connection type, providing a reliable and convenient way to connect your interface to your computer. However, there are also interfaces that utilize Thunderbolt, PCIe, or FireWire connections for even faster data transfer speeds.
Another consideration is the number of channels offered by the audio interface. This determines how many simultaneous inputs and outputs you can have. For example, a two-channel interface would typically have two XLR inputs and outputs, while a larger interface might offer up to eight channels or more.
Audio interfaces also differ in terms of their conversion quality, measured in bits and sample rates. Higher bit depths and sample rates result in better audio fidelity and more accurate representation of the original source material. However, it’s important to note that higher quality interfaces often come with a higher price tag.
Lastly, it’s worth mentioning that some audio interfaces come bundled with software, including a DAW (Digital Audio Workstation) like Cubase. This can be a cost-effective way to get started in music production, as you’ll have both the hardware and software needed to create professional recordings.
Now that you have a solid understanding of what audio interfaces are and how they work, it’s time to explore how to choose the right one for your Cubase setup. In the next section, we’ll discuss the factors to consider when selecting an audio interface that suits your recording needs and budget.
Choosing the Right Audio Interface for Cubase
When it comes to choosing the right audio interface for Cubase, there are several factors to consider. Your recording needs, your budget, and the specific features you require will all play a role in determining the best interface for your setup. Let’s explore these factors in more detail.
First and foremost, think about the number of inputs and outputs you’ll need. If you primarily work solo or with a single instrument, a two-channel interface may be sufficient. However, if you plan on recording multiple instruments simultaneously or need to connect external devices, consider opting for an interface with more inputs and outputs.
Consider the types of inputs you require. XLR inputs are essential for connecting microphones, while 1/4″ inputs accommodate instruments such as guitars and keyboards. Ensure that the interface you choose has the necessary input types and enough of them to support your recording needs.
Next, think about the quality of conversion that the audio interface offers. Higher bit depths and sample rates provide better audio resolution and fidelity. Cubase supports up to 32-bit floating-point audio, so choosing an interface that can handle this level of quality is ideal for capturing the full potential of your recordings.
Connectivity is another crucial consideration. USB is the most common and widely supported connection type, making it a reliable choice for most setups. However, if you have a Mac computer with Thunderbolt connectivity, consider an interface with Thunderbolt support for enhanced data transfer speeds.
Budget is a significant factor for many musicians and producers. It’s important to find a balance between cost and the features you need. Determine your budget and look for an audio interface that offers the right combination of inputs, outputs, conversion quality, and connectivity within your price range.
Compatibility with Cubase should also be considered. Most audio interfaces are compatible with Cubase, but it’s always a good idea to check the manufacturer’s specifications to ensure seamless integration with the software. Some interfaces even come bundled with Cubase or offer specific features designed to enhance the recording experience with the software.
Lastly, consider any additional features or functionality that may be important to your recording workflow. This could include features like built-in microphone preamps, MIDI connectivity, direct monitoring, or software control options. These extra features can simplify your setup and enhance your recording experience.
With these considerations in mind, take your time to research and compare different audio interfaces. Read reviews, watch demos, and consider reaching out to fellow musicians or producers for their recommendations. By carefully selecting the right audio interface for your Cubase setup, you’ll be equipped to create professional recordings with ease and efficiency.
Connecting Your Audio Interface to Cubase
Once you have chosen the right audio interface for your Cubase setup, it’s time to connect it to your computer and integrate it seamlessly into your recording workflow. Follow these steps to ensure a smooth and successful connection.
1. Gather the necessary cables: Depending on your audio interface and computer, you may need a USB cable, Thunderbolt cable, or other specific cables for connecting your interface to your computer. Ensure that you have the appropriate cables on hand before proceeding.
2. Power off your computer: Before connecting any cables, it’s always a good idea to power off your computer to avoid any potential electrical issues or damage. Shut down your computer and unplug it from the power source.
3. Connect the audio interface to your computer: Locate the appropriate port on your audio interface for connecting it to your computer. Depending on the interface, this may be a USB or Thunderbolt port. Insert one end of the cable into the corresponding port on the interface and the other end into an available port on your computer.
4. Power on your audio interface: Once the interface is connected to your computer, you can power it on using the provided power source, if applicable. Some interfaces are bus-powered and draw power from the computer, in which case you can skip this step.
5. Open Cubase: Launch Cubase on your computer. Once it’s open, go to the “Devices” menu and select “Device Setup” or “Studio Setup,” depending on the version of Cubase you are using.
6. Configure the audio interface in Cubase: In the Device Setup or Studio Setup window, select your audio interface from the list of available devices. Cubase should automatically detect your interface if it’s properly connected. If not, ensure that the interface is powered on and try refreshing the device list.
7. Adjust the audio settings: Once your audio interface is selected, you may need to adjust some audio settings. This includes setting the sample rate, buffer size, and driver settings. Consult your audio interface’s documentation or the Cubase user manual for guidance on optimal settings for your specific interface.
8. Test the connection: To ensure that your audio interface is properly connected and functioning, create a new audio track in Cubase. Arm the track for recording and try playing an instrument or speaking into a connected microphone. You should see the signal coming in on the track’s audio meter and hear the audio through your connected speakers or headphones.
9. Monitor and adjust levels: During the testing phase, pay attention to the input and output levels on your audio interface. Make sure that the levels are healthy, avoiding clipping or distortion. Adjust the gain on your interface or in Cubase as needed to achieve optimal recording levels.
That’s it! You have successfully connected your audio interface to Cubase. Now you’re ready to start recording and producing high-quality audio using your chosen interface. Remember to save your settings in Cubase for future sessions and enjoy the seamless integration that the audio interface brings to your music production process.
Configuring Audio Settings in Cubase
Configuring the audio settings in Cubase is crucial to ensure optimal recording and playback quality. By correctly setting up the sample rate, buffer size, and other parameters, you can minimize latency and achieve the best audio performance. Follow these steps to configure your audio settings in Cubase:
1. Launch Cubase: Open Cubase on your computer and make sure your audio interface is properly connected and recognized by the software.
2. Go to the Studio Setup: Access the “Devices” menu in Cubase and select “Device Setup” or “Studio Setup” (depending on your version of Cubase).
3. Select your audio interface: In the Device Setup or Studio Setup window, locate and select your audio interface from the list of available devices.
4. Set the sample rate: The sample rate determines the number of samples taken per second during recording or playback. It is important to set it to match the sample rate supported by your audio interface and the audio files you’ll be working with. The most common sample rates are 44.1 kHz and 48 kHz, but you can choose higher sample rates for increased audio fidelity if your interface supports it.
5. Adjust the buffer size: The buffer size defines the amount of audio data processed at a time. It impacts the latency and performance of your system. A smaller buffer size will reduce latency but may cause audio dropouts if your computer cannot handle the processing load. A larger buffer size may increase latency but provides more stability. Find a balance that suits your needs by adjusting the buffer size slider or inputting a specific value.
6. Configure the driver settings: The driver settings control the communication between Cubase and your audio interface. Depending on your interface and computer, you may have different driver options available, such as ASIO, Core Audio, or WASAPI. Choose the driver that is specifically designed for your audio interface to ensure the best performance and compatibility.
7. Enable direct monitoring: Direct monitoring allows you to hear the sound from your inputs in real-time without any noticeable latency. Check your audio interface’s documentation or the Cubase user manual to see if direct monitoring is available and how to enable it. This feature is especially useful when recording vocals or live instruments.
8. Save your settings: Once you have configured the audio settings to your preference, click on “Apply” or “OK” to save the changes. It is recommended to save these settings as a preset, so you can easily recall them for future projects.
9. Test the configuration: To ensure that your audio settings are properly configured, create a new project or load an existing one. Add an audio track and record or import audio files to test the recording and playback quality. Monitor the latency, audio clarity, and any potential issues during the testing phase. Adjust the settings if necessary to achieve the desired outcome.
By carefully configuring the audio settings in Cubase, you can optimize your recording and playback experience. Experiment with different settings to find the right balance for your specific setup, ensuring smooth performance and professional audio quality.
Recording Audio with an Audio Interface in Cubase
Now that you have your audio interface properly connected and configured in Cubase, it’s time to start recording audio. Whether you’re capturing vocals, acoustic instruments, or any other sound source, Cubase provides powerful tools and features to ensure high-quality recordings. Follow these steps to record audio with an audio interface in Cubase:
1. Set up your recording session: Create a new project in Cubase or open an existing one. Configure the project settings such as the sample rate, bit depth, and project tempo to match your desired recording specifications.
2. Create an audio track: In the Cubase project window, go to the “Project” menu and select “Add Track” or use the keyboard shortcut (Ctrl+T for Windows or Cmd+T for Mac). Choose “Audio” as the track type.
3. Configure the audio track: Once the audio track is added, you can configure its settings. Select the desired input of your audio interface from the input routing options. Assign the appropriate channel and adjust other parameters like monitoring, record enable, and input gain as needed.
4. Set recording levels: Before recording, it’s important to set proper recording levels to avoid clipping or distortion. Adjust the input gain on your audio interface or in Cubase to achieve an optimal signal level. Monitor the level meters in Cubase to ensure that the audio signal is hitting the sweet spot without going into the red zone.
5. Arm the track for recording: Click on the record enable button (the red circle icon) on the audio track to arm it for recording. When armed, the button will turn red, indicating that the track is ready to record incoming audio signals.
6. Start recording: Once everything is set up, press the record button in the Cubase transport bar or use the assigned keyboard shortcut (typically the R key). Cubase will start recording on the selected audio track, capturing the incoming audio signals from your audio interface.
7. Monitor the recording: While recording, you can monitor the audio through your connected headphones or studio monitors. Ensure that the monitoring settings on your audio interface and in Cubase are configured correctly, allowing you to hear the recorded audio in real-time.
8. Stop and review the recording: When you’re done recording, press the stop button in the Cubase transport bar or use the assigned keyboard shortcut (usually the spacebar). You can now listen to the recorded audio by playing it back using the project’s timeline or the dedicated playback controls.
9. Edit and enhance the recording: Once the audio is recorded, you can edit and enhance it further in Cubase. Trim the beginning and end of the recorded audio, apply effects and plugins, adjust the levels, and perform any necessary edits or corrections to refine the recorded material.
10. Save your project: After completing the recording and any subsequent editing, make sure to save your project to preserve your work. Consider using version control or creating backups to avoid any potential data loss.
Cubase provides a versatile and intuitive environment for recording audio with an audio interface. With the right setup and careful monitoring, you can capture professional-quality recordings and unleash your creativity in the world of music production.
Monitoring and Playback with an Audio Interface in Cubase
Monitoring and playback are essential aspects of working with an audio interface in Cubase. It’s crucial to ensure that you can hear your recordings and playback with clarity and accuracy. Cubase provides various monitoring options and playback features to enhance your workflow and ensure a seamless recording experience. Let’s explore how to monitor and playback with an audio interface in Cubase:
1. Set up your monitoring system: Connect your studio monitors or headphones to the appropriate outputs on your audio interface. Ensure that the output connections are correct and that your monitoring system is functioning properly.
2. Configure monitor outputs in Cubase: In Cubase, go to the “Devices” menu and select “VST Connections” or use the keyboard shortcut (F4). In the Control Room settings, assign the outputs of your audio interface to your studio monitors or headphones. Adjust the volume levels accordingly for comfortable and accurate monitoring.
3. Enable monitoring on the audio track: When recording, it’s essential to monitor the incoming audio signals in real-time. To enable monitoring for an audio track, click on the monitor button (the speaker icon) on the track. This allows you to hear the input signal as it’s being recorded, ensuring accurate performances.
4. Choose the appropriate monitoring mode: Cubase offers different monitoring modes to suit your needs. The default is “Auto Monitoring,” which automatically switches between monitoring the input signal during recording and the playback signal during playback. You can also manually toggle between input monitoring and playback monitoring modes based on your preferences.
5. Solo and mute tracks for monitoring: If you have multiple tracks in your project, you can solo or mute individual tracks to focus on specific elements during monitoring. Soloing a track allows you to hear only that track’s audio, while muting a track silences its audio. This can help you fine-tune your monitoring experience and focus on specific parts of your project.
6. Utilize the Control Room: Cubase’s Control Room feature provides enhanced monitoring capabilities. It allows you to create multiple monitor mixes, apply effects to your monitor mixes, and even simulate different studio environments. Take advantage of the Control Room to customize your monitoring setup according to your preferences and workflow.
7. Playback your recordings: After recording, it’s important to listen back to your recordings to evaluate the quality and make any necessary adjustments. Cubase provides various playback controls, including play, pause, rewind, and fast forward, which allow you to navigate through your project and listen to specific sections or the entire recording as needed.
8. Apply effects and processing: During playback, you can apply effects, plugins, and processing to your recorded tracks to enhance the sound. Cubase offers a wide range of audio plugins and processing tools, allowing you to shape your recordings creatively and achieve the desired sonic characteristics.
9. Fine-tune levels and balance: While listening to your recorded audio, pay attention to the levels and the balance between different tracks. Adjust the volume levels of individual tracks as needed, making sure each element sits well in the mix. This will help you achieve a well-balanced and cohesive sound during playback.
10. Polish your mix: After playback, you can further refine your mix by making adjustments to the overall volume, panning, and applying additional processing or automation. Spend time tweaking your mix to achieve the desired sonic result before finalizing your project.
By properly monitoring and utilizing the playback features in Cubase, you can ensure accurate recordings, evaluate the quality of your work, and make informed decisions during the mixing process. Take advantage of the monitoring options available to you through your audio interface and customize your setup for an optimal listening experience.
Troubleshooting Tips for Audio Interface Issues in Cubase
Despite careful setup and configuration, you may encounter occasional issues with your audio interface while using Cubase. Fortunately, there are several troubleshooting steps you can take to resolve these problems and maintain a smooth recording experience. Here are some tips to help you troubleshoot common audio interface issues in Cubase:
1. Update drivers and firmware: Make sure you have the latest drivers and firmware for your audio interface installed. Check the manufacturer’s website for any available updates and follow the instructions to install them correctly. Updated drivers often address compatibility issues and improve overall performance.
2. Verify connections: Double-check all cable connections between your audio interface, computer, and any other equipment in your setup. Ensure that cables are securely plugged in, and there are no loose connections. Sometimes, a simple reseating of cables can resolve intermittent issues.
3. Check device settings: Confirm that your audio interface is selected correctly in the Cubase device settings. Go to the “Devices” menu, select “Device Setup” or “Studio Setup,” and ensure that the right audio interface is chosen. If it’s not recognized, try refreshing the device list or reconnecting the interface.
4. Adjust buffer size and sample rate: If you experience audio glitches or latency, adjusting the buffer size and sample rate might help. Increase the buffer size to minimize processing demands on your computer but beware that it may increase latency. Experiment with different buffer sizes and sample rates to find the optimal balance for your system.
5. Check power and USB connections: If you have a bus-powered audio interface, ensure it is receiving adequate power. Consider using a powered USB hub if you notice stability issues. Additionally, try connecting your audio interface to different USB ports on your computer to rule out any port-related issues.
6. Restart your computer: Sometimes, a simple restart of your computer can resolve various software and hardware conflicts. It helps to clear temporary files and refresh system resources, potentially resolving any issues that may have arisen during your session.
7. Disable unnecessary background applications: Close any unnecessary applications running in the background, as they can consume system resources and cause audio dropouts or glitches. Disable antivirus software temporarily if it’s interrupting audio performance. Remember to re-enable them after troubleshooting.
8. Test with different projects and plugins: Create a new project and test your audio interface with different Cubase projects. If issues occur only in specific projects, it could be related to specific plugins or settings in those projects. Disable or remove plugins temporarily to identify the source of the problem.
9. Reset Cubase preferences: If you encounter persistent issues, you can try resetting Cubase preferences to their default settings. Close Cubase and search for the Cubase preference folder on your computer. Rename or move it to another location, and then restart Cubase. This will create a new preference folder with fresh settings.
10. Contact manufacturer support: If you have exhausted all troubleshooting options and the issues persist, consider reaching out to the manufacturer’s support team. They can provide specific guidance and help address any hardware or compatibility-related issues with your audio interface.
Remember to document any error messages or specific symptoms you encounter, as these details can be helpful for troubleshooting and resolving issues effectively. With perseverance and the use of these troubleshooting tips, you’ll be able to overcome audio interface issues and continue recording and producing music smoothly in Cubase.
Conclusion
Congratulations on reaching the end of this comprehensive guide on using an audio interface with Cubase! By now, you should have a solid understanding of audio interfaces, their role in music production, and how to seamlessly integrate them into the Cubase software.
We started by introducing the concept of audio interfaces and how they facilitate the connection between analog audio sources and your computer. We discussed the importance of choosing the right audio interface for your specific needs, considering factors such as inputs, outputs, connectivity options, and budget.
Next, we explored the process of connecting your audio interface to Cubase, ensuring proper cable connections, and configuring the necessary settings. We covered important aspects like sample rates, buffer sizes, and driver settings to optimize audio performance and minimize latency.
We then delved into recording audio with an audio interface in Cubase. We discussed how to set up a recording session, create audio tracks, set recording levels, and monitor the incoming signal. By following these steps, you can capture pristine audio recordings and unleash your creative potential.
Monitoring and playback are crucial elements of the recording process, and we provided insights into setting up your monitoring system, configuring playback settings, and adjusting volumes and balance. These steps ensure that you can accurately evaluate your recordings and make informed decisions during the mixing process.
We also offered troubleshooting tips for common audio interface issues in Cubase. From updating drivers and checking connections to adjusting buffer sizes and sample rates, these tips can help you troubleshoot and resolve any technical difficulties you encounter.
In conclusion, the audio interface is an indispensable tool for musicians and producers working with Cubase. It bridges the gap between analog and digital audio, enabling you to capture professional-quality recordings and unlock your creative potential. By following the guidelines and tips provided in this guide, you can confidently incorporate an audio interface into your Cubase setup, enhance your recordings, and bring your musical ideas to life.
Now, armed with the knowledge and skills gained from this guide, go forth and explore the endless possibilities that an audio interface combined with the power of Cubase has to offer. Happy recording and producing!