Home>Production & Technology>Stereo>How To Remove A Car Stereo Without Din Tools

Stereo
How To Remove A Car Stereo Without Din Tools
Published: November 18, 2023
Learn how to remove a car stereo without the need for DIN tools. Our step-by-step guide will make the process easy and hassle-free.
(Many of the links in this article redirect to a specific reviewed product. Your purchase of these products through affiliate links helps to generate commission for AudioLover.com, at no extra cost. Learn more)
Table of Contents
Introduction
Welcome to our guide on how to remove a car stereo without the use of DIN tools. Whether you want to upgrade your car’s audio system or troubleshoot an issue with your current stereo, knowing how to remove it is an important skill to have. While DIN tools are commonly used to remove car stereos, not everyone has these tools readily available. Fortunately, there are alternative methods that you can use to safely remove the stereo from your car without the need for specialized tools. In this article, we will explore four different methods that you can try.
Before you begin, it’s important to note that removing the car stereo without DIN tools may require some patience and caution. Make sure to take your time and follow the instructions carefully to avoid causing any damage to your car’s interior or stereo unit.
In the following sections, we will provide step-by-step instructions for each method. You can choose the method that you feel most comfortable with based on the available materials and tools you have at your disposal. Keep in mind that some methods may work better for certain car models or stereo units, so it’s always a good idea to consult your car’s manual or do some additional research specific to your car make and model.
Without further ado, let’s dive into the first method: using pry tools.
Method 1: Using Pry Tools
Pry tools are commonly used in car audio installations and are highly effective for removing car stereos without DIN tools. These tools are designed to help you pry apart panels and safely remove the stereo unit from its housing. Here’s how you can use pry tools to remove your car stereo:
- Start by locating the trim panel surrounding your car stereo. This panel is typically made of plastic and may be secured with clips or screws. Use a trim removal tool or a flathead screwdriver wrapped in a cloth to gently pry off the trim panel. Be careful not to scratch or damage the surrounding areas.
- Once the trim panel is removed, you’ll have access to the mounting screws or clips holding the stereo unit in place. Use a pry tool to carefully remove any screws or clips securing the stereo unit. Take note of the number and location of these fasteners as they might vary depending on your car model.
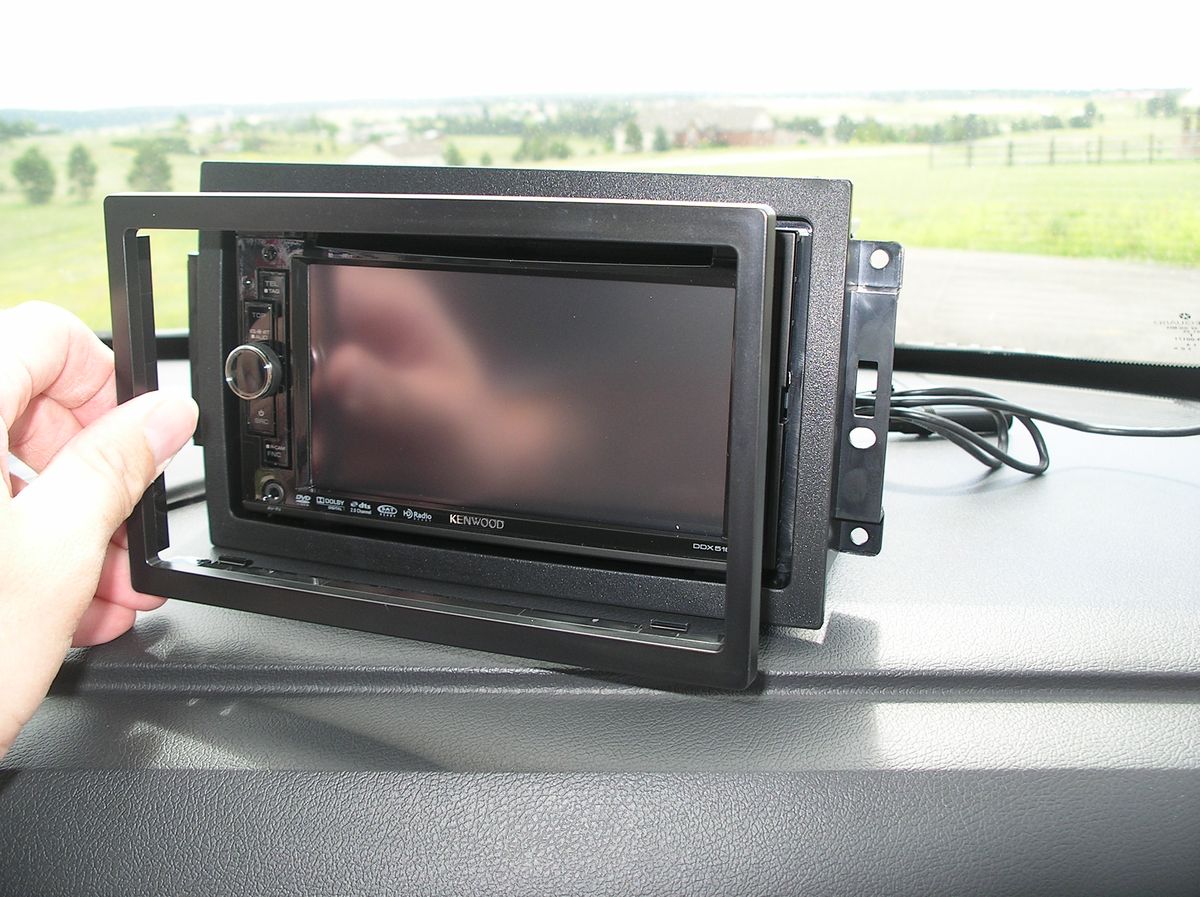
- With the mounting screws or clips removed, gently pull the car stereo unit out of its housing. Be cautious not to force it out or pull on any cables that may be connected to the unit.
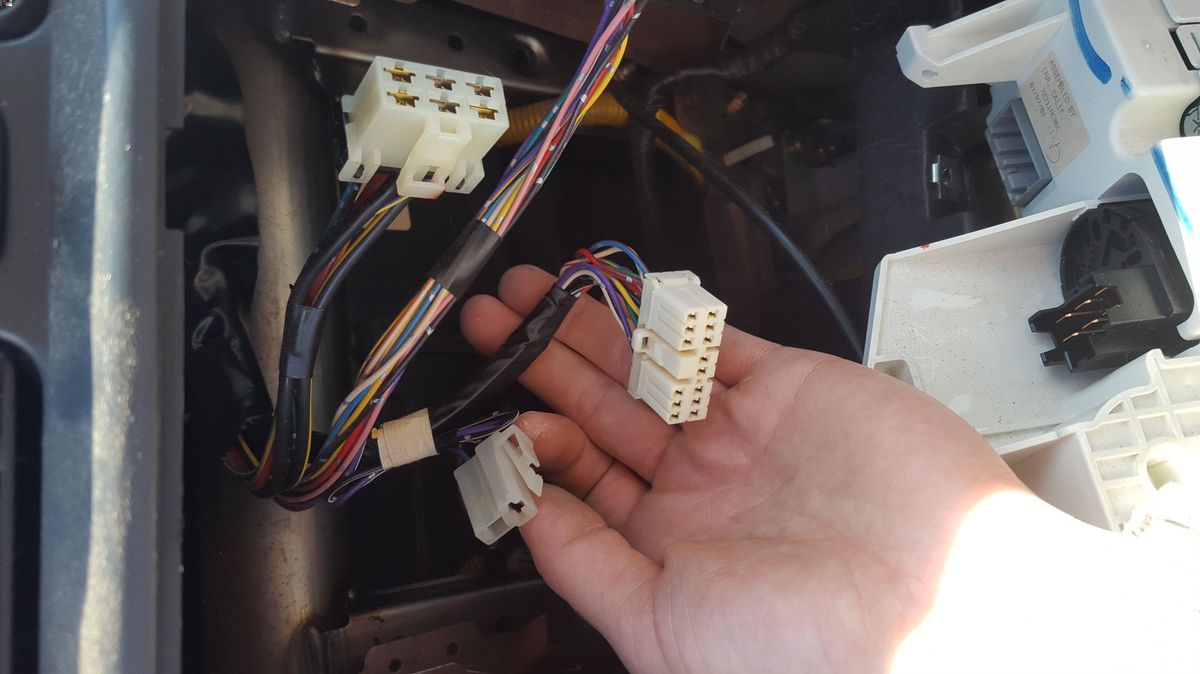
- Once the stereo unit is disconnected, carefully detach any wiring harnesses or connectors that are connected to the back of the unit. Take your time and ensure that you unlock any locking mechanisms or release tabs before pulling the connectors away.
- Now that the stereo unit is completely disconnected, you can safely remove it from the car. Keep in mind that some car models may have additional steps or considerations, so refer to your car’s manual or consult a professional if you have any doubts.
Using pry tools is a reliable and straightforward method for removing a car stereo without DIN tools. However, it’s essential to be gentle and patient throughout the process to prevent any damage to your car’s interior or stereo unit. Now, let’s move on to the next method: using wire hangers.
Method 2: Using Wire Hangers
If you don’t have access to pry tools or prefer a DIY approach, you can use wire hangers as an alternative method to remove a car stereo. While it may sound unconventional, wire hangers can be surprisingly effective in releasing the stereo unit from its housing. Follow these steps to remove your car stereo using wire hangers:
- Start by straightening out two wire hangers until they are relatively straight. You can use pliers to flatten any curved sections and ensure that the hangers are sturdy.
- Bend one end of each wire hanger into a U-shape to create a makeshift hook. The hooks will act as the extraction tools to release the stereo unit.
- Insert one of the wire hangers into the holes or gaps on the sides of the car stereo. The goal is to hook onto the metal clips that secure the stereo in place.
- Gently and evenly apply outward pressure with the wire hanger hooks to release the clips. Be patient during this process and avoid using excessive force to prevent any damage to the stereo unit or surrounding dashboard.
- Repeat the same steps with the second wire hanger on the opposite side of the stereo. This will ensure that both clips are sufficiently released.
- Once both clips are released, carefully pull the stereo unit out of its housing. Be cautious not to pull or tug on any wires that may be connected to the back of the unit.
- Disconnect any wiring harnesses or connectors attached to the back of the stereo unit. Make sure to unlock any locking mechanisms or release tabs if present before removing the connectors.
- With the connectors detached, you can safely remove the stereo unit from the car.
Using wire hangers as extraction tools may require some finesse and patience compared to using pry tools. It’s important to take your time and ensure a gentle yet firm grip on the wire hangers to avoid any accidents or damage. Now, let’s explore the next method: using a trim removal tool.
Method 3: Using a Trim Removal Tool
If you prefer a more specialized tool to remove your car stereo, a trim removal tool can be an excellent option. These tools are specifically designed to safely and efficiently remove trim panels and other components in your car’s interior. Here’s how you can use a trim removal tool to remove your car stereo:
- Obtain a trim removal tool, which typically comes in the form of a plastic or nylon pry tool with a flat, wedge-like shape.
- Identify the trim panel surrounding your car stereo. This panel may be secured with clips, screws, or both. The trim removal tool will help you safely pry off the panel without causing any damage to the surrounding areas.
- Insert the flat edge of the trim removal tool between the trim panel and the dashboard or console. Apply gentle pressure to pry the panel away from its clips or release the screws.
- Work your way around the trim panel, using the trim removal tool to release any remaining clips or screws keeping the panel in place. Take your time and be careful not to rush to avoid any accidents or damage.
- Once the trim panel is fully removed, you will have access to the mounting screws or clips that secure the stereo unit. Use the trim removal tool to carefully remove the screws or release the clips as necessary.
- With the mounting screws or clips undone, gently pull the car stereo unit out of its housing. Avoid applying excessive force or pulling on any connected cables to prevent any damage.
- Disconnect any wiring harnesses or connectors attached to the back of the stereo unit. Take note of any locking mechanisms or release tabs that need to be unlocked before removing the connectors.
- Once all the connectors are detached, you can safely remove the car stereo from the car.
Using a trim removal tool offers a more specialized and efficient approach to removing a car stereo. The tool’s design allows for precise and careful maneuvering, minimizing the risk of damage to your car’s interior or stereo unit. Now, let’s explore the final method: using a paperclip or Allen key.
Method 4: Using a Paperclip or Allen Key
If you don’t have access to pry tools, wire hangers, or trim removal tools, you can still remove your car stereo using everyday objects like a paperclip or an Allen key. These items can be used as makeshift extraction tools to release the stereo unit. Here’s how you can use a paperclip or Allen key to remove your car stereo:
- Start by straightening out a paperclip or an Allen key until it is relatively straight. This will serve as your extraction tool.
- Locate the small holes or slots on the sides of the car stereo unit. These are the release points for the metal clips that secure the stereo in place.
- Insert the straightened paperclip or Allen key into one of the release holes or slots. The goal is to push against the clips to release them.
- Gently and evenly apply outward pressure with the paperclip or Allen key to release the clip. Be patient during this process and avoid using excessive force to prevent any damage to the stereo unit or surrounding dashboard.
- Repeat the same steps with the second release hole or slot on the opposite side of the stereo. This will ensure that both clips are sufficiently released.
- Once both clips are released, carefully pull the stereo unit out of its housing. Be cautious not to pull or tug on any wires that may be connected to the back of the unit.
- Detach any wiring harnesses or connectors attached to the back of the stereo unit. Make sure to unlock any locking mechanisms or release tabs if present before removing the connectors.
- With the connectors detached, you can safely remove the stereo unit from the car.
Using a paperclip or Allen key as extraction tools may not be as convenient as using specialized tools, but they can get the job done in a pinch. Just remember to be gentle and patient throughout the process to avoid any damage to your car’s interior or stereo unit. Now that you know these four methods, you can confidently remove your car stereo without the need for DIN tools. Remember to refer to your car’s manual or consult a professional if you encounter any difficulties along the way.
Choose the method that suits your resources and comfort level. Happy stereo removal!
Conclusion
Removing a car stereo without DIN tools is possible and can be accomplished using various alternative methods. Throughout this guide, we have explored four different methods to safely remove a car stereo: using pry tools, wire hangers, a trim removal tool, and a paperclip or Allen key. Each method offers its own advantages and may be more suitable depending on the available resources and personal preference.
Regardless of the method chosen, it’s crucial to approach the removal process with patience, caution, and attention to detail. Rushing or applying excessive force can result in damage to your car’s interior or the stereo unit itself. Take your time, follow the steps carefully, and refer to your car’s manual or seek professional help if needed.
By utilizing pry tools, wire hangers, a trim removal tool, or a paperclip/Allen key, you can successfully remove your car stereo and proceed with your desired audio system upgrade or troubleshooting. Remember to disconnect any wiring harnesses or connectors properly and be mindful of any locking mechanisms or release tabs that may be present.
Now that you have learned these alternative methods, you’re equipped with the knowledge to remove a car stereo without DIN tools. Choose the method that suits your resources and comfort level, and enjoy the satisfaction of accomplishing it yourself. Happy stereo removal!