Home>Production & Technology>Stereo>How To Remove Sony Car Stereo
Stereo
How To Remove Sony Car Stereo
Modified: January 22, 2024
Learn how to remove a Sony car stereo with our step-by-step guide. Upgrade your audio experience by replacing your old stereo with ease.
(Many of the links in this article redirect to a specific reviewed product. Your purchase of these products through affiliate links helps to generate commission for AudioLover.com, at no extra cost. Learn more)
Table of Contents
- Introduction
- Step 1: Gather the Necessary Tools
- Step 2: Disconnect the Battery
- Step 3: Remove the Trim Panel
- Step 4: Unmount the Sony Car Stereo
- Step 5: Disconnect Wiring Connections
- Step 6: Install a Replacement Stereo (Optional)
- Step 7: Reconnect Wiring Connections
- Step 8: Replace the Trim Panel
- Step 9: Reconnect the Battery
- Conclusion
Introduction
If you’re looking to remove your Sony car stereo, whether it’s because you’re upgrading to a newer model or experiencing issues with your current one, this article is here to guide you through the process. Removing a car stereo may sound challenging, but with the right tools and knowledge, it can be a straightforward task.
Before we begin, it’s important to note that the specific steps may vary depending on the make and model of your car. However, the general process outlined here will give you an idea of what to expect when removing a Sony car stereo.
In the following steps, we will cover everything you need to know to remove your Sony car stereo, including gathering the necessary tools, disconnecting the battery, removing the trim panel, unmounting the stereo itself, and disconnecting the wiring connections. We will also touch on the option of installing a replacement stereo if desired.
It’s worth mentioning that while removing the stereo is a task that can often be done by yourself, if you’re not comfortable with car electronics or unsure about any step, it’s always a good idea to consult a professional or refer to your vehicle’s manual.
Now, let’s get started and learn how to remove your Sony car stereo!
Step 1: Gather the Necessary Tools
Before you begin the process of removing your Sony car stereo, it’s essential to gather all the necessary tools to ensure a smooth and efficient process. Here’s a list of tools that you will need:
- Trim panel removal tool or a flathead screwdriver
- Socket wrench set
- Wire cutter/stripper
- Electrical tape
- Plastic prying tools (optional, for delicate panels)
The trim panel removal tool is recommended as it reduces the risk of damaging the interior components of your car. However, if you don’t have one, a flathead screwdriver can be used, but be extra careful to avoid any scratches or damage.
The socket wrench set will come in handy for unmounting the stereo from its position. Make sure you have a set that includes the appropriate socket size for your specific car stereo.
A wire cutter/stripper is necessary if you plan on disconnecting any wiring connections. This tool will help you strip and cut wires cleanly and safely.
Electrical tape is crucial for insulating the exposed wires to prevent any electrical short circuits or damage during the disconnection process.
Lastly, plastic prying tools are optional but can be useful if you have delicate panels that may be prone to damage. These tools provide a gentler alternative for prying open panels without causing any scratches or dents.
Once you have gathered all the necessary tools, you’ll be well-prepared to move on to the next steps of removing your Sony car stereo.
Step 2: Disconnect the Battery
Before you begin removing your Sony car stereo, it’s crucial to disconnect the battery to prevent any electrical mishaps and ensure your safety. Follow these steps:
- Locate the car’s battery. It is typically found under the hood, in the engine compartment, or in the trunk.
- Using a socket wrench, loosen the nut on the negative terminal of the battery.
- Once the nut is loosened, carefully remove the negative cable from the battery terminal. The negative terminal is usually labeled with a minus (-) sign or colored black.
- Set the negative cable aside, ensuring that it does not come into contact with any metal surfaces.
- Repeat the same steps for the positive terminal of the battery. The positive terminal is usually labeled with a plus (+) sign or colored red.
By disconnecting the battery, you are eliminating the risk of any electrical shock or short circuits as you work on removing the car stereo. It’s important to note that disconnecting the battery may reset certain settings in your vehicle, such as the radio station presets. However, this can easily be reconfigured once you have completed the stereo removal and reconnected the battery.
Remember, safety should be your top priority during this process. Always exercise caution when dealing with electrical components and ensure that the battery is properly disconnected before proceeding further.
Step 3: Remove the Trim Panel
With the battery disconnected, it’s time to remove the trim panel surrounding the car stereo. The trim panel is usually made of plastic and covers the area where the stereo is located. Follow these steps to remove it:
- Use your trim panel removal tool or a flathead screwdriver to gently pry off the trim panel. Start at one corner and work your way around, applying even pressure to release the clips that hold it in place.
- Be careful not to force or bend the trim panel excessively, as it can break easily.
- If your vehicle has any screws holding the trim panel in place, use the appropriate screwdriver to remove them.
- Once all the clips or screws are removed, carefully pull the trim panel away from the dashboard or center console.
- Set the trim panel aside in a safe place to avoid any damage.
Removing the trim panel may reveal additional screws or mounting brackets that need to be removed before you can proceed. Take note of any such components and keep them in a secure location to ensure you can reinstall them later if necessary.
It’s important to be patient and gentle during this step to avoid causing any damage to the trim panel or the surrounding area. Take your time, and if needed, use plastic prying tools to help prevent any scratches or marks.
Once the trim panel is successfully removed, you are ready to move on to the next step of unmounting the Sony car stereo.
Step 4: Unmount the Sony Car Stereo
Now that the trim panel has been removed, it’s time to unmount the Sony car stereo from its position. Follow these steps to proceed:
- Identify the mounting brackets or screws securing the car stereo to the dashboard or center console. These may be located on the sides or top and bottom of the stereo.
- Using a socket wrench or the appropriate screwdriver, loosen and remove any screws or bolts holding the stereo in place.
- If your car stereo is held in by mounting brackets, gently squeeze or press the release tabs on each side of the stereo and slide it out of the brackets.
- Be careful not to force or yank the stereo out, as there may still be wiring connections that need to be disconnected.
- If you encounter any resistance while trying to remove the stereo, double-check for any screws or bolts that may still be holding it in place.
Once the Sony car stereo is successfully unmounted, set it aside in a safe and secure location. Take care not to drop or damage the stereo during this process.
It’s important to note that some car models may have additional components or systems integrated with the stereo, such as climate controls or navigation systems. In such cases, removing the stereo may require additional steps or precautions, so refer to your vehicle’s manual or consult a professional if you need assistance.
With the Sony car stereo now unmounted, you can proceed to the next step of disconnecting the wiring connections.
Step 5: Disconnect Wiring Connections
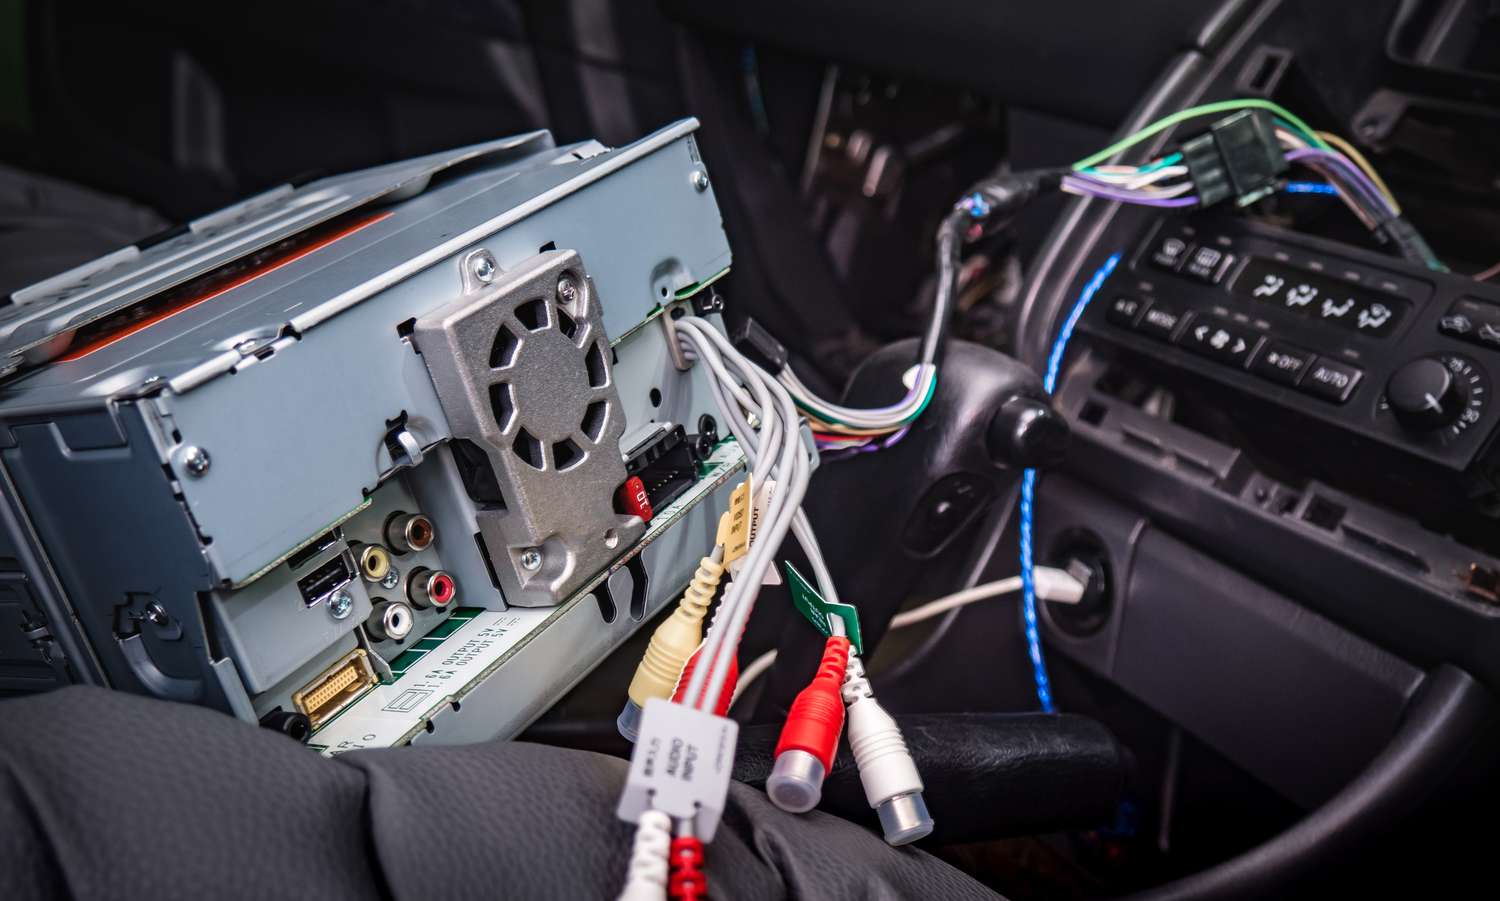
With the Sony car stereo unmounted, the next step is to disconnect the wiring connections. These connections are responsible for supplying power, audio signals, and control functions to the stereo. Follow these steps to safely disconnect the wiring:
- Locate the wiring harness connected to the back of the stereo. The wiring harness consists of multiple wires bundled together with a connector at the end.
- Identify the connector that plugs into the stereo and locate the release tab. This tab needs to be pressed or squeezed to release the connector from the stereo.
- Press or squeeze the release tab and carefully pull the connector away from the stereo. Avoid pulling on the wires themselves, as this can cause damage.
- In addition to the main wiring harness, there may be other connectors or cables connected to the stereo, such as antenna cables or auxiliary input cables. Disconnect these cables according to their respective connections.
- As you disconnect each wire or cable, ensure that it is firmly grasped and gently pull it away from the stereo. Avoid excessive force or twisting, as this can damage the connectors or wires.
It’s crucial to handle the wiring connections with care to avoid any damage to the connectors or wires. If the connectors are difficult to release, double-check for any additional locking mechanisms or tabs that may need to be undone.
Once all the wiring connections are successfully disconnected, set the Sony car stereo and the wiring harness aside in a safe and secure location.
Now that the wiring connections are disconnected, you can choose to install a replacement stereo or proceed with the reinstallation of the original stereo. If you’re planning to install a replacement, continue to Step 6. Otherwise, skip to Step 7.
Step 6: Install a Replacement Stereo (Optional)
If you’ve chosen to upgrade your car stereo and install a replacement, this step will guide you through the process. Installing a new stereo can improve audio quality and offer additional features. Follow these steps to install a replacement stereo:
- Ensure that the new stereo is compatible with your vehicle and that you have all the necessary installation accessories, such as a mounting kit and wiring harness adapter.
- Connect the wiring harness adapter to the new stereo. The adapter will have color-coded wires that correspond to the wires in your vehicle’s harness. Match the colors and connect them securely.
- Attach the mounting brackets or sleeve to the new stereo, following the manufacturer’s instructions.
- Slide the new stereo into the vacant stereo slot, making sure that it is securely seated in the dash or center console.
- If necessary, follow the specific instructions provided with your aftermarket stereo to secure it in place using screws or bolts.
- Reconnect any additional cables or connectors, such as antenna cables or auxiliary input cables, to the appropriate ports on the new stereo.
- For a professional and clean installation, refer to the installation instructions provided with your new stereo. These instructions may include additional steps specific to your model and vehicle.
Take your time during the installation process and ensure that all connections are secure and properly seated. Double-check that the new stereo is functioning correctly before proceeding to the next step.
Remember, installing a replacement stereo is optional, and you can skip this step if you’re reinstalling the original Sony car stereo. In that case, proceed to Step 7.
Step 7: Reconnect Wiring Connections
If you’ve opted to reinstall the original Sony car stereo or have completed the installation of a replacement stereo, it’s time to reconnect the wiring connections. Follow these steps to ensure a secure and proper reconnection:
- Take the wiring harness that was disconnected earlier and align it with the corresponding connector on the back of the stereo.
- Gently insert the connector into the stereo’s wiring harness port and ensure that it is fully seated. You should feel it click into place or feel a snug fit.
- Repeat this process for any other connectors or cables that were disconnected, such as antenna cables or auxiliary input cables. Ensure each connection is secure.
- Check that all wiring connections are properly aligned and fully connected. Inspect for any loose or unconnected wires.
It’s essential to pay close attention to the connections to avoid any loose or misaligned wires. Improperly connected wiring can lead to issues such as audio distortion or a malfunctioning stereo.
If you have installed a replacement stereo, make sure that all the adapters and cables are securely connected between the aftermarket stereo and your vehicle’s wiring system.
Once all the wiring connections are reestablished, you’re ready to move on to the next step of replacing the trim panel.
Step 8: Replace the Trim Panel
With the wiring connections securely reconnected, it’s time to replace the trim panel that covers the area around the car stereo. Follow these steps to ensure a proper and seamless reinstallation:
- Align the trim panel with the corresponding slots on the dashboard or center console.
- Gently push the trim panel back into place, starting from one corner and working your way around. Apply even pressure to ensure that the clips or screws align properly.
- If your vehicle had screws holding the trim panel in place, use the appropriate screwdriver to reinsert and tighten them securely.
- Ensure that the trim panel is flush with the surrounding surfaces and that it sits evenly without any gaps or misalignment.
- Give the trim panel a gentle tug to ensure it is firmly attached and won’t come loose while driving.
Take your time when replacing the trim panel to avoid any damage or misalignment. Be mindful of any delicate or sensitive components, such as buttons or knobs, that may be on the panel.
If you had any additional components or systems integrated with the trim panel, such as climate controls or navigation systems, make sure they are properly reinstalled and functioning correctly.
Once the trim panel is securely back in place, you’re almost done. One final step remains – reconnecting the battery.
Step 9: Reconnect the Battery
With the trim panel replaced, the final step is to reconnect the battery. Follow these steps:
- Locate the car’s battery, which is typically found in the engine compartment or trunk. Ensure that the area surrounding the battery is clear of any tools or debris.
- Take the negative cable (marked with a minus (-) sign or colored black) and carefully place it onto the negative terminal of the battery.
- Use a socket wrench to tighten the nut on the negative terminal, ensuring a secure connection.
- Repeat the same process for the positive cable (marked with a plus (+) sign or colored red) by placing it onto the positive terminal and tightening the nut.
- Double-check that all connections are tight and secure to minimize the risk of any electrical issues.
By reconnecting the battery, you are restoring power to the vehicle’s electrical system, including the car stereo. This enables the stereo to function properly.
Once the battery is successfully reconnected, you can test the functionality of the Sony car stereo. Turn on the stereo and make sure all the features, such as audio playback and control functions, are working correctly. Additionally, check that any integrated systems, such as climate controls or navigation, are functioning as expected.
Now that you have completed the process of removing and reinstalling the Sony car stereo, take a moment to appreciate your accomplishment. You can now enjoy your car stereo’s improved performance or the features of your new replacement stereo!
As a final reminder, if at any point during the process you felt unsure or encountered difficulties, it’s always a good idea to consult a professional or refer to your vehicle’s manual for further guidance.
Conclusion
Removing a Sony car stereo may seem like a daunting task, but with the right tools and knowledge, it can be a straightforward process. By following the steps outlined in this guide, you can successfully remove the stereo, disconnect the wiring connections, and reinstall the trim panel. Additionally, if you choose to upgrade to a new stereo, you can easily install a replacement with the proper adapters and connections.
Throughout the process, it’s important to prioritize safety and exercise caution when working with electrical components and wiring. Always remember to disconnect the battery before starting and ensure that all connections are properly secured and aligned when reconnecting.
While this guide aims to provide a general overview of removing a Sony car stereo, it’s important to refer to your specific vehicle’s manual for detailed instructions and any unique steps or considerations. If you’re unsure about any aspect of the process or encounter any difficulties, it’s always best to consult a professional to ensure the task is completed correctly and safely.
By following the steps in this guide, you can confidently remove your Sony car stereo and either reinstall the original unit or upgrade to a new and improved one. Enjoy the enhanced audio experience and functionality that your car stereo brings!