Home>Production & Technology>Stereo>How To Remove The Antenna From A Car Stereo
Stereo
How To Remove The Antenna From A Car Stereo
Modified: January 22, 2024
Learn how to remove the antenna from your car stereo with these easy steps. Improve the performance and appearance of your stereo system.
(Many of the links in this article redirect to a specific reviewed product. Your purchase of these products through affiliate links helps to generate commission for AudioLover.com, at no extra cost. Learn more)
Table of Contents
Introduction
When it comes to car stereos, one of the components that often goes unnoticed is the antenna. The antenna is responsible for receiving radio signals and ensuring a clear and crisp audio experience during your commute. However, there may be situations where you find the need to remove the antenna from your car stereo. Whether you’re replacing it with a new one or making modifications to your vehicle, knowing how to properly remove the antenna is essential.
In this article, we will guide you through the process of removing the antenna from a car stereo. We will provide you with step-by-step instructions, along with helpful tips to ensure that you perform the task smoothly and without causing any damage.
Before we dive into the details, it’s important to note that removing the antenna may result in the loss of your radio reception. If you still want to listen to your favorite radio stations, you may need to consider alternative options such as a replacement antenna or connecting to streaming services through your smartphone or other devices.
So, if you’re ready to learn how to remove the antenna from your car stereo, gather your tools and let’s get started!
Why Remove the Antenna from a Car Stereo?
There are several reasons why someone might want to remove the antenna from a car stereo. Let’s explore some of the most common scenarios:
- Installing a new antenna: If you’re upgrading your car stereo system or installing a new one, you may need to remove the existing antenna to make way for the new equipment. This is especially true if the new system has a different type of antenna connection or requires a specific antenna for optimal performance.
- Vehicle modifications: Some car enthusiasts and DIYers may want to modify their vehicles for aesthetic or performance reasons. Removing the antenna can help create a cleaner look, particularly if you’re getting rid of unnecessary external features on your car.
- Repair or replacement: If your antenna is damaged or not functioning properly, you may need to remove it to repair or replace it. This can improve your radio reception and ensure a better listening experience during your drives.
- Reducing wind resistance: For those looking to improve fuel efficiency or reduce wind drag on their vehicle, removing the antenna can help. By eliminating the antenna, you can reduce the overall aerodynamic resistance, resulting in a slight increase in fuel economy and potentially even improving the car’s performance.
It’s important to note that removing the antenna may affect your ability to listen to traditional radio stations, as it is the main component responsible for capturing radio signals. However, there are alternative options available, such as streaming services and digital radio, which can help compensate for the loss of traditional radio reception.
Now that we understand the reasons behind removing the antenna, let’s move on to the tools and materials you’ll need for the task.
Tools and Materials Needed
Before you begin removing the antenna from your car stereo, it’s important to gather the necessary tools and materials. Here’s a list of what you’ll need:
- Flathead screwdriver: This will be handy for prying off any clips or screws that may be holding the antenna in place.
- Pliers: You may need pliers to remove any connectors or cables attached to the antenna.
- Socket set: Depending on the type of mounting hardware used for your antenna, you may require a socket set to remove any screws or bolts.
- Antenna removal tool (optional): Some vehicles have antenna removal tools specifically designed to make the process easier. Check if your car manufacturer provides any specialized tools for this task.
- Gloves: It’s always a good idea to wear gloves to protect your hands during the removal process.
In addition to the tools, you may also need the following materials:
- Electrical tape: It’s a good idea to have electrical tape on hand to secure any exposed wires or connectors after removing the antenna.
- Zip ties (optional): If you plan on keeping the antenna cable in place, you can use zip ties to secure it to other parts of the vehicle, preventing it from dangling or getting in the way.
With these tools and materials at your disposal, you’ll be prepared to safely and effectively remove the antenna from your car stereo. In the next section, we’ll provide a step-by-step guide on how to do just that.
Step-by-Step Guide:
Now that you have gathered the necessary tools and materials, let’s walk through the step-by-step process of removing the antenna from your car stereo:
- Prepare the car: Park your car on a level surface and engage the parking brake for safety. You may also consider disconnecting the battery to avoid any electrical mishaps during the removal process.
- Locate the antenna: The antenna is typically located on the exterior of the vehicle, either on the roof, fender, or trunk. Take a moment to visually inspect your car and identify the antenna’s position.
- Disconnect the antenna cable: Depending on the type of antenna, you may need to disconnect a cable that is connected to the back of the stereo unit. Use your pliers to carefully disconnect the cable by gently pulling it out of the socket. Make sure to remember its position for reinstallation if needed.
- Remove any mounting screws or clips: Look for any screws, bolts, or clips that may be securing the antenna in place. Use the appropriate tool, such as a screwdriver or socket set, to remove them. Keep the mounting hardware in a safe place if you plan on reinstalling the antenna in the future.
- Gently pull out the antenna: With the mounting hardware removed, you can now gently pull the antenna out of its socket or mounting position. Be careful not to apply excessive force or damage any surrounding components.
Once the antenna is removed, you can either choose to replace it with a new one or leave the space empty for aesthetic purposes. If you do decide to install a new antenna, simply reverse the steps outlined above, ensuring that you reconnect the antenna cable and secure any mounting hardware properly.
Remember, removing the antenna may affect your radio reception, so consider alternative options such as replacement antennas or utilizing streaming services through your smartphone or other devices.
Before you complete the process, make sure to test your car stereo to ensure everything is functioning correctly without the antenna. If you encounter any issues, double-check your connections or consult a professional if needed.
Now that you know how to remove the antenna from your car stereo, let’s move on to some additional tips to help you perform the task more efficiently and avoid any potential pitfalls.
Prepare the Car
Before you begin removing the antenna from your car stereo, it is essential to prepare the vehicle properly. Follow these steps to ensure a safe and efficient removal process:
- Park on a level surface: Find a level area to park your car and engage the parking brake. This will prevent the car from rolling during the antenna removal process.
- Disconnect the battery: For added safety, consider disconnecting the battery before proceeding. This will help prevent any accidental electrical shocks or shorts while working on the car.
- Gather your tools and supplies: Ensure that you have all the necessary tools, such as a flathead screwdriver, pliers, socket set, and any optional tools specific to your car’s antenna removal process. Also, have your gloves, electrical tape, and zip ties (if needed) ready.
By taking these preparatory steps, you’ll create a safe and organized workspace to remove the antenna from your car stereo. Always prioritize your safety and be cautious throughout the process.
Now that you’re prepared, let’s move on to the next step: locating the antenna on your vehicle.
Locate the Antenna
Once you’ve prepared your car, the next step in removing the antenna from your car stereo is to locate its position. The antenna can vary in location depending on your vehicle’s make and model. Here are some common areas where you might find the antenna:
- Roof: Many vehicles have their antennas mounted on the roof, typically towards the rear end. Look for a thin, rigid structure or a small, raised component on the roof of your car.
- Fender: In some cars, the antenna may be located on one of the fenders, near the front or rear wheel well. It might be a short, stubby antenna or a sleek, whip-style antenna.
- Trunk: Occasionally, the antenna is positioned on the trunk lid or tucked away in the rear of the vehicle. Look for a small, elevated object or a cable leading to the trunk area.
Keep in mind that the antenna’s appearance and location may vary depending on the make, model, and year of your vehicle. If you’re having trouble finding it, refer to your car’s owner’s manual or consult online resources specific to your vehicle.
Take a moment to visually inspect your car and identify the antenna’s position. Knowing its location will help you in the subsequent steps of the removal process.
Once you’ve located the antenna, we can move on to the next step: disconnecting the antenna cable.
Disconnect the Antenna Cable
Now that you have located the antenna on your vehicle, the next step is to disconnect the antenna cable from the back of the car stereo. This cable is what allows the audio signals to reach your car’s audio system. Follow these steps to safely disconnect the antenna cable:
- Access the back of the car stereo: Depending on your car’s design, you may need to remove the stereo unit from the dashboard to access the back. Refer to your car’s manual or seek online resources for specific instructions on removing the stereo.
- Identify the antenna cable: Look for a cable connected to the antenna input on the back of the stereo. It is usually a coaxial cable with a connector at the end.
- Unplug the antenna cable: Carefully grip the connector and gently pull it straight out. Avoid pulling on the cable itself to prevent any damage. If the connector feels stuck, check for any locks or clips that may be holding it in place and release them accordingly.
Once the antenna cable is disconnected from the back of the car stereo, handle it with care to avoid tangling or damaging the cable or connectors. You may want to tuck it away neatly to prevent interference or damage during the rest of the removal process.
Remember to take note of the cable’s position and connection point for future reinstallation, if necessary.
With the antenna cable disconnected, we can proceed to the next step: removing any mounting screws or clips.
Remove any Mounting Screws or Clips
After disconnecting the antenna cable, the next step in removing the antenna from your car stereo is to remove any mounting screws or clips that hold the antenna in place. These fixtures secure the antenna to the vehicle’s structure and may vary depending on the car’s make and model. Follow these steps to remove them:
- Inspect the antenna mounting: Take a close look at the antenna and surrounding area to identify any screws, bolts, or clips that are securing it in place. They may be visible on the surface or hidden beneath a cover or trim piece.
- Choose the appropriate tool: Depending on the fasteners used, select the appropriate tool, such as a screwdriver, socket set, or specialized antenna removal tool if available.
- Remove the screws or clips: Carefully loosen and remove any screws or bolts that are holding the antenna. Turn them counterclockwise until they are fully removed. If there are clips, use a flathead screwdriver to gently pry them open and release the antenna.
As you remove the mounting screws or clips, be sure to keep them in a safe place. You may need them for reinstallation or if you plan to replace the antenna in the future.
With the mounting hardware removed, the antenna should be ready to be removed from its position. Proceed to the next step to learn how to gently pull out the antenna.
Gently Pull Out the Antenna
Now that you have removed the mounting screws or clips, it’s time to gently pull out the antenna from its position. Follow these steps to safely remove the antenna:
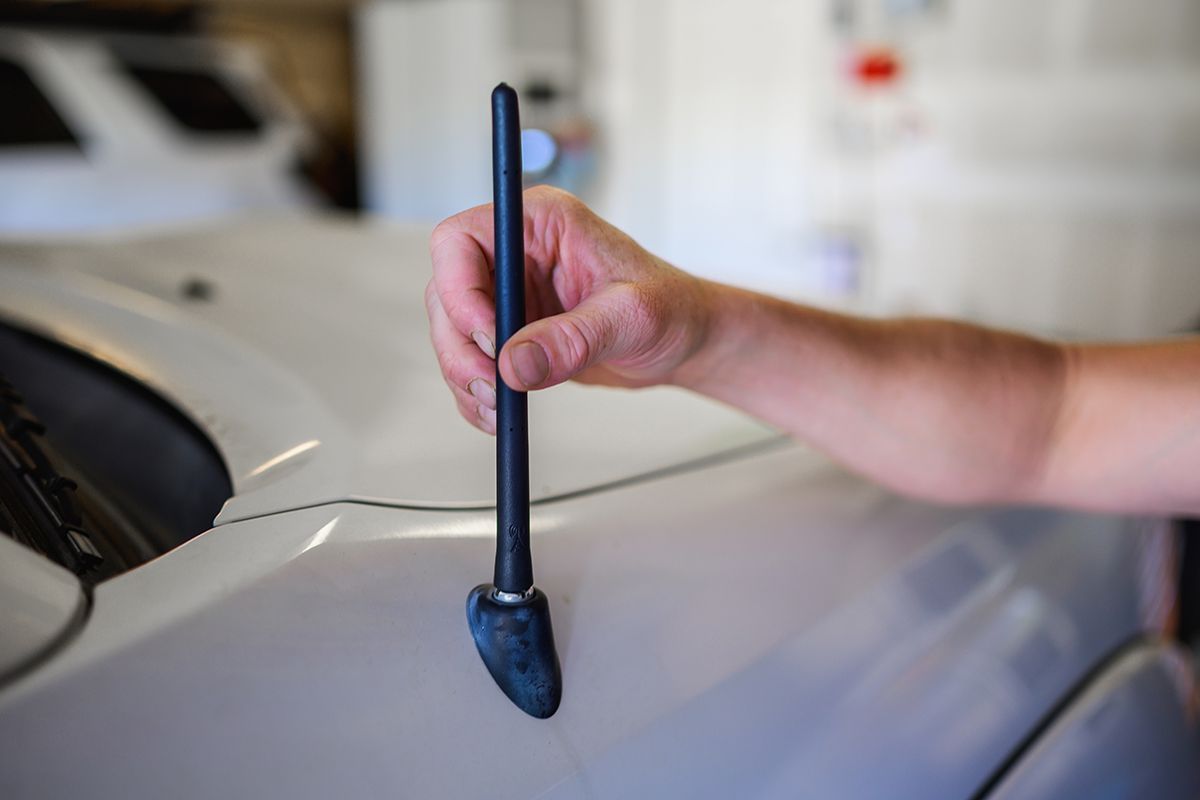
- Assess the antenna’s attachment: Take a moment to observe how the antenna is attached to the vehicle. Some antennas may simply slide out, while others may have a threaded connector that needs to be unscrewed.
- Apply gentle force: With a firm grip on the antenna, apply gentle pulling force to remove it. If the antenna is threaded, turn it counterclockwise to unscrew it while pulling.
- Be cautious of any resistance: While pulling out the antenna, pay attention to any resistance. If you encounter significant resistance, double-check for any remaining screws, bolts, or clips that may still be holding the antenna in place.
- Store the antenna safely: Once the antenna is successfully removed, place it in a safe and secure location. Consider wrapping it in a soft cloth or storing it in a protective case to prevent any damage during storage or future use.
Remember, the antenna is made of delicate materials and can be easily damaged if mishandled. Take your time, be patient, and proceed with caution while removing the antenna.
With the antenna successfully removed, you have completed the process of removing the antenna from your car stereo. If you don’t plan on installing a new antenna, you can leave the space empty for aesthetic purposes, or explore alternative audio options such as streaming services or digital radio for your audio needs.
Now that you’re familiar with the step-by-step process of removing the antenna, let’s move on to some additional tips to help you perform the task more efficiently and avoid any potential pitfalls.
Tips for Removing the Antenna without Causing Damage
Removing the antenna from a car stereo can be a delicate task. To ensure a smooth and damage-free removal process, follow these helpful tips:
- Refer to your car’s manual: Before attempting any removal, consult your car’s manual for specific instructions and precautions related to your vehicle’s antenna. This will provide you with valuable information tailored to your car’s make and model.
- Take note of the cable connections: Before disconnecting the antenna cable, take a moment to observe how it is connected. This will help you remember the proper reconnection order later on.
- Use the appropriate tools: Ensure that you have the right tools, including screwdrivers, pliers, and socket sets, for the job. Using the correct tools will help prevent damage to the antenna or surrounding components.
- Apply gentle and steady force: When pulling out the antenna, exert gentle and steady force. Avoid using excessive force or jerking motions, as this can risk damaging the antenna or other parts of the car.
- Check for hidden fasteners or clips: Thoroughly inspect the antenna and its surroundings for any hidden screws, bolts, or clips. Failure to remove these fasteners can prevent the antenna from being fully detached and may lead to damage during removal.
- Secure any loose wires or connectors: After removing the antenna, take the time to secure any loose wires or connectors using electrical tape. This will prevent them from dangling or causing interference with other components.
- Store the removed antenna safely: If you plan on keeping the removed antenna, store it in a safe and dry place to prevent any damage. Wrapping it in a soft cloth or placing it in a protective case can help protect it from dust, moisture, and potential impact.
By following these tips, you can remove the antenna from your car stereo without causing any damage and ensure a successful removal process.
Now that you’re equipped with all the necessary information and tips, you’re ready to remove the antenna from your car stereo. Whether you’re upgrading your audio system, making modifications to your vehicle, or simply replacing a damaged antenna, be patient and careful throughout the process. Good luck!
Conclusion
Removing the antenna from a car stereo may be necessary for various reasons, such as upgrading the audio system, making modifications to your vehicle, or replacing a damaged antenna. By following the step-by-step guide and tips provided in this article, you can safely remove the antenna without causing any damage.
Remember to prepare your car by parking on a level surface and disconnecting the battery for safety. Gather the necessary tools and materials, including a flathead screwdriver, pliers, socket set, and optional antenna removal tool. Then, follow the step-by-step process of locating the antenna, disconnecting the antenna cable, removing mounting screws or clips, and gently pulling out the antenna.
Throughout the removal process, exercise caution, apply gentle force, and be aware of any hidden fasteners or resistance. Once the antenna is removed, store it safely and securely for future use, if desired.
It’s important to note that removing the antenna may result in the loss of traditional radio reception. However, there are alternative options available, such as replacement antennas or using streaming services through your smartphone or other devices.
Now that you have the knowledge and confidence to remove the antenna from your car stereo, you can proceed with your desired modifications or upgrades. Remember to consult your car’s manual for specific instructions and precautions related to your vehicle.
By following the guidelines and tips provided, you can successfully remove the antenna from your car stereo, ensuring a smooth and damage-free process. Enjoy your newfound knowledge and the freedom it gives you to customize your car’s audio system to your liking!