Home>Production & Technology>Stereo>How To Wire One Speaker To Stereo
Stereo
How To Wire One Speaker To Stereo
Modified: January 22, 2024
Learn how to wire a single speaker to your stereo for optimal sound quality. Enhance your stereo experience and enjoy crystal-clear audio with this step-by-step guide.
(Many of the links in this article redirect to a specific reviewed product. Your purchase of these products through affiliate links helps to generate commission for AudioLover.com, at no extra cost. Learn more)
Table of Contents
Introduction
Welcome to the world of stereo speakers! If you’re a music enthusiast or simply someone who appreciates high-quality sound, having a stereo system at home can greatly enhance your listening experience. But setting up a stereo system involves more than just plugging in the speakers; it also requires proper wiring to ensure optimal performance.
In this article, we will guide you through the process of wiring one speaker to a stereo system. Whether you’re adding an additional speaker to an existing setup or setting up a new stereo system from scratch, understanding the basics of speaker wiring is crucial.
Speaker wiring is the process of connecting the speaker to your stereo receiver, allowing the audio signal to be transmitted and reproduced through the speaker. This wiring ensures that the sound reaches your ears with clarity and precision, bringing your favorite songs to life.
While it may seem intimidating at first, wiring a speaker to a stereo system is actually a straightforward process. We will break it down into simple steps and provide you with all the information you need to do it yourself.
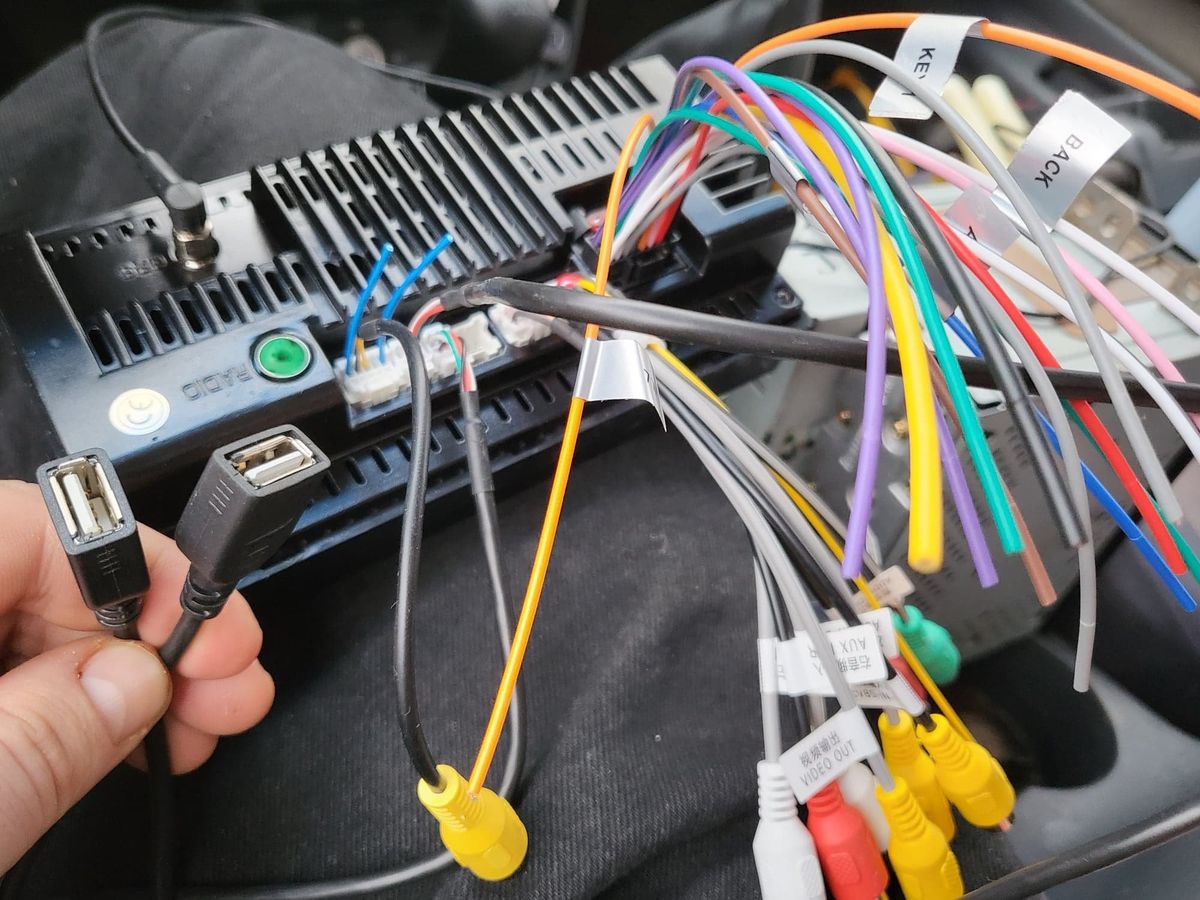
Before we dive into the specifics of wiring one speaker to a stereo system, it’s important to mention that the instructions provided in this article are applicable for wired speakers. If you’re using wireless speakers, the wiring process may differ.
Now, let’s get started and empower you to wire your speaker to your stereo system like a pro!
Speaker Wiring Basics
Understanding some basic concepts of speaker wiring can help you navigate the process with ease. Here are some key points to keep in mind:
- Impedance: Speaker impedance is measured in ohms and refers to the resistance the speaker presents to the audio signal. It is important to match the speaker impedance with the output impedance of the stereo receiver to ensure proper functioning and prevent damage to the equipment.
- Speaker Wire Gauge: The gauge of the speaker wire determines its thickness and resistance. Thicker wires (lower gauge) are generally recommended for longer wire runs or speakers with lower impedance. It is crucial to choose the appropriate wire gauge to minimize signal loss and maintain optimal audio quality.
- Polarity: Proper polarity ensures that the positive and negative terminals of the speaker are correctly connected to the corresponding terminals on the stereo receiver. Reversing the polarity can result in phase cancellation and diminish the sound quality.
- Stranded vs. Solid Wire: Speaker wire is available in stranded and solid forms. Stranded wire consists of multiple small strands, making it flexible and easy to work with. Solid wire, on the other hand, is a single piece of wire and is relatively less flexible. Either type can be used for speaker wiring, so choose the one that suits your preference.
- Wire Length: The length of the speaker wire can affect the signal quality. Longer wire runs may introduce resistance and cause signal degradation. It’s best to keep the speaker wire length as short as possible.
By understanding these basics, you’ll be well-prepared to wire your speaker to your stereo system. In the following sections, we will outline the step-by-step process and provide you with the necessary tools and materials needed for the task.
Tools and Materials Needed
Before you begin wiring your speaker to your stereo system, gather the following tools and materials:
- Speaker Wire: Choose a high-quality speaker wire suitable for your setup. Consider the length required and the gauge appropriate for your speaker impedance and wire run.
- Wire Strippers: These tools are essential for removing the insulation from the ends of the speaker wire, allowing you to make proper connections.
- Wire Cutters: Use wire cutters to trim the speaker wire to the desired length.
- Banana Plugs or Spade Connectors (Optional): While not necessary, banana plugs or spade connectors can make the connection process easier and more secure. These connectors attach to the ends of the speaker wire and plug into the corresponding terminals on the stereo receiver and speaker.
- Labels or Markers (Optional): Labeling or marking your speaker wire can help you keep track of which wire is connected to which terminal, ensuring proper polarity.
- Stereo Receiver: Ensure you have a stereo receiver or amplifier to power your speakers. It should have the necessary terminals to connect your speaker wire.
- Speaker: Have your speaker ready for the wiring process. Make sure it has terminals to connect the speaker wire.
- Owner’s Manuals: Keep the owner’s manuals for your stereo receiver and speaker handy. They provide specific instructions and diagrams for connecting the equipment.
Having these tools and materials readily available will make the wiring process smooth and efficient. Now, let’s move on to the step-by-step instructions for wiring your speaker to your stereo system.
Step 1: Determine Speaker Impedance
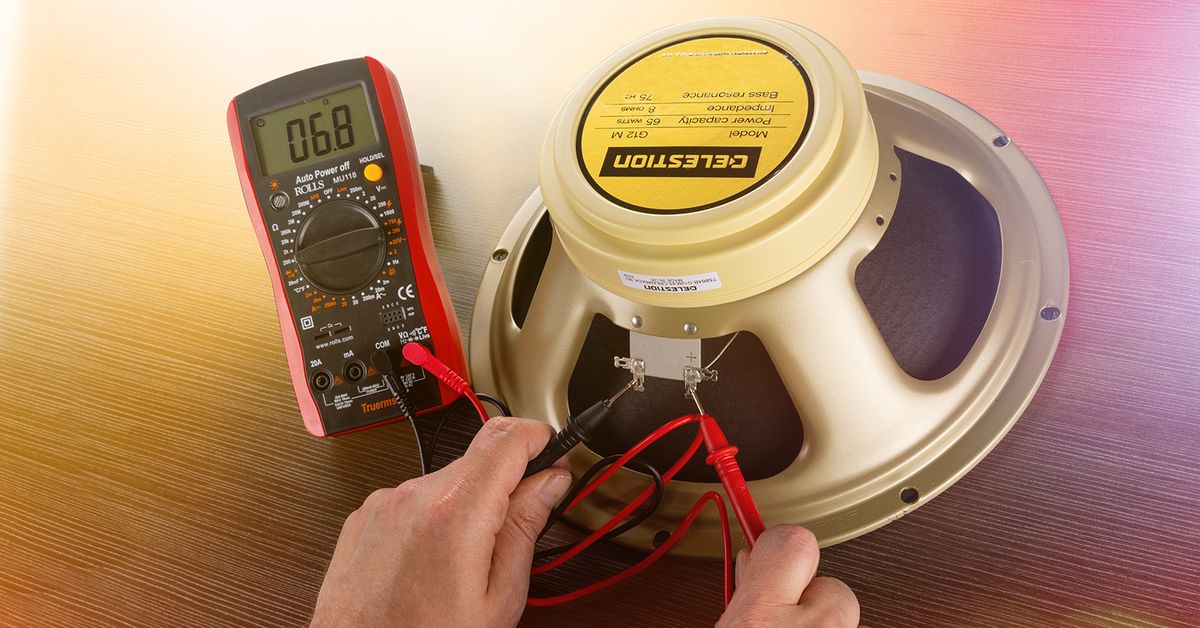
Before you wire your speaker to your stereo system, it’s crucial to determine the speaker impedance. The impedance rating of the speaker is typically indicated on the back or bottom of the speaker or mentioned in its user manual.
The speaker impedance is measured in ohms and represents the resistance the speaker presents to the audio signal. It is important to match the speaker impedance with the output impedance of your stereo receiver or amplifier to ensure compatibility and optimal performance.
Most speakers have an impedance rating of either 4 ohms or 8 ohms. Some speakers may have a lower or higher impedance, so it’s important to check the specifications of your specific speaker.
To determine the speaker impedance, follow these steps:
- Locate the impedance rating on the speaker or refer to the user manual.
- Note the impedance rating, which is usually expressed as a number followed by the symbol “Ω” (ohm).
Once you have determined the speaker impedance, make sure your stereo receiver or amplifier is capable of driving speakers with that impedance. It is generally recommended to match the impedance of the speaker with the rated impedance of the stereo receiver or amplifier.
Incorrectly matching the speaker impedance with the output impedance of the stereo receiver can lead to distorted sound, reduced volume levels, or even damage to the equipment. Therefore, ensuring impedance compatibility is an essential step in the wiring process.
Now that you have determined the speaker impedance, it’s time to move on to the next step: choosing the correct speaker wire for your setup.
Step 2: Choose the Correct Speaker Wire
Choosing the correct speaker wire is crucial for ensuring optimal audio performance and minimizing signal loss. The right speaker wire will help transmit the audio signal from your stereo receiver to the speaker with clarity and accuracy.
Consider the following factors when selecting your speaker wire:
- Wire Gauge: Speaker wire comes in different gauges, which determine the thickness and resistance of the wire. Thicker wires (lower gauge numbers) have lower resistance and are generally recommended for longer wire runs or speakers with lower impedance. For shorter distances and speakers with higher impedance, a thinner wire may be sufficient.
- Length of Wire Run: The length of the wire run between the stereo receiver and the speaker should be taken into account. Longer wire runs can introduce resistance and cause signal loss. It’s advisable to keep the speaker wire as short as possible to maintain optimal audio quality.
- Speaker Impedance: Ensure that the chosen speaker wire is suitable for the impedance rating of your speaker. As mentioned in Step 1, the impedance rating is usually 4 ohms or 8 ohms. Matching the wire gauge to the impedance will help deliver the appropriate power to the speaker.
- Wire Material: Speaker wire is typically made of copper or copper-clad aluminum. Copper provides better conductivity and is a preferred choice for most audio systems. Copper-clad aluminum wire is more cost-effective but offers slightly higher resistance.
When purchasing speaker wire, look for reputable brands that offer good quality and durability. It’s also a good idea to buy a bit more wire than you think you’ll need to allow for any adjustments or changes in your setup later on.
Remember, the goal is to select a speaker wire that matches the requirements of your speaker impedance and wire run length. By choosing the correct speaker wire, you can ensure optimal audio performance without compromising on signal quality.
Once you have selected the appropriate speaker wire, it’s time to proceed to the next step: preparing the speaker wire for installation.
Step 3: Prepare Speaker Wire
Now that you have chosen the correct speaker wire, the next step is to prepare it for installation. Properly preparing the speaker wire will ensure a secure and reliable connection between your stereo receiver and the speaker.
Follow these steps to prepare the speaker wire:
- Measure the Length: Determine the length of the speaker wire needed to connect your stereo receiver to the speaker. It’s advisable to add a bit of extra length to allow for flexibility during installation.
- Strip the Ends: Use wire strippers to carefully remove approximately 1/2 inch (1.27 cm) of insulation from the ends of the speaker wire. This will expose the bare wire for making connections. Take care not to damage the conductors while stripping the wire.
- Twist the Strands: If you are using stranded wire, gently twist the strands together to create a neat and secure connection. This will prevent the strands from fraying or separating once inserted into the terminals.
- Label the Ends (Optional): To ensure proper polarity and connection, you may choose to label the ends of the speaker wire. You can use small labels, markers, or colored tape to distinguish the positive (+) and negative (-) ends. This will make it easier to identify and match the polarity when connecting the wire to the stereo receiver and speaker.
Once you have prepared the speaker wire, double-check that the ends are clean and free of any frayed wires or leftover insulation. Clean, properly prepared wire ends will make the connection process smoother and more reliable.
With the speaker wire prepared, you are now ready to move on to the next step: connecting the speaker wire to the stereo receiver.
Step 4: Connect Speaker Wire to Stereo Receiver
Connecting the speaker wire to your stereo receiver is a crucial step in the wiring process. This step ensures that the audio signal from the receiver is properly transmitted to the speakers, allowing you to enjoy immersive sound quality.
Follow these steps to connect the speaker wire to the stereo receiver:
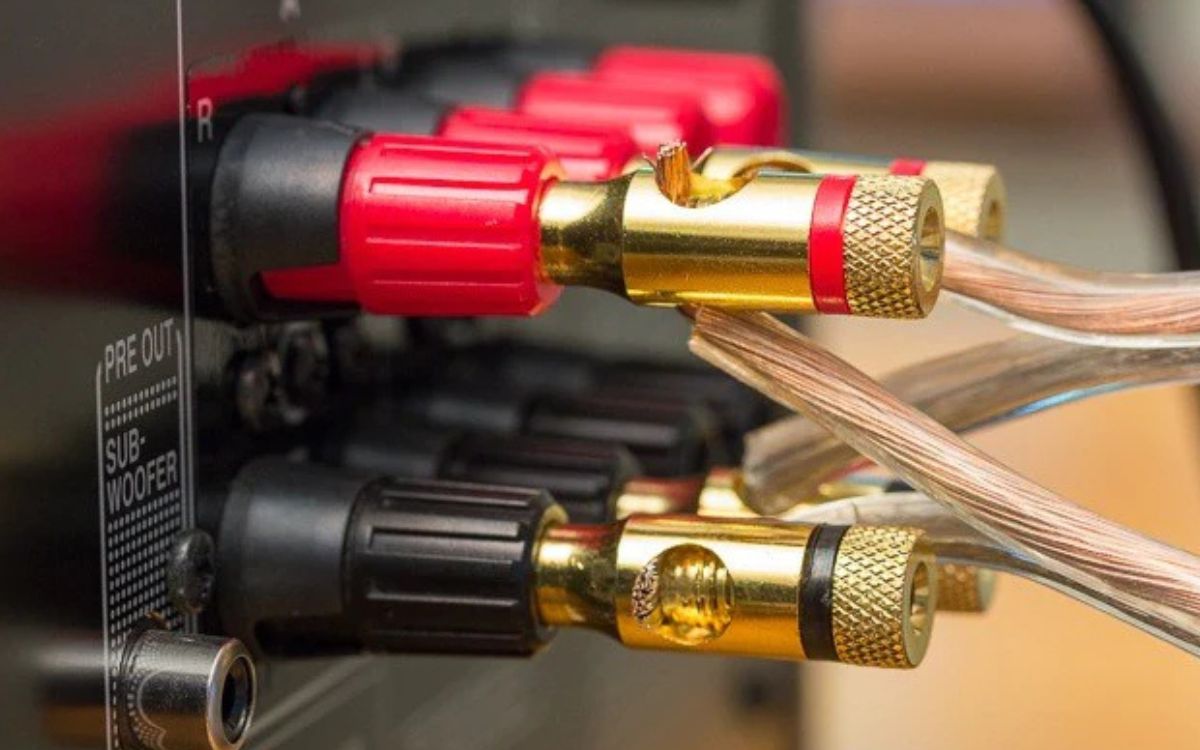
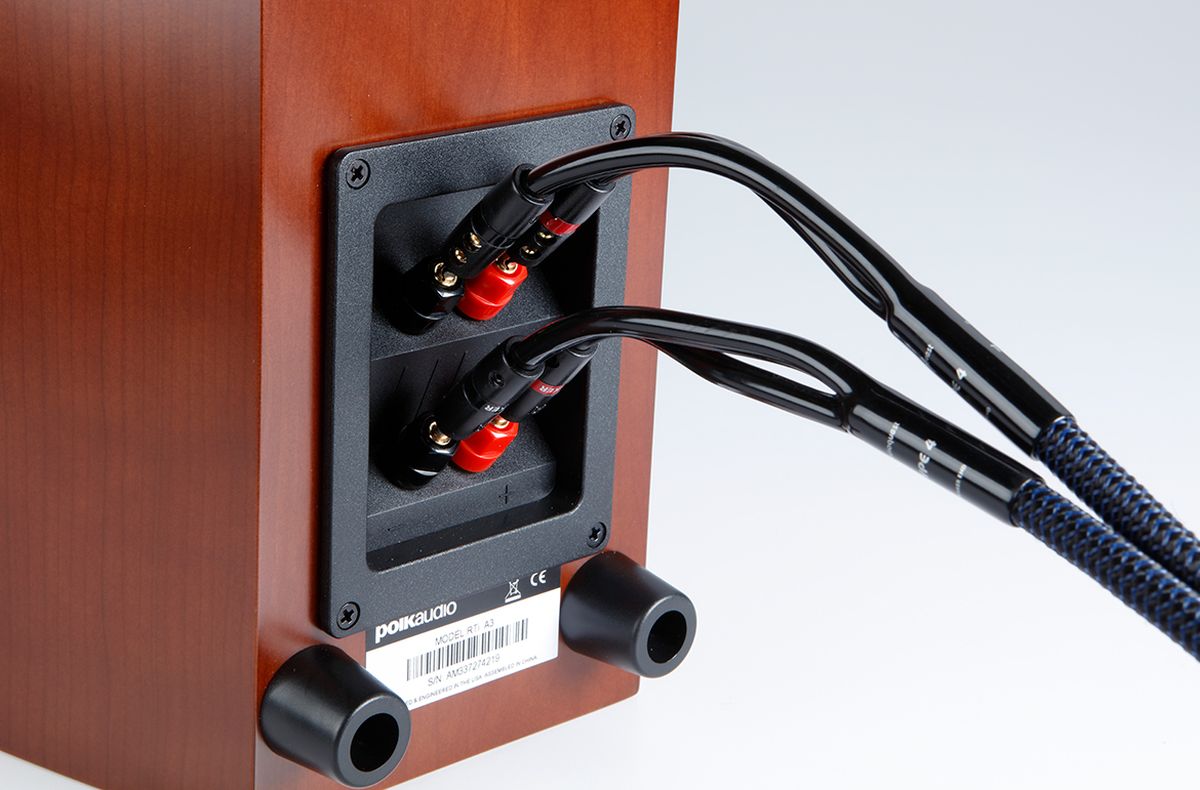
- Locate the Speaker Terminals: On the back of your stereo receiver, look for the speaker terminals. They are usually labeled as “Speaker Out” or “Speaker Outputs.” The terminals are typically color-coded as red for positive (+) and black or white for negative (-) connections.
- Identify the Polarity: Referencing the polarity labels or markings on your speaker wire (if you labeled the wire ends in Step 3), identify the positive (+) and negative (-) ends of the wire. If you didn’t label the wire ends, pay attention to any distinguishing marks or color-coding on the wire itself.
- Insert the Wire into the Terminals: Starting with one speaker, insert the bare wire ends into the corresponding terminals on the stereo receiver. For example, if the positive (+) wire is red, insert it into the red terminal. If there are screw terminals, loosen the screws, insert the wire into the hole, and tighten the screws securely. If your receiver has binding posts, loosen the caps, insert the bare wire, and tighten the caps to secure the connection.
- Secure the Connection: Ensure that the wire is inserted fully into the terminals and that there are no loose strands or exposed wiring. A secure connection is essential for optimal conductivity and preventing any signal loss or distortion.
- Repeat for Additional Speakers (if applicable): If you have multiple speakers to connect, repeat the process for each speaker, making sure to connect the corresponding positive (+) and negative (-) terminals to the appropriate speaker wire ends.
Once all the speaker wires are securely connected to the stereo receiver, you have completed the connection between the audio source and the speakers. Now you can move on to the next step: connecting the speaker wire to the speaker itself.
Step 5: Connect Speaker Wire to Speaker
The next step in wiring your speaker to the stereo system is connecting the speaker wire to the speaker itself. This step allows the audio signal to be transmitted from the stereo receiver to the speaker, producing the desired sound output.
Follow these steps to connect the speaker wire to the speaker:
- Locate the Speaker Terminals: On the back or bottom of your speaker, locate the speaker terminals. They are typically labeled as “Speaker In” or “Speaker Inputs” and may also be color-coded.
- Identify the Polarity: Just as you did with the stereo receiver, identify the positive (+) and negative (-) ends of the speaker wire. Refer to the polarity labels or markings you created in Step 3, or look for any existing color-coding or markings on the wire itself.
- Insert the Wire into the Terminals: Insert the bare wire ends into the corresponding terminals on the speaker. As with the receiver, match the positive (+) wire to the positive terminal and the negative (-) wire to the negative terminal. If the speaker has screw terminals, loosen the screws, insert the wire into the appropriate hole, and tighten the screws securely. For speakers with binding posts, loosen the caps, insert the bare wire, and tighten the caps to secure the connection.
- Ensure a Secure Connection: Double-check that the speaker wire is fully inserted into the terminals and that there are no loose strands or exposed wire. A secure connection is important for maintaining proper signal transmission and preventing any audio interruptions or degradation.
- Repeat for Additional Speakers (if applicable): If you have multiple speakers to connect, repeat the process for each speaker, connecting the corresponding positive (+) and negative (-) terminals to the appropriate ends of the speaker wire.
Once all the speaker wires are securely connected to the speakers, you have successfully completed the wiring process. However, before enjoying your newly wired speakers, there is one more crucial step: testing and adjusting the sound output.
Step 6: Test and Adjust Sound Output
After wiring your speaker to the stereo system, it’s important to test the sound output and make any necessary adjustments to ensure optimal audio performance. This step allows you to fine-tune the settings and ensure that your speakers are delivering the best sound quality.
Follow these steps to test and adjust the sound output:
- Power On the Stereo System: Ensure that your stereo receiver or amplifier is powered on.
- Check Volume Level: Start with a low volume level to avoid any sudden bursts of loud sound. Gradually increase the volume to a comfortable listening level.
- Confirm Proper Sound Output: Play a piece of audio, such as music or a test tone, and listen to each speaker individually. Make sure that each speaker is producing sound and that there are no issues with balance or distortion.
- Adjust Balance and Equalizer: If needed, utilize the balance and equalizer settings on your stereo receiver to adjust the sound distribution and tone to your preference. This may involve increasing or decreasing the volume of specific speakers or adjusting the bass, treble, and other audio frequencies.
- Fine-Tune Speaker Placement: Experiment with the placement of your speakers to optimize sound quality. Small adjustments in positioning can make a significant difference in audio output. Consider factors such as the distance from walls, reflections, and room acoustics.
- Listen to Different Types of Audio: Test your speakers with various types of audio, such as music, movies, or podcasts, to ensure they perform well across different sound sources. Pay attention to the clarity, balance, and overall sound experience.
During the testing and adjustment phase, take the time to familiarize yourself with the different controls and settings on your stereo receiver. Experiment with different settings to find the sweet spot that suits your audio preferences.
By testing and making necessary adjustments, you can ensure that your newly wired speaker system is delivering the best possible sound quality and enhancing your listening experience.
Congratulations! You have successfully wired your speaker to the stereo system and completed the essential steps to optimize your audio setup.
Remember, if you encounter any issues or need further assistance, consult the user manuals for your stereo receiver and speakers, or reach out to a professional for expert guidance.
Now sit back, relax, and enjoy the amazing sound from your newly wired speaker!
Conclusion
Wiring a speaker to a stereo system is a vital step in creating an immersive and high-quality audio experience. By following the steps outlined in this guide, you can confidently wire your speaker and enjoy crystal-clear sound.
Throughout the process, we discussed important aspects such as determining speaker impedance, choosing the correct speaker wire, preparing the wire, and connecting it to both the stereo receiver and speaker. We also emphasized the significance of testing and adjusting the sound output to ensure optimal performance.
Remember to consider factors like speaker impedance, wire gauge, wire length, and wire material when selecting your speaker wire. Properly preparing the wire by stripping and labeling the ends ensures a secure connection, while adhering to correct polarity prevents sound distortion.
As you connect the speaker wire to both the stereo receiver and speaker, always ensure a secure and tight connection. Taking the time to test the sound output, adjust settings like balance and equalizer, and position your speakers optimally will help you achieve the best audio experience.
Now that you have learned the ins and outs of wiring one speaker to a stereo system, you have the necessary knowledge and skills to set up your audio system with confidence.
Enjoy the immersive sound, crisp details, and powerful delivery that your wired stereo speakers can provide. Let the music transport you, the movies captivate you, and the podcasts engage you, all with the enhanced audio experience you’ve created.
Remember, practice makes perfect. As you become more familiar with the wiring process, you may feel inspired to explore additional speakers, setup configurations, or even delve into more advanced audio systems. The possibilities are endless.
So go ahead, unleash the full potential of your speakers, and immerse yourself in a world of exceptional sound.