Home>Devices & Equipment>Earbuds>How To Connect Earbuds To Mac

Earbuds
How To Connect Earbuds To Mac
Modified: January 22, 2024
Learn how to easily connect your earbuds to your Mac. Step-by-step guide to pair and enjoy high-quality audio on your device.
(Many of the links in this article redirect to a specific reviewed product. Your purchase of these products through affiliate links helps to generate commission for AudioLover.com, at no extra cost. Learn more)
Table of Contents
Introduction
Earbuds have become an essential accessory for music lovers and those who value portable audio. With their compact size and high-quality sound, earbuds offer a convenient way to enjoy music, podcasts, and other audio content on the go. If you’re a Mac user, you may be wondering how to connect your earbuds to your device for an immersive sound experience.
This article will guide you through the process of connecting your earbuds to your Mac, step by step. Whether you have wireless Bluetooth earbuds or wired earbuds with a headphone jack, we’ve got you covered. You’ll learn how to ensure compatibility, enable Bluetooth on your Mac, put your earbuds in pairing mode, and successfully connect them to your Mac.
Connecting earbuds to your Mac can open up a world of possibilities. You can use them for listening to music, watching movies or videos, participating in online meetings or conferences, and even gaming. Plus, with the advancement of technology, many earbuds offer additional features such as noise cancellation, touch controls, and voice assistants, making the listening experience even more seamless and enjoyable.
So, if you’re ready to take your audio experience to the next level, let’s dive in and explore the simple steps to connect your earbuds to your Mac.
Step 1: Check the Earbud Compatibility
Before you start connecting your earbuds to your Mac, it’s crucial to ensure their compatibility with your device. Depending on the type of earbuds you have, there are a few factors to consider.
If you have wired earbuds with a headphone jack, check if your Mac has a compatible audio input/output port. Most Mac models feature a 3.5mm headphone jack, but newer models may require a USB-C to 3.5mm adapter. Make sure to have the necessary adapters or connectors on hand if needed.
For wireless Bluetooth earbuds, you need to verify if your Mac supports Bluetooth connectivity. Most Macs have built-in Bluetooth capabilities, but it’s a good practice to double-check. To do this, click on the Apple menu at the top left corner of your screen, select “About This Mac,” and navigate to the “Bluetooth” section. If Bluetooth is listed, you’re good to go. However, if it’s not present, you might need to use a Bluetooth dongle or external adapter to enable Bluetooth on your Mac.
Furthermore, check if your earbuds are compatible with your Mac’s operating system. Macs usually support a wide range of earbud models, but there can be occasional compatibility issues. Visit the earbud manufacturer’s website or refer to the product manual to see if your earbuds are officially compatible with macOS. Keep your Mac’s operating system up to date by installing the latest software updates as well.
Lastly, ensure that your earbuds are charged or have fresh batteries. Without sufficient power, your earbuds may not connect properly or maintain a stable connection with your Mac.
By checking earbud compatibility, you can avoid any potential issues and ensure a seamless connection process. Once you’ve confirmed compatibility, you’re ready to move on to the next step of connecting your earbuds to your Mac.
Step 2: Enable Bluetooth on your Mac
Now that you have confirmed the compatibility of your earbuds with your Mac, it’s time to enable Bluetooth on your device. Bluetooth is the wireless technology that allows your Mac to connect with your earbuds without the need for any physical cables.
To enable Bluetooth on your Mac, follow these simple steps:
- Click on the Apple menu located at the top left corner of your screen.
- Select “System Preferences” from the dropdown menu.
- In the System Preferences window, click on the “Bluetooth” icon.
- Make sure the “Bluetooth” option on the left sidebar is turned on (with a checkmark next to it). If it’s not enabled, click on the checkbox to turn it on.
Enabling Bluetooth on your Mac allows it to scan for nearby Bluetooth devices, including your earbuds. Once Bluetooth is turned on, your Mac will start searching for available earbuds. This process may take a few seconds, so please be patient while your Mac completes the search.
Remember to keep Bluetooth enabled on your Mac while you perform the next steps to connect your earbuds. If Bluetooth is disabled, your Mac won’t be able to establish a connection with your earbuds.
With Bluetooth enabled on your Mac, you’re now ready to move on to the next step and put your earbuds in pairing mode.
Step 3: Put your Earbuds in Pairing Mode
Before your Mac can establish a connection with your earbuds, you’ll need to put the earbuds in pairing mode. Pairing mode allows the earbuds to be discoverable by other devices, such as your Mac, so they can establish a connection.
The process of putting earbuds in pairing mode can vary depending on the model and brand. Here are some general steps to follow:
- Refer to the user manual: Consult the user manual that came with your earbuds. It should provide specific instructions on how to activate pairing mode.
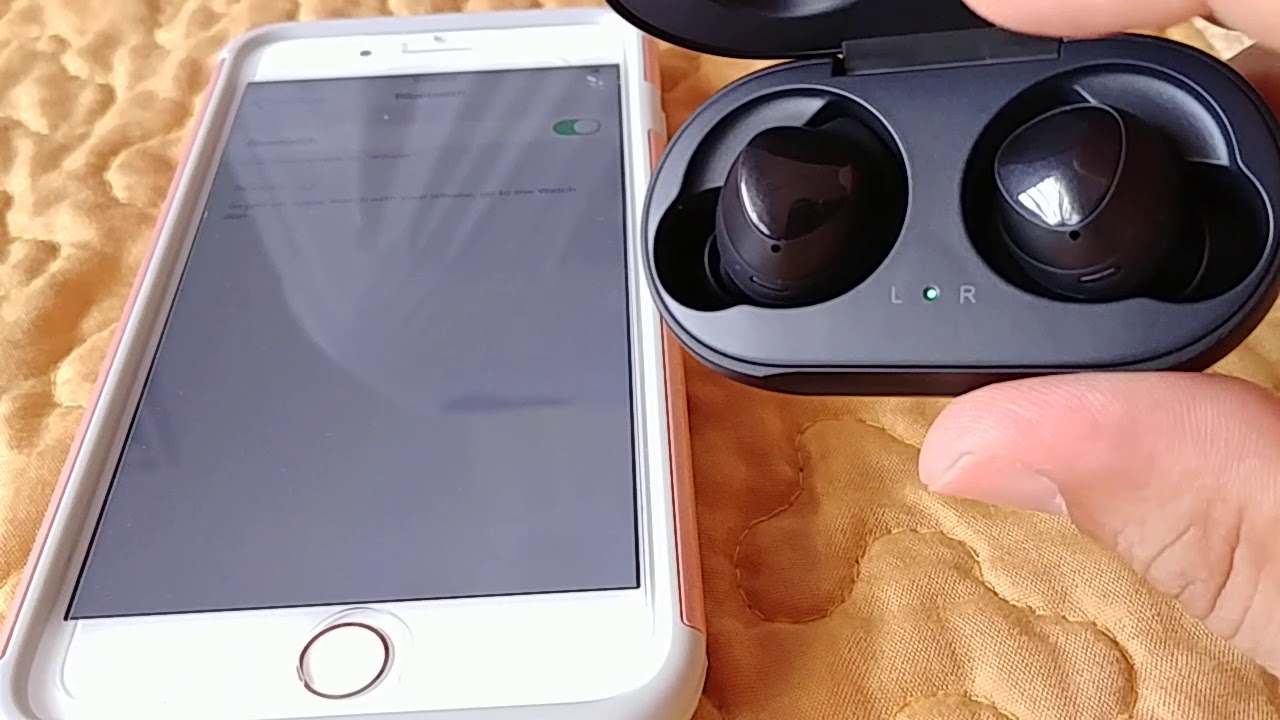
- Long press the power button: Most earbuds have a power button that also doubles as a pairing button. Press and hold the power button for a few seconds until you see a LED light indicator flashing or hear an audio cue indicating the earbuds are in pairing mode.
- Reset to pairing mode: If your earbuds are already paired with another device, you may need to reset them to enter pairing mode. Check the user manual or the manufacturer’s website for specific instructions on how to reset your earbuds.
- Follow on-screen instructions: Some earbuds have companion mobile apps or dedicated software that can assist in putting them in pairing mode. Install the necessary app or software and follow the on-screen instructions to enter pairing mode.
It’s important to note that the duration for which you need to hold the power button to activate pairing mode may vary. Refer to your earbuds’ documentation for the specific instructions.
Once your earbuds are in pairing mode, they are ready to be discovered and connected to your Mac. Keep your earbuds in close proximity to your Mac during the connection process to ensure a stable and successful pairing.
Now that your earbuds are in pairing mode, let’s move on to the next step and connect your earbuds to your Mac.
Step 4: Connect Earbuds to Mac
With your earbuds in pairing mode and your Mac’s Bluetooth enabled, it’s time to connect your earbuds to your Mac. Follow these steps to establish a connection:
- Click on the Bluetooth icon in the menu bar at the top right corner of your Mac’s screen.
- In the dropdown menu, you should see a list of available Bluetooth devices. Look for the name of your earbuds and select them from the list.
- Your Mac will attempt to establish a connection with your earbuds. You may see a spinning indicator or a progress bar during this process. The time it takes to connect may vary depending on your earbuds and the Mac model you’re using.
- Once the connection is successful, you will see a confirmation message on your Mac’s screen, indicating that your earbuds are connected and ready to use.
It’s important to note that some earbuds may require you to enter a password or PIN during the pairing process. If prompted, refer to your earbuds’ documentation for the correct code to enter.
If you have multiple Bluetooth devices nearby, ensure that you’re connecting to the correct pair of earbuds. The name of your earbuds should match the name displayed on your Mac’s Bluetooth devices list.
If the connection fails, make sure your earbuds are still in pairing mode and that your Mac’s Bluetooth is enabled. You may need to repeat the previous steps or consult your earbuds’ documentation for troubleshooting tips.
Once your earbuds are successfully connected to your Mac, you’re ready to move on to the final step: testing the connection.
Step 5: Test the Connection
After successfully connecting your earbuds to your Mac, it’s important to test the connection to ensure everything is working as expected. Testing the connection will verify that audio is being transmitted properly from your Mac to your earbuds.
Follow these steps to test the connection between your earbuds and Mac:
- Play a audio file or video with sound on your Mac. This can be a music track, a YouTube video, or any other media that has audio.
- Ensure the audio output is set to your earbuds. You can do this by clicking on the volume icon in the menu bar and selecting your earbuds as the audio output device. Alternatively, you can go to System Preferences > Sound and select your earbuds under the Output tab.
- Listen for the audio output through your earbuds. Make sure the volume is at an appropriate level and adjust it if necessary.
- Pay attention to the quality of the audio. Check for any distortions, dropouts, or issues with the sound. If you notice any problems, try reconnecting your earbuds or adjusting the positioning to improve the signal reception.
If the audio quality is clear and you can hear the sound properly through your earbuds, congratulations! Your earbuds are successfully connected to your Mac, and you’re all set to enjoy your favorite music and audio content.
If you encounter any issues during the testing phase, such as poor audio quality or connectivity problems, try the following troubleshooting steps:
- Make sure your earbuds have sufficient battery life or are properly charged.
- Ensure that your earbuds are within a reasonable range of your Mac. Interference from other devices or physical obstacles can weaken the Bluetooth signal.
- Restart your Mac and earbuds to refresh the Bluetooth connection.
- Update your Mac’s software and ensure you have the latest Bluetooth drivers installed.
- Refer to the user manual or contact the manufacturer’s support for further assistance.
By testing the connection and addressing any potential issues, you can have a seamless and enjoyable audio experience with your earbuds and Mac.
Congratulations! You have successfully connected your earbuds to your Mac and tested the connection. You’re now ready to immerse yourself in your favorite audio content, whether it’s music, podcasts, or movies.
Conclusion
Connecting your earbuds to your Mac can enhance your audio experience and provide you with the convenience of wireless listening or a personal sound bubble. Whether you have Bluetooth earbuds or wired earbuds with a headphone jack, the process of connecting them to your Mac is simple and straightforward.
In this article, we covered the step-by-step process to connect your earbuds to your Mac. We began by ensuring the compatibility of your earbuds with your Mac and checking for necessary adapters or connectors. Then, we enabled Bluetooth on your Mac as a prerequisite for establishing a wireless connection. We proceeded to put your earbuds in pairing mode, making them discoverable to your Mac. Next, we connected your earbuds to your Mac through the Bluetooth settings. Lastly, we tested the connection to ensure the audio was being transmitted properly.
By following these steps, you can enjoy your favorite music, podcasts, and audio content with the immersive sound provided by your earbuds. Remember to keep your earbuds charged or replace their batteries regularly to ensure uninterrupted listening pleasure.
If you encounter any issues during the connection process or experience audio quality problems, refer to the troubleshooting tips mentioned in the previous sections or consult the user manual of your earbuds for further guidance.
Now that you have successfully connected your earbuds to your Mac, you can fully embrace the world of wireless audio and enjoy a personalized listening experience wherever you go.
So put on your earbuds and get ready to immerse yourself in a world of sound!

