Home>Devices & Equipment>Radio>How To Remove Pioneer Radio
Radio
How To Remove Pioneer Radio
Published: November 10, 2023
Learn how to easily remove your old Pioneer radio and upgrade to a new one. Find step-by-step instructions and expert tips for a seamless radio replacement.
(Many of the links in this article redirect to a specific reviewed product. Your purchase of these products through affiliate links helps to generate commission for AudioLover.com, at no extra cost. Learn more)
Table of Contents
- Introduction
- Tools and Materials You Will Need
- Step 1: Gather Necessary Tools
- Step 2: Disconnect the Battery
- Step 3: Remove the Trim Panel
- Step 4: Disconnect Wiring Harnesses
- Step 5: Remove Mounting Screws
- Step 6: Take Out the Pioneer Radio
- Step 7: Disconnect the Antenna Cable
- Step 8: Install the New Radio (Optional)
- Conclusion
Introduction
Welcome to our guide on how to remove a Pioneer radio! Whether you’re upgrading to a new audio system or troubleshooting an issue, knowing how to remove the radio is an essential skill for any car enthusiast. Pioneer is a well-known brand in the audio industry, and their radios are popular for their high-quality sound and advanced features. However, removing a Pioneer radio can be a bit tricky if you’re unfamiliar with the process.
In this article, we will guide you step-by-step through the process of removing a Pioneer radio from your vehicle. We will provide you with the necessary tools and materials, as well as detailed instructions to ensure a smooth and successful removal. Whether you’re a DIY enthusiast or just looking to save some money on installation costs, this guide will help you get the job done.
Before we dive into the process, it’s important to note that removing a Pioneer radio can vary depending on the specific model and make of your vehicle. Therefore, it’s always a good idea to consult your vehicle’s manual or seek professional advice if you’re unsure about any steps or connections.
Now, let’s gather the tools and materials you’ll need for this task.
Tools and Materials You Will Need
Before you begin the process of removing your Pioneer radio, it’s essential to gather the necessary tools and materials. Having everything on hand will help make the process smooth and efficient. Here’s a list of what you’ll need:
- Flathead screwdriver – This will come in handy for prying off the trim panel and removing any mounting screws.
- Trim panel removal tool – While a flathead screwdriver can work, a trim panel removal tool specifically designed for this purpose will help prevent damage to the trim or surrounding components.
- Socket wrench – You’ll need a socket wrench to remove any mounting screws that hold the radio in place.
- Wire crimping tool – If you plan to install a new radio, you may need a wire crimping tool to connect the wiring harnesses properly.
- Electrical tape – This will be useful for securing and insulating any loose wires.
- Cloth or microfiber towel – A clean cloth or microfiber towel will help protect the interior of your vehicle from scratches or damage during the removal process.
Depending on the specific model and make of your Pioneer radio, you may also need additional tools or materials. It’s always a good idea to consult the owner’s manual or do some research to ensure you have everything you need before starting.
Once you have all the tools and materials ready, it’s time to move on to the next step: disconnecting the battery.
Step 1: Gather Necessary Tools
Before you can begin removing your Pioneer radio, it’s essential to have all the necessary tools gathered and ready for use. Having everything on hand will help ensure a smooth and efficient removal process. Here’s a list of tools you’ll need:
- Flathead screwdriver: This versatile tool will come in handy for prying off the trim panel and removing any mounting screws. Make sure to choose a screwdriver with a comfortable grip and suitable size for the job.
- Trim panel removal tool: While a flathead screwdriver can work, using a trim panel removal tool specifically designed for this purpose will help prevent damage to the trim or surrounding components. These tools have a wider, flat shape that makes prying off the trim panel easier and safer.
- Socket wrench: You’ll need a socket wrench to remove any mounting screws that hold the Pioneer radio in place. Ensure you have the appropriate socket size that matches the screws on your specific radio model.
- Wire crimping tool: If you plan on installing a new radio, you may need a wire crimping tool to connect the wiring harnesses properly. This tool allows you to securely join wires together and ensure a reliable connection.
- Electrical tape: Electrical tape will be useful for securing and insulating any loose wires during the removal process. It helps protect the wiring and prevents any unwanted connections or short circuits.
- Cloth or microfiber towel: Having a clean cloth or microfiber towel on hand will help protect the interior of your vehicle from scratches or damage while you work. You can use it to cover surfaces or place tools and components on to avoid any accidental scratches.
Ensure that you have all the necessary tools listed above before proceeding to the next steps. Having everything prepared will save you time and frustration during the removal process.
Step 2: Disconnect the Battery
Now that you have gathered the necessary tools, it’s time to disconnect the battery before removing your Pioneer radio. Disconnecting the battery is an important safety precaution that helps prevent any electrical mishaps or damage during the removal process. Follow these steps to disconnect the battery:
- Locate the vehicle’s battery: The battery is typically located in the engine bay or trunk of your vehicle. Consult your vehicle’s manual if you’re unsure about its exact location.
- Identify the negative terminal: The battery terminals are labeled as positive (+) and negative (-). Locate the negative terminal, which is usually marked with a minus sign (-) or the letters “NEG” or “GND”.
- Use appropriate safety measures: It’s important to take safety precautions before handling the battery. Wear protective gloves and safety glasses to protect yourself from any potential sparks or battery acid.
- Disconnect the negative terminal: Use an appropriate wrench or socket to loosen the nut on the negative terminal. Once loosened, carefully remove the cable from the negative terminal and set it aside. Make sure it does not come into contact with any metal surfaces.
By disconnecting the battery, you eliminate the risk of electric shock or short circuits while working on your vehicle’s electrical components, including the Pioneer radio. Keep in mind that disconnecting the battery might also result in a loss of some vehicle settings and presets, so it’s a good idea to have those noted or saved before proceeding.
With the battery safely disconnected, you’re now ready to move on to the next step: removing the trim panel.
Step 3: Remove the Trim Panel
With the battery safely disconnected, it’s time to remove the trim panel to access the Pioneer radio in your vehicle. The trim panel is the decorative piece that surrounds the radio and other controls in your car’s dashboard. Follow these steps to remove the trim panel:
- Assess the trim panel: Take a close look at the trim panel and identify any screws, clips, or fasteners that may be securing it in place. These may vary depending on your specific vehicle make and model.
- Use a trim panel removal tool or a flathead screwdriver: Insert the trim panel removal tool or a flathead screwdriver into the gaps or slots around the edges of the trim panel. Gently apply pressure to pry it away from the dashboard. Be cautious not to use excessive force, as it may cause damage to the panel or surrounding components.
- Work your way around: Gradually move around the trim panel, applying gentle pressure with the tool or screwdriver to release any clips or fasteners. Take your time and be patient during this step to avoid unnecessary damage.
- Disconnect any electrical connectors: Once the trim panel is loose, carefully check for any electrical connectors that may be attached to it. These connectors can include wiring harnesses for buttons, switches, or other accessories on the panel. Gently unplug them by pressing on the release tabs and pulling them apart.
- Set the trim panel aside: Once all the connectors are detached, carefully remove the trim panel from the dashboard. Place it in a safe location where it won’t get damaged or dirty.
Removing the trim panel is an important step in gaining access to the Pioneer radio. It allows you to proceed with the removal process smoothly and securely. With the trim panel successfully removed, you’re now ready to move on to the next step: disconnecting the wiring harnesses.
Step 4: Disconnect Wiring Harnesses
Now that the trim panel has been removed, you can proceed to disconnect the wiring harnesses connected to the Pioneer radio. The wiring harnesses are electrical connectors that provide power and transmit signals to the radio. Follow these steps to disconnect the wiring harnesses:
- Identify the wiring harnesses: Take a close look at the back of the Pioneer radio and locate the wiring harnesses. These are typically a set of colored cables bundled together with plastic connectors.
- Release the connectors: To remove the wiring harnesses, you’ll need to release the connectors that hold them in place. Look for small tabs or levers on the connectors and gently push or pry them to release the locks. This will allow you to easily remove the connectors from the radio.
- Disconnect the wiring harnesses: With the locks released, carefully pull the wiring harnesses away from the back of the radio. Wiggle them gently if needed, but avoid applying excessive force to prevent any damage to the connectors or wires.
- Secure the disconnected harnesses: Once the wiring harnesses are disconnected, it’s a good idea to secure them using tape or zip ties. This will prevent them from getting tangled or interfering with other components during the removal process or reinstallation of a new radio.
It’s important to note that some vehicles may have additional connections, such as antenna cables or amplifier cables, depending on the audio setup. If you notice any additional connectors, be sure to disconnect them as well to ensure a complete removal.
By disconnecting the wiring harnesses, you are one step closer to removing the Pioneer radio from your vehicle. The next step involves removing the mounting screws that hold the radio in place.
Step 5: Remove Mounting Screws
With the wiring harnesses safely disconnected, it’s time to remove the mounting screws that secure the Pioneer radio in place. These screws are typically located on the sides or bottom of the radio unit. Follow these steps to remove the mounting screws:
- Locate the mounting screws: Carefully examine the Pioneer radio and identify the screws that hold it in place. Depending on the model and installation, there may be two to four screws.
- Use a socket wrench or appropriate screwdriver: Select the appropriate tool, such as a socket wrench or screwdriver, that matches the size and type of screws used to secure the radio. This will ensure a secure fit and prevent any stripping or damage to the screws.
- Remove the screws: Using the socket wrench or screwdriver, loosen and remove each screw one at a time. Place the screws in a safe location where they won’t get lost. Be cautious when removing the last screw, as it may be the only thing holding the radio in place.
Once all the mounting screws are removed, the Pioneer radio should now be free from its mounting position. However, before completely removing the radio, you should perform the next step, which involves carefully pulling the unit out.
It’s important to note that some vehicles may have different mounting systems or brackets. If you encounter any difficulties during this step, refer to your vehicle’s manual or consult a professional for guidance.
With the mounting screws removed, you’re now ready to proceed to the next step: taking out the Pioneer radio from the dashboard.
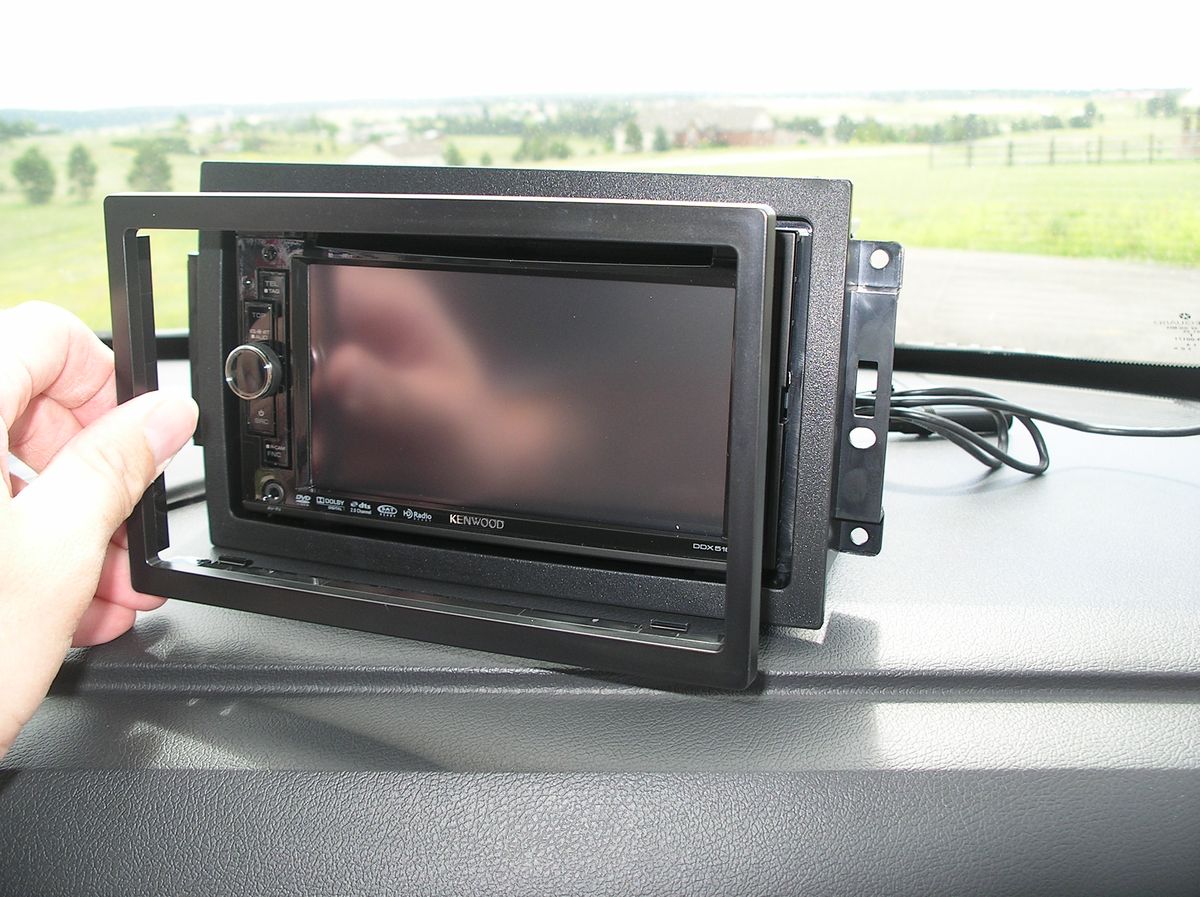
Step 6: Take Out the Pioneer Radio
With the mounting screws removed, it’s time to take out the Pioneer radio from its position in the vehicle’s dashboard. Follow these steps to safely and effectively remove the radio:
- Gently pull the radio outward: Carefully grab the sides or edges of the Pioneer radio and gently pull it out from the dashboard. Apply even pressure on both sides to ensure a smooth and balanced removal.
- Check for any obstructing wires: As you pull the radio out, be mindful of any wires or cables that may still be connected to the unit. Take care not to strain or damage these wires.
- If necessary, disconnect additional cables: In some cases, there may be additional cables, such as antenna cables or amplifier cables, connected to the back of the radio. If you come across any such cables, follow the same process as in Step 4 to disconnect them.
- Set the Pioneer radio aside: Once all the necessary cables are disconnected, carefully place the Pioneer radio in a safe location where it won’t get damaged or scratched.
Removing the Pioneer radio from the dashboard opens up opportunities for upgrades or repairs. Whether you’re replacing the radio with a new unit or troubleshooting an issue, having it out of the way allows for easier access and maneuverability.
It’s important to handle the radio with care during removal to prevent any damage to the unit or the surrounding components. Avoid using excessive force and be mindful of any sensitive parts or connections.
With the Pioneer radio successfully removed, you’re ready to move on to the next step: disconnecting the antenna cable.
Step 7: Disconnect the Antenna Cable
Now that the Pioneer radio is out of the way, it’s time to disconnect the antenna cable. The antenna cable is responsible for capturing radio signals and delivering them to the radio unit. Follow these steps to disconnect the antenna cable:
- Locate the antenna cable: Look for the antenna cable connected to the back of the Pioneer radio. It is usually a single wire with a connector at the end.
- Identify the antenna connector: The antenna connector is typically a small round or rectangular plug that attaches the antenna cable to the radio unit. It may have a tab or lever that needs to be pressed or lifted to release the connection.
- Disconnect the antenna cable: With the antenna connector identified, gently press or lift the tab/lever while simultaneously pulling the connector away from the radio unit. This will disengage the connection and allow you to remove the antenna cable.
When disconnecting the antenna cable, be careful not to damage the connector or the cable itself. Apply even pressure and avoid pulling on the cable excessively, as it can cause the cable to fray or break.
Once the antenna cable is disconnected, set it aside in a safe location. Ensure that it is not tangled with any other cables or components to prevent any damage or confusion during reinstallation.
With the antenna cable successfully disconnected, you have completed an essential step in the removal process. Now, you can proceed to the next step: installing a new radio (if desired) or concluding the removal process.
Step 8: Install the New Radio (Optional)
If you’re looking to upgrade your car’s audio system or replace the Pioneer radio with a new unit, this step will guide you through the process of installing the new radio. Here’s how to install the new radio:
- Prepare the new radio: Make sure you have the new radio unit and any necessary installation accessories, such as a wiring harness adapter, dash kit, or antenna adapter. These accessories will help ensure a proper fit and compatibility with your vehicle.
- Connect the antenna cable: Begin by reconnecting the antenna cable to the new radio. Insert the antenna connector into the corresponding port on the back of the new radio and firmly push it in until it clicks into place.
- Connect the wiring harnesses: If using a wiring harness adapter, connect the adapter to the wiring harnesses that came with the new radio unit. If necessary, follow the color-coded connections or refer to the wiring diagram provided with the adapter. Once the connections are secure, plug the other end of the adapter into the wiring harness in your vehicle.
- Secure the new radio: Carefully slide the new radio into the empty slot in the dashboard. Align the mounting holes of the radio with the holes in the dashboard. If necessary, refer to the instructions provided with the dash kit for any additional installation steps or modifications.
- Secure the mounting screws: Insert the mounting screws through the holes in the radio and into the corresponding holes in the dashboard. Use a socket wrench or screwdriver to tighten the screws, making sure not to overtighten and cause any damage.
- Test the new radio: Before reassembling the trim panel and completing the installation, test the new radio to ensure it is functioning properly. Turn on the ignition and check if the radio powers on, the display is visible, and you can hear sound from the speakers.
- Reassemble the trim panel: If everything is working correctly, reattach the trim panel by aligning it with the clips or fasteners in the dashboard. Apply gentle pressure and push it back into place until it is securely seated.
Remember, the installation process may vary depending on the specific model and make of your vehicle as well as the new radio unit you are installing. Always refer to the instructions provided with the new radio and any installation accessories for detailed guidance.
Once the new radio is installed and tested, you can enjoy an upgraded audio experience or explore the advanced features of your new unit.
Regardless of whether you choose to install a new radio or not, completing the removal process ensures a clean and organized dashboard. If you’re not installing a new unit, you can conclude the process by reassembling the trim panel and reconnecting the vehicle’s battery.
Conclusion
Removing a Pioneer radio from your vehicle is a task that can be accomplished with the right tools and steps. Whether you’re upgrading your audio system or troubleshooting an issue, following this guide will help you successfully remove a Pioneer radio with ease.
We began by gathering the necessary tools, including a flathead screwdriver, trim panel removal tool, socket wrench, wire crimping tool, electrical tape, and a cloth or microfiber towel. These tools ensure a smooth and efficient removal process.
We then went through each step, starting with disconnecting the battery to ensure safety during the removal process. We proceeded to remove the trim panel, disconnect the wiring harnesses, remove the mounting screws, take out the Pioneer radio, disconnect the antenna cable, and optionally install a new radio.
Remember, it’s crucial to consult your vehicle’s manual and exercise caution when working with electrical components. Take your time, be patient, and handle all parts and connections with care.
By following this guide, you can confidently remove a Pioneer radio from your vehicle and potentially upgrade to a new system or perform any necessary repairs. Remember to keep track of all connections and take note of any presets before starting the removal process.
Whether you’re a DIY enthusiast or just looking to save on installation costs, knowing how to remove a Pioneer radio is a valuable skill. With the information provided in this guide, you’re now equipped to undertake this task and enjoy a successful removal process.
Good luck with your Pioneer radio removal, and enjoy the journey of enhancing your car’s audio experience!