Home>Devices & Equipment>Yamaha>How To Connect Sustain Pedal To Yamaha Keyboard
Yamaha
How To Connect Sustain Pedal To Yamaha Keyboard
Modified: February 20, 2024
Learn how to connect a sustain pedal to your Yamaha keyboard and enhance your playing experience. Find step-by-step instructions and helpful tips!
(Many of the links in this article redirect to a specific reviewed product. Your purchase of these products through affiliate links helps to generate commission for AudioLover.com, at no extra cost. Learn more)
Table of Contents
Introduction
Connecting a sustain pedal to your Yamaha keyboard can greatly enhance your playing experience, allowing you to create expressive and sustained notes while playing. Whether you’re a beginner or an experienced musician, understanding how to connect a sustain pedal to your Yamaha keyboard is essential if you want to take full advantage of its capabilities.
In this article, we will guide you through the process of connecting a sustain pedal to your Yamaha keyboard. We will provide step-by-step instructions to ensure that you can easily follow along and successfully connect the pedal.
Before we dive into the details, it’s important to note that not all Yamaha keyboards are compatible with sustain pedals. It’s crucial to check the compatibility of your keyboard model before proceeding. Some entry-level keyboards may not have a sustain pedal input, while advanced models generally include this feature.
Now that you have an overview, let’s move on to the first step: checking the compatibility of your Yamaha keyboard.
Step 1: Check compatibility
The first step in connecting a sustain pedal to your Yamaha keyboard is to check whether your keyboard model is compatible with a sustain pedal. Not all Yamaha keyboards have a sustain pedal input, so it’s crucial to verify this information before making any further arrangements.
To determine the compatibility of your keyboard, you can refer to the user manual that came with your instrument. The user manual will provide detailed specifications and information about the available inputs and features of your Yamaha keyboard. Look for a section that mentions sustain pedal compatibility or pedal inputs.
If you don’t have the user manual, you can typically find the information online. Visit the official Yamaha website and navigate to the support section. Enter your keyboard model number or browse through the available models to find the specifications for your particular keyboard.
Once you have confirmed that your Yamaha keyboard has a sustain pedal input, you can proceed with the next steps to connect the pedal.
If, on the other hand, your keyboard does not have a sustain pedal input, don’t worry! There are alternative options available, such as using a MIDI controller with a sustain pedal jack or utilizing virtual pedal effects within your keyboard’s software.
Now that you have determined the compatibility of your Yamaha keyboard, let’s move on to locating the sustain pedal input in the next step.
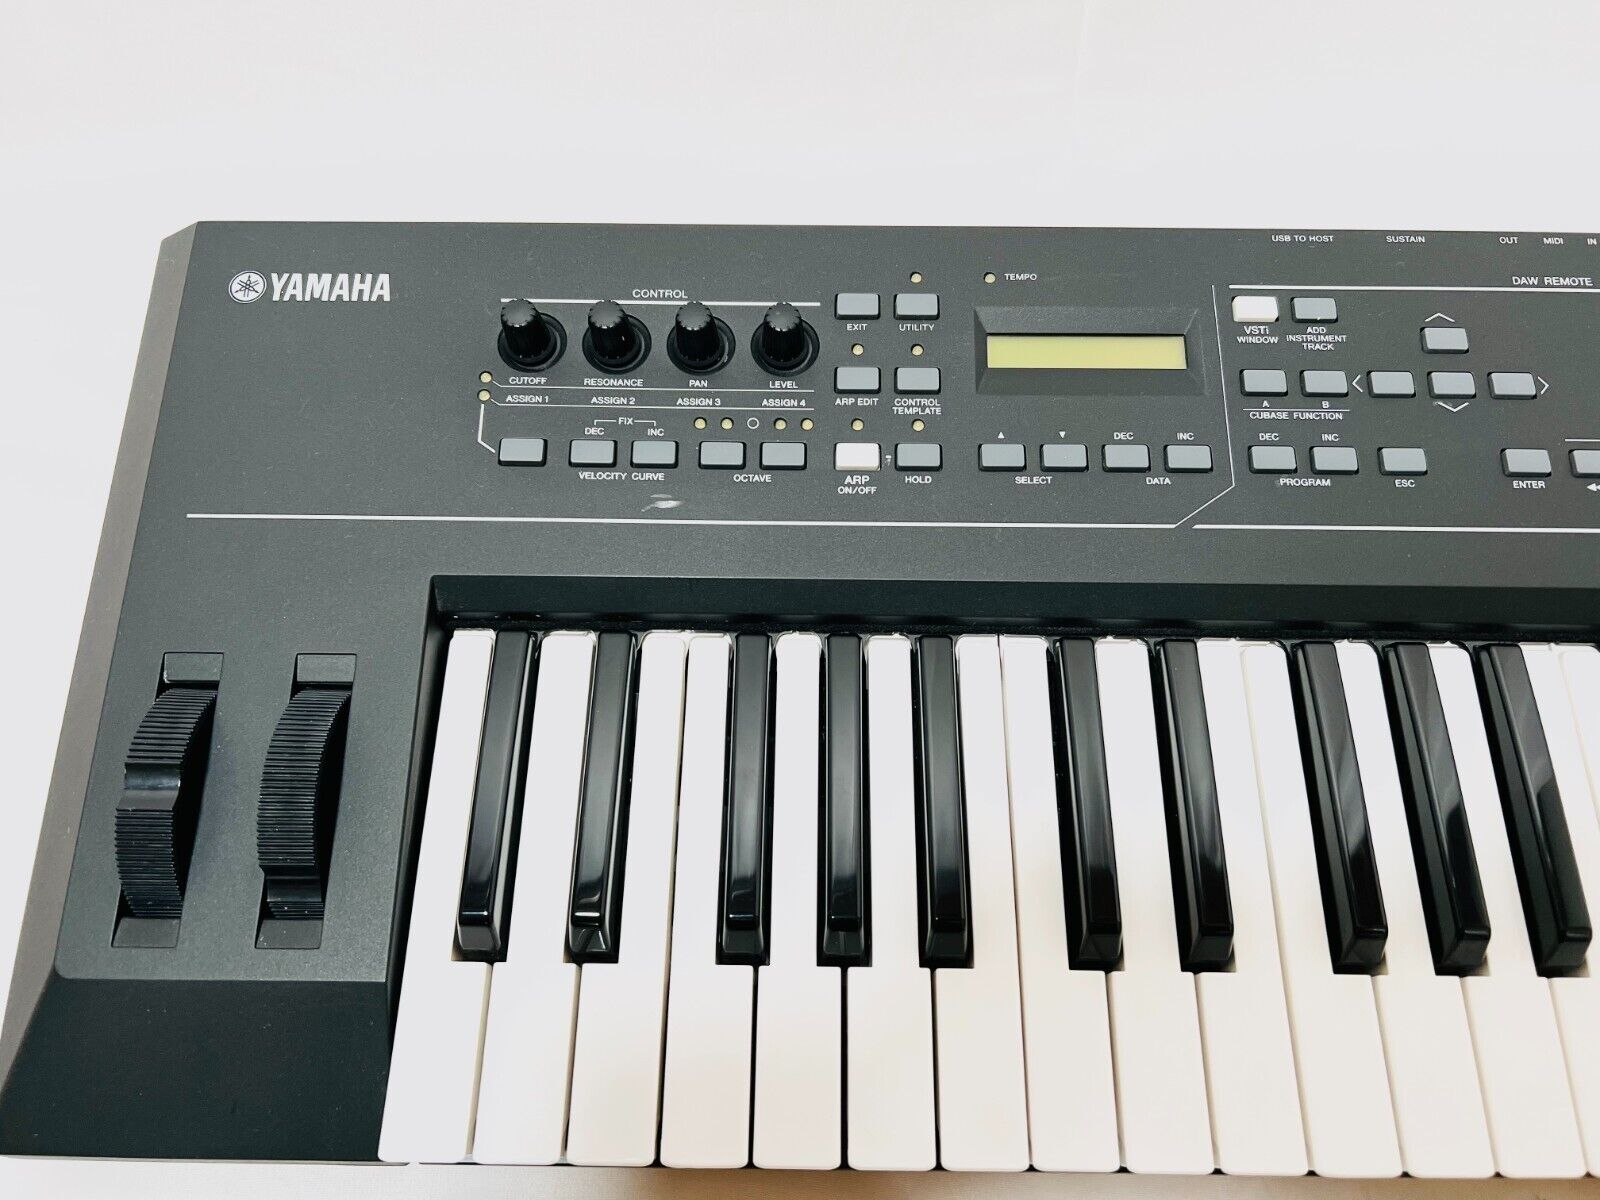
Step 2: Locate the sustain pedal input
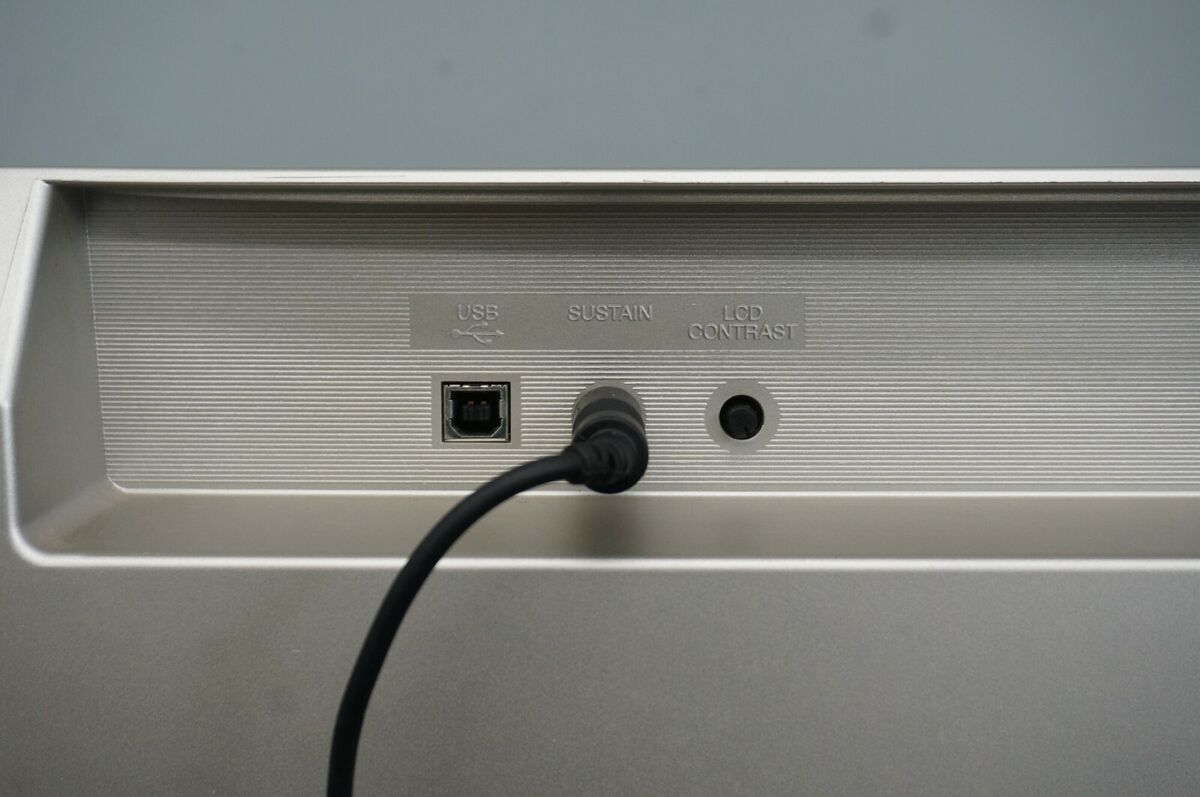
Once you have confirmed the compatibility of your Yamaha keyboard with a sustain pedal, the next step is to locate the sustain pedal input. The sustain pedal input is where you will connect the pedal to the keyboard.
The location of the sustain pedal input may vary depending on the model of your Yamaha keyboard. Typically, it is located on the back or the side of the keyboard, near the other inputs and connectors.
If you are not sure where to find the sustain pedal input on your specific model, refer to the user manual or the online documentation mentioned in the previous step. These resources will typically provide a diagram or a description of the keyboard’s layout, pointing out the location of the sustain pedal input.
Once you have located the sustain pedal input, you are ready to move on to the next step, which involves connecting the sustain pedal to your Yamaha keyboard.
Before proceeding, make sure to have your sustain pedal handy. If you haven’t purchased one yet, you can find sustain pedals at music stores or online retailers. Ensure that the sustain pedal you choose is compatible with your Yamaha keyboard.
Now that you know the location of the sustain pedal input, let’s proceed to the next step and connect the pedal to your Yamaha keyboard.
Step 3: Connect the sustain pedal
Now that you have located the sustain pedal input on your Yamaha keyboard, it’s time to connect the sustain pedal. Follow these steps to ensure a proper connection:
- Take the cable of the sustain pedal and plug it into the sustain pedal input on your keyboard. The cable is usually equipped with a 1/4-inch TS (tip-sleeve) plug, which is the standard connector for sustain pedals.
- Ensure that the plug is fully inserted into the sustain pedal input. You may need to apply gentle pressure and make sure it is properly seated.
- Once the sustain pedal is connected, you are ready to test the connection and ensure that it is functioning correctly. Continue to the next step to learn how.
It’s essential to note that while most sustain pedals follow the standard TS plug configuration, some high-end models may feature different connectors. In such cases, make sure to refer to the pedal’s user manual or consult the manufacturer’s instructions for the correct way to connect the pedal to your Yamaha keyboard.
Now that the sustain pedal is properly connected, it’s time to test the connection and ensure that it’s working as expected. Move on to the next step to learn how to do this.
Step 4: Test the connection
After connecting the sustain pedal to your Yamaha keyboard, it’s important to test the connection and ensure that it is functioning correctly. Follow these steps to test the sustain pedal:
- Turn on your Yamaha keyboard and select a sound or instrument that you want to play.
- Press a key on the keyboard and notice the sound produced when you release the key. Without the sustain pedal, the sound will stop immediately when you release the key.
- Now, press the sustain pedal down with your foot or hand while holding down a key. The sound should continue playing even after you release the key.
- Release the sustain pedal, and the sound should stop. If the sound continues playing or doesn’t stop when you release the pedal, double-check the connection and make sure it is securely plugged into the sustain pedal input.
- Repeat the process with different keys and notes to ensure that the sustain pedal is functioning correctly across the keyboard.
If the sustain pedal is working as expected, congratulations! You have successfully connected and tested the sustain pedal on your Yamaha keyboard. Now you can enjoy the enhanced playing experience with sustained notes and expressive performances.
If you encounter any issues with the sustain pedal, such as the sound not sustaining or not responding properly, double-check the connection and consult the user manual for troubleshooting steps specific to your keyboard model.
Lastly, keep in mind that the functionality and responsiveness of the sustain pedal may vary depending on the specific features and capabilities of your Yamaha keyboard. Experiment with different settings and adjust the sensitivity or response parameters if available to customize the sustain pedal experience to your liking.
With the connection tested and confirmed, you are now ready to unleash your musical creativity and explore the dynamic possibilities that the sustain pedal brings to your Yamaha keyboard.
Conclusion
Connecting a sustain pedal to your Yamaha keyboard is a simple process that can greatly enhance your playing experience. By following the steps outlined in this article, you can easily and successfully connect a sustain pedal to your Yamaha keyboard.
Before getting started, it’s important to check the compatibility of your keyboard model to ensure that it has a sustain pedal input. Once verified, you can proceed to locate the sustain pedal input on your keyboard.
After finding the sustain pedal input, you can connect the sustain pedal by plugging the cable into the sustain pedal input. Ensure that the plug is securely inserted so that the connection is stable.
Once the sustain pedal is connected, it’s crucial to test the connection. Verify that the sound sustains when the pedal is pressed and releases when the pedal is released. If any issues arise, double-check the connection and consult the user manual for troubleshooting steps.
With the sustain pedal successfully connected and tested, you can now enjoy the enhanced musical expression and creativity that it brings to your Yamaha keyboard playing. Whether you’re performing on stage, recording in the studio, or simply playing for your own enjoyment, the sustain pedal will allow you to create sustained and expressive notes.
Remember to take the time to explore different settings and adjust the sensitivity or response parameters if available on your keyboard. This will help you tailor the sustain pedal experience to your personal preferences and playing style.
So go ahead, connect your sustain pedal to your Yamaha keyboard, and unlock a new realm of musical possibilities. Let your creativity soar as you enjoy the expressive and sustained notes that the sustain pedal brings to your playing.