Home>Devices & Equipment>Yamaha>How To Update Firmware Yamaha Receiver

Yamaha
How To Update Firmware Yamaha Receiver
Published: February 6, 2024
Learn how to update the firmware on your Yamaha receiver. Keep your Yamaha receiver up to date and ensure optimal performance.
(Many of the links in this article redirect to a specific reviewed product. Your purchase of these products through affiliate links helps to generate commission for AudioLover.com, at no extra cost. Learn more)
Table of Contents
- Introduction
- Step 1: Determine current firmware version
- Step 2: Find and download firmware update file
- Step 3: Prepare USB drive for firmware update
- Step 4: Connect USB drive to Yamaha receiver
- Step 5: Access firmware update menu
- Step 6: Start the firmware update process
- Step 7: Wait for the firmware update to complete
- Step 8: Power cycle the Yamaha receiver
- Step 9: Verify successful firmware update
- Conclusion
Introduction
Welcome to our comprehensive guide on how to update the firmware on your Yamaha receiver. Firmware updates are important as they not only provide bug fixes and performance enhancements but also ensure compatibility with the latest features and technologies. By keeping your Yamaha receiver up to date, you can enhance your audio experience and take full advantage of its capabilities.
Yamaha is a renowned brand in the audio industry, known for producing high-quality receivers that deliver exceptional sound performance. These receivers are equipped with advanced features such as multi-channel audio decoding, network connectivity, and compatibility with various audio and video formats. To ensure that your Yamaha receiver continues to perform at its best, it’s essential to keep the firmware up to date.
In this guide, we will walk you through the step-by-step process of updating the firmware on your Yamaha receiver. Whether you are a beginner or an experienced user, this guide will provide you with all the necessary information to successfully update the firmware.
Before we begin, it’s important to note that the steps outlined in this guide may vary slightly depending on the specific model of your Yamaha receiver. However, the general process remains the same. It is recommended to refer to your Yamaha receiver’s user manual for model-specific instructions.
Now, let’s dive into the exciting world of firmware updates for your beloved Yamaha receiver!
Step 1: Determine current firmware version
Before proceeding with the firmware update, it is crucial to determine the current firmware version of your Yamaha receiver. This information will help you verify if a newer firmware version is available and if an update is necessary.
To check the firmware version, follow these steps:
- Turn on your Yamaha receiver and ensure it is connected to your audio/video system.
- Using the remote control, press the “Menu” button to access the receiver’s menu.
- Navigate to the “Setup” or “System Setup” section, which may be named differently depending on your model.
- In the setup menu, look for an option related to firmware or software information. This option may be labeled as “Version,” “Firmware Version,” or similar.
- Select the firmware information option to display the current firmware version on the screen.
Once you have identified the firmware version, compare it to the latest firmware version available on the Yamaha website. If there is a newer version, it is recommended to proceed with the firmware update to ensure that your receiver is up to date with the latest bug fixes and enhancements.
It is important to note that firmware updates can vary depending on the model of your Yamaha receiver. Some models may offer over-the-air (OTA) updates, where you can download and install the firmware directly from the receiver’s menu or through a network connection. Others may require manually downloading the firmware file from the Yamaha website and installing it via USB.
Now that you know the current firmware version of your Yamaha receiver, let’s move on to the next step – finding and downloading the firmware update file.
Step 2: Find and download firmware update file
Once you have determined the current firmware version of your Yamaha receiver, the next step is to find and download the appropriate firmware update file from the Yamaha website. Yamaha regularly releases firmware updates to improve the performance and functionality of their receivers, so it’s crucial to have the latest version installed.
Here’s how you can find and download the firmware update file:
- Open a web browser on your computer and go to the official Yamaha website.
- Look for the “Support” or “Downloads” section on the website, which is usually located in the top navigation menu.
- In the support or downloads section, search for your specific Yamaha receiver model. You can either browse through the product categories or use the search function to find your model.
- Once you have found your model, navigate to the “Downloads” or “Firmware” section associated with your receiver.
- On the firmware download page, you should see a list of available firmware updates for your receiver. Check if there is a firmware version newer than the one currently installed on your receiver.
- Click on the download link for the latest firmware update file. Ensure that you are downloading the correct file for your receiver model.
After you click on the download link, the firmware update file will be saved to your computer. Make sure to remember the location where the file is saved for easy access in the next steps of the update process.
It’s important to note that Yamaha provides firmware updates in different formats, such as .zip or .rar files. In most cases, you will need to extract the firmware update file from the downloaded archive before proceeding with the update process. Right-click on the downloaded file and select “Extract” or use a file extraction program to extract the firmware update file.
Now that you have successfully downloaded the firmware update file, we can move on to the next step – preparing a USB drive for the firmware update.
Step 3: Prepare USB drive for firmware update
To update the firmware on your Yamaha receiver, you will need to prepare a USB drive that can be used to transfer the firmware update file. The USB drive acts as the intermediary between your computer and the receiver, allowing you to install the firmware update easily. Here’s how you can prepare the USB drive:
- Insert a USB drive into your computer’s USB port.
- Format the USB drive to ensure compatibility with the Yamaha receiver. To format the drive, right-click on it in your operating system’s file explorer and select the “Format” option.
- In the format window, choose the appropriate file system. The Yamaha receiver typically requires the USB drive to be formatted in FAT32 or exFAT format. Select the desired format and click “Format” to begin the formatting process.
- Once the formatting is complete, create a new folder on the USB drive. You can name the folder anything you prefer, but it’s a good practice to name it something related to the firmware update, such as “Yamaha Firmware Update”.
- Open the folder where you have saved the firmware update file on your computer.
- Copy the firmware update file from your computer and paste it into the folder you created on the USB drive.
- Once the firmware update file is successfully transferred to the USB drive, safely eject and remove the USB drive from your computer.
Now that you have prepared the USB drive with the firmware update file, you are ready to connect it to your Yamaha receiver and proceed with the firmware update process. In the next step, we will guide you through the necessary steps to connect the USB drive to your receiver, so let’s move on!
Step 4: Connect USB drive to Yamaha receiver
Now that you have prepared the USB drive with the firmware update file, the next step is to connect the USB drive to your Yamaha receiver. This connection allows the receiver to access the firmware update file and initiate the update process. Follow these steps to connect the USB drive:
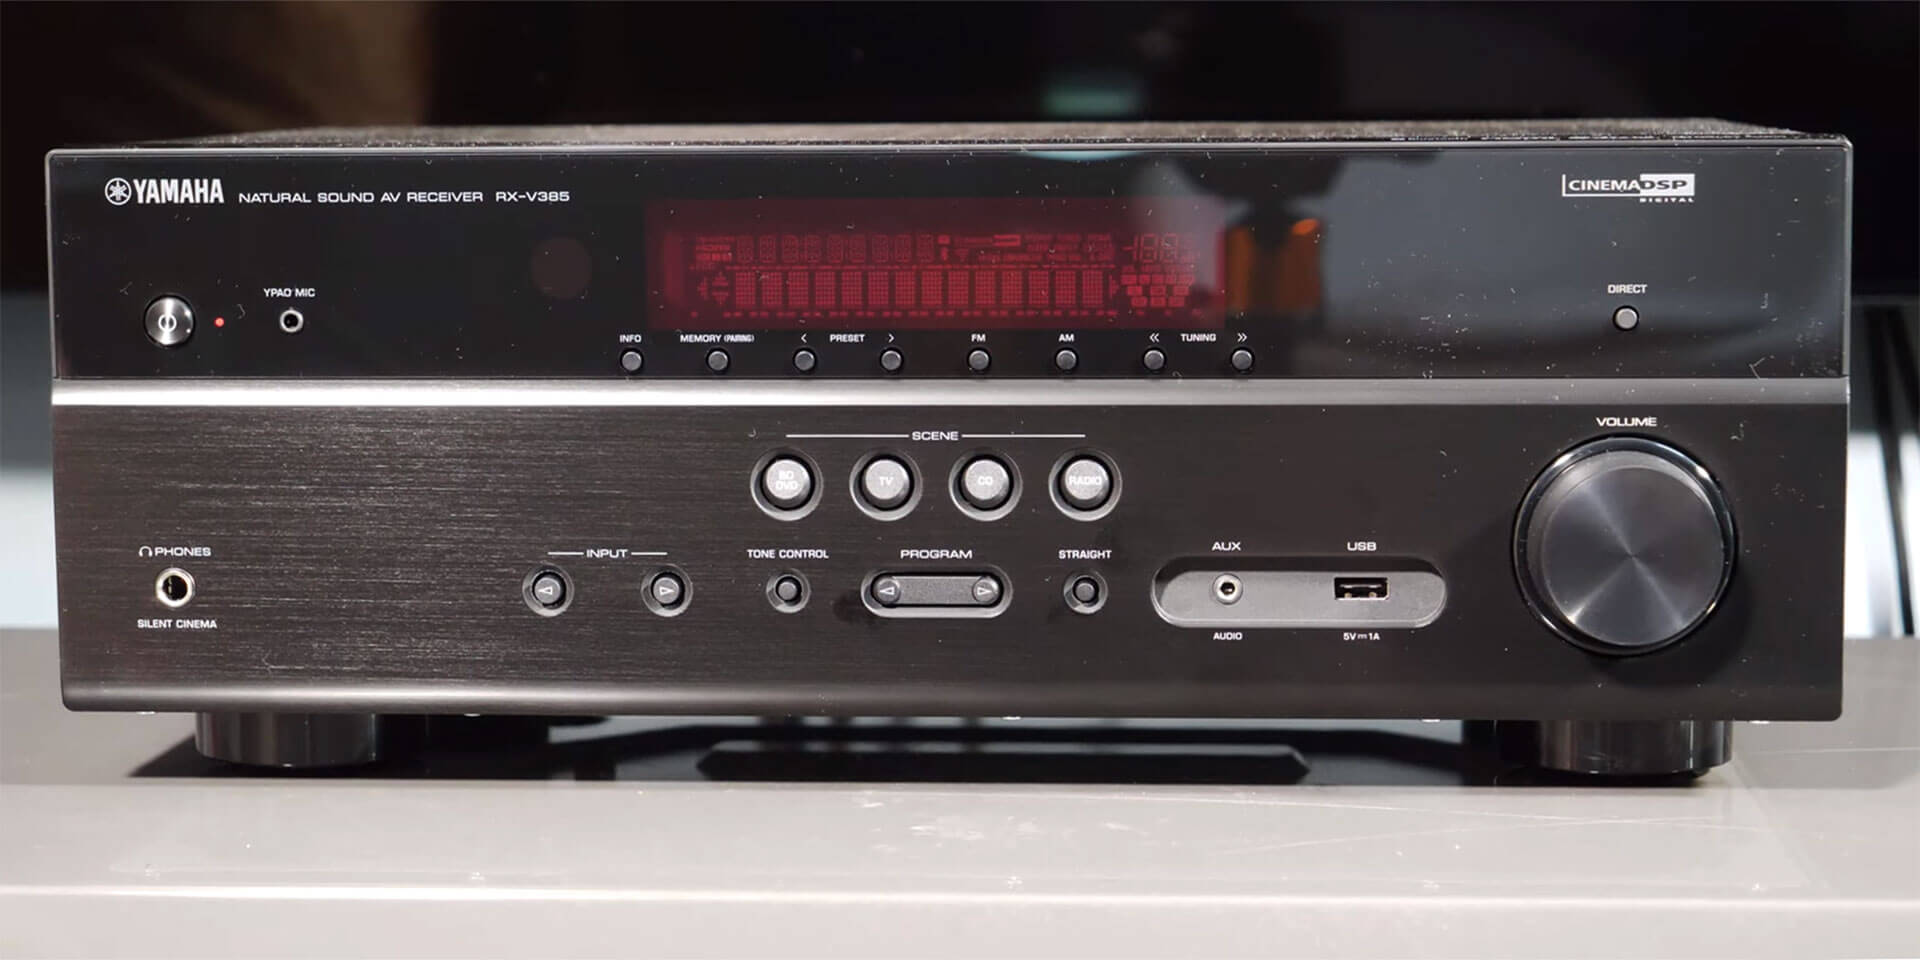
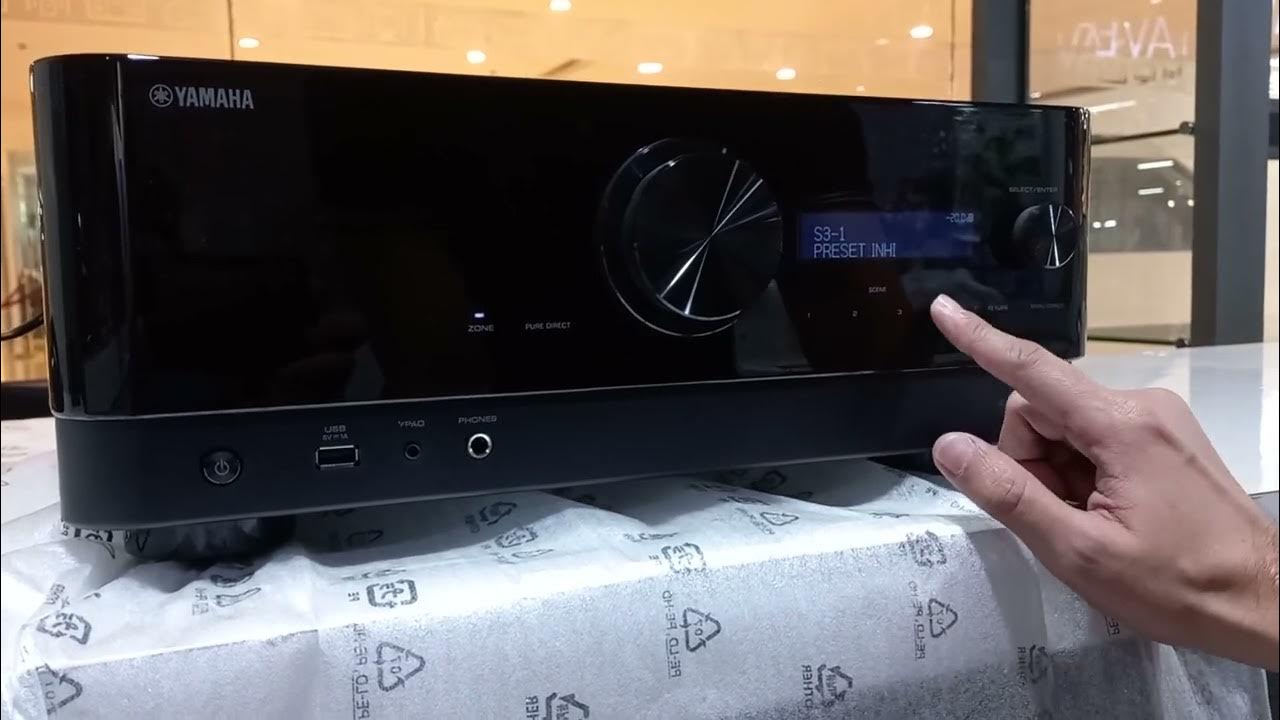
- Locate the USB port on your Yamaha receiver. The USB port is typically located on the front or rear panel of the receiver, but the exact placement may vary depending on your model. Consult your receiver’s user manual for the specific location of the USB port.
- Take the USB drive that you prepared in the previous step and insert it into the USB port of the receiver. Ensure that the USB drive is securely inserted into the port.
- If your receiver is currently powered on, you may see a notification or prompt on the receiver’s display indicating that a USB device has been connected. You can ignore this for now, as we will access the firmware update menu in the next step.
Connecting the USB drive to your Yamaha receiver establishes the link required to initiate the firmware update process. Once the USB drive is connected, you are ready to move on to the next step – accessing the firmware update menu.
It’s important to note that some Yamaha receiver models may have additional requirements or specific instructions when it comes to connecting the USB drive. Make sure to consult your receiver’s user manual for any model-specific information or considerations.
Now that the USB drive is connected to your Yamaha receiver, let’s proceed to the next step and access the firmware update menu!
Step 5: Access firmware update menu
Once you have connected the USB drive containing the firmware update file to your Yamaha receiver, the next step is to access the firmware update menu. The firmware update menu allows you to initiate the firmware update process and install the latest firmware on your receiver. Follow these steps to access the firmware update menu:
- If your Yamaha receiver is powered off, turn it on using the power button on the front panel or remote control.
- On the remote control, press the “Menu” button to access the receiver’s main menu.
- Navigate through the menu options using the arrow keys on the remote control until you find the “Setup” or “System Setup” option. Select it by pressing the corresponding button.
- In the setup menu, look for an option related to firmware updates. This option may be labeled as “Firmware Update,” “Software Update,” or something similar.
- Select the firmware update option to enter the firmware update menu.
Once you have accessed the firmware update menu, you should see information about the current firmware version and an option to update the firmware. The menu may also display additional instructions or information about the firmware update process.
Depending on your Yamaha receiver model, the firmware update menu may vary slightly in appearance and layout. However, the general process remains the same. If you encounter any difficulties finding or accessing the firmware update menu, refer to your receiver’s user manual for specific instructions.
Now that you have successfully accessed the firmware update menu, let’s move on to the next step and start the firmware update process!
Step 6: Start the firmware update process
Now that you have accessed the firmware update menu on your Yamaha receiver, it’s time to start the firmware update process. This step involves selecting the firmware update file from the connected USB drive and initiating the installation. Follow these steps to start the firmware update:
- In the firmware update menu, you should see an option to select the firmware update file. Use the arrow keys on your remote control to navigate to the option and press the corresponding button to select it.
- A file browser window should appear, displaying the contents of the connected USB drive. Navigate through the folders on the USB drive and locate the folder where you saved the firmware update file.
- Select the firmware update file from the USB drive. Press the appropriate button on your remote control to confirm the selection.
- Once the firmware update file is selected, you may see a confirmation message asking if you want to proceed with the firmware update. Read the message carefully and select the option to initiate the update process.
After you confirm the firmware update, the Yamaha receiver will start the installation process. The receiver will extract the firmware update file from the USB drive and begin updating the firmware. During this time, it’s crucial to not disconnect the power or interrupt the update process, as it may cause damage to the receiver.
The firmware update process may take several minutes to complete, depending on the size of the update file and the speed of your Yamaha receiver. It’s essential to be patient and let the receiver complete the update process without any interruptions. The progress may be displayed on the receiver’s screen or indicated by a flashing LED light.
Now that you have initiated the firmware update process, let’s move on to the next step and wait for the firmware update to complete.
Step 7: Wait for the firmware update to complete
After starting the firmware update on your Yamaha receiver, it’s important to patiently wait for the update process to complete. During this step, the receiver will be implementing the new firmware, ensuring that your receiver runs smoothly with the latest features and bug fixes. Here’s what you need to do:
- Once you have initiated the firmware update, resist the temptation to turn off the receiver or disconnect it from the power source. Interrupting the update process can cause irreversible damage to the receiver.
- Depending on the size of the firmware update file and the processing power of your Yamaha receiver, the update process may take several minutes to complete. Be patient and allow the receiver to finish the update on its own.
- During the update process, you may notice the receiver’s display may show progress indicators or messages indicating the update status. Pay attention to any on-screen prompts, but avoid pressing any buttons or making any adjustments until the update is completed.
- Avoid engaging in any activities that could cause interference with the update process. For example, keep the receiver away from sources of electromagnetic interference or other electronic devices.
- Do not disconnect the USB drive or make any changes to the receiver’s settings during the firmware update. It’s crucial to keep the receiver and USB drive connected until the update process is fully completed.
It’s important to note that the receiver may restart or power cycle multiple times during the update process. This is normal as the firmware is being implemented and the receiver is optimizing its performance with the new update. As such, do not be alarmed if you see the receiver powering on and off or experiencing brief interruptions in audio or video output.
Once the firmware update is successfully completed, your Yamaha receiver will notify you, either through on-screen messages or LED indicators. At this point, you can proceed to the next step and power cycle the receiver.
Now that you have allowed the firmware update to run its course, let’s move on to the next step – power cycling the Yamaha receiver.
Step 8: Power cycle the Yamaha receiver
After the firmware update process is complete, it is necessary to power cycle your Yamaha receiver. Power cycling involves turning off the receiver and then turning it back on again. This step ensures that the updated firmware is fully implemented and that the receiver operates optimally. Follow these steps to power cycle your Yamaha receiver:
- If your receiver is currently powered on, use the power button on the front panel or the remote control to turn it off.
- Once the receiver is powered off, disconnect the power cord from the back of the receiver or from the power outlet.
- Wait for about 10 to 15 seconds to allow any residual power to dissipate from the receiver.
- After the waiting period, plug the power cord back into the receiver or reconnect it to the power outlet.
- Press the power button to turn on the Yamaha receiver.
As the receiver powers back on, you may notice that it takes slightly longer to start up compared to a regular power on/off cycle. This is because the receiver is initializing the updated firmware and optimizing its settings. During this process, avoid making any adjustments to the receiver’s settings or connections.
Once the Yamaha receiver has fully powered on, it’s important to make sure that the new firmware version is correctly installed. In the next step, we will guide you on how to verify the successful firmware update. So let’s move on!
Step 9: Verify successful firmware update
After power cycling your Yamaha receiver, it’s crucial to verify that the firmware update was successful. Verifying the update ensures that the receiver is now running on the latest firmware version, which brings bug fixes, performance enhancements, and new features to your audio system. Here’s how you can verify the successful firmware update:
- Power on your Yamaha receiver using the power button on the front panel or the remote control.
- Once the receiver is powered on, access the menu system or settings to check the firmware version. The exact steps may vary based on your receiver model.
- Locate the firmware information section, which is usually labeled as “Version,” “Firmware Version,” or similar.
- Compare the firmware version displayed with the one you noted down in Step 1. If the displayed version matches or is newer than the previous version, it indicates that the firmware update was successful.
- If the firmware version did not update or if the receiver still displays the old version number, double-check that you followed all the previous steps correctly. If you continue to experience issues, consult the user manual or reach out to Yamaha customer support for assistance.
After verifying the successful firmware update, take a moment to explore the updated features or performance improvements that the new firmware brings. You may notice enhancements in sound quality, added functionality, or an overall smoother user experience.
Lastly, it’s essential to keep in mind that firmware updates can sometimes introduce unforeseen issues. If you encounter any new issues or notice a regression in performance after the update, you can revert to the previous firmware version if supported by your receiver. However, it is recommended to carefully evaluate the impact and consult Yamaha customer support or online forums for guidance before reverting to an older firmware version.
Congratulations! You have successfully completed the firmware update process on your Yamaha receiver and ensured it is running on the latest firmware version. Enjoy the improved audio experience and new features that come with the update!
As a final note, it’s advisable to periodically check for future firmware updates from Yamaha to keep your receiver up to date. Regular updates help optimize performance, address any known issues, and unlock new capabilities, ensuring that you get the most out of your Yamaha receiver.
Thank you for following this comprehensive guide on updating the firmware of your Yamaha receiver. If you have any further questions or encounter any difficulties during the update process, feel free to reach out to Yamaha customer support for assistance.
Conclusion
Congratulations on successfully updating the firmware of your Yamaha receiver! By following the step-by-step guide outlined in this article, you have ensured that your receiver is running on the latest firmware version, benefiting from bug fixes, performance enhancements, and new features.
Updating the firmware on your Yamaha receiver is essential to maintain optimal performance and compatibility with the latest technologies. It enhances your audio experience and ensures that your receiver remains up to date with the ever-evolving audio industry.
Throughout this guide, we covered all the necessary steps, from determining the current firmware version to verifying the successful update. We discussed how to find and download the firmware update file, prepare a USB drive for the update, connect the USB drive to the receiver, access the firmware update menu, and finally start the update process.
We also highlighted the importance of patience during the firmware update, as well as the need to power cycle the receiver and verify the successful update. Remember to always consult your receiver’s user manual for model-specific instructions and refer to Yamaha’s official website for the latest firmware updates.
With the updated firmware, your Yamaha receiver is ready to deliver exceptional audio performance and make the most out of your home theater setup. Enjoy the enhanced sound quality, new features, and seamless integration with your audio/video sources.
As technology continues to advance, it’s advisable to regularly check for firmware updates from Yamaha to stay up to date with the latest improvements and features. This will ensure that your receiver continues to provide an immersive and unparalleled audio experience for years to come.
Thank you for following this comprehensive guide, and we hope it has been informative and helpful for you. Should you have any further questions or need additional support, don’t hesitate to reach out to Yamaha’s customer support or consult online forums and communities dedicated to Yamaha audio equipment.
Happy listening!

