Home>Instruments>Synthesizer>How To Plug My Synthesizer Into A Computer
Synthesizer
How To Plug My Synthesizer Into A Computer
Modified: February 22, 2024
Learn how to easily connect your synthesizer to your computer and unlock a world of creative possibilities. Start experimenting and recording today with our step-by-step guide!
(Many of the links in this article redirect to a specific reviewed product. Your purchase of these products through affiliate links helps to generate commission for AudioLover.com, at no extra cost. Learn more)
Table of Contents
Introduction
Synthesizers have become an integral part of modern music production, allowing musicians and producers to create a wide range of sounds and melodies. However, to fully unlock their potential, it is essential to connect them to a computer. Whether you want to record your synth performances, edit them digitally, or use virtual instruments and effects, plugging your synthesizer into a computer is a crucial step.
In this article, we will guide you through the process of connecting your synthesizer to a computer. We will cover everything from checking the necessary connections to setting up the audio interface and configuring the software settings. By the end of this guide, you will have a clear understanding of how to harness the power of your synthesizer in conjunction with your computer.
Before we delve into the steps, it is important to note that the specifics may vary depending on the make and model of your synthesizer and computer. However, the general principles covered in this guide can be applied to most setups.
Step 1: Check the Connections
Before diving into the process of connecting your synthesizer to your computer, it is essential to ensure that you have the necessary connections available. Here are a few key factors to consider:
- Power Connection: Check if your synthesizer requires an external power source or if it can be powered directly through the USB connection.
- Audio Outputs: Identify the audio outputs on your synthesizer. Most synthesizers have a selection of outputs, such as 1/4″ jacks or XLR connectors. Determine which outputs you will be using to connect to your computer.
- Audio Inputs: In some cases, you may also want to connect audio inputs from your computer to your synthesizer. This is useful if you plan on using your synthesizer as a standalone instrument, processing external audio sources through its filters and effects.
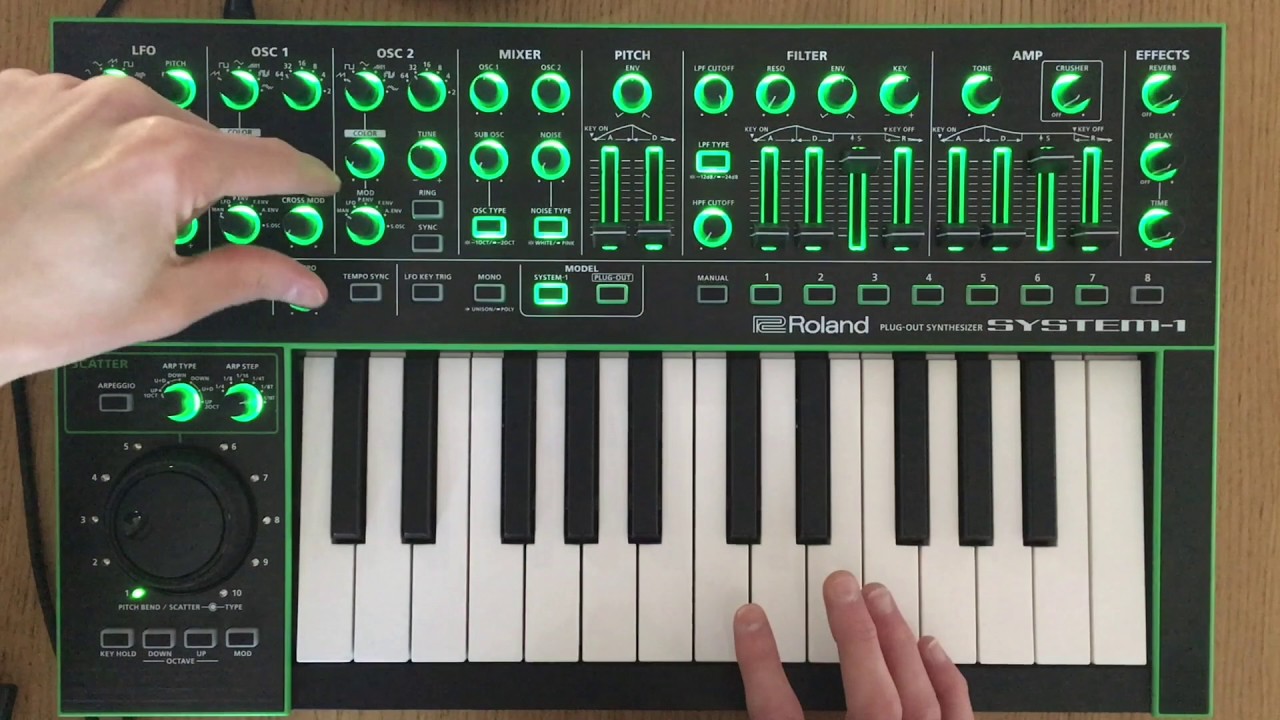
- MIDI Connectivity: If you plan on using your synthesizer to control virtual instruments or record MIDI data, make sure you have MIDI connectivity options available. This can range from traditional 5-pin MIDI ports to USB MIDI connections.
- USB Connection: Determine if your synthesizer has a USB port that can be used for connecting to a computer. This is a common and convenient option, as it can handle both audio and MIDI data transfer.
Once you have identified the necessary connections on your synthesizer, you can move on to the next steps of the process. However, if you are unsure about any of the connections or require additional cables or adapters, consult the user manual of your synthesizer or seek advice from a professional music retailer.
Step 2: Choose the Appropriate Cables
Now that you have checked the connections on your synthesizer, it’s time to select the appropriate cables for the setup. The choice of cables will depend on the types of connections available on your synthesizer and computer. Here are some common cable options:
- Audio Cables: If your synthesizer has 1/4″ audio outputs, you will need TRS or TS cables to connect to your computer’s audio interface. For XLR outputs, XLR cables are required. Make sure to choose cables of sufficient length to reach your computer without strain.
- MIDI Cables: For MIDI connectivity, you will need MIDI cables with appropriate connectors. If your synthesizer has traditional 5-pin MIDI ports, use MIDI cables with 5-pin DIN connectors. If you have USB MIDI connectivity, you won’t need a MIDI cable, as the USB connection will handle both audio and MIDI data transfer.
- USB Cable: If you plan on using the USB connection between your synthesizer and computer, ensure you have a USB cable of suitable length and type (USB-A to USB-B, USB-C, etc.).
When selecting cables, it is worth investing in quality cables to ensure a reliable connection and minimize interference. Shielded cables are recommended to reduce any potential noise or signal degradation. Additionally, consider the length of the cables based on the placement of your synthesizer and computer setup.
If you are unsure about the appropriate cables for your setup or need assistance with compatibility, refer to the user manual of your synthesizer or consult with a knowledgeable music retailer.
Now that you have the right cables in hand, you are ready to move on to the next step and connect your synthesizer to your computer.
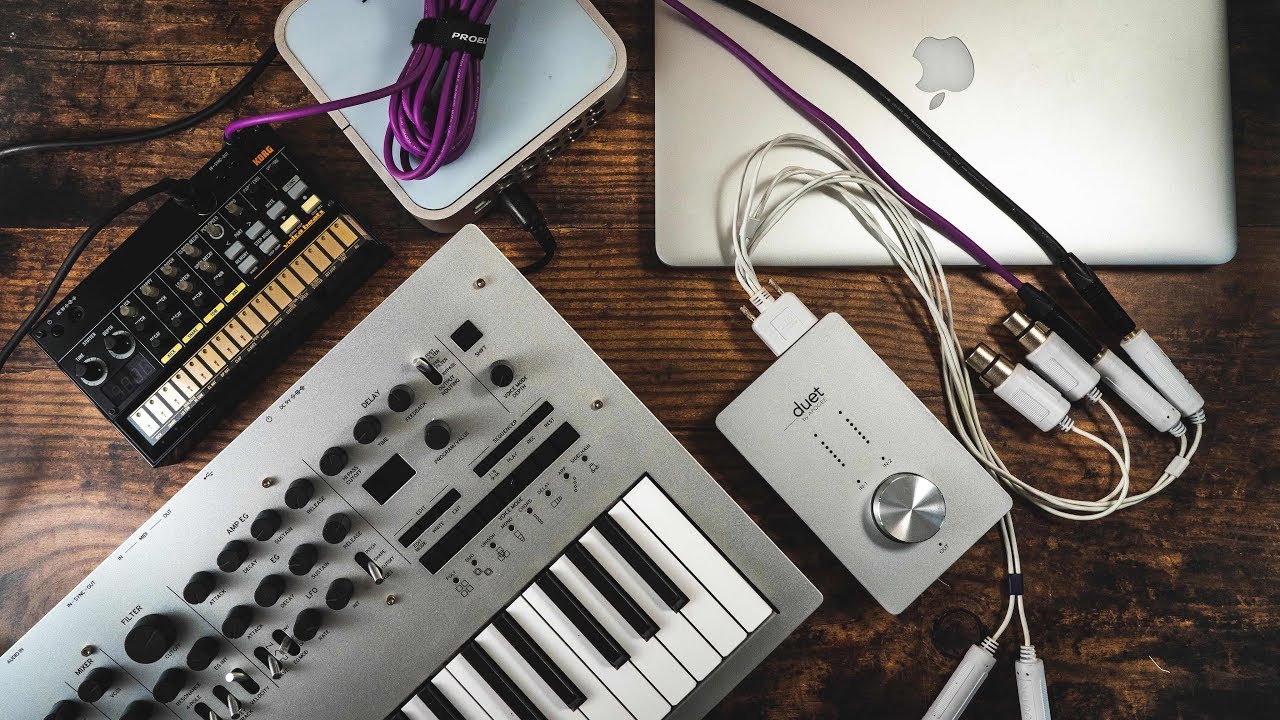
Step 3: Connect the Synthesizer to the Computer
With the necessary cables on hand, it’s time to connect your synthesizer to your computer. Follow these steps to establish the physical connection:
- Power On: If your synthesizer requires external power, ensure it is plugged into a power source and turned on. If it can be powered through the USB connection, make sure the synthesizer is switched on.
- Audio Connection: Take the appropriate audio cables and connect the audio outputs from your synthesizer to the audio inputs of your computer’s audio interface. For example, if your synthesizer has 1/4″ audio outputs, use 1/4″ TRS or TS cables to connect them to the corresponding inputs on the audio interface.
- MIDI Connection: If you plan on using MIDI connectivity, establish the MIDI connection between your synthesizer and computer. For traditional 5-pin MIDI ports, use MIDI cables to connect the MIDI out of your synthesizer to the MIDI in of your computer’s MIDI interface. If you have USB MIDI connectivity, connect the USB cable from your synthesizer to an available USB port on your computer.
- USB Connection (Audio Interface): If your audio interface supports USB connectivity, connect it to an available USB port on your computer using a compatible USB cable. This connection will handle audio data transfer between your synthesizer and computer.
Make sure all the cables are securely connected on both ends to ensure a stable and reliable connection.
Once the physical connections are established, you are ready to move on to setting up the audio interface and configuring the settings to ensure proper communication between your synthesizer and computer.
Step 4: Set Up the Audio Interface
After connecting your synthesizer to your computer, the next step is to set up the audio interface. The audio interface allows you to route audio signals between your synthesizer and your computer’s recording software or digital audio workstation (DAW).
Follow these steps to set up the audio interface:
- Install Drivers: If your audio interface requires specific drivers, make sure to install them on your computer. Check the manufacturer’s website for the latest drivers and follow the installation instructions provided.
- Select the Audio Interface: Once the drivers are installed, select your audio interface as the default audio input and output device on your computer. This can usually be done through the audio settings in your operating system or audio control panel.
- Set Sample Rate and Buffer Size: Configure the sample rate and buffer size settings of your audio interface. The sample rate determines the number of audio samples captured and played back per second, while the buffer size affects the latency or delay between the input and output signals. Adjust these settings according to your specific requirements and system capabilities.
- Check Input and Output Levels: Use the audio interface’s control panel or software to check and adjust the input and output levels. Make sure the levels are set appropriately to prevent clipping or distortion and ensure optimum recording quality.
Every audio interface may have a slightly different set of software or control panel options. Refer to the user manual of your specific audio interface for detailed instructions on setting up and configuring its parameters.
With your audio interface properly set up, you can now move on to configuring the settings on your synthesizer to establish communication with your computer.
Step 5: Configure the Synthesizer Settings
Now that the audio interface is set up, it’s time to configure the settings on your synthesizer to establish communication with your computer. Here are the steps to follow:
- Audio Routing: Access the audio settings on your synthesizer and ensure that the audio outputs are correctly routed to the outputs connected to your audio interface. This will allow the synthesizer’s audio to be sent to your computer for recording or processing.
- MIDI Settings: If you plan on using MIDI connectivity, navigate to the MIDI settings on your synthesizer. Select the appropriate MIDI communication options, such as MIDI channel or MIDI clock settings, based on your requirements and the capabilities of your MIDI software.
- USB Mode: If your synthesizer has USB connectivity, check the USB mode settings on the device. Depending on the synthesizer, you may need to select the appropriate USB mode (MIDI, Audio, or both) to enable proper communication with your computer. Ensure the USB mode is set according to your intended use.
- Sync Options: If you want your synthesizer to sync with your computer’s clock or other MIDI devices, adjust the sync options accordingly. This will ensure that timing and synchronization between your synthesizer and other devices or software are accurate.
Refer to the user manual of your synthesizer for specific instructions on accessing and configuring these settings. Each synthesizer may have a different interface and menu structure, so it’s important to consult the documentation provided by the manufacturer.
With the appropriate settings configured on your synthesizer, you are now ready to move on to the software side of the setup. This involves installing and configuring MIDI software on your computer.
Step 6: Install and Configure MIDI Software
In order to fully utilize your synthesizer’s capabilities and establish a seamless connection with your computer, you will need to install and configure MIDI software. This software allows you to record MIDI data, control virtual instruments, and manage your synthesizer’s settings. Follow these steps to install and configure MIDI software:
- Choose MIDI Software: There are several MIDI software options available, ranging from basic MIDI editors to comprehensive digital audio workstations (DAWs). Choose a software that suits your needs and budget. Popular choices include Ableton Live, Logic Pro, FL Studio, and Cubase.
- Install the Software: Download and install the MIDI software on your computer. Follow the installation instructions provided by the software manufacturer to ensure a successful installation.
- Configure MIDI Input and Output: Once the software is installed, open its settings or preferences menu and configure the MIDI input and output options. Select your synthesizer as the MIDI input device to receive MIDI data from the synthesizer’s keys, knobs, and other controllers. Set the audio interface as the MIDI output device to send MIDI data from the software to your synthesizer.
- Set Up MIDI Channels: If you are using multiple MIDI channels on your synthesizer, make sure to configure the MIDI channels in the software accordingly. This allows you to send MIDI data to specific channels on your synthesizer for precise control and performance.
- Assign MIDI Controllers: Some MIDI software allows you to assign specific MIDI controllers, such as knobs or sliders, to control various parameters of virtual instruments or effects. Take advantage of this feature to enhance your performance and workflow.
Consult the user manual or online documentation of your selected MIDI software for detailed instructions on configuring its settings. Additionally, explore tutorials and resources available online to learn more about the features and capabilities of the software of your choice.
With the MIDI software installed and properly configured, you are now ready to test the connection between your synthesizer and computer.
Step 7: Test the Connection
Once you have completed the previous steps, it is important to test the connection between your synthesizer and computer to ensure everything is working as expected. Follow these steps to perform a connection test:
- Open your MIDI Software: Launch the MIDI software you installed in the previous step.
- Create a New Project: Start a new project or session in your MIDI software. This will provide a clean slate for testing the connection.
- Select the Synthesizer: In your MIDI software’s settings or preferences menu, ensure that your synthesizer is recognized as a MIDI input device and that the audio interface is selected as the MIDI output device.
- Play the Synthesizer: Start playing the keys or triggering the sounds on your synthesizer. Monitor the MIDI activity in your software to verify that it is receiving MIDI data from your synthesizer. This can be indicated by MIDI notes being triggered or MIDI CC data being transmitted.
- Record and Playback: Record a short test performance in your MIDI software and play it back. Listen for audio output from the synthesizer and ensure that it matches what was recorded. Also, verify that any MIDI CC (Control Change) messages are being transmitted correctly and responding to your synthesizer’s parameters.
If the connection test is successful and you are hearing the intended audio and seeing MIDI data being recorded and played back, congratulations! Your synthesizer is now fully connected to your computer and ready for your musical adventures.
In the event that the connection test does not work as expected, double-check all the physical connections, software configurations, and settings on both your synthesizer and MIDI software. Ensure that the audio interface drivers and the MIDI software are up to date. If problems persist, consult the user manuals, online forums, or seek assistance from experienced users or professionals for troubleshooting help.
By following these steps and thorough testing, you can ensure a reliable and efficient connection between your synthesizer and computer, enabling you to unlock a world of creative possibilities in your music production journey.
Conclusion
Connecting your synthesizer to your computer opens up a world of possibilities for creating, recording, and producing music. By following the steps outlined in this guide, you can establish a seamless and efficient connection between your synthesizer and computer, enabling you to maximize the potential of your sound synthesis and music production.
Starting with checking the connections and choosing the appropriate cables, you can ensure a reliable and stable connection between your synthesizer and computer. Setting up the audio interface and configuring the settings on both your synthesizer and computer’s MIDI software allows for smooth communication and data transfer.
Finally, testing the connection ensures that everything is working as intended and allows you to address any issues that may arise. By going through each step meticulously, you can confidently connect your synthesizer to your computer and embark on a creative journey of producing music like never before.
Remember to consult the user manuals of your synthesizer, audio interface, and MIDI software for specific instructions related to your equipment. Additionally, explore online resources, tutorials, and forums to expand your knowledge and learn new techniques for getting the most out of your synthesizer and computer setup.
Now that you have the tools and knowledge to plug your synthesizer into your computer, unleash your creativity and explore the vast sonic possibilities that await you. Enjoy the journey of creating unique sounds, recording captivating performances, and shaping your musical vision with the powerful combination of your synthesizer and computer.