Home>Production & Technology>Audio Interface>How To Use Behringer Uca222 USB Audio Interface
Audio Interface
How To Use Behringer Uca222 USB Audio Interface
Published: February 5, 2024
Learn how to use the Behringer UCA222 USB audio interface to enhance your audio experience. Connect your favorite instruments and devices easily.
(Many of the links in this article redirect to a specific reviewed product. Your purchase of these products through affiliate links helps to generate commission for AudioLover.com, at no extra cost. Learn more)
Table of Contents
Introduction
Welcome to the world of audio interfaces! Whether you’re a musician, podcaster, or content creator, having a reliable and high-quality audio interface is essential for capturing and refining your audio recordings.
In this article, we’ll dive into the Behringer UCA222 USB audio interface, a popular choice among professionals and beginners alike. We’ll explore its specifications, how to connect it to your computer, how to install the necessary drivers, and how to set it up for optimal performance.
The Behringer UCA222 offers a compact and affordable solution for those looking to improve the recording and playback capabilities of their computer. It provides high-resolution audio conversion, allowing you to capture the nuances of your recordings with pristine clarity.
Aside from its superior audio quality, the UCA222 stands out with its user-friendly features. It offers versatile connectivity options, including inputs for microphones and instruments, as well as outputs for headphones and speakers. This makes it perfect for recording vocals or instruments, podcasting, live streaming, and much more.
Not only does the Behringer UCA222 offer great sound quality and versatility, but it’s also incredibly easy to use. Its compact size and plug-and-play functionality make it a convenient choice for both home studios and on-the-go setups.
So, whether you’re a seasoned audio professional or just starting out, the Behringer UCA222 is a fantastic audio interface that delivers excellent results without breaking the bank. In the following sections, we’ll guide you through the process of connecting, setting up, and using this incredible device to unlock the true potential of your recordings.
Specifications
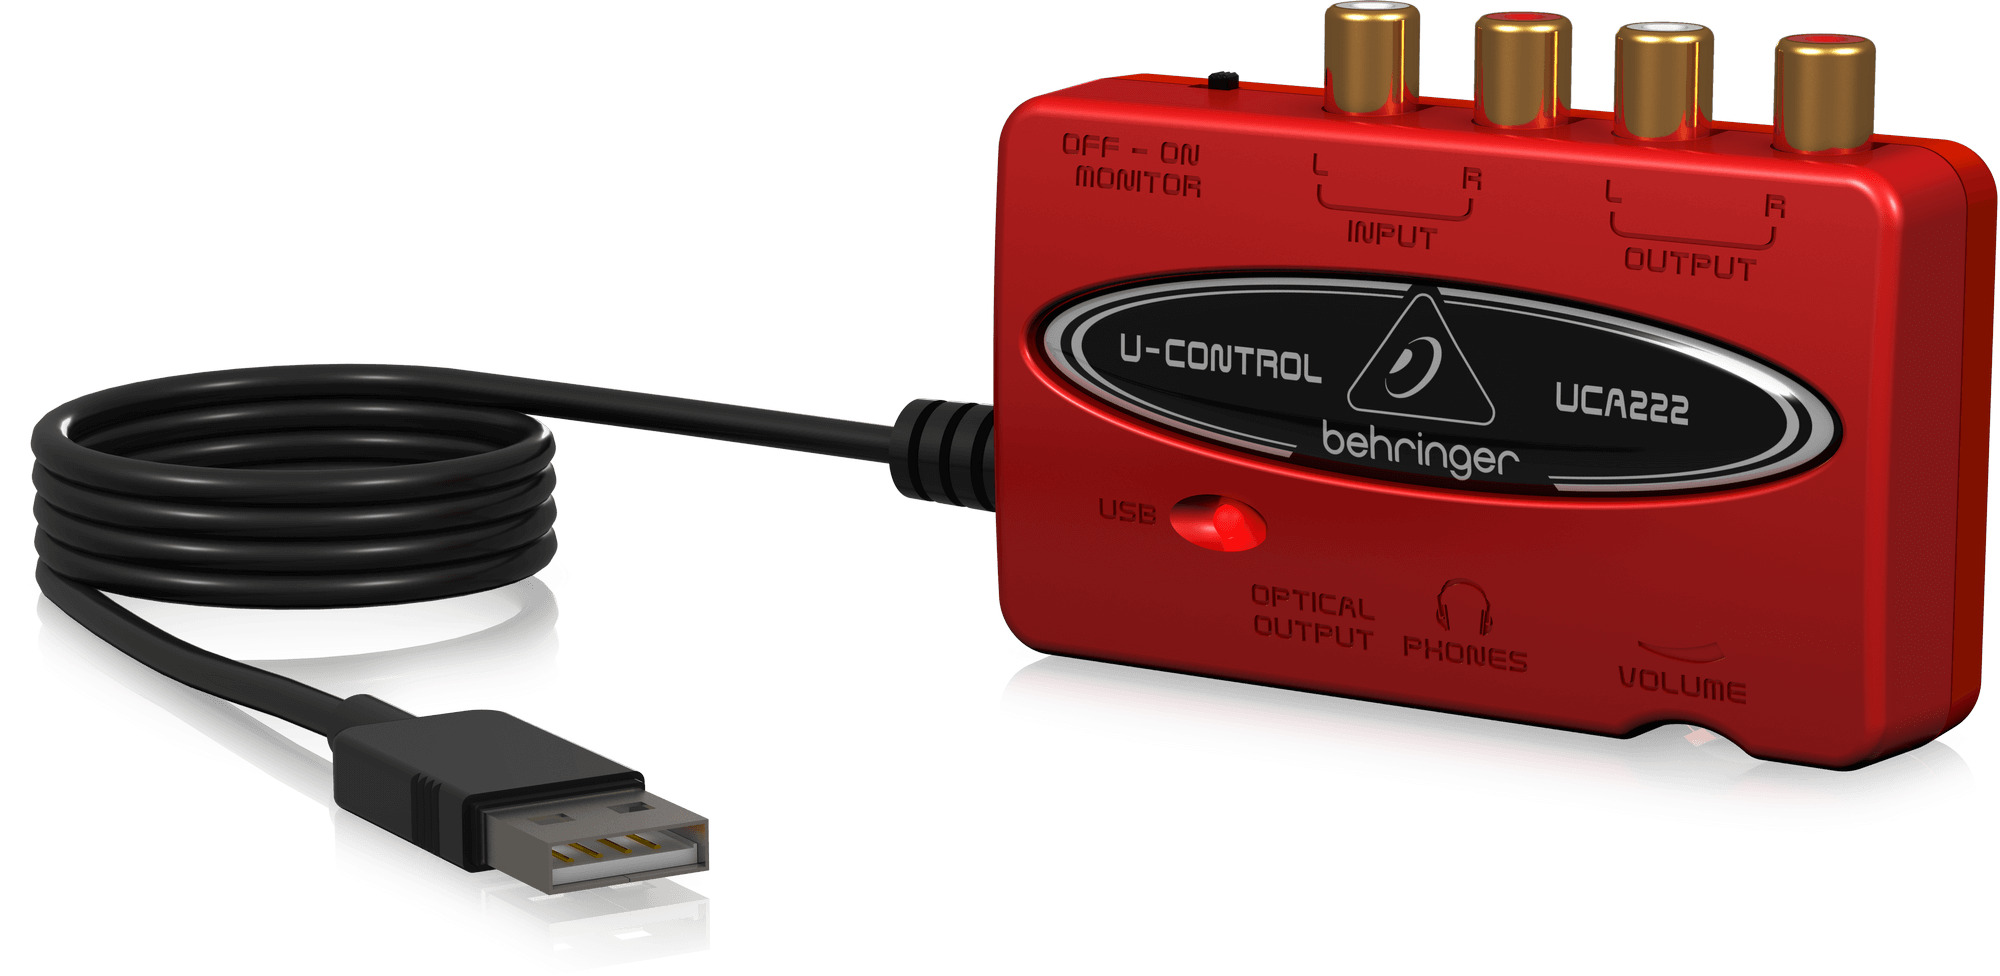
The Behringer UCA222 USB audio interface packs a range of features and specifications that make it a powerful tool for audio recording and playback. Let’s take a closer look at its key specifications:
- Audio Resolution: The UCA222 supports 16-bit/48 kHz audio resolution, allowing for clear and detailed recordings.
- Inputs: It features two RCA inputs, perfect for connecting external devices such as instruments or line-level sources.
- Outputs: The UCA222 offers two RCA outputs, providing flexibility for connecting headphones, speakers, or other audio playback systems.
- Headphone Output: Equipped with a dedicated headphone out, the UCA222 allows for convenient monitoring and playback without requiring additional equipment.
- USB Connectivity: The UCA222 connects to your computer through a USB 1.1 interface, ensuring compatibility with a wide range of systems.
- Compatibility: This audio interface is compatible with Windows and Mac operating systems, making it versatile for various setups.
- Signal-to-Noise Ratio: At 48 kHz, the UCA222 boasts an impressive signal-to-noise ratio of 89 dB, ensuring low noise and clear recordings.
- Direct Monitoring: Thanks to the direct monitoring feature, you can monitor your input signal in real-time without any latency, allowing for accurate recording and performance.
- Power Supply: The UCA222 is USB-powered, eliminating the need for an external power supply and adding to its convenience and portability.
These specifications make the Behringer UCA222 a versatile and powerful audio interface option for home studios, podcasting setups, and other audio recording needs. Its compact design and robust features make it an excellent choice for both beginners and professionals in the industry.
Connecting the Behringer UCA222
Connecting the Behringer UCA222 to your computer is a straightforward process, and within minutes, you’ll be ready to start recording and playing back audio. Here’s a step-by-step guide to help you get started:
- First, ensure that your computer is turned off to prevent any potential damage to the UCA222 or your computer’s audio system.
- Locate the USB cable that comes with the Behringer UCA222. Connect one end of the cable to the USB port on the back of the UCA222.
- Next, find an available USB port on your computer and connect the other end of the USB cable to the computer’s USB port. Make sure the connection is secure.
- If you’re using any external devices, such as a microphone or instrument, you’ll need to connect them to the UCA222. The UCA222 features RCA inputs, so you may need RCA cables or adapters depending on the type of connection required by your devices.
- If you’re planning to use headphones or external speakers, locate the RCA outputs on the UCA222 and connect the appropriate cables. If you’re using headphones, plug them into the dedicated headphone output.
- Ensure that all connections are secure and properly plugged in.
- Once all the connections are made, you can now power on your computer. The UCA222 will be automatically recognized by your operating system.
That’s it! You have successfully connected the Behringer UCA222 to your computer. It’s important to note that the UCA222 is a plug-and-play device, meaning there’s no need for any additional software or drivers to start using it.
Now that you’re all set up, the next step is to install any necessary drivers to ensure optimum performance. In the next section, we’ll guide you through the driver installation process.
Installing the Drivers
Although the Behringer UCA222 is a plug-and-play audio interface, you may need to install specific drivers to ensure seamless functionality and optimal performance. Here’s a step-by-step guide to help you with the driver installation process:
- Before proceeding, ensure that your UCA222 is connected to your computer and powered on.
- Visit the official Behringer website (www.behringer.com) and navigate to the support or downloads section.
- Search for the UCA222 under the audio interfaces category and locate the drivers download section.
- Select the appropriate driver for your operating system (Windows or Mac) and download it to your computer.
- Once the driver file is downloaded, locate the file on your computer and double-click on it to start the installation process.
- Follow the on-screen instructions provided by the driver installer. Typically, you’ll need to agree to the terms and conditions and select the installation location.
- After the installation is complete, restart your computer to ensure that the driver changes take effect.
- Once your computer has restarted, you can check if the drivers are installed and functioning correctly by opening your audio settings panel or control panel. Look for the Behringer UCA222 as an available audio device.
- Ensure that the UCA222 is selected as the default input and output device in your audio settings for recording and playback.
- With the drivers successfully installed, you’re now ready to utilize the full capabilities of the Behringer UCA222 audio interface.
It’s worth noting that while the Behringer UCA222 is compatible with most operating systems out of the box, installing the drivers ensures that you have access to the latest updates, features, and stability enhancements.
Now that your drivers are installed and your UCA222 is ready to go, let’s move on to setting up the audio interface for optimal performance.
Setting Up the Audio Interface
Now that you have connected the Behringer UCA222 to your computer and installed the necessary drivers, it’s time to set up the audio interface for optimal performance. Here are the steps to configure your UCA222:
- Open your computer’s audio settings panel or control panel. On Windows, you can access it through the Control Panel or by right-clicking on the speaker icon in the system tray. On Mac, go to System Preferences and click on Sound.
- Ensure that the Behringer UCA222 is selected as the default input and output device. You may need to navigate to the audio devices or playback/recording tab in your settings.
- Adjust the output volume level to an appropriate level for your setup. Start with a moderate volume and fine-tune it as per your preference during playback.
- If you are using headphones, make sure the headphone volume is set to an audible level for monitoring.
- Check the sample rate and bit depth settings to match your desired recording quality. The UCA222 supports a maximum sample rate of 48 kHz and a bit depth of 16 bits.
- Ensure that any additional recording or streaming software you plan to use recognizes the Behringer UCA222 as the input device. Select the UCA222 as the audio source within the software settings.
- If you plan to use any external devices such as microphones or instruments, adjust the input gain level on the UCA222 accordingly to avoid distortion or clipping.
- Perform a test recording or playback to ensure that the audio is being routed correctly and that the levels are working as expected.
- Experiment with the different features and settings of the UCA222, such as enabling or disabling the direct monitoring feature or adjusting the headphone output level, to find the optimal configuration for your workflow.
By following these steps and customizing the settings to your preferences, you’ll be able to maximize the performance of your Behringer UCA222 USB audio interface.
Now that your UCA222 is properly set up, it’s time to start recording and enjoying high-quality audio. In the next section, we’ll explore how to record with the Behringer UCA222.
Recording With Behringer UCA222
Now that your Behringer UCA222 is connected, drivers are installed, and audio interface is set up, it’s time to dive into the recording process. Whether you’re capturing vocals, instruments, podcasts, or any other audio content, the UCA222 offers a reliable and user-friendly experience. Follow these steps to start recording with the UCA222:
- Open your preferred recording software or digital audio workstation (DAW) on your computer. Some popular options include Audacity, Ableton Live, Logic Pro, and Reaper.
- Create a new project or session in your recording software and configure the settings for your recording session, such as the sample rate, bit depth, and audio track setup.
- Ensure that the Behringer UCA222 is selected as the input device within the recording software. This allows the software to receive audio input from the UCA222.
- If you’re using a microphone, connect it to one of the UCA222’s inputs. For instruments, connect them to the appropriate input as well. Make sure the input levels are properly adjusted to prevent distortion or clipping.
- Arm the audio track in your recording software for recording. This enables the track to start capturing audio from the UCA222.
- When everything is set up, click the record button in your software to start recording. Perform or play your audio content while the software captures the audio input from the UCA222.
- Monitor the recorded audio through headphones or speakers connected to the UCA222 for real-time feedback.
- Once the recording is complete, stop the recording in your software. You can now edit, mix, and process the recorded audio using the capabilities of your recording software.
Remember to experiment with different microphone placements, instrument positions, and recording techniques to achieve the best sound quality and capture the essence of your content.
The Behringer UCA222’s high-resolution audio conversion ensures that your recordings are clear, detailed, and faithful to the original source. Its low-latency direct monitoring feature allows for seamless real-time monitoring, ensuring accurate performance and recording without audio delays.
With the UCA222, you have the tools you need to capture professional-grade audio right at your fingertips. Let your creativity flow and start recording with confidence using the Behringer UCA222.
In the next section, we’ll explore how to monitor and playback your recordings using the UCA222.
Monitoring and Playback
Monitoring and playback are crucial aspects of the recording process, and the Behringer UCA222 provides convenient options for monitoring your recordings and playing them back with exceptional audio quality. Here’s how to monitor and playback your audio using the UCA222:
- Ensure that your headphones or speakers are connected to the appropriate outputs on the UCA222.
- If you haven’t already done so, select the UCA222 as the default output device in your computer’s audio settings.
- In your recording software or DAW, check that the output routing is correctly set to the UCA222. This ensures that the playback audio is routed through the UCA222 and sent to your headphones or speakers.
- If necessary, adjust the output volume level on the UCA222 to a comfortable listening level. You can do this using the volume control knobs on the interface itself.
- Play back your recorded audio using the controls in your recording software. You should now hear your recordings through the headphones or speakers connected to the UCA222.
- Utilize the various playback features and options in your recording software to fine-tune the playback experience, such as adjusting volume levels, applying EQ or effects, or looping sections for review.
- Take advantage of the UCA222’s direct monitoring feature to hear your input signals in real-time while recording or performing. This eliminates any latency issues, allowing you to stay in sync and make accurate adjustments during the recording process.
By monitoring and playing back your recordings through the Behringer UCA222, you can ensure the quality and fidelity of your audio. The UCA222’s high-resolution audio conversion and low-latency monitoring capabilities guarantee an accurate and immersive playback experience.
Whether you’re reviewing your recorded vocals, fine-tuning your instrumental performance, or listening back to a podcast episode, the UCA222 provides a reliable and professional monitoring solution.
In the next section, we’ll address some common troubleshooting tips to help you overcome any issues you may encounter while using the Behringer UCA222.
Troubleshooting
While the Behringer UCA222 is a reliable and user-friendly audio interface, it’s not uncommon to encounter some troubleshooting issues at times. Here are some common problems you may face while using the UCA222 and their possible solutions:
No Sound or Signal:
- Make sure all cables are securely connected to the UCA222 and your computer.
- Check that the volume levels on the UCA222 and your computer are set appropriately.
- Ensure that the UCA222 is selected as the default input and output device in your computer’s audio settings.
- Verify that the input levels are properly adjusted if you’re using microphones or instruments.
Driver Issues:
- Confirm that you have the latest drivers installed by visiting the Behringer website and downloading the most recent version.
- Uninstall any previous versions of the drivers and reinstall the latest version.
- If you’re still experiencing driver-related issues, try connecting the UCA222 to a different USB port on your computer.
Latency or Delay:
- Ensure that you have the latest drivers installed as outdated drivers can cause latency problems.
- Adjust the buffer size in your recording software’s settings to minimize latency.
- Activating the UCA222’s direct monitoring feature can help reduce latency by providing a real-time audio feed without going through the computer.
Power and Connectivity:
- If the UCA222 is not turning on, check that the USB cable is securely connected to both the interface and your computer.
- Try connecting the UCA222 to a different USB port or using a different USB cable to rule out any potential connectivity issues.
- If you’re using a USB hub, try connecting the UCA222 directly to your computer as some hubs may not provide enough power for the interface.
If you’re still experiencing difficulties after trying these troubleshooting tips, it may be worth reaching out to Behringer’s customer support for further assistance.
Remember, troubleshooting can sometimes be a trial-and-error process. Stay patient and persistent, and you’ll likely find a solution to any issues you encounter while using the Behringer UCA222.
In the final section, we’ll wrap up our exploration of the Behringer UCA222 with some closing thoughts.
Final Thoughts
The Behringer UCA222 USB audio interface is a powerful and versatile tool for anyone looking to improve their audio recording and playback capabilities. With its compact size, affordable price point, and exceptional sound quality, the UCA222 stands out as a popular choice among musicians, podcasters, and content creators.
Connecting the UCA222 to your computer is a breeze, and the plug-and-play functionality means you can start using it right away. Its compatibility with both Windows and Mac operating systems ensures flexibility and ease of use for a wide range of setups.
The UCA222’s high-resolution audio conversion capabilities, combined with its low-latency direct monitoring feature, make it a reliable and professional-grade audio interface. Whether you’re recording vocals, instruments, podcast episodes, or any other audio content, the UCA222 captures the nuances and details with pristine clarity.
Monitoring and playback through the UCA222 is a seamless experience, allowing you to hear your recordings accurately and with exceptional audio quality. The dedicated headphone output and versatile connectivity options ensure that you can easily monitor your recordings or enjoy playback through headphones or external speakers.
While troubleshooting issues may occasionally arise, the UCA222 has proven to be a reliable and user-friendly device. By following the troubleshooting tips mentioned, you can quickly resolve common problems and get back to recording and enjoying your audio creations.
All in all, the Behringer UCA222 USB audio interface offers exceptional performance and features at an affordable price. Whether you’re a seasoned professional or just starting your audio journey, the UCA222 is a valuable tool that will enhance your recordings and bring your sound to the next level.
So, don’t hesitate to incorporate the Behringer UCA222 into your setup and unlock the true potential of your audio recordings. Get creative, experiment, and enjoy the benefits of this powerful audio interface.