(Many of the links in this article redirect to a specific reviewed product. Your purchase of these products through affiliate links helps to generate commission for AudioLover.com, at no extra cost. Learn more)
How To Use Audio Interface With Maschine
Introduction
Welcome to the world of audio production and music creation! In this article, we will explore the exciting realm of using an audio interface with Maschine, a powerful music production software and hardware combination developed by Native Instruments.
Before we dive into the details, let’s establish a clear understanding of what an audio interface is and why it is essential for your music production setup. An audio interface is an external device that connects to your computer and serves as the bridge between your audio sources (such as microphones, instruments, and synthesizers) and your digital audio workstation (DAW).
Maschine, on the other hand, is a renowned music production software and hardware solution that offers a vast array of capabilities for beat-making, sampling, sequencing, and more. When used in conjunction with an audio interface, you can harness the full potential of Maschine and achieve professional-level audio quality.
Throughout this article, we will guide you through the process of setting up your audio interface with Maschine, connecting it to your computer, configuring the audio settings, routing audio and MIDI, and even using the audio interface for recording. We will also provide troubleshooting tips and address common issues to ensure a seamless and successful experience.
Whether you’re a seasoned music producer or a beginner taking your first steps into the world of audio production, this guide will equip you with the knowledge and skills to harness the power of an audio interface with Maschine effectively.
So, let’s roll up our sleeves and embark on this exciting journey of using an audio interface with Maschine to unlock your creative potential and bring your musical ideas to life!
What is an Audio Interface?
An audio interface is a crucial piece of equipment for anyone involved in music production, recording, or audio engineering. It serves as the intermediary between your audio sources, such as microphones, instruments, and synthesizers, and your computer-based digital audio workstation (DAW).
Think of the audio interface as a translator that converts analog audio signals into digital data that your computer can process. It also performs the reverse function, converting digital audio signals from your computer back into analog signals that can be played back through speakers or headphones.
Audio interfaces come in various shapes and sizes, offering different input and output options to suit different needs. They typically connect to your computer via USB, Thunderbolt, or PCIe, and provide a range of inputs for connecting microphones, instruments, and other audio devices, as well as outputs for monitoring and playback.
One of the essential features of an audio interface is its ability to provide high-quality preamps. Preamps amplify the weak signals from microphones and instruments to a suitable level for recording and processing. Good preamps ensure clean and transparent audio recordings without noise or distortion.
Additionally, audio interfaces often include features like phantom power, which is necessary for powering condenser microphones, and direct monitoring, allowing you to monitor audio signals with near-zero latency while recording.
Whether you’re a home studio enthusiast, a professional music producer, or a live sound engineer, investing in a reliable audio interface is paramount. It not only enhances the audio quality but also expands your possibilities for connecting and controlling various audio sources in your production workflow.
In the context of using Maschine, an audio interface becomes indispensable, allowing you to capture and manipulate audio sources with precision, while ensuring optimal recording and playback performance.
Now that we have a clear understanding of what an audio interface is and its importance in the music production process let’s explore how to integrate it seamlessly with Maschine.
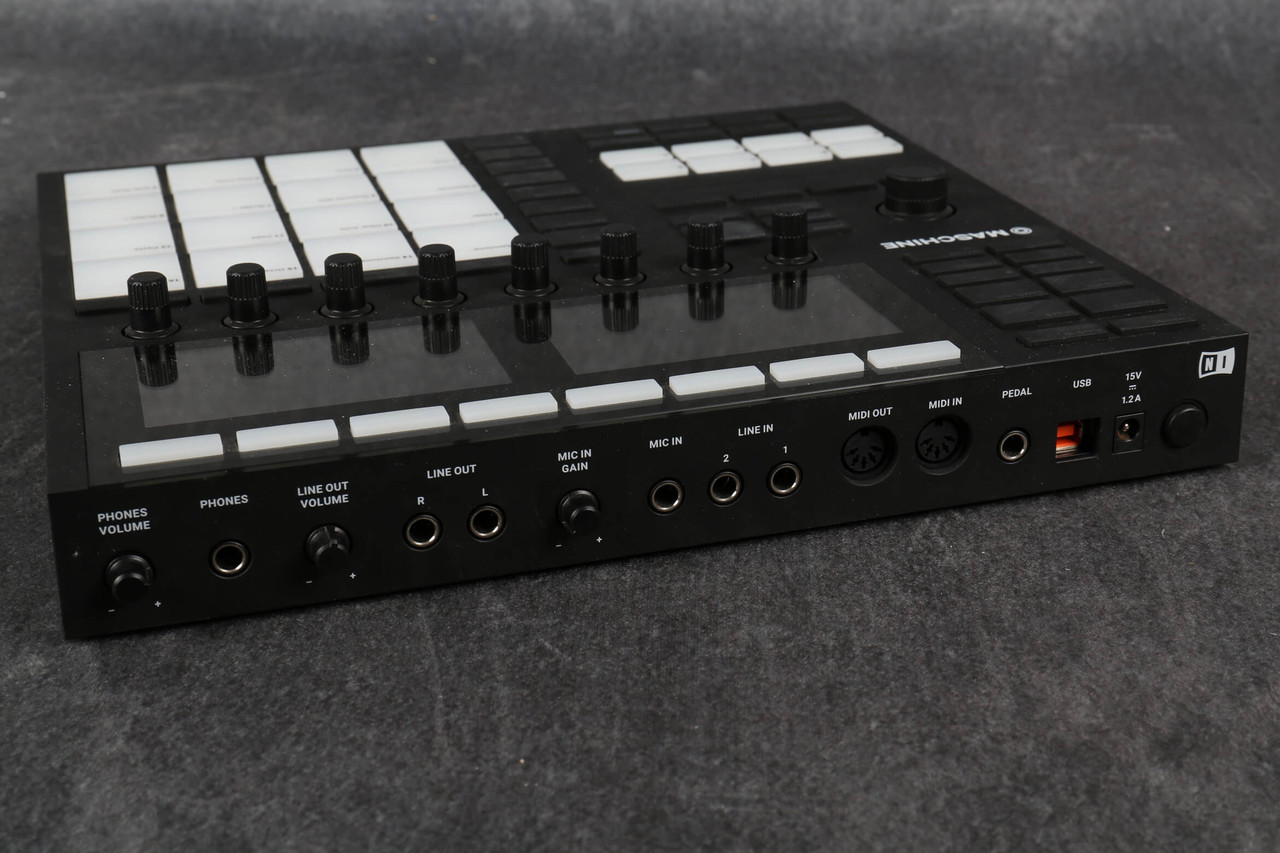
Overview of Maschine
Maschine, developed by Native Instruments, is a powerful music production software and hardware combination that has become a staple in the music industry. It provides a comprehensive platform for creating beats, arranging songs, sampling, sequencing, and more, all within an intuitive and user-friendly interface.
At the heart of the Maschine ecosystem is the hardware controller, which offers a tactile and immersive experience for music production. The controller features drum pads, knobs, buttons, and a large color display, allowing you to interact with the software and manipulate sounds in real-time.
With Maschine, you have access to an extensive library of sounds, including high-quality drum kits, instruments, and sampled content. These sounds can be easily integrated into your projects, enabling you to experiment with different genres and styles.
The software aspect of Maschine provides a powerful and versatile digital audio workstation (DAW) environment. It offers advanced features such as step sequencing, powerful drum and instrument plugins, effects processors, and a robust mixing and mastering toolkit.
One of the standout features of Maschine is its seamless integration with third-party plugins and virtual instruments. This allows you to expand your sonic palette by incorporating your favorite plugins and instruments into your Maschine projects.
Maschine also offers a range of performance-oriented features, making it an ideal tool for live performances and onstage improvisation. The ability to create and arrange patterns on the fly, perform live effects, and control external hardware make Maschine a versatile companion for both studio work and live gigs.
Whether you’re a producer, beatmaker, or live performer, Maschine provides a robust and flexible platform for unleashing your creativity. And when paired with an audio interface, the combination becomes even more powerful, allowing you to achieve pristine audio quality and incorporate external audio sources seamlessly into your projects.
Now that we have explored the basics of Maschine let’s move on to setting up your audio interface to work seamlessly with this powerful music production tool.
Setting Up Your Audio Interface with Maschine
Setting up your audio interface with Maschine is a straightforward process that will greatly enhance your music production experience. Follow these steps to get started:
- Ensure that you have the latest drivers and software for both your audio interface and Maschine installed on your computer. These can usually be downloaded from the manufacturer’s website.
- Connect your audio interface to your computer using the appropriate cable (USB, Thunderbolt, etc.).
- Power on your audio interface and Maschine controller (if applicable).
- Launch Maschine on your computer.
- In the Maschine software, navigate to the preferences or settings menu. This can usually be found under the “File” or “Options” dropdown.
- Select your audio interface as the audio input and output device in the preferences or settings menu. Make sure to set the sample rate and buffer size according to your needs. Consult the documentation of your audio interface for the recommended settings.
- Verify that the drivers for your audio interface are correctly selected and functioning in the Maschine preferences or settings menu.
- If your audio interface has multiple inputs and outputs, configure the routing in Maschine to designate which inputs and outputs you want to use.
- Test the audio playback and recording by loading a sound or sample in Maschine and playing it back or recording a short test pattern.
Once you have completed these steps, your audio interface should be properly set up and integrated with Maschine. You can now start creating music with confidence, knowing that you have a reliable and high-quality audio interface handling your audio signals.
It’s worth mentioning that the specific setup steps may vary depending on your audio interface model, operating system, and version of Maschine. Therefore, it’s always a good idea to consult the user manuals and documentation provided by the manufacturers for detailed instructions and troubleshooting tips.
Now that we have successfully set up your audio interface let’s delve into the process of connecting it to your computer.
Connecting Your Audio Interface to the Computer
Connecting your audio interface to your computer is a crucial step in ensuring a seamless and reliable audio production workflow. Follow these steps to connect your audio interface properly:
- Identify the appropriate cable or connection method for your audio interface. Most modern audio interfaces use USB or Thunderbolt connections.
- Ensure that your audio interface is powered off before making any connections.
- Locate the appropriate ports on your audio interface and computer. For USB connections, this is usually a USB Type-A or Type-C port. For Thunderbolt connections, it may be a Thunderbolt 2 or Thunderbolt 3 port.
- Connect one end of the cable to the corresponding port on your computer.
- Connect the other end of the cable to the port on your audio interface.
- Power on your audio interface. Some interfaces may require an external power source, so make sure it is properly connected.
- Ensure that your computer recognizes the audio interface by checking the system settings or device manager. The audio interface should be listed as an available audio device.
- Test the connection by playing back audio through your audio interface. You can use any audio playback software or your digital audio workstation (DAW) for this purpose.
Once you have completed these steps, your audio interface should be successfully connected to your computer. It’s important to note that different audio interface models may have additional setup requirements, such as installing specific drivers or software. Refer to the documentation provided by the manufacturer for detailed instructions.
Remember to use high-quality cables and ensure that they are properly connected to avoid any signal loss or interference. Also, consider using a powered USB hub if you need to connect multiple USB devices or if your audio interface requires additional power.
Now that your audio interface is connected to your computer, we can move on to configuring the audio settings in Maschine.
Configuring Audio Settings in Maschine
Configuring the audio settings in Maschine is crucial to ensure optimal performance and audio quality. Follow these steps to configure the audio settings:
- Launch Maschine on your computer.
- Click on the “Preferences” or “Settings” menu within the Maschine software. This can usually be found under the “File” or “Options” dropdown.
- In the preferences or settings menu, navigate to the audio settings section.
- Select your audio interface from the list of available audio devices. Ensure that the proper inputs and outputs are selected, corresponding to the inputs and outputs on your audio interface.
- Set the sample rate to match the sample rate of your audio interface. Most audio interfaces support sample rates of 44.1 kHz or 48 kHz. Consult the documentation of your interface for the recommended sample rate.
- Adjust the buffer size according to your needs. A smaller buffer size will reduce latency but may require more processing power from your computer. Conversely, a larger buffer size will increase latency but may provide better stability.
- Depending on your audio interface, you may also have options for setting the audio driver type (ASIO, Core Audio, etc.). Choose the appropriate driver that is provided by your audio interface manufacturer for the best performance.
- Once you have made the necessary adjustments, click “Apply” or “OK” to save the changes.
- Test the audio settings by loading a sound or sample in Maschine and playing it back. Ensure that you are hearing the sound through your audio interface and that the audio quality is satisfactory.
It’s worth noting that the specific options and settings may vary depending on the version of Maschine and your audio interface. Consult the Maschine and audio interface documentation for more detailed instructions specific to your setup.
Getting the audio settings right is crucial for a smooth and reliable music production experience. Take the time to experiment with different buffer sizes and sample rates to find the optimal settings for your workflow and hardware capabilities.
With the audio settings properly configured, we can now move on to routing audio and MIDI in Maschine.
Routing Audio and MIDI in Maschine
Understanding how to route audio and MIDI signals in Maschine is essential for creating complex music arrangements and integrating external hardware into your setup. Follow these steps to route audio and MIDI in Maschine:
- Launch Maschine on your computer and open a project or create a new one.
- In the Maschine software, locate the “Group” or “Sound” that you want to route.
- Click on the sound or group to select it.
- In the sound or group settings view, you will find options for routing audio and MIDI. These options may vary depending on the version of Maschine you are using.
- To route audio, select the desired output destination from the available options. This could be a specific output on your audio interface or a bus within Maschine.
- To route MIDI, click on the MIDI tab or section in the sound or group settings. From here, you can select the input source for MIDI control. This could be the Maschine controller itself, an external MIDI controller connected to your computer, or a MIDI input from your audio interface.
- If you are using external hardware synthesizers or instruments, you can also configure MIDI output channels to send MIDI data to specific devices or channels.
- Repeat these steps for each sound or group that you want to route in your project.
- Once you have finished routing audio and MIDI, you can start creating complex musical arrangements, triggering sounds from your external hardware, or controlling virtual instruments and plugins.
Routing audio and MIDI in Maschine opens up a world of possibilities for capturing and manipulating sound sources. You can seamlessly integrate external instruments and hardware, record audio from external sources, and achieve intricate control over your musical elements.
It’s important to experiment and explore different routing configurations to unlock the full potential of Maschine and your audio interface. Refer to the Maschine documentation for more detailed instructions on advanced routing techniques and options.
Now that you have a solid understanding of routing audio and MIDI in Maschine, let’s move on to utilizing the audio interface for recording.
Using the Audio Interface for Recording
One of the key benefits of using an audio interface with Maschine is the ability to record audio directly into your projects. Whether it’s capturing vocals, guitars, or any other external sound source, the audio interface serves as the gateway to high-quality recordings. Here’s how you can use your audio interface for recording in Maschine:
- Connect your microphone or instrument to the appropriate input on your audio interface.
- Launch Maschine and open a project or create a new one.
- In the Maschine software, select an empty sound slot or group where you want to record the audio.
- In the sound or group settings, make sure that the audio input is set to the corresponding input on your audio interface.
- Arm the track for recording by clicking on the record button, typically represented by a red circle, in the sound or group settings.
- Set the recording level by adjusting the gain knob or input level on your audio interface. Start with a conservative level and gradually increase it to avoid clipping or distortion.
- Press the play button in Maschine to start playback.
- When ready, press the record button in Maschine to start recording.
- Perform or play your desired audio into the microphone or instrument connected to your audio interface.
- Once you’re finished, press the stop button to end the recording.
- Using the editing features in Maschine, you can trim, manipulate, and process the recorded audio to fit your desired sound and arrangement.
Recording audio through the audio interface in Maschine allows you to capture crisp, professional-quality recordings directly into your projects. Whether you’re working on vocals, instruments, or field recordings, the audio interface ensures accurate and pristine sound reproduction.
Remember to experiment with different microphone positions, gain settings, and processing techniques to achieve the desired sound. Additionally, consult the documentation provided with your audio interface for detailed instructions on optimizing recording settings and troubleshooting any potential issues.
Now that you know how to use the audio interface for recording in Maschine, let’s move on to troubleshooting tips and common issues you may encounter.
Troubleshooting Tips and Common Issues
While using an audio interface with Maschine can greatly enhance your music production experience, it’s not uncommon to encounter some issues along the way. Here are some troubleshooting tips for common audio interface-related problems:
- No Sound: If you’re not getting any sound from your audio interface, ensure that the audio output is correctly routed in Maschine. Check the audio interface connections and make sure that the volume levels are turned up.
- Driver Issues: Occasionally, audio interface drivers may need to be updated or reinstalled. Visit the manufacturer’s website and download the latest drivers that are compatible with your operating system.
- Latency: Latency refers to the delay between a sound being produced and when it is heard through your audio interface. If you’re experiencing high latency, increase the buffer size in the audio settings of Maschine. However, keep in mind that increasing the buffer size could lead to higher latency, so find a balance that works for your setup.
- No Signal: If your audio interface is not receiving any input signal from your microphone or instrument, check the cable connections, ensure that the input is properly set in Maschine, and verify that the gain settings on your audio interface are adjusted correctly.
- Crackling or Popping Sounds: If you’re experiencing crackling or popping sounds during playback or recording, try adjusting the buffer size in the audio settings. Additionally, ensure that your computer’s processor is not overloaded by closing unnecessary background tasks or increasing the buffer size.
- Audio Artifacts: If you notice unwanted audio artifacts or distortion in your recordings, check the gain settings on your audio interface and make sure that the input levels are not too high. Adjust the gain to a suitable level, and consider using a pop filter or a different microphone placement to improve the sound quality.
If you encounter persistent issues with your audio interface, it’s advisable to consult the manufacturer’s documentation or reach out to their support for further assistance. They will often have troubleshooting guides or forums where you can find solutions specific to your audio interface model.
Remember to regularly update your audio interface drivers and keep your Maschine software up to date to ensure compatibility and access to the latest features and bug fixes.
By following these troubleshooting tips, you’ll be better equipped to address common audio interface-related issues and ensure a smoother and more enjoyable music production experience with Maschine.
Now that we’ve covered troubleshooting tips, let’s conclude our discussion on using an audio interface with Maschine.
Conclusion
Using an audio interface with Maschine opens up a world of possibilities for music production, recording, and creative expression. By connecting your audio interface to Maschine, you can achieve professional-level audio quality and seamless integration with external audio sources.
In this article, we covered the basics of what an audio interface is and its importance in the music production process. We also provided an overview of Maschine as a powerful music production software and hardware solution.
We then walked through the steps of setting up your audio interface with Maschine, connecting it to your computer, and configuring the audio settings. We explored how to route audio and MIDI in Maschine and discussed the benefits of using the audio interface for recording.
Furthermore, we shared troubleshooting tips for common audio interface-related issues, offering guidance in resolving problems you may encounter along the way.
By following the instructions and tips outlined in this article, you can make the most out of your audio interface and Maschine, ensuring a seamless and productive music production experience.
Remember, integrating an audio interface with Maschine not only improves the audio quality of your projects but also expands your creative possibilities. With the power to capture high-quality recordings, control external hardware, and manipulate sound sources with precision, you can bring your musical ideas to life like never before.
So, dive into the world of audio interfaces and Maschine, experiment, and let your creativity take flight. The combination of these powerful tools will surely elevate your music production and help you achieve your artistic vision.