Home>Production & Technology>Audio Interface>How To Use Audio Interface With Mixcraft

Audio Interface
How To Use Audio Interface With Mixcraft
Modified: March 11, 2024
Learn how to effortlessly use an audio interface with Mixcraft for seamless recording and editing. Enhance your sound quality and take your music production to the next level with this comprehensive guide.
(Many of the links in this article redirect to a specific reviewed product. Your purchase of these products through affiliate links helps to generate commission for AudioLover.com, at no extra cost. Learn more)
Table of Contents
- Introduction
- What is an audio interface?
- Choosing the right audio interface for Mixcraft
- Connecting your audio interface to your computer
- Setting up the audio interface in Mixcraft
- Configuring audio settings in Mixcraft
- Recording audio with an audio interface in Mixcraft
- Troubleshooting common audio interface issues in Mixcraft
- Conclusion
Introduction
Are you passionate about music production? Do you use Mixcraft as your digital audio workstation (DAW) of choice? If so, then using an audio interface can greatly enhance your recording and playback capabilities.
An audio interface serves as the bridge between your computer and the outside world, allowing you to connect microphones, instruments, and other audio sources to capture high-quality sound. It acts as a crucial component in achieving professional-grade audio recordings.
In this article, we will explore the world of audio interfaces and how to use them effectively with Mixcraft. Whether you’re a seasoned music producer or just starting out, understanding the role of an audio interface and how to set it up is essential for achieving optimal audio quality in your Mixcraft projects.
We will delve into the process of choosing the right audio interface for Mixcraft, connecting it to your computer, and configuring the audio settings within the software. We will also cover the basics of recording audio using an audio interface and troubleshoot common issues that may arise during the setup process.
So, if you’re ready to take your music production to the next level with Mixcraft and an audio interface, let’s dive in and discover how to unlock the full potential of your recordings.
What is an audio interface?
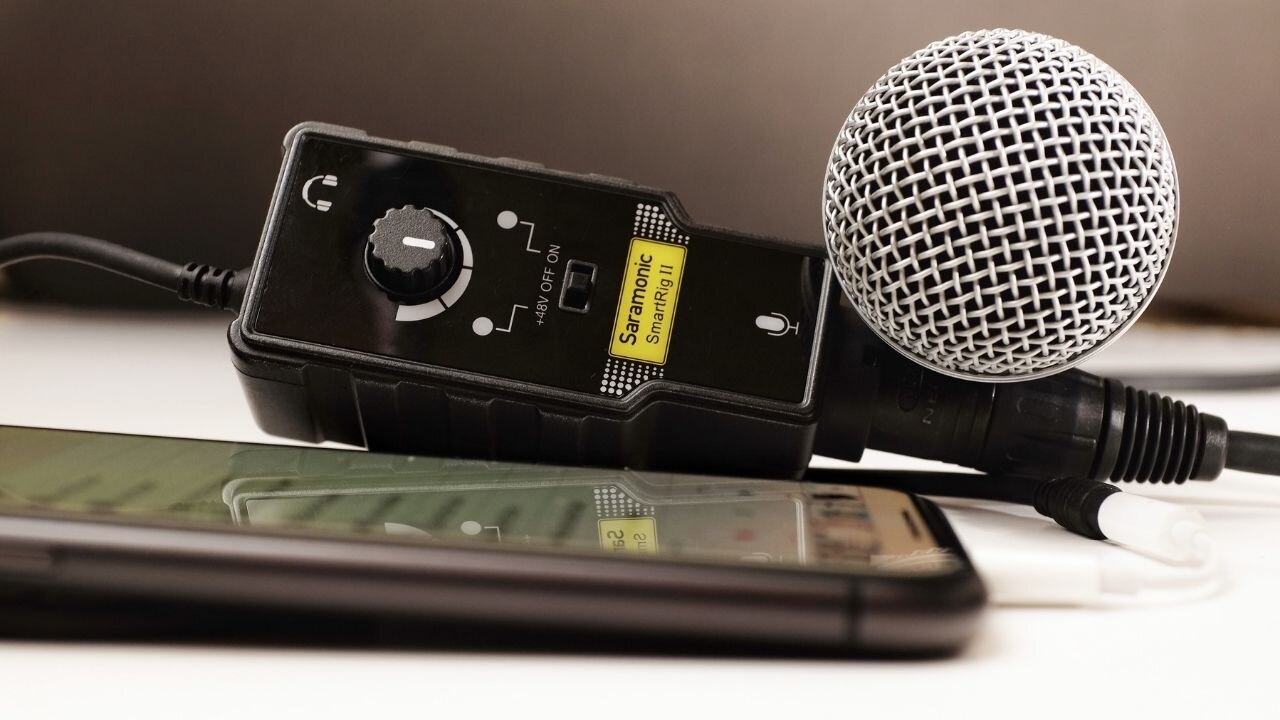
An audio interface is a device that connects to your computer and acts as the intermediary between your audio sources (such as microphones, instruments, and synthesizers) and your digital audio workstation (DAW) software, such as Mixcraft.
Traditionally, computers have built-in sound cards that can handle basic audio tasks. However, these sound cards often have limitations in terms of audio quality and input/output options. This is where an audio interface comes in.
Audio interfaces are designed to provide higher-quality audio conversion, more inputs and outputs, and greater flexibility for capturing and processing audio. They typically connect to your computer via USB, Thunderbolt, or PCIe, depending on the model.
One of the primary benefits of using an audio interface is its ability to capture audio with low latency. Latency refers to the delay between when you play or sing into a microphone and when you hear the sound through your speakers or headphones. Audio interfaces can offer significantly lower latency compared to built-in sound cards, resulting in a more responsive and enjoyable recording experience.
Additionally, audio interfaces often include features such as phantom power, which is necessary for powering condenser microphones, as well as preamps and analog-to-digital converters (ADCs) that ensure clean and accurate audio signal transfer.
Audio interfaces come in various sizes and configurations to suit different needs. Some are compact and portable, making them ideal for musicians on the go, while others offer more inputs and outputs for multi-track recording in a studio setting. It’s important to choose an audio interface that meets your specific recording requirements.
Overall, an audio interface is a crucial tool for any musician or producer looking to elevate the audio quality of their recordings. By using an audio interface with Mixcraft, you can capture sound with greater fidelity, reduce latency, and unlock a world of creative possibilities for your music production endeavors.
Choosing the right audio interface for Mixcraft
When it comes to choosing the right audio interface for Mixcraft, there are a few key factors to consider. Each musician or producer will have unique requirements, so it’s essential to evaluate your specific needs before making a decision. Here are some important factors to keep in mind:
- Audio quality: Look for an audio interface that offers high-quality audio conversion. A higher bit depth and sample rate will result in cleaner and more accurate recordings.
- Input and output options: Consider the number and type of inputs and outputs you require. If you primarily record vocals or acoustic instruments, a few XLR inputs may be sufficient. However, if you plan on recording a full band or multiple sources simultaneously, you’ll need an interface with more inputs and outputs.
- Connectivity: Determine what type of connection your computer supports (USB, Thunderbolt, or PCIe) and choose an audio interface that is compatible. USB interfaces are the most common and generally offer a good balance of performance and affordability.
- Portability: If you need to record on the go or move your setup frequently, consider a portable and compact audio interface. These interfaces often come with fewer inputs and outputs but provide convenience and mobility.
- Preamps: Preamps amplify the weak microphone signals before converting them to a digital format. Look for an audio interface with high-quality preamps that deliver clean and transparent amplification.
- Software compatibility: Ensure that the audio interface you choose is compatible with Mixcraft. Most interfaces are compatible with popular DAWs like Mixcraft, but it’s always important to check the specifications and system requirements.
It’s also worth considering your budget when selecting an audio interface. While high-end interfaces can provide top-notch features and audio quality, they may be a bit costly for beginners or those on a tight budget. There are, however, many affordable and reliable options available that offer excellent performance for the price.
Researching different audio interfaces, reading customer reviews, and seeking recommendations from fellow musicians or producers can help you make an informed decision. Ultimately, choosing the right audio interface for Mixcraft will depend on the specific needs of your recording setup and the goals you want to accomplish.
Once you’ve decided on the audio interface that best suits your needs, you can start enjoying the improved audio quality, flexibility, and creative possibilities it brings to your Mixcraft projects.
Connecting your audio interface to your computer
Once you have chosen the right audio interface for your Mixcraft setup, it’s time to connect it to your computer. The process may vary slightly depending on the interface and computer you are using, but the following steps will give you a general overview of how to connect your audio interface:
- Check the interface’s connections: Take a look at the back panel of your audio interface to identify the different input and output options available. Most interfaces will have input connections for microphones and instruments (such as XLR and 1/4″ TRS jacks) and output connections for speakers or headphones (such as RCA or 1/4″ jacks).
- Connect your interface to your computer: Use the appropriate cable to connect your audio interface to your computer. If your interface uses USB, connect one end of the USB cable to the interface and the other end to an available USB port on your computer. If your interface uses Thunderbolt or PCIe, follow the instructions provided by the manufacturer for proper installation.
- Power on your interface: Some audio interfaces receive power directly from the computer via USB, while others may require an external power supply or have their power switch. Make sure to follow the instructions specific to your interface to properly power it on.
- Install necessary drivers: In some cases, you may need to install drivers or software provided by the manufacturer of your audio interface. Check the manufacturer’s website for the latest drivers and follow the installation instructions.
- Set the interface as your audio device: In your computer’s audio settings, select the audio interface as the default audio device. This ensures that your computer recognizes the interface for audio input and output.
- Check the connections and levels: Double-check that all the cables are securely connected, and adjust the input and output levels on your audio interface as needed. You can refer to your interface’s user manual for detailed instructions on setting appropriate levels.
Once your audio interface is connected properly to your computer, it should be recognized by Mixcraft. You can now start taking advantage of the improved audio quality and flexibility offered by the interface.
Remember to consult the user manual or online documentation provided by the manufacturer for specific instructions and troubleshooting tips related to your audio interface model. Properly connecting your audio interface is a crucial step in ensuring optimal audio performance and a seamless recording experience in Mixcraft.
Setting up the audio interface in Mixcraft
Once you have connected your audio interface to your computer, the next step is to set it up within Mixcraft. Configuring the audio interface settings in Mixcraft allows you to utilize its features and ensures that your recordings and playback are routed correctly. Here’s how you can set up your audio interface in Mixcraft:
- Open Mixcraft: Launch Mixcraft on your computer. If you haven’t installed Mixcraft yet, make sure to download and install the latest version from the official Acoustica website.
- Go to Preferences: Click on “Edit” in the menu bar and select “Preferences” from the dropdown menu. Alternatively, you can press the “Ctrl” and “P” keys simultaneously to access the Preferences window.
- Select Audio Device: In the Preferences window, click on the “Sound” tab. Under the “Audio Device” section, choose your audio interface from the dropdown menu. Make sure to select the correct audio device name that corresponds to your interface.
- Set Sample Rate and Buffer Size: Adjust the sample rate and buffer size settings according to your preferences and requirements. A higher sample rate will result in better audio quality, while a larger buffer size can help reduce audio dropouts and latency.
- Check Inputs and Outputs: In the “Inputs” and “Outputs” sections, verify that the correct inputs and outputs from your audio interface are selected. If your interface has multiple inputs or outputs, ensure that the appropriate ones are enabled for recording and playback.
- Test Audio: Once you have selected the audio interface and configured the settings, it’s a good idea to test the audio to ensure everything is working properly. Connect a microphone or instrument to your interface and make sure that you can see the input levels in Mixcraft when you speak or play.
After completing the setup process, you are now ready to start recording and using your audio interface in Mixcraft. Whether you’re capturing vocals, recording instruments, or mixing and mastering your tracks, the proper setup of your audio interface ensures that you can achieve the best possible sound quality and performance in your Mixcraft projects.
Keep in mind that the specific steps and options in Mixcraft may vary depending on the version you are using. Consult the Mixcraft user manual or online documentation for further assistance and guidance specific to your version of the software.
Configuring audio settings in Mixcraft
Configuring the audio settings in Mixcraft is an important step to ensure optimal performance and audio quality in your projects. By adjusting these settings, you can customize your recording and playback experience according to your specific needs. Here are the key audio settings you can configure in Mixcraft:
- Audio Device: As mentioned earlier, make sure you have selected the correct audio device (your audio interface) in the Preferences window.
- Sample Rate: The sample rate determines the number of samples captured per second during recording. Higher sample rates (such as 44.1 kHz or 48 kHz) result in better audio quality but may require more processing power from your computer. Choose a sample rate that fits your needs and the capabilities of your audio interface.
- Buffer Size: The buffer size determines the amount of audio data processed at a time. Smaller buffer sizes can reduce latency but may require more processing power and can lead to audio dropouts if your computer struggles to keep up. Experiment with different buffer sizes until you find the balance between low latency and stable performance.
- Audio Latency: Latency refers to the delay between when you play or sing into a microphone and when you hear the sound through your speakers or headphones. Mixcraft provides an audio latency slider that you can adjust to reduce latency. Find the lowest possible setting that doesn’t introduce audio glitches or distortions.
- Input and Output Levels: It’s essential to set the input and output levels properly to avoid clipping or distorted recordings. In Mixcraft, you can monitor and adjust the input and output levels using the level meters present in the mixer or track view. Keep an eye on these meters and adjust the levels accordingly to ensure a clean and balanced sound.
- MIDI Settings: If you are using MIDI devices in your production, you can configure the MIDI settings in Mixcraft to connect and control your MIDI instruments and controllers. These settings allow you to map MIDI inputs and outputs and customize the behavior of your MIDI devices within Mixcraft.
- Audio Routing: Mixcraft offers flexible audio routing options, allowing you to route audio from one track to another, apply effects, and create complex routing configurations. Understanding and utilizing the audio routing capabilities in Mixcraft can greatly enhance your workflow and creativity. Take the time to explore the various routing options available and experiment with different setups.
Remember, each project and recording scenario may require different audio settings. Take the time to fine-tune these settings to achieve the best results for your specific needs and equipment. Regularly check and adjust the audio settings as necessary to ensure optimal performance and audio quality in your Mixcraft projects.
By configuring these audio settings in Mixcraft, you can harness the full potential of your audio interface and create professional-quality recordings and mixes.
Recording audio with an audio interface in Mixcraft
Recording audio with an audio interface in Mixcraft is a straightforward process that allows you to capture high-quality recordings of vocals, instruments, or any other sound source. Follow these steps to start recording audio in Mixcraft:
- Create a new audio track: Open Mixcraft and create a new audio track in your project. You can do this by clicking on the “+” icon in the track list or selecting “Track” and then “New Track” from the menu.
- Set the input source: In the track’s properties, specify the input source for your audio interface. This could be the microphone input or a specific line input depending on your setup. You can choose the input source from the dropdown menu in the track properties window.
- Set the recording settings: Ensure that the recording settings are configured correctly. Set the desired sample rate, bit depth, and recording mode (such as stereo or mono) in the track properties. It’s also a good idea to enable the monitoring option if you want to hear yourself while recording.
- Arm the track for recording: Arm the track for recording by clicking on the “Arm for Recording” button in the track controls. This will activate the track and prepare it for recording.
- Monitor the input levels: Before recording, monitor the input levels to ensure that your audio isn’t clipping or clipping. Watch the level meter in the track’s mixer strip and adjust the input gain on your audio interface if necessary. Aim for a healthy signal level without any distortion.
- Start recording: Once everything is set up, simply press the record button (usually a red circle) in Mixcraft’s transport controls to start recording. Perform your vocals or play your instrument while Mixcraft captures the audio data onto the track.
- Stop recording and review: When you’re finished recording, press the stop button in the transport controls. You can then review and play back your recorded audio to ensure it has been captured accurately.
Repeat these steps for each audio track you want to record in your Mixcraft project. You can record multiple tracks simultaneously if your audio interface has multiple inputs available.
Remember to save your project regularly to avoid any potential data loss. Also, consider creating backups of your audio files to prevent loss or corruption of your recorded material.
By following these simple steps, you can take full advantage of your audio interface in Mixcraft and record professional-quality audio for your music productions.
Troubleshooting common audio interface issues in Mixcraft
While working with an audio interface in Mixcraft, you may encounter some common issues that can disrupt your recording or playback experience. Let’s explore a few troubleshooting techniques to help you address these issues:
- No sound or playback: If you’re not hearing any sound or playback from Mixcraft, ensure that your audio interface is properly connected and selected as the audio device in Mixcraft’s preferences. Check the volume levels on your interface and speakers/headphones, and make sure they are turned up and not muted.
- No input signal: If you’re not getting any input signal when recording, verify that your audio interface’s input is properly connected to your microphone or instrument. Check that the input level and gain on the interface are appropriately set, and make sure that the track in Mixcraft is armed for recording.
- Audio dropouts or glitches: Audio dropouts or glitches can occur if your computer is struggling to process the audio data. To address this issue, increase the buffer size in Mixcraft’s audio settings to reduce the strain on your computer’s CPU. You can also try closing any unnecessary applications or processes running in the background that may be consuming system resources.
- Latency issues: If you’re experiencing noticeable delay (latency) between playing or singing and hearing the sound, try adjusting the buffer size to reduce latency. Experiment with smaller buffer sizes, but keep in mind that extremely low buffer sizes can cause audio dropouts or glitches. Consider optimizing your computer’s performance by closing unnecessary applications or using an audio driver specifically designed for low-latency performance.
- Driver issues: Ensure that you have the latest drivers installed for your audio interface. Check the manufacturer’s website for any available updates or new driver releases. Outdated or incompatible drivers can cause various issues with your audio interface, so it’s essential to keep them up to date.
- USB connectivity problems: If you’re using a USB audio interface and experiencing connectivity problems, try connecting the interface to a different USB port on your computer. Sometimes, certain USB ports may have compatibility issues or insufficient power. Additionally, make sure that you’re using a high-quality USB cable to connect the interface.
- Unwanted noise or interference: If you’re hearing unwanted noise or interference in your recordings, check for any loose or faulty cables. Ensure that your audio interface is away from any potential sources of electrical interference, such as power supplies or mobile devices. Using balanced cables and keeping signal cables away from power cables can also help reduce noise and interference.
If you’ve followed these troubleshooting techniques and are still experiencing issues with your audio interface in Mixcraft, consult the user manual for your specific audio interface or reach out to the manufacturer’s support team for further assistance.
By addressing these common audio interface issues, you can ensure a smooth and uninterrupted recording and playback experience in Mixcraft.
Conclusion
Using an audio interface with Mixcraft can significantly enhance your music production workflow and improve the quality of your recordings. By understanding the role of an audio interface, choosing the right one for your needs, and properly setting it up in Mixcraft, you can unleash the full potential of your music production capabilities.
Throughout this article, we’ve explored the fundamentals of audio interfaces, including their purpose and benefits. We’ve discussed the importance of selecting the right audio interface based on factors such as audio quality, input/output options, connectivity, and budget. We’ve also covered the process of connecting your audio interface to your computer, configuring the audio settings in Mixcraft, and troubleshooting common issues that may arise.
By following the recommended steps and troubleshooting techniques, you can overcome common challenges such as sound or playback issues, latency, audio dropouts, and unwanted noise. These troubleshooting techniques will help you maintain a smooth recording and playback experience with your audio interface in Mixcraft.
Ultimately, using an audio interface with Mixcraft opens up a world of possibilities for music producers, allowing for high-quality recordings, flexible input/output options, and low-latency performance. Whether you’re a beginner or an experienced musician, investing in a reliable audio interface and understanding how to utilize it within Mixcraft will greatly enhance your music production process.
Now, armed with the knowledge and guidelines provided in this article, it’s time to connect your audio interface, explore its features, and start creating music with the enhanced audio quality and flexibility that it brings to your Mixcraft projects.
Remember to always refer to the documentation and support resources provided by the manufacturer of your specific audio interface for detailed instructions and further assistance. Happy music making!

