Home>Production & Technology>Background Music>How To Add Background Music Gopro Studio
Background Music
How To Add Background Music Gopro Studio
Published: October 29, 2023
Learn how to add background music to your videos in GoPro Studio with this easy step-by-step guide. Enhance your videos with the perfect soundtrack!
(Many of the links in this article redirect to a specific reviewed product. Your purchase of these products through affiliate links helps to generate commission for AudioLover.com, at no extra cost. Learn more)
Table of Contents
Introduction
Welcome to our guide on how to add background music to your GoPro Studio videos! GoPro Studio is a powerful video editing software that allows you to create stunning videos with your GoPro footage. One of the key elements in making your videos more engaging and impactful is adding background music.
Background music not only enhances the overall viewing experience but also helps set the mood and convey emotions. With the right choice of music, you can take your videos to the next level, making them more captivating and memorable.
In this article, we will walk you through the step-by-step process of adding background music to your GoPro Studio videos. Whether you want to highlight an adrenaline-fueled adventure or create a heartwarming travel montage, we’ve got you covered.
Before we dive into the details, it’s important to note that GoPro Studio is no longer officially supported by GoPro. However, it is still widely used by many GoPro enthusiasts due to its user-friendly interface and powerful editing capabilities.
Now, let’s get started and learn how to add background music to your GoPro Studio videos!
Step 1: Downloading and Installing GoPro Studio
The first step to adding background music to your GoPro Studio videos is to download and install the software. Although GoPro Studio is no longer actively supported, you can still find it available for download on various websites.
To get started, follow these steps:
- Visit the official GoPro website or trusted software download sites.
- Search for “GoPro Studio” in the search bar.
- Select the appropriate version for your operating system (Windows or Mac).
- Click on the download link and save the installer file to your computer.
- Once the download is complete, locate the installer file and double-click on it to initiate the installation process.
- Follow the on-screen instructions to complete the installation.
After the installation is finished, you should have GoPro Studio ready to use on your computer. It’s important to note that GoPro Studio is compatible with both Windows and Mac operating systems.
Once you have successfully installed GoPro Studio, you can proceed to the next step of importing your footage.
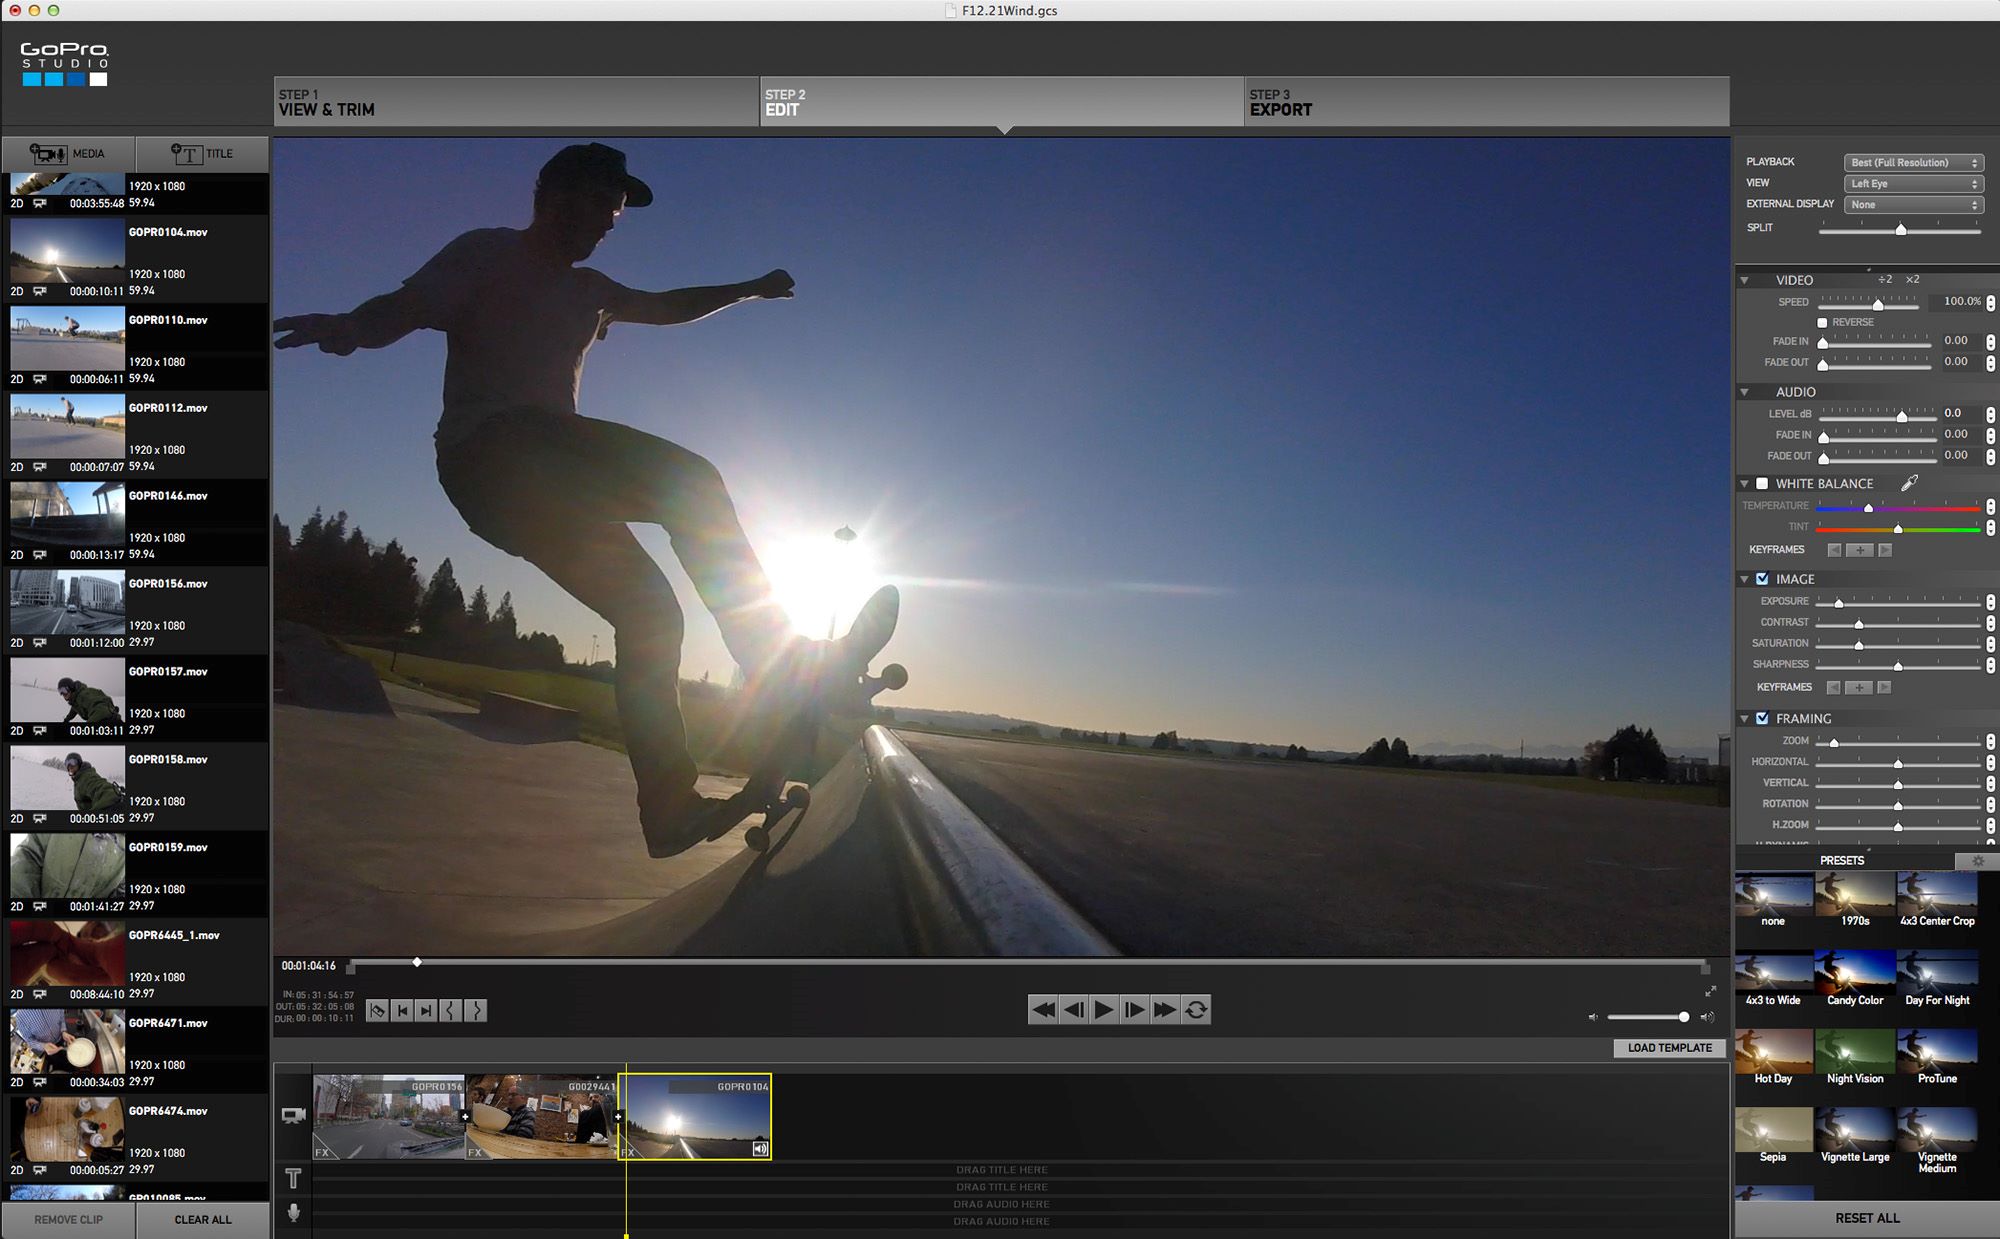
Step 2: Importing Your Footage
With GoPro Studio installed on your computer, it’s time to import your footage into the software. Follow these steps to import your GoPro videos:
- Launch GoPro Studio by double-clicking on the program icon.
- In the main menu, click on the “Import New Files” button.
- Navigate to the folder where your GoPro videos are stored.
- Select the video files you want to add to your project.
- Click the “Import” button to start importing the selected footage.
GoPro Studio supports a wide range of video formats, including MP4, MOV, and AVI. Once the import process is complete, you will see your imported files displayed in the left-hand media library panel of the GoPro Studio interface.
It’s important to note that GoPro Studio also allows you to import other types of media files, such as photos and music, which can be handy for creating more diverse and dynamic videos.
Now that your footage is imported and ready to be edited, let’s move on to the next step: choosing the right music for your video.
Step 3: Choosing the Right Music for Your Video
Choosing the right music for your GoPro Studio video is crucial, as it sets the tone and enhances the overall viewing experience. The music should complement the visuals, evoke the desired emotions, and create a seamless and immersive storytelling experience. Here are some tips to help you select the perfect background music:
- Define the mood and theme: Consider the mood and theme of your video. Are you creating an adventurous action sequence or a peaceful nature montage? Understanding the desired mood will help guide your music selection.
- Consider the tempo and rhythm: The tempo and rhythm of the music should align with the pace and editing style of your video. For high-energy action scenes, faster and upbeat tracks work well, while slower and more melodic tunes are ideal for reflective or emotional moments.
- Match the genre to the content: Choose a music genre that suits the content of your video. For example, if you’re showcasing a surfing adventure, you might opt for upbeat rock or electronic music, while a travel montage may benefit from uplifting and light-hearted acoustic tracks.
- Avoid copyright infringement: Ensure that the music you choose is royalty-free or properly licensed for use in your videos. Using copyrighted music without permission can lead to legal issues and content takedowns.
- Utilize music libraries: Explore online music libraries that offer a wide range of royalty-free tracks specifically curated for video production. These libraries often categorize music by genre, mood, and tempo, making it easier to find the perfect match for your video.
- Experiment and preview: Don’t be afraid to try different music options and experiment with different tracks. Many video editing software, including GoPro Studio, allow you to preview how the music syncs with your footage before making a final decision.
By taking the time to choose the right music for your video, you can elevate the viewing experience and make a lasting impression on your audience. Once you have selected your desired background music, it’s time to move on to the next step: adding the music to your GoPro Studio project.
Step 4: Adding Background Music in GoPro Studio
Now that you have selected the perfect background music for your video, it’s time to add it to your GoPro Studio project. Follow these steps to seamlessly incorporate music into your video:
- In GoPro Studio, make sure you have your project open and your imported footage in the timeline.
- Locate the music track that you want to add to your video. This can be a file on your computer or one you have downloaded from a music library.
- Drag and drop the music file onto the “Audio Track” of your timeline.
- Once the music track is in the timeline, you can adjust its position and duration according to your preferences.
- Split and trim the music track if necessary. GoPro Studio allows you to cut and edit the music to align perfectly with your video clips.
- If you have multiple music tracks, you can add them to different audio tracks in the timeline to create a layered effect or to fade in and out at different points in your video.
Adding background music is a simple and intuitive process in GoPro Studio. By following these steps, you can enhance your video’s storytelling and emotional impact.
Once you have added the music to your project, it’s important to adjust the volume levels to ensure it doesn’t overpower the video’s audio or vice versa. Let’s move on to the next step to learn how to adjust the music volume in GoPro Studio.
Step 5: Adjusting the Music Volume
After adding the background music to your GoPro Studio project, it’s essential to ensure that the music volume is balanced with the audio from your video clips. You want the music to enhance the viewing experience without overpowering other sounds. Follow these steps to adjust the music volume:
- Select the music track in the timeline by clicking on it.
- Locate the volume controls in the GoPro Studio interface. These controls are usually represented by a speaker icon or sliders.
- Adjust the volume slider or input a specific value to set the desired volume level for the music.
- Preview your video to ensure that the music volume is balanced with the other sounds in your project.
- Make further adjustments as needed until you achieve the desired balance.
It’s important to note that GoPro Studio allows you to adjust the music volume independently from the volume of your video clips. This flexibility helps you achieve the right audio balance and ensures that your background music enhances the overall viewing experience.
Once you are satisfied with the music volume, it’s time to move on to the final step: previewing and exporting your video with the background music.
Step 6: Previewing and Exporting Your Video with Background Music
Now that you have added background music and adjusted the volume in your GoPro Studio project, it’s time to preview your video with the music and export it as a final, polished product. Follow these steps to preview and export your video:
- Ensure that you have saved your project by clicking on “File” and then “Save Project.”
- Click on the “Play” button in the preview window to preview your video with the added background music.
- Pay attention to the synchronization between the music and your video clips, as well as the overall flow and impact of the content.
- If you need to make any further adjustments, such as trimming or repositioning the music track, do so before proceeding.
- Once you are satisfied with the preview, it’s time to export your final video. Go to the “File” menu and select “Export” or “Share.”
- Choose the export settings that best suit your needs, such as video format, resolution, and quality options.
- Specify the destination folder where you want to save the exported video file.
- Click “Export” or “Start” to begin the export process. The time it takes to export will depend on the length and complexity of your video.
- Once the export is complete, locate the exported video file in the specified destination folder. Your video is now ready to be shared with the world!
Congratulations! You have successfully added background music, adjusted the volume, and exported your GoPro Studio video with the perfect audio accompaniment. Take a moment to watch your final video and appreciate the enhanced viewing experience.
Now that you know how to add background music to your GoPro Studio videos, let your creativity soar and experiment with different music choices to create unique and compelling content.
Remember, the right background music can elevate your videos and leave a lasting impact on your viewers. Enjoy the process of creating captivating videos with the perfect soundtrack!
Thank you for reading this guide, and we hope you found it helpful in enhancing your GoPro Studio editing skills.
Conclusion
Adding background music to your GoPro Studio videos can make a significant difference in the overall quality and impact of your content. With the right music, you can create a more immersive and emotional viewing experience for your audience. In this guide, we’ve walked you through the step-by-step process of adding background music to your GoPro Studio videos.
We started by downloading and installing GoPro Studio, followed by importing your footage into the software. Next, we discussed the importance of choosing the right music for your video, considering factors such as mood, tempo, and genre. We also highlighted the need to avoid copyright infringement and recommended using music libraries for a wide selection of royalty-free tracks.
After that, we explained how to add background music to your GoPro Studio project by simply dragging and dropping the music file onto the audio track in the timeline. We also covered the process of adjusting the music volume to ensure it harmonizes with the other audio elements in your video.
Finally, we explained the importance of previewing your video with the background music and provided instructions on how to export your video with the finalized audio. We emphasized the satisfaction of witnessing your project come to life with the perfect audio accompaniment.
By following these steps, you can take your GoPro Studio videos to the next level and create captivating content that engages and resonates with your viewers.
Now it’s time to let your creativity shine. Experiment with different music styles, tempos, and genres to find the perfect match for your GoPro Studio projects. Remember to always consider the mood and emotion you want to convey and choose background music that enhances your storytelling.
We hope this guide has been helpful in improving your GoPro Studio editing skills. Enjoy the process of adding background music and creating videos that leave a lasting impression on your audience.
Thank you for reading, and happy editing!