Home>Production & Technology>Surround Sound>How To Mix Surround Sound In Adobe Premiere Pro
Surround Sound
How To Mix Surround Sound In Adobe Premiere Pro
Modified: January 22, 2024
Learn how to mix surround sound in Adobe Premiere Pro with our step-by-step guide. Enhance your audio experience and create immersive videos with surround sound effects.
(Many of the links in this article redirect to a specific reviewed product. Your purchase of these products through affiliate links helps to generate commission for AudioLover.com, at no extra cost. Learn more)
Table of Contents
Introduction
Welcome to the world of surround sound! If you want to take your audio editing skills to the next level and create immersive audio experiences, then you’ve come to the right place. In this article, we will explore the process of mixing surround sound in Adobe Premiere Pro, a widely-used video editing software that offers powerful audio editing capabilities.
Surround sound is a technique that gives the listener the feeling of being completely surrounded by audio. It creates a more dynamic and immersive audio experience by distributing sound across multiple channels, typically through a speaker system. This technology is widely used in movies, TV shows, video games, and even music production to enhance the overall audio quality and create a more captivating experience for the audience.
With Adobe Premiere Pro, you have the tools to manipulate and control audio in a way that allows you to create a realistic and engaging surround sound mix. Whether you are working on a film project, a documentary, or simply want to improve the audio quality of your videos, mastering the art of surround sound mixing is a valuable skill to have.
In this article, we will guide you through the process of setting up your project, importing audio files, adjusting track layout, understanding audio channels, panning and leveling, applying effects, and finally, exporting your surround sound mix. By the end of this article, you will have a solid understanding of how to create a professional-sounding surround sound mix in Adobe Premiere Pro.
So, let’s get started on this exciting journey into the world of surround sound mixing in Adobe Premiere Pro!
What is Surround Sound?
Surround sound is a technology that creates a multidimensional audio experience for the listener, simulating a sense of sound coming from all directions. It takes the audio beyond the traditional stereo setup and immerses the listener in a more realistic and captivating audio environment.
The concept of surround sound originated in the 1940s with the development of stereo sound, which involved using two speakers to create a left and right audio channel. However, surround sound takes it a step further by incorporating additional speakers positioned around the listener to create a more enveloping audio experience.
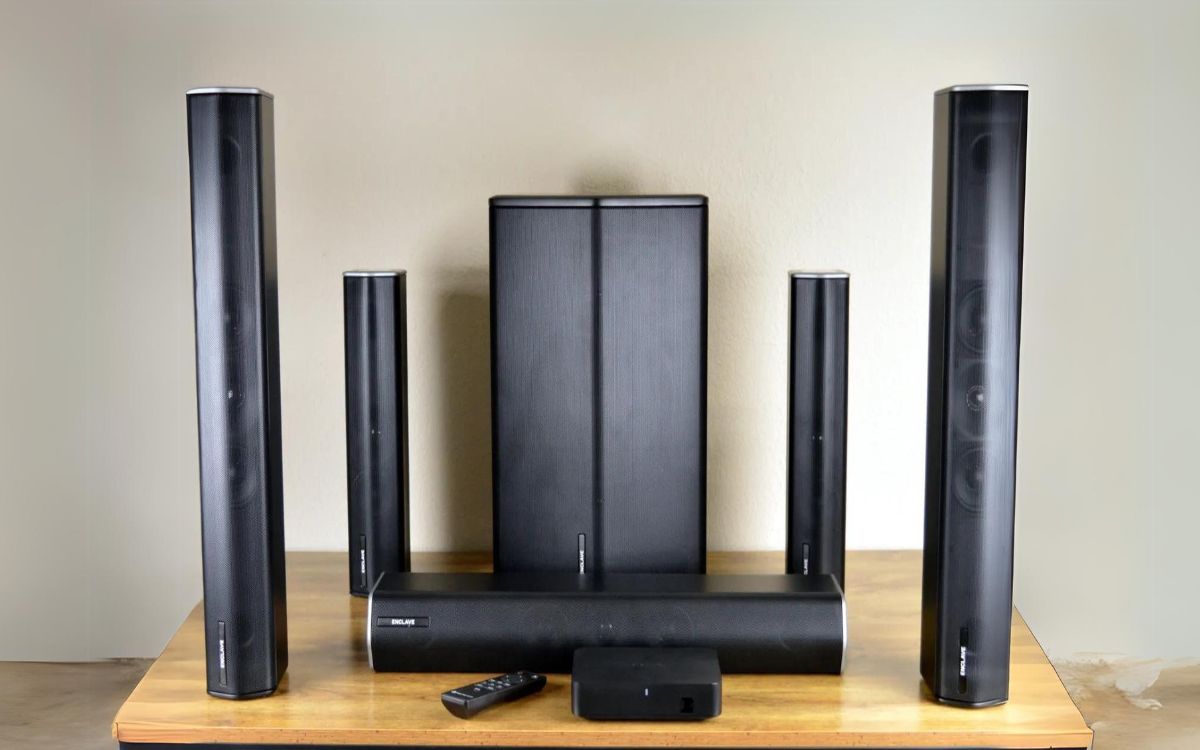
The most common surround sound setups include 5.1 and 7.1 configurations. In a 5.1 setup, there are five speakers and one subwoofer. The five speakers consist of a center speaker, two front speakers (left and right), and two rear speakers (left surround and right surround). The subwoofer is responsible for reproducing low-frequency sounds, adding depth and richness to the audio.
In a 7.1 setup, two additional speakers are added to the rear, resulting in a more immersive audio experience. These setups are widely used in home theaters, cinemas, and gaming setups to enhance the overall audio quality and provide a more realistic sense of sound movement.
Surround sound systems are not only limited to physical speaker setups. With advancements in technology, virtual surround sound has become increasingly popular. Virtual surround sound can be achieved through headphones or soundbars, where algorithms and digital signal processing techniques recreate the sensation of three-dimensional audio.
Surround sound is widely utilized in various industries, such as film and television production, gaming, and music. In movies and TV shows, surround sound is used to create an immersive audio experience, making the viewer feel like they are part of the action. In gaming, surround sound adds an extra layer of realism, allowing players to pinpoint sounds and improve gameplay. In music, surround sound techniques are used to create a more spacious and enveloping soundstage.
So, whether you’re watching a movie, playing a game, or enjoying your favorite music, surround sound enhances the overall audio experience, immersing you in a world of rich, detailed, and multidimensional sound.
Setting Up Your Project
Before diving into the world of surround sound mixing in Adobe Premiere Pro, it’s essential to set up your project correctly. This will ensure that you have the right audio settings and layout to work with in order to achieve the desired surround sound experience.
Follow these steps to set up your project for surround sound mixing:
- Create a New Project: Launch Adobe Premiere Pro and create a new project by selecting “File” and then “New Project.” Give your project a name and choose a location to save it.
- Choose the Correct Audio Settings: In the project settings, click on the “Audio” tab. Make sure the “Audio Master” is set to your desired audio sample rate and bit depth. Typically, 48kHz and 24-bit are the standard settings for professional audio quality.
- Select the Surround Sound Format: Under the “Audio” tab in the project settings, select the appropriate surround sound format based on your speaker setup. Choose either 5.1 or 7.1, depending on the number of speakers you have.
- Set Up Sequence Settings: In the sequence settings, ensure that the audio format matches the surround sound format you selected in the project settings. This will ensure proper audio playback and editing capabilities in your timeline.
- Organize Your Workspace: Arrange your workspace to accommodate the additional audio tracks needed for surround sound mixing. This may include adding extra track headers and adjusting the size of the audio track area to comfortably fit the surround sound channels.
By following these steps, you’ll have a properly configured project ready for surround sound mixing in Adobe Premiere Pro. The correct audio settings and track layout are crucial for achieving an accurate and optimized surround sound mix.
Now that your project is set up, it’s time to import your audio files and start the process of mixing surround sound in Adobe Premiere Pro. In the upcoming sections, we’ll explore how to import audio files, adjust track layouts, and manipulate audio channels to create a captivating surround sound experience. So, let’s keep going!
Importing Audio Files
Now that you have your project set up for surround sound mixing in Adobe Premiere Pro, it’s time to import your audio files. Whether you have recorded audio separately or have pre-existing audio tracks, Premiere Pro makes it easy to bring them into your project.
Follow these steps to import audio files into your project:
- Open the Project Panel: In Adobe Premiere Pro, click on the “Project” tab to open the Project Panel. This is where you can manage and organize all your project assets.
- Locate the Audio Files: In your file explorer, navigate to the folder where your audio files are stored.
- Import the Files: Select the desired audio files, and either drag and drop them into the Project Panel or right-click and choose “Import.” The imported audio files will now appear in the Project Panel.
In addition to importing individual audio files, Premiere Pro also supports the import of entire audio folders. This can be beneficial if you have a collection of audio tracks that you want to import all at once.
Once the audio files are imported, they can be easily accessed and used in your project. From the Project Panel, you can organize the audio files into folders, rename them, and even create subclips for easy manipulation.
It’s important to note that when importing audio files, Adobe Premiere Pro supports a wide range of file formats, including popular formats like WAV, MP3, and AIFF. Ensure that your audio files are compatible with Premiere Pro to avoid any playback or compatibility issues.
Now that your audio files are successfully imported into your project, you’re ready to arrange and manipulate them to create the desired surround sound mix. In the next section, we’ll explore how to adjust the track layout to accommodate the surround sound channels and dive into the intricacies of working with audio channels. So, let’s continue our journey into surround sound mixing in Adobe Premiere Pro!
Adjusting Track Layout
Once you have imported your audio files into your Adobe Premiere Pro project, the next step in the process of mixing surround sound is adjusting the track layout. This involves arranging the audio tracks to match the specific channels of your surround sound setup.
Follow these steps to adjust the track layout for surround sound mixing:
- Expand the Audio Track Area: In the Timeline panel, locate the audio track area and resize it vertically if needed. This will provide you with enough space to visualize and manipulate the surround sound channels.
- Create Additional Audio Tracks: By default, Premiere Pro provides a stereo track for each audio clip. In the audio track area, right-click and select “Add Tracks.” Choose the appropriate number of tracks based on your surround sound format (5.1 or 7.1).
- Rearrange the Tracks: Now that you have the required number of audio tracks, drag and drop them to rearrange them in the desired order. Following the channel layout of your surround sound setup, position each track accordingly.
- Label the Tracks: To easily identify each audio track, it’s a good practice to label them accordingly. Right-click on each track, select “Rename,” and enter a descriptive name such as “Front Left,” “Front Right,” “Center,” “Rear Left,” etc.
Properly adjusting the track layout ensures that the audio signals are routed correctly to their respective channels, enhancing the immersive experience of your surround sound mix. With your tracks organized and labeled, it becomes easier to visualize and manipulate the individual audio elements.
It’s important to note that the specific names and order of the audio tracks will depend on your surround sound setup. Be sure to consult the documentation or specifications of your speaker system to ensure the accurate arrangement of the tracks.
Now that you have adjusted the track layout, your audio tracks are prepared for the next step in the surround sound mixing process: understanding audio channels. In the upcoming section, we will dive into the intricacies of working with audio channels to create a well-balanced and engaging surround sound mix. So, let’s continue our journey towards mastering surround sound mixing in Adobe Premiere Pro!
Understanding Audio Channels
In the world of surround sound mixing, understanding audio channels is essential in order to create a balanced and immersive audio experience. Each audio channel corresponds to a specific speaker in your surround sound setup and carries a unique audio signal.
Here are the key audio channels in a standard 5.1 surround sound setup:
- Front Left and Front Right: These channels are responsible for reproducing audio that appears to be coming from the front left and front right speakers, creating the stereo effect.
- Center: The center channel carries dialogue and other important audio information that should be perceived as coming from the center of the sound stage.
- Rear Left and Rear Right (or Surround Left and Surround Right): These channels provide surround sound effects, immersing the listener with audio that appears to be coming from behind.
- LFE (Low-Frequency Effects): The LFE channel is dedicated to reproducing low-frequency sounds, such as deep booms and rumbling effects, adding depth and impact to the overall audio mix.
It’s important to note that in a 7.1 surround sound setup, additional channels for rear surround speakers are added, enhancing the surround sound experience even further.
When working with audio channels in Adobe Premiere Pro, each audio clip can be assigned to different channels to control its position within the surround sound mix. By default, audio clips are assigned to the master channel, but you can easily route them to the specific audio channels using the Audio Track Mixer or the Audio Clip Mixer.
To assign an audio clip to a specific channel:
- Open the Audio Track Mixer: Locate the Audio Track Mixer panel by going to “Window” and selecting “Audio Track Mixer” from the dropdown menu.
- Select the Track: In the Audio Track Mixer, select the track corresponding to the desired audio channel.
- Adjust the Fader: Use the fader in the Audio Track Mixer to set the level and balance of the audio signal for that channel.
- Repeat for Each Channel: Repeat the process for each audio clip, assigning them to their respective channels and adjusting the levels accordingly.
By understanding and manipulating the audio channels in your surround sound setup, you can create a well-balanced mix where each sound element is accurately positioned within the audio space. This brings depth, realism, and immersion to your surround sound mix.
Now that you have a solid grasp of audio channels, we can move on to the next step in the surround sound mixing process: panning and leveling. In the upcoming section, we will explore how to control the placement of audio within the surround sound field and achieve a seamless and engaging audio mix. So, let’s continue our journey towards becoming surround sound mixing experts in Adobe Premiere Pro!
Panning and Leveling
When it comes to surround sound mixing in Adobe Premiere Pro, panning and leveling are crucial techniques that allow you to control the position and volume of audio within the surround sound field. By strategically placing and balancing audio elements, you can create a dynamic and immersive listening experience.
Panning refers to the horizontal movement of audio within the surround sound field. It determines the perceived direction from which the sound is coming. By adjusting the panning settings, you can position audio elements in specific speakers, creating a sense of movement and depth.
Here’s how you can pan audio in Adobe Premiere Pro:
- Open the Audio Track Mixer: Locate the Audio Track Mixer panel by going to “Window” and selecting “Audio Track Mixer” from the dropdown menu.
- Select the Track: Choose the audio track that you want to pan within the surround sound field.
- Adjust the Pan Control: Use the pan control in the Audio Track Mixer to move the audio signal left or right. A value of -100 represents full left pan, 0 is center, and +100 is full right pan.
- Repeat for Each Audio Track: Repeat the process for each audio track, panning them accordingly to create a balanced and immersive surround sound mix.
Leveling, on the other hand, refers to adjusting the volume or level of each audio element within the surround sound mix. This ensures that all the channels are well-balanced and that no single audio element overpowers the others.
To level your audio in Adobe Premiere Pro, you can use the Audio Track Mixer:
- Open the Audio Track Mixer: Open the Audio Track Mixer panel by going to “Window” and selecting “Audio Track Mixer.”
- Select the Track: Choose the audio track that you want to adjust the level for.
- Adjust the Volume Fader: Use the volume fader in the Audio Track Mixer to increase or decrease the volume of the selected track.
- Repeat for Each Audio Track: Repeat the process for each audio track, ensuring that all the channels are leveled appropriately for a balanced surround sound mix.
By mastering the art of panning and leveling, you can create a surround sound mix that not only immerses the listener but also maintains a sense of balance and clarity in the overall audio experience. Take the time to fine-tune the panning and leveling settings for each audio element, paying attention to the specific position and volume needed to achieve the desired effect.
In the next section, we will explore how to add effects to your surround sound mix, further enhancing the audio experience and creativity of your project. So, let’s continue our journey to becoming experts in surround sound mixing in Adobe Premiere Pro!
Applying Effects
One of the most exciting aspects of surround sound mixing in Adobe Premiere Pro is the ability to apply effects to your audio tracks. Effects can enhance the overall audio quality and add creative elements to your surround sound mix, making it more captivating and engaging for the listener.
Here’s how you can apply effects to your audio tracks in Adobe Premiere Pro:
- Select the Audio Track: Choose the audio track to which you want to apply the effect.
- Open the Effects Panel: Go to “Window” and select “Effects” to open the Effects panel in Adobe Premiere Pro.
- Browse and Choose an Effect: In the Effects panel, browse through the available audio effects. You can find various options such as equalizers, reverb, delay, compression, and more.
- Drag and Drop the Effect: Once you’ve selected an effect, simply drag and drop it onto the audio track in the Timeline panel.
- Adjust the Effect Settings: With the effect applied, you can now adjust its parameters to suit your desired sound. Use the Effect Controls panel to modify settings such as intensity, frequency ranges, time parameters, and more.
When applying effects to your surround sound mix, be mindful of the overall balance and coherence of the audio. It’s important to maintain clarity and ensure that the effect enhances the immersive experience rather than overwhelming or detracting from it.
Additionally, Adobe Premiere Pro provides the option to apply effects to specific audio channels, allowing you to further customize the audio experience. By targeting specific channels with effects, you can create unique sonic effects and enhance the depth and movement within your surround sound mix.
It’s worth noting that not all effects may work equally well for surround sound mixing. Some effects may be designed specifically for stereo audio, while others are optimized for surround sound configurations. Experiment with different effects, listen to the results, and trust your ears to determine which effects work best for your specific project.
With the ability to apply effects, you can take your surround sound mix to the next level, adding depth, character, and creativity to your audio tracks. In the next section, we’ll explore how to export your surround sound mix so you can share it with others. So, let’s continue our journey towards the final step of surround sound mixing in Adobe Premiere Pro!
Exporting Your Surround Sound Mix
Once you have completed the process of mixing your surround sound project in Adobe Premiere Pro, the final step is to export your finished mix. Exporting ensures that your surround sound mix is properly encoded and ready for distribution or playback.
Follow these steps to export your surround sound mix in Adobe Premiere Pro:
- Select the Sequence: In the Timeline panel, select the sequence that contains your completed surround sound mix.
- Go to File: Click on “File” in the top menu and select “Export” from the dropdown menu.
- Choose Export Media: In the Export window, select “Media” to access the export settings.
- Set the Format: In the Export Settings window, choose the desired audio codec and file format for your surround sound mix. Depending on your needs, you may choose formats such as WAV, AC3, or AAC.
- Configure Audio Settings: Within the Export Settings window, ensure that your audio settings match the settings you used for your project. This includes the sample rate, bit depth, and channel configuration.
- Adjust Additional Export Settings: Customize any additional export settings according to your needs. This may include specifying the export location, setting the file name, adjusting the video settings if applicable, and more.
- Start the Export: Once you have configured all the necessary settings, click on the “Export” button to begin the export process.
Depending on the length and complexity of your project, the export process may take some time. Be patient and let Adobe Premiere Pro work its magic to generate your final surround sound mix.
It’s important to note that when exporting a surround sound mix, it’s recommended to test the exported file on a system with a proper surround sound setup to ensure that the audio channels are correctly encoded and playback as intended.
After the export is complete, you can share your surround sound mix with the world. Whether you’re uploading it to an online platform, burning it to a DVD, or using it for a professional presentation, your mix will now be ready to deliver an immersive audio experience to your audience.
With your surround sound mix successfully exported, you have completed the journey of mixing surround sound in Adobe Premiere Pro. Congratulations on your achievement! Continue to explore and experiment with different techniques and effects to further refine your skills and create exceptional surround sound mixes.
As technology continues to evolve, surround sound plays an increasingly vital role in enhancing audio experiences. By mastering the art of surround sound mixing, you can captivate and engage listeners on a whole new level. So let your creativity soar, and enjoy the process of creating immersive and unforgettable audio mixes in Adobe Premiere Pro!
Conclusion
Congratulations! You have reached the end of our comprehensive guide to mixing surround sound in Adobe Premiere Pro. Hopefully, this journey has provided you with a solid foundation and useful techniques to create immersive and captivating audio experiences.
We discussed the concept of surround sound and its significance in enhancing audio quality and creating a realistic audio environment. We covered the essential steps of setting up your project, importing audio files, adjusting track layouts, understanding audio channels, panning and leveling, applying effects, and exporting your surround sound mix.
By following these steps, you can take your audio editing skills to the next level and create professional-sounding surround sound mixes. Remember, practice makes perfect, so don’t hesitate to experiment and refine your techniques to achieve the desired results.
As you continue your journey in surround sound mixing, always keep in mind the importance of maintaining balance and clarity in your audio mix. Pay attention to the placement and movement of audio elements within the surround sound field, and ensure that the levels and effects enhance the overall immersive experience for the listener.
Adobe Premiere Pro provides a powerful set of tools and features to support your surround sound mixing endeavors. Take advantage of the Audio Track Mixer, Effects panel, and export settings to fine-tune and deliver your unique audio creations.
Remember, surround sound mixing is an art form that requires both technical knowledge and a keen ear for creative expression. It’s a fusion of science and art that can transport your audience into new realms of audio immersion.
So, embrace the possibilities, let your creativity flow, and continue exploring the world of surround sound mixing in Adobe Premiere Pro. With dedication and practice, you can elevate the audio quality of your projects and captivate your audience with breathtaking surround sound experiences. Happy mixing!