Home>Production & Technology>Sound Bar>How To Connect Sound Bar To Roku TV
Sound Bar
How To Connect Sound Bar To Roku TV
Modified: January 22, 2024
Learn how to easily connect a sound bar to your Roku TV for enhanced audio experience. Follow our step-by-step guide and enjoy high-quality sound with your favorite shows and movies.
(Many of the links in this article redirect to a specific reviewed product. Your purchase of these products through affiliate links helps to generate commission for AudioLover.com, at no extra cost. Learn more)
Table of Contents
Introduction
Welcome to our comprehensive guide on how to connect a sound bar to a Roku TV! If you’re looking to enhance your TV viewing experience with better audio quality, a sound bar can be the perfect solution. Roku TVs are known for their exceptional picture quality and user-friendly interface, and pairing them with a sound bar can take your entertainment to the next level.
Connecting a sound bar to your Roku TV may seem daunting, but fear not! In this article, we will provide you with step-by-step instructions to make the process seamless and hassle-free.
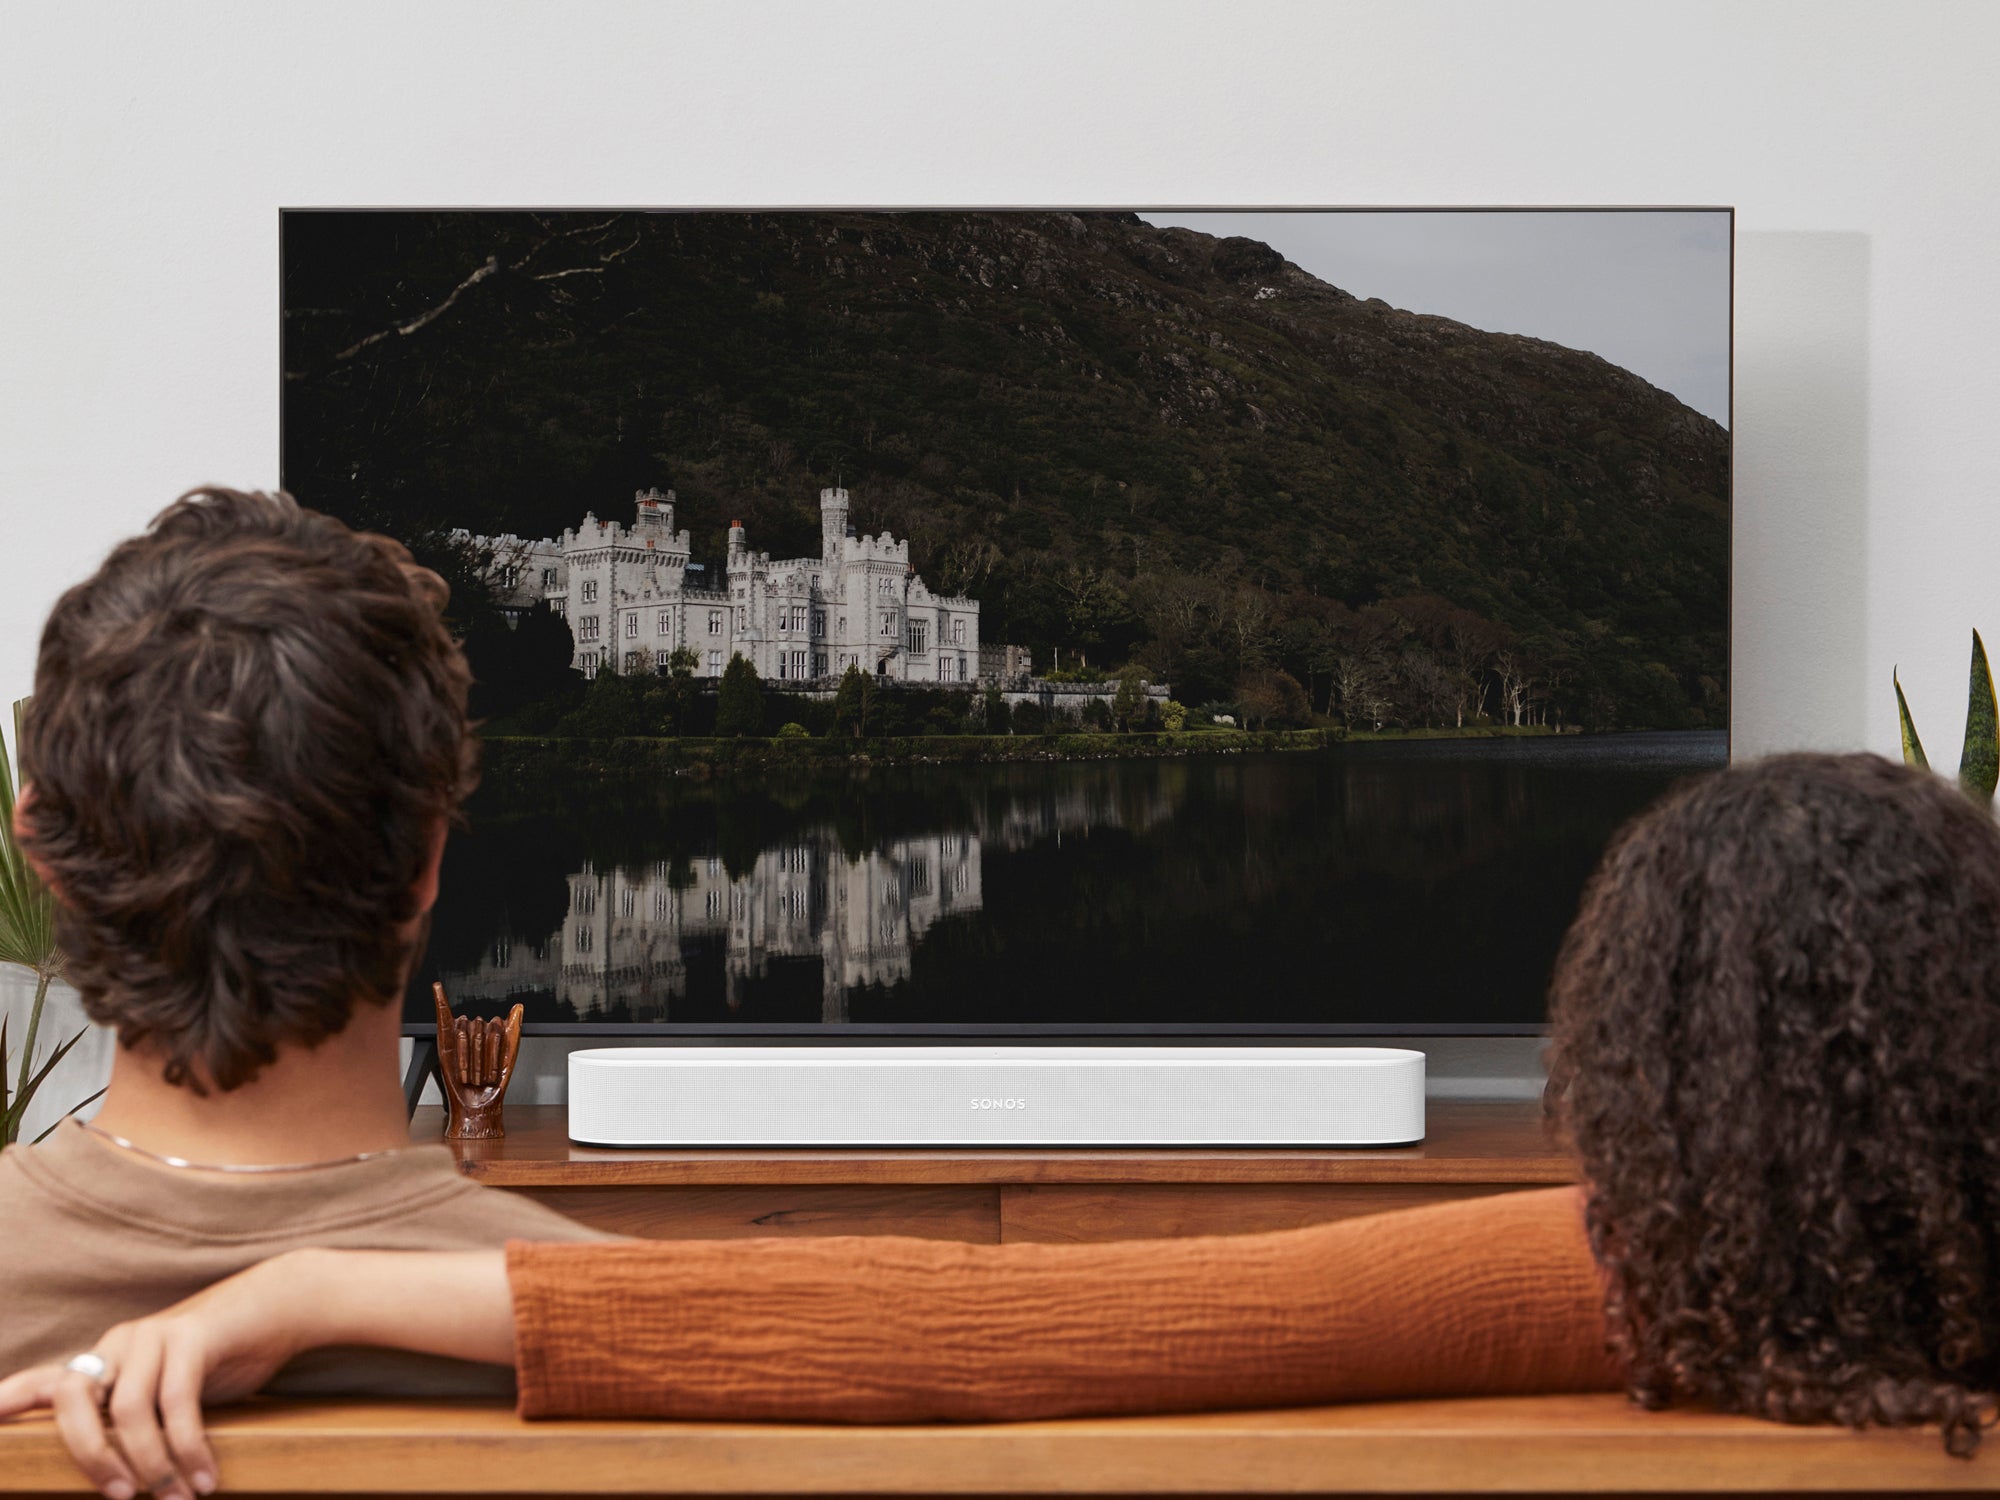
Before we dive into the details, let’s understand what a sound bar is and why it’s a great addition to your Roku TV setup. A sound bar is a long, slender speaker typically placed below or above your TV screen. It can significantly enhance the audio quality of your TV, providing a more immersive and cinematic experience. Sound bars are designed to offer better sound projection and clarity, compared to the built-in speakers found in most TVs.
One of the advantages of using a sound bar with a Roku TV is the ability to customize your audio settings. Roku TVs come equipped with various sound modes, equalizer options, and volume leveling features that can be easily optimized when connected to a sound bar. Whether you’re watching a movie, playing video games, or streaming your favorite TV shows, a sound bar can deliver rich, dynamic sound that will elevate your entertainment experience.
So, if you’re ready to learn how to connect your sound bar to your Roku TV, let’s get started with the first step: gathering the equipment needed.
Step 1: Gather the Equipment Needed
Before you begin connecting your sound bar to your Roku TV, it’s important to gather all the necessary equipment. Here’s a list of items you’ll need:
- A sound bar – Choose a sound bar that suits your needs and budget. There are various options available, ranging from basic models to high-end ones with advanced features.
- HDMI cable – Most sound bars and Roku TVs support HDMI connections. Ensure you have an HDMI cable that is long enough to reach from your TV to the sound bar.
- Power cords – Make sure you have the power cords for both the sound bar and the Roku TV.
- Remote control – Locate the remote control that came with your Roku TV. You’ll need it to navigate through the settings.
- Optional: Optical or RCA cables – Some sound bars also offer optical or RCA connections as an alternative to HDMI. If your sound bar supports these connections and you prefer to use them, make sure you have the appropriate cables.
Once you have gathered all the necessary equipment, you’re ready to move on to the next step: checking the compatibility between your sound bar and Roku TV.
Step 2: Check Compatibility Between Sound Bar and Roku TV
Before proceeding with the connection, it’s essential to check the compatibility between your sound bar and Roku TV. Here are a few key considerations:
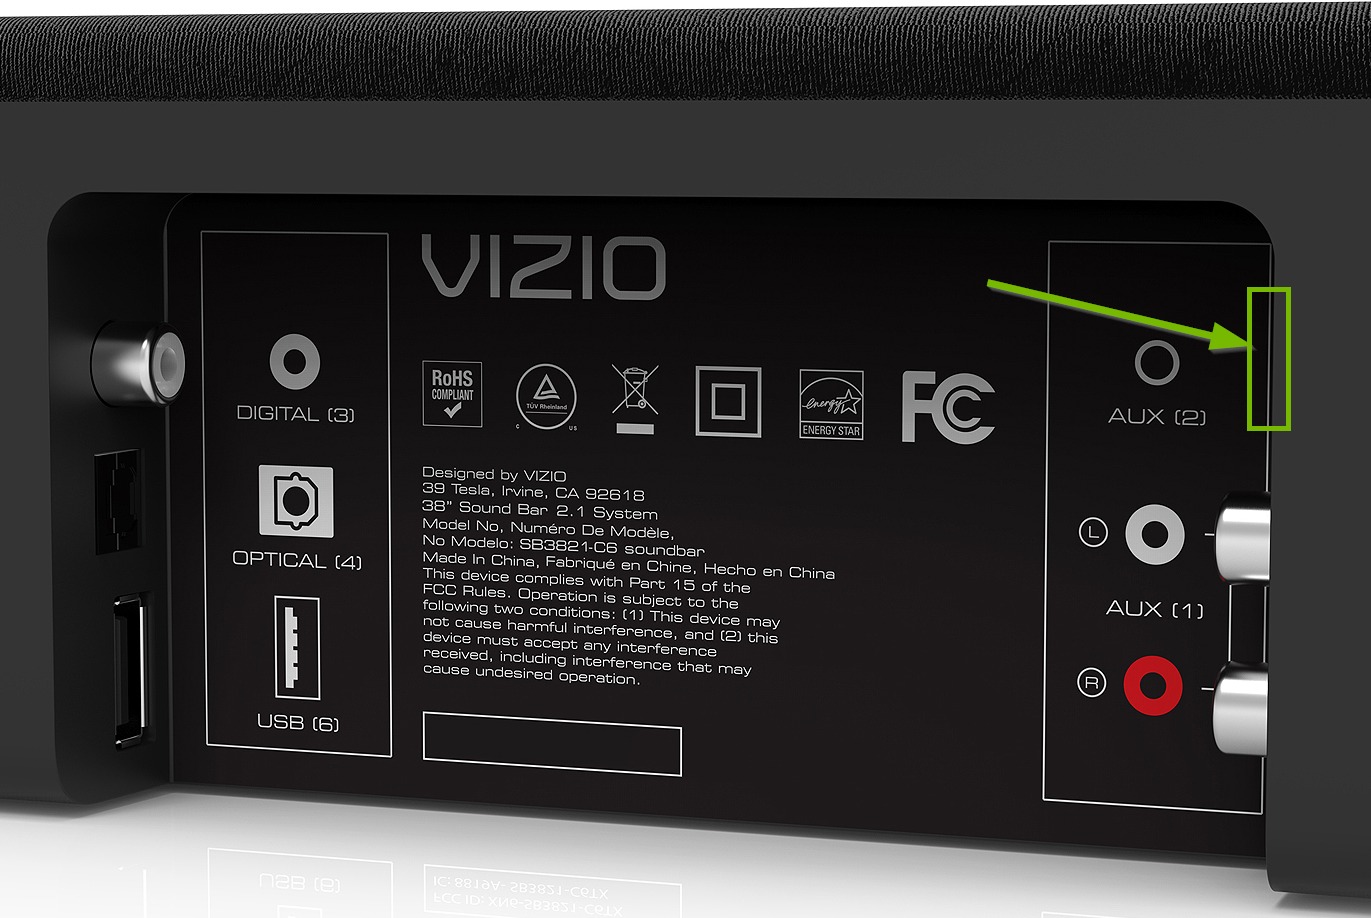
- Audio Output: Ensure that your Roku TV has the necessary audio output options, such as HDMI ARC (Audio Return Channel), optical, or RCA, which are supported by your sound bar. Refer to the user manuals of both devices to verify the available audio output options.
- Sound Bar Input: Check the input options on your sound bar. HDMI, optical, and RCA are common input options. Confirm that your sound bar has at least one input that matches the audio output option of your Roku TV.
- Audio Format Support: Some sound bars support specific audio formats like Dolby Digital or DTS. Verify if your sound bar can decode the audio formats produced by your Roku TV. This information can be found in the sound bar’s specifications or user manual.
- HDMI ARC Compatibility: If you plan to use HDMI ARC to connect your devices, make sure both your sound bar and Roku TV support this feature. HDMI ARC allows the sound bar to receive audio signals, control volume, and power on/off through a single HDMI connection.
Checking compatibility between your sound bar and Roku TV ensures that you can establish a proper audio connection and enjoy optimal audio performance.
If your devices are compatible, move on to the next step: connecting the sound bar to your Roku TV using an HDMI cable.
However, if your devices are not compatible or you encounter any difficulties during the compatibility check, refer to the user manuals of your sound bar and Roku TV for alternative connection methods or consider consulting a professional for assistance.
Step 3: Connect the Sound Bar to Roku TV with HDMI Cable
Now that you have confirmed compatibility between your sound bar and Roku TV, it’s time to connect them using an HDMI cable. Follow the steps below:
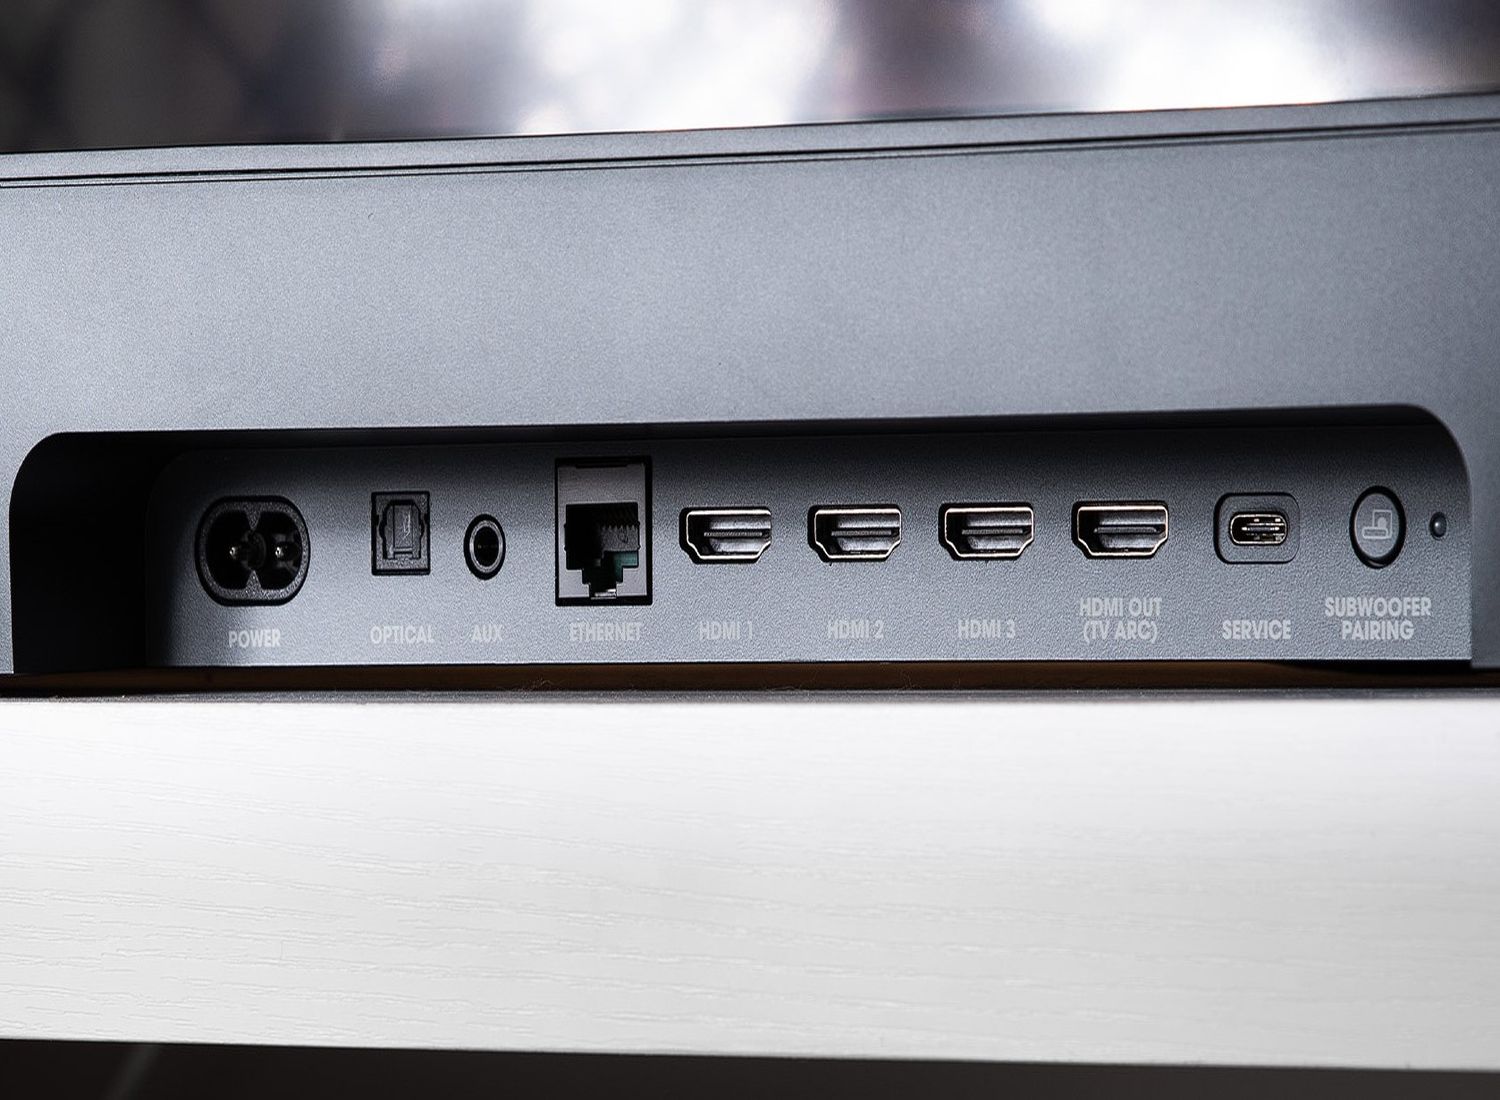
- Locate the HDMI ports on both your sound bar and Roku TV. Typically, the HDMI ports are labeled as “HDMI In” on the sound bar and “HDMI Out” or “ARC” on the Roku TV.
- Insert one end of the HDMI cable into the HDMI Out or ARC port on your Roku TV.
- Connect the other end of the HDMI cable to the HDMI In port on your sound bar.
- Ensure that the cable is securely plugged into both devices to establish a stable connection.
Once you have successfully connected the sound bar and Roku TV using the HDMI cable, proceed to the next step: enabling HDMI ARC (Audio Return Channel) on your Roku TV.
Note: If your sound bar does not have HDMI compatibility, refer to the user manual for alternative connection methods, such as using optical or RCA cables.
Step 4: Enable HDMI ARC (Audio Return Channel) on Roku TV
To ensure that the audio signals can be transmitted from your Roku TV to the sound bar through the HDMI connection, you need to enable HDMI ARC (Audio Return Channel) on your Roku TV. Follow the steps below:
- Using your Roku TV remote, navigate to the “Settings” menu by pressing the Home button.
- Scroll to the right and select “System.”
- Choose “Control other devices” and then select “HDMI ARC.”
- Toggle the HDMI ARC setting to “On.”
Enabling HDMI ARC allows for two-way communication between your Roku TV and sound bar through a single HDMI cable. This enables the sound bar to receive audio signals from the TV while also allowing you to control the sound bar’s volume and power using your Roku TV remote.
Once you have enabled HDMI ARC on your Roku TV, proceed to the next step: adjusting the sound settings on your Roku TV.
Note: If your Roku TV does not have an HDMI ARC setting or if you encounter any issues during the setup, refer to the user manual or contact Roku customer support for further assistance.
Step 5: Adjust Sound Settings on Roku TV
After successfully connecting your sound bar to your Roku TV, it’s time to fine-tune the sound settings to optimize your audio experience. Follow the steps below:
- Using your Roku TV remote, press the Home button to access the main menu.
- Scroll to the right and select “Settings.”
- Choose “Audio” from the list of options.
- Here, you will find various sound settings that you can adjust according to your preferences:
- Sound Mode: Select the sound mode that suits your content. Options may include Standard, Movie, Music, or Game, among others.
- Equalizer: Adjust the equalizer settings to customize the audio frequencies according to your preference. This allows you to fine-tune the bass, treble, and other sound elements.
- Volume Mode: Choose between Normal and Leveling. Normal maintains the original volume levels, while Leveling equalizes volume differences between different programs or channels.
- Night Mode: If you want to enjoy late-night viewing without disturbing others, enable Night Mode. This setting reduces abrupt and loud sound effects, enhancing dialogue clarity at low volumes.
- Make the desired adjustments to the sound settings and test the audio quality to ensure that it suits your preferences.
- Try playing different types of content, such as movies, music, or games, to evaluate the sound output and make any necessary changes to the settings.
By adjusting the sound settings on your Roku TV, you can achieve the optimal audio experience with your newly connected sound bar. Don’t hesitate to experiment with different settings to find the perfect balance that enhances your overall viewing or listening experience.
Once you have adjusted the sound settings, you’re all set to enjoy an immersive audio experience with your sound bar and Roku TV.
Step 6: Troubleshooting Tips
If you encounter any issues while connecting your sound bar to your Roku TV or experiencing audio problems, don’t worry. Here are some troubleshooting tips to help you resolve common issues:
- Check the connections: Ensure that all the cables are securely connected to both the sound bar and the Roku TV. Sometimes, loose connections can cause audio problems.
- Restart your devices: Try restarting both your sound bar and Roku TV. This can help reset any temporary glitches or conflicts that might be affecting the audio output.
- Update firmware: Check for firmware updates for both your sound bar and Roku TV. Manufacturers often release firmware updates to address performance issues and improve compatibility.
- Try a different HDMI port: If you are using HDMI ARC, try connecting the HDMI cable to a different HDMI port on your Roku TV. Some ports may have better compatibility or functionality than others.
- Verify settings on both devices: Double-check the audio settings on both your sound bar and Roku TV to ensure they are properly configured. Confirm that the selected audio input on the sound bar matches the HDMI port you connected to on your Roku TV.
- Disable audio features: If you’re experiencing issues with audio output, try disabling any additional audio features, such as surround sound or audio enhancements, on your sound bar or Roku TV. Sometimes, these features can cause compatibility issues.
- Consult manufacturer support: If the troubleshooting tips above don’t resolve your issues, refer to the user manuals or contact the customer support of your sound bar or Roku TV manufacturer for further assistance. They may be able to provide specific guidance for your particular setup.
Remember, troubleshooting steps may vary depending on the make and model of your sound bar and Roku TV. Be sure to refer to the user manuals or online support resources for more specific troubleshooting advice.
By following these troubleshooting tips, you should be able to overcome any obstacles and enjoy a seamless sound bar integration with your Roku TV.
Conclusion
Congratulations! You have successfully connected your sound bar to your Roku TV. By following the steps outlined in this guide, you can now enjoy an enhanced audio experience that complements the exceptional picture quality of your Roku TV.
We started by gathering the necessary equipment, ensuring compatibility between your sound bar and Roku TV. We then connected them using an HDMI cable and enabled HDMI ARC to establish a seamless audio connection. Next, we adjusted the sound settings on your Roku TV to customize the audio output to your preferences. Lastly, we provided troubleshooting tips to help you overcome any potential issues.
Remember, different sound bars and Roku TV models have varying features and settings, so always refer to the user manuals for detailed instructions tailored to your specific devices.
Now that your sound bar is connected, sit back, relax, and enjoy the immersive sound experience as you dive into your favorite movies, TV shows, or games. Whether you’re watching a thrilling action-packed movie or enjoying a concert, the improved sound quality will create a more captivating and immersive viewing experience.
If you have any further questions or encounter any difficulties during the setup process, don’t hesitate to seek assistance from the customer support of your sound bar or Roku TV manufacturer. They will be able to provide specific guidance and troubleshooting tailored to your setup.
Thank you for choosing to enhance your entertainment setup with a sound bar and Roku TV combination. We hope this guide has been helpful and wish you many enjoyable hours of high-quality audio and visual entertainment!