Home>Production & Technology>Stereo>How To Remove 1999 Toyota Camry Stereo
Stereo
How To Remove 1999 Toyota Camry Stereo
Modified: January 22, 2024
Learn how to easily remove the stereo from your 1999 Toyota Camry. Follow our step-by-step guide to upgrade or replace your car's audio system.
(Many of the links in this article redirect to a specific reviewed product. Your purchase of these products through affiliate links helps to generate commission for AudioLover.com, at no extra cost. Learn more)
Table of Contents
- Introduction
- Preparations
- Step 1: Gather the necessary tools
- Step 2: Disconnect the car battery
- Step 3: Remove the dashboard panels
- Step 4: Locate and detach the stereo mounting brackets
- Step 5: Unplug the wiring harness and antenna
- Step 6: Slide out the old stereo unit
- Step 7: Install the new stereo unit
- Step 8: Reconnect the wiring harness and antenna
- Step 9: Reattach the stereo mounting brackets
- Step 10: Replace the dashboard panels
- Step 11: Reconnect the car battery
- Conclusion
Introduction
Welcome to this comprehensive guide on how to remove the stereo from a 1999 Toyota Camry. Whether you’re looking to upgrade your current stereo system or perform necessary repairs, removing the stereo is the first step in the process. By following the steps outlined in this article, you’ll be able to successfully remove the stereo unit from your Toyota Camry without any hassle.
The stereo system in the 1999 Toyota Camry is integrated into the dashboard, making it a bit more challenging to remove compared to aftermarket stereos. However, with the right tools and instructions, you’ll be able to tackle this task with confidence. It’s important to note that disconnecting the car battery before starting the removal process is crucial to ensure safety and prevent any potential electrical issues.
Before we dive into the step-by-step instructions, it’s essential to gather all the necessary tools for the job. This will save you time and frustration during the removal process. You’ll need a set of car stereo removal keys or a trim removal tool, a screwdriver set, and a pry tool. Additionally, having a small container to hold screws and other small parts is recommended to prevent them from getting lost during the removal process.
Now that we have the tools ready, let’s move on to the next step: disconnecting the car battery. This ensures that you’ll be working with a completely safe electrical system and minimizes the risk of damage during the removal process.
Note: The specific steps outlined in this guide may vary slightly depending on the exact model and trim of your 1999 Toyota Camry. It’s always a good idea to consult your vehicle’s owner’s manual or seek professional assistance if you have any doubts or concerns.
Preparations
Before you begin the process of removing the stereo from your 1999 Toyota Camry, it’s essential to make a few preparations to ensure a smooth and successful removal. Here are the key steps to take before getting started:
- Gather the necessary tools: As mentioned earlier, you’ll need a set of car stereo removal keys or a trim removal tool, a screwdriver set, and a pry tool. These tools will help you safely and effectively remove the stereo unit from the dashboard.
- Disconnect the car battery: Safety should always be a top priority when working with electrical components. Before starting the removal process, locate the car battery and disconnect the negative terminal. This will prevent any electrical shock or damage during the process.
- Familiarize yourself with the stereo unit: Take a moment to familiarize yourself with the layout and components of the stereo unit in your Toyota Camry. Look for any screws, clips, or mounting brackets that may need to be removed or detached during the process.
- Prepare a small container: To keep track of screws, bolts, and other small parts, it’s a good idea to have a small container ready. This will prevent any loss or confusion during the removal process and make reassembly much easier.
- Refer to the car’s manual: If you’re uncertain about any specific details or steps related to removing the stereo, consult your car’s manual. The manual will provide you with the most accurate and specific instructions for your exact model and trim of the 1999 Toyota Camry.
By following these preparatory steps, you’ll be well-equipped and ready to begin the process of removing the stereo from your 1999 Toyota Camry. It’s important to take your time and proceed with caution to avoid any damage to the dashboard or the stereo unit itself.
Step 1: Gather the necessary tools
Before you can begin removing the stereo from your 1999 Toyota Camry, it’s crucial to gather all the necessary tools. Having the right tools on hand will make the removal process much smoother and more efficient. Here are the tools you’ll need:
- Car stereo removal keys or trim removal tool: These tools are specifically designed to safely remove the stereo unit from the dashboard. They can be inserted into the slots on the sides of the stereo to release the locking mechanism and allow for easy removal.
- Screwdriver set: You’ll need a screwdriver set with various sizes of Phillips and flathead screwdrivers. This will enable you to remove any screws or bolts that are securing the stereo or dashboard panels in place.
- Pry tool: A pry tool, such as a plastic trim removal tool, will come in handy when gently prying off dashboard panels or trim pieces. It helps prevent damage to the interior surfaces while allowing you to access the stereo unit.
- Small container: It’s important to have a small container or dish to hold any screws, bolts, or small parts that you remove during the process. This will prevent them from getting lost and make reassembly easier.
Once you’ve gathered these tools, you’ll be well-prepared to tackle the stereo removal process. It’s a good idea to keep them within reach and organized during the process to ensure a smooth and efficient removal.
Remember to exercise caution while using tools and be mindful of any sharp edges or delicate components. If you’re unsure about using any of the tools or have concerns about damaging the dashboard or stereo unit, it’s always a good idea to seek professional assistance or refer to your vehicle’s manual for guidance.
With the necessary tools in hand, you’re now ready to move on to the next step: disconnecting the car battery to ensure safety during the removal process.
Step 2: Disconnect the car battery
Before you begin removing the stereo from your 1999 Toyota Camry, it’s crucial to disconnect the car battery. This step is essential to ensure your safety and prevent any electrical mishaps during the removal process. Follow these steps to disconnect the car battery:
- Locate the car battery: The car battery is usually located under the hood of your Toyota Camry. It’s a rectangular-shaped box with two terminals, one marked with a “+” symbol for positive and one marked with a “-” symbol for negative.
- Identify the negative terminal: The negative terminal is usually black and marked with a “-” symbol. Using a wrench or socket set, loosen the nut or bolt that secures the negative cable to the battery. Once loose, gently remove the cable from the terminal. Make sure to keep the cable away from the battery terminal to prevent accidental reconnection.
- Secure the negative cable: To ensure that the negative cable doesn’t accidentally come into contact with the battery terminal, you can wrap it with electrical tape or secure it in a safe position using a cable tie. This will prevent any unintentional electrical connection during the stereo removal process.
- Wait for a few minutes: After disconnecting the car battery, it’s important to wait for a few minutes before proceeding to allow any residual electrical charge to dissipate.
By disconnecting the car battery, you eliminate the risk of electrical shock and protect both yourself and the car’s electrical system. It’s crucial to exercise caution during this step to avoid touching any metal surfaces or creating a short circuit.
It’s important to note that disconnecting the car battery may reset certain settings in your vehicle, such as radio presets or clock settings. Be prepared to reset or reprogram these settings once the stereo installation is complete.
With the car battery safely disconnected, you’re now ready to move on to the next step: removing the dashboard panels to gain access to the stereo unit.
Step 3: Remove the dashboard panels
With the car battery safely disconnected, you can now proceed to remove the dashboard panels in order to gain access to the stereo unit. Follow these steps to remove the dashboard panels:
- Locate the trim pieces: Take a close look at the dashboard and locate the trim pieces that surround the stereo unit. These trim pieces may vary depending on the specific model and trim level of your 1999 Toyota Camry.
- Use a pry tool: Insert a pry tool, such as a plastic trim removal tool, into the gaps between the trim pieces and the dashboard. Apply gentle pressure to pop the clips that hold the trim pieces in place. Be careful not to use excessive force to avoid damaging the trim or causing any scratches.
- Work your way around: Once you’ve loosened one corner of a trim piece, carefully work your way around the panel, gently prying it off. Take your time and be patient to avoid breaking any clips or causing any damage to the dashboard or trim pieces.
- Remove all necessary trim pieces: Repeat the previous steps for all the trim pieces surrounding the stereo unit, including any air vents or climate control panels that may need to be removed for access.
- Set the trim pieces aside: As you remove each trim piece, set them aside in a safe place where they won’t get damaged. You may want to use a soft cloth or towel to protect them from any scratches or dust.
Removing the dashboard panels can be a bit time-consuming, but with patience and caution, you’ll be able to successfully access the stereo unit. Remember to keep track of any screws or clips that may be attached to the trim pieces, as you’ll need them for reinstallation later on.
Once all the necessary dashboard panels have been removed, you’re now ready to move on to the next step: locating and detaching the stereo mounting brackets.
Step 4: Locate and detach the stereo mounting brackets
With the dashboard panels removed, the next step in removing the stereo from your 1999 Toyota Camry is to locate and detach the stereo mounting brackets. These brackets secure the stereo unit in place within the dashboard. Follow these steps to proceed:
- Locate the mounting brackets: Look for the metal or plastic brackets that are holding the stereo unit in place. These brackets may be located on the sides, top, or bottom of the stereo unit, depending on the specific model and trim level of your Camry.
- Detach the mounting brackets: Use a screwdriver or the appropriate tool to remove any screws or bolts that are securing the mounting brackets to the stereo unit. Keep these screws or bolts in a safe place for reinstallation later on.
- Release any additional clips or connectors: In addition to screws or bolts, there may be clips or connectors that are holding the stereo unit in place. Carefully detach these clips or connectors by pressing or releasing the locking mechanism, depending on the design. Take note of their location to ensure easy reconnection in the future.
- Gently pull out the stereo unit: Once the mounting brackets and any additional clips or connectors have been detached, gently pull out the stereo unit from the dashboard. Be cautious not to force or damage any wires or connections that are still attached to the stereo unit.
Removing the stereo mounting brackets is a critical step in the process of removing the stereo from your 1999 Toyota Camry. Take your time and be mindful of any small parts or connectors that may need to be handled delicately.
Once you have successfully located and detached the stereo mounting brackets, you’re now ready to move on to the next step: unplugging the wiring harness and antenna from the stereo unit.
Step 5: Unplug the wiring harness and antenna
Now that you have removed the stereo unit from the mounting brackets, the next step is to unplug the wiring harness and antenna connections. These connections provide power and signal to the stereo unit. Follow these steps to proceed:
- Locate the wiring harness: Look for a bundle of wires connected to the back of the stereo unit. This is the wiring harness, and it is typically held in place by a plastic connector.
- Disconnect the wiring harness: Firmly grasp the plastic connector and gently pull it away from the back of the stereo unit. Be careful not to pull on the wires themselves. If the connector feels tight, you may need to depress a release tab or press a locking mechanism to detach it.
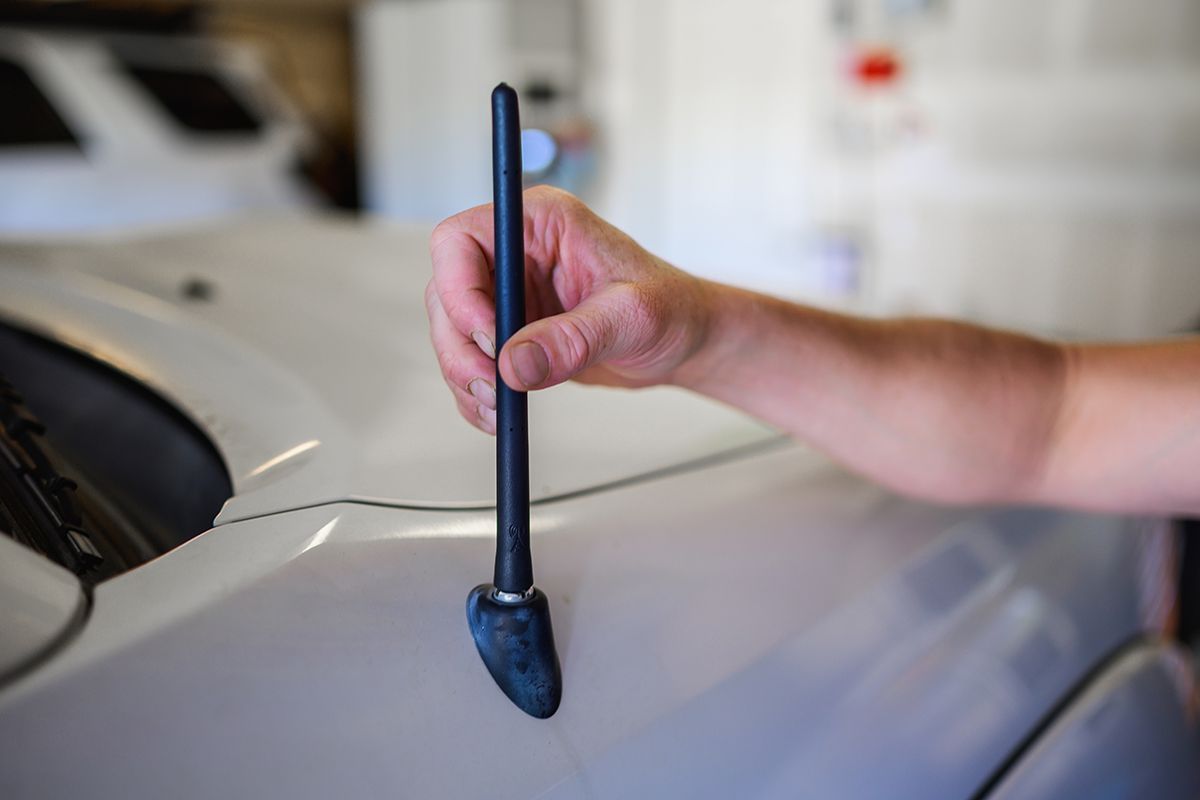
- Identify the antenna connection: Look for a single wire or coaxial cable connected to the back of the stereo unit. This is the antenna connection, which provides reception for the radio.
- Disconnect the antenna connection: Similar to the wiring harness, the antenna connection may have a plastic connector that needs to be released or a lock to be undone. Disconnect the antenna connection by gently pulling it away from the stereo unit.
When unplugging the wiring harness and antenna connections, it’s essential to be gentle and avoid applying excessive force. Take your time and ensure that the connectors are fully detached before proceeding.
Once you have successfully unplugged the wiring harness and antenna connections, you can set the stereo unit aside. Be careful not to let it dangle or allow the connectors to be damaged.
With the wiring harness and antenna disconnected, you’re now ready to move on to the next step: sliding out the old stereo unit from the dashboard.
Step 6: Slide out the old stereo unit
With the wiring harness and antenna disconnected, you can now proceed to slide out the old stereo unit from the dashboard of your 1999 Toyota Camry. Follow these steps to complete this process:
- Grasp the sides of the stereo unit: Place your hands on the sides of the stereo unit, ensuring a firm grip.
- Gently pull the stereo unit towards you: Slowly and evenly pull the stereo unit towards you. Use steady and controlled force to avoid any sudden movement or damage to the surrounding components.
- Continue sliding until the stereo unit is completely free: Keep pulling the stereo unit out until it is completely free from the dashboard. Be mindful of any remaining wires or connections that may still be attached.
- Set the old stereo unit aside: Once the old stereo unit is fully removed, set it aside in a safe location. Take care not to place anything heavy or sharp on top of it to avoid any potential damage.
Removing the old stereo unit from the dashboard is a significant milestone in the process. Congratulations! You’ve successfully completed this step and are now ready to move on to the installation of the new stereo unit.
Before proceeding, take a moment to inspect the surrounding area and ensure that there are no loose wires or any debris that may interfere with the installation of the new stereo unit.
In the next step, we’ll cover the installation process for the new stereo unit. Make sure to refer to the manufacturer’s instructions or any additional resources specific to your new stereo unit to ensure a successful installation.
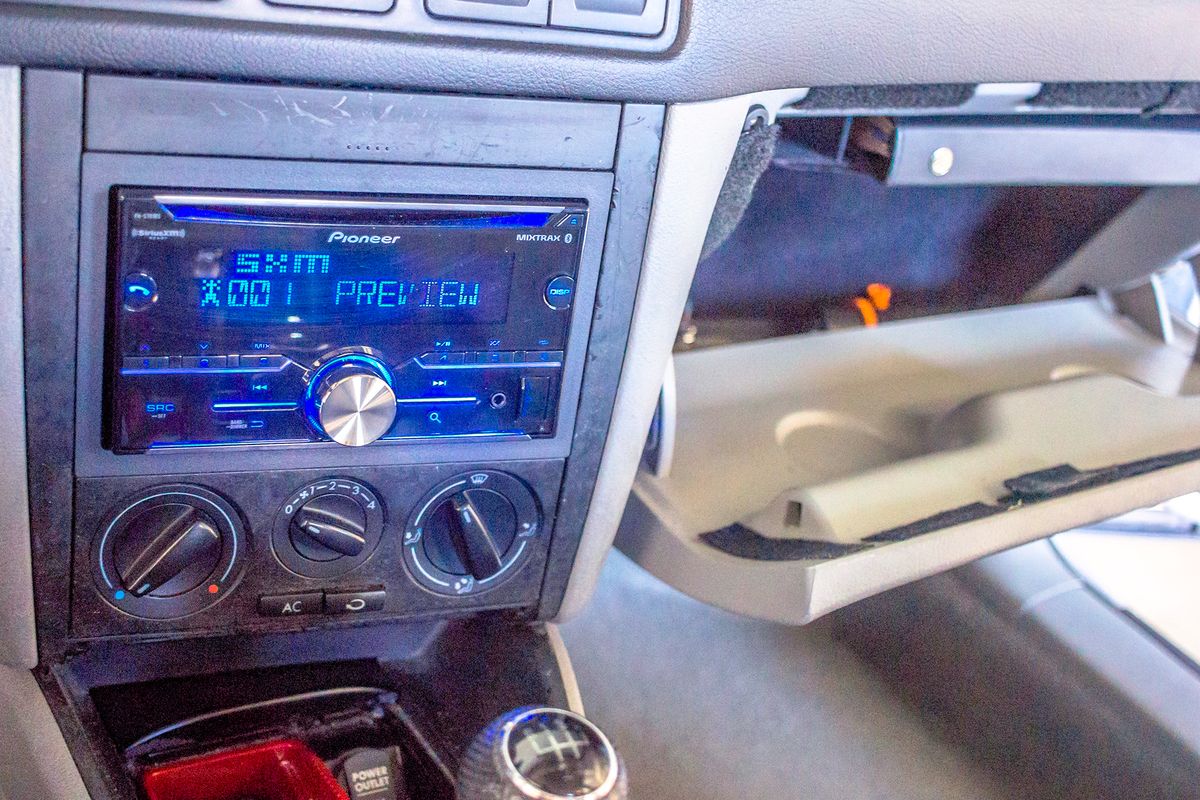
Step 7: Install the new stereo unit
Now that you have successfully removed the old stereo unit, it’s time to install the new stereo unit in your 1999 Toyota Camry. Follow these steps to complete the installation process:
- Position the new stereo unit: Carefully position the new stereo unit in the appropriate slot in the dashboard. Make sure it is aligned properly and fits securely.
- Connect the wiring harness: Plug the wiring harness from the vehicle into the corresponding port on the back of the new stereo unit. Ensure that the connectors are fully inserted and securely fastened.
- Attach the antenna connection: Connect the antenna cable to the designated port on the back of the new stereo unit. Ensure that it is firmly connected to ensure proper radio reception.
- Slide the stereo unit into place: With the wiring harness and antenna connection secured, slide the new stereo unit into the dashboard slot. Apply even pressure, ensuring that it goes in smoothly without any obstructions.
- Ensure a proper fit: Check that the new stereo unit sits flush with the dashboard and is properly seated. It should not wobble or feel loose.
- Follow any additional manufacturer instructions: Depending on the specific model and features of your new stereo unit, there may be additional steps or instructions provided by the manufacturer. It’s essential to follow these instructions to ensure proper functionality and compatibility.
Once the new stereo unit is installed, take a moment to double-check all the connections and ensure that everything is securely in place. Test the functionality of the new stereo, including the radio, CD player, and any other features, to ensure proper operation.
Keep in mind that some new stereo units may require additional configuration or programming. Refer to the manufacturer’s instructions or consult a professional if you need assistance with any specific setup or adjustments.
With the new stereo unit successfully installed, you’re one step closer to enjoying an upgraded audio experience in your 1999 Toyota Camry. In the next steps, we’ll cover the process of reconnecting the wiring harness and antenna, and reassembling the dashboard panels.
Step 8: Reconnect the wiring harness and antenna
With the new stereo unit in place, it’s time to reconnect the wiring harness and antenna connections to ensure proper functionality. Follow these steps to complete this process:
- Locate the wiring harness and antenna connections: Identify the wiring harness and antenna connectors on the back of the new stereo unit. Make sure to match them with the corresponding connectors from the vehicle.
- Connect the wiring harness: Take the wiring harness from the vehicle and align it with the corresponding connector on the back of the new stereo unit. Insert the connector and ensure it is securely fastened. You may hear a click or feel a slight resistance when it is properly connected.
- Attach the antenna connection: Take the antenna cable and connect it to the designated port on the back of the new stereo unit. Ensure that it is firmly inserted to ensure proper radio reception.
- Double-check the connections: Once both the wiring harness and antenna connection are in place, give them a gentle tug to ensure they are securely connected. Verify that there are no loose or disconnected wires.
It’s crucial to ensure that all connections are properly seated and secure to avoid any potential electrical issues or audio problems. Take a moment to inspect the connections and make sure they are tight and secure.
With the wiring harness and antenna connections successfully reconnected, you can now move on to the next step: reattaching the stereo mounting brackets to secure the new unit in place.
Step 9: Reattach the stereo mounting brackets
After connecting the wiring harness and antenna, the next step in the process of installing a new stereo unit in your 1999 Toyota Camry is to reattach the stereo mounting brackets. These brackets ensure that the stereo unit is securely held in place within the dashboard. Follow these steps to complete this process:
- Locate the stereo mounting brackets: Identify the metal or plastic brackets that were originally attached to the sides, top, or bottom of the old stereo unit. These brackets are designed to hold the stereo unit in place within the dashboard.
- Align the new stereo unit with the mounting brackets: Carefully align the new stereo unit with the mounting brackets in the dashboard. Ensure that the brackets correspond to the appropriate slots or holes on the sides of the stereo unit.
- Attach the mounting brackets: Use the screws or bolts that were removed earlier to secure the mounting brackets to the new stereo unit. Insert and tighten them using the appropriate tool. Be cautious not to overtighten, as it may damage the brackets or the stereo unit.
- Check the stability and fit: After attaching the mounting brackets, check the stability and fit of the new stereo unit. Ensure that it is securely held in place and does not wobble or move when lightly pushed or shaken.
Reattaching the stereo mounting brackets is an essential step to ensure the new stereo unit remains securely in place within the dashboard of your Toyota Camry. Take your time to align the brackets properly to avoid any misalignment or issues during the installation.
Once the brackets are securely attached, you can now proceed to the next step: replacing the dashboard panels to restore the aesthetic appeal of the interior.
Step 10: Replace the dashboard panels
With the new stereo unit securely in place and the mounting brackets attached, it’s time to replace the dashboard panels. This step will restore the aesthetic appeal of the interior and ensure a clean and polished look. Follow these steps to complete this process:
- Retrieve the dashboard panels: Gather all the trim pieces that were removed earlier in a safe and easily accessible location. Make sure they are free from any dust or debris.
- Align the panels: Align each panel carefully with the corresponding slots or openings in the dashboard. Be sure to match the clips or connectors on the back of the panels with the corresponding ones on the dashboard.
- Apply pressure: Once properly aligned, apply gentle pressure on each panel to secure them into place. Use your hands or a trim removal tool to ensure that the clips engage and hold the panels firmly.
- Check for evenness: After replacing all the panels, visually inspect the dashboard to ensure that each panel is flush and even. Make any necessary adjustments to achieve a seamless fit.
- Test panel stability: Give each panel a gentle tug to test its stability. If any panel feels loose or unstable, reposition and apply more pressure to secure it properly.
Replacing the dashboard panels brings the installation process of the new stereo unit to a close. Take a moment to appreciate the refreshed and unified look of your Toyota Camry’s interior.
With the dashboard panels securely in place, you’re now ready for the final step: reconnecting the car battery to bring the electrical system back online.
Step 11: Reconnect the car battery
With the new stereo unit installed and the dashboard panels replaced, the final step in the process of removing and replacing your 1999 Toyota Camry’s stereo is to reconnect the car battery. Follow these steps to complete this process:
- Locate the car battery: Lift the hood of your car and locate the car battery. It is typically located in the engine compartment on one side.
- Identify the negative terminal: Locate the negative terminal on the car battery. It is usually marked with a “-” symbol and colored black.
- Remove any protective covers: If there are any protective covers over the battery terminals, remove them to expose the connectors.
- Reconnect the negative cable: Take the negative cable that you had disconnected earlier and fit it onto the negative terminal of the car battery. Slide it onto the terminal and tighten the bolt or nut to secure it in place.
- Ensure a secure connection: After securing the negative cable, give it a gentle tug to ensure that it is securely attached to the battery terminal.
- Replace any protective covers: If you removed any protective covers, now is the time to put them back in place to safeguard the battery terminals.
- Close the hood: Finally, close the hood of your car, ensuring that it is properly latched.
With the car battery reconnected, the electrical system is back online. This allows the new stereo unit to power up and function properly.
Now is the perfect time to test the new stereo unit and enjoy the improved sound and features it brings to your Toyota Camry. Test the radio, CD player, and any other audio sources to ensure they are working as expected. Don’t forget to set up your favorite radio stations and adjust any audio settings to your preference.
Congratulations! You have successfully removed, replaced, and installed a new stereo unit in your 1999 Toyota Camry. Enjoy your enhanced audio experience!
Note: It’s always a good idea to consult your vehicle’s owner’s manual or seek professional assistance if you have any doubts, concerns, or specific instructions related to your particular car model.
Conclusion
Congratulations on successfully removing and replacing the stereo unit in your 1999 Toyota Camry! By following the step-by-step instructions outlined in this guide, you were able to upgrade your audio system or perform necessary repairs with confidence and ease.
Removing the stereo unit required gathering the necessary tools and disconnecting the car battery to ensure safety. You then proceeded to remove the dashboard panels, locate and detach the stereo mounting brackets, and unplug the wiring harness and antenna connections. With the old stereo unit out, you installed the new stereo unit, reconnected the wiring harness and antenna, and reattached the stereo mounting brackets. Finally, you replaced the dashboard panels and reconnected the car battery.
With the new stereo unit installed, you can now enjoy an enhanced audio experience in your Toyota Camry. Take a moment to appreciate the updated appearance of your dashboard, and explore the various features and functionalities of your new stereo system.
Remember, it’s always important to consult your vehicle’s manual or seek professional assistance if you have any doubts or concerns during the removal and installation process. Safety should always be a top priority.
Thank you for using this comprehensive guide. We hope it provided you with the knowledge and confidence to successfully remove and replace your 1999 Toyota Camry’s stereo unit. Enjoy your new audio journey!