Home>Production & Technology>Stereo>How To Remove A Stereo From A 2001 Honda Civic

Stereo
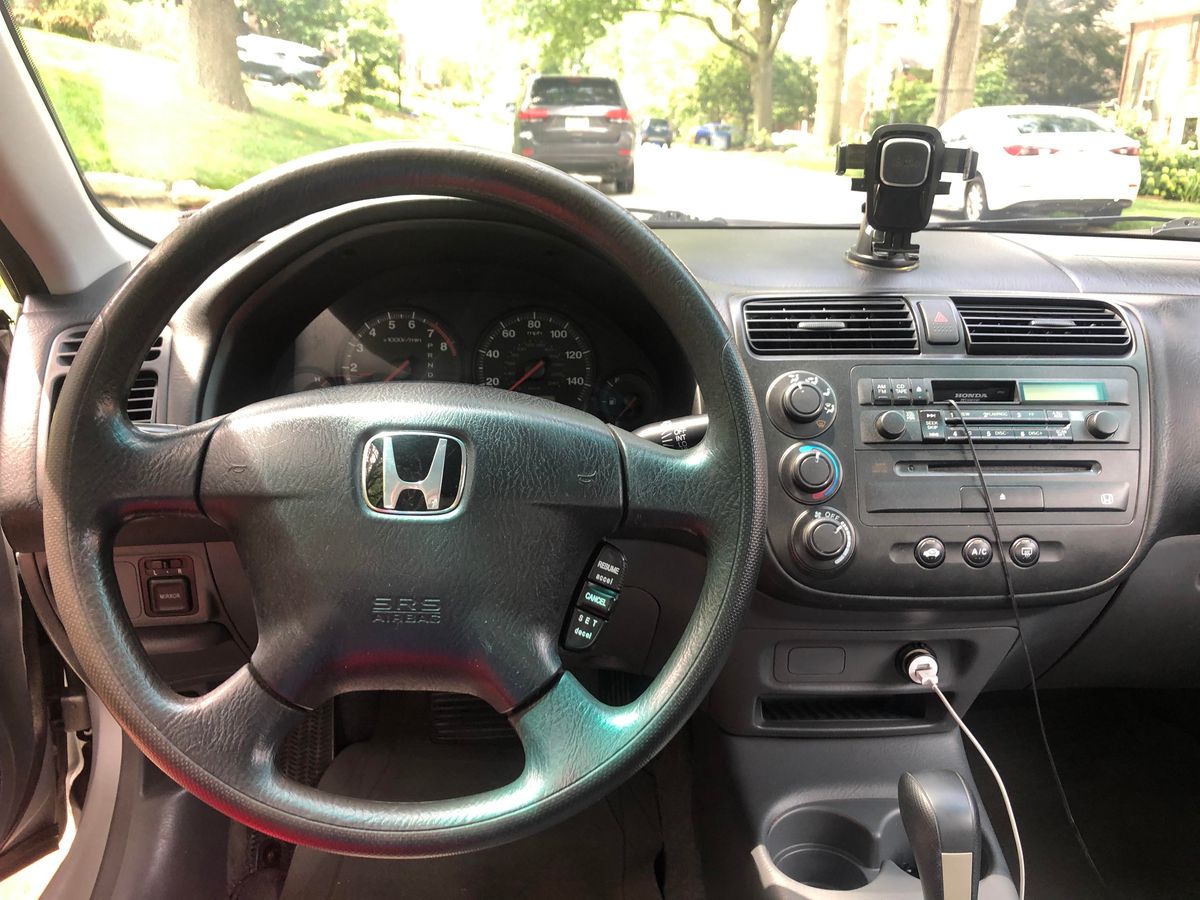
How To Remove A Stereo From A 2001 Honda Civic
Published: November 25, 2023
Need to remove the stereo from your 2001 Honda Civic? Learn how to do it easily with our step-by-step guide. Say goodbye to outdated audio and upgrade your car's sound system now!
(Many of the links in this article redirect to a specific reviewed product. Your purchase of these products through affiliate links helps to generate commission for AudioLover.com, at no extra cost. Learn more)
Table of Contents
Introduction
So, you’ve decided it’s time to upgrade your car stereo and bring your music experience to the next level. Or maybe your stereo is malfunctioning and needs to be repaired or replaced. Whatever the reason may be, removing a stereo from a 2001 Honda Civic is a relatively simple process that can be done with the right tools and a little bit of know-how.
Upgrading or replacing the stereo in your Honda Civic can significantly enhance the audio quality and functionality of your car’s entertainment system. You’ll have access to features like Bluetooth connectivity, hands-free calling, and maybe even Apple CarPlay or Android Auto integration. But before you can enjoy these new features, you need to remove the old stereo.
In this guide, we’ll take you through a step-by-step process on how to remove the stereo from a 2001 Honda Civic. We’ll cover the tools and materials you’ll need, as well as the necessary steps to ensure a smooth and successful removal process.
Before we begin, it is important to note that this guide is specific to the 2001 Honda Civic. While the general process may be similar for other makes and models, it’s always a good idea to consult your car’s owner’s manual or a professional if you’re unsure about the specific steps for your vehicle.
Now, let’s gather the tools and materials we’ll need for this process.
Tools and Materials Needed
Before you start the process of removing the stereo from your 2001 Honda Civic, make sure you have the following tools and materials on hand:
- Flathead screwdriver
- Phillips head screwdriver
- Socket set
- Pliers
- Trim removal tools
- Electrical tape
- Wire connectors or crimping tool
The flathead and Phillips head screwdrivers will help you remove any screws or panels that are holding the stereo in place. The socket set is necessary for removing any bolts that may be securing the stereo unit. Pliers can come in handy for disconnecting any wiring harnesses or connectors.
Trim removal tools are essential for safely removing the dashboard trim without damaging it or any surrounding panels. These tools provide leverage and help you apply pressure in the right places to release the clips holding the trim in place.
Electrical tape is useful for securing any disconnected wires during the removal process. It prevents them from accidentally making contact with metal surfaces and causing short circuits.
Wire connectors or a crimping tool are necessary if you plan on installing a new stereo unit. They help you connect the wiring harnesses from the new stereo to the existing wiring in your car. If you’re not planning on installing a new stereo, you may not need these materials.
Now that we have all the necessary tools and materials, let’s move on to the first step of removing the stereo from your 2001 Honda Civic – disconnecting the negative battery terminal.
Step 1: Disconnect the Negative Battery Terminal
Before you start working on the stereo removal process, it’s important to disconnect the negative battery terminal to avoid any electrical mishaps. Here’s how you can do it:
- Locate the battery under the hood of your 2001 Honda Civic. It should be on the driver’s side of the engine bay.
- Using a socket wrench, loosen the nut holding the negative battery cable in place. The negative cable is usually marked with a minus (-) sign.
- Once the nut is loose, carefully remove the negative battery cable from the terminal. Make sure it is secure and won’t accidentally come into contact with the terminal again.
- Wrap the exposed end of the negative battery cable with electrical tape to prevent it from making contact and causing any electrical issues while you’re working on the stereo.
By disconnecting the negative battery terminal, you’re ensuring that there is no power running through the car’s electrical system. This will prevent any accidental short circuits or electrical damage while you’re removing the stereo.
Remember, safety should always be a priority when working with any electrical components of your car. Now that we have safely disconnected the negative battery terminal, we can move on to the next step – removing the dashboard trim.
Step 2: Remove the Dashboard Trim
With the negative battery terminal safely disconnected, we can now proceed to remove the dashboard trim. This trim surrounds the stereo unit and needs to be taken off to access the stereo itself. Here’s how you can do it:
- Take a trim removal tool or a flathead screwdriver wrapped in a soft cloth to prevent any damage to the trim.
- Starting at one corner of the trim, carefully insert the tool between the trim and the dashboard.
- Gently pry the trim away from the dashboard, applying even pressure along the length of the trim piece. Be cautious not to use excessive force to prevent any breakage.
- Continue working your way around the trim, releasing the clips that hold it in place. There might be several clips along each side that need to be released.
- Once all the clips are detached, you can remove the trim from the dashboard.
It’s important to note that some trims might have screws holding them in place as well. If you encounter any screws during the removal process, use a screwdriver (likely Phillips head) to remove them before prying off the trim.
Without the dashboard trim in the way, you’ll have clear access to the stereo unit. Now, it’s time to move on to the next step – unmounting the stereo unit itself.
Step 3: Unmount the Stereo Unit
With the dashboard trim removed, we can now proceed to unmount the stereo unit. This step involves removing any screws or bolts that are holding the stereo in place. Follow these steps to safely unmount the stereo:
- Locate the screws or bolts that are securing the stereo unit. These are typically found on the sides or top of the stereo.
- Using a screwdriver or socket set, carefully remove the screws or bolts. Keep them in a safe place as you will need them later when installing a new stereo or reassembling the original one.
- Once the screws or bolts are removed, gently pull the stereo unit outwards to detach it from the mounting bracket. Be careful not to force it or tug on any wires that may still be connected.
If the stereo feels stuck or doesn’t come out easily, double-check for any additional screws or bolts that may be holding it in place. Sometimes there are hidden screws or bolts that aren’t immediately visible.
Once the stereo unit is detached from the mounting bracket, you can proceed to the next step – disconnecting the wiring.
Note: If you’re not planning on installing a new stereo and only need to remove the existing one for repair or other purposes, you can skip the rest of the steps and conclude the process here. However, if you do plan on installing a new stereo, continue reading to learn how to disconnect the wiring harnesses.
Step 4: Disconnect the Wiring
Now that the stereo unit is unmounted from the bracket, it’s time to disconnect the wiring harnesses. These connectors provide power and signal to the stereo, enabling it to function properly. Follow these steps to disconnect the wiring:
- Identify the wiring harnesses at the back of the stereo unit. There may be multiple harnesses depending on the specific model and features of your 2001 Honda Civic.
- Locate the plastic clips or locks on each wiring harness connector. These clips or locks need to be released to disconnect the wiring.
- Depending on the type of connector, you may need to depress the clip or slide the lock mechanism to unlock it. This can usually be done with your fingers or a small flathead screwdriver.
- Once the clip or lock is released, gently pull the wiring harness connector away from the stereo unit. Avoid pulling on the wires themselves to prevent any damage.
- Repeat the process for each wiring harness connector until all of them are disconnected.
It’s important to keep track of each wiring harness and its corresponding connector. This will make it easier during the installation of a new stereo or reassembly of the original one.
If the wiring connectors are tightly connected and difficult to remove, try twisting them slightly while pulling to loosen any friction. Be patient and gentle to avoid causing any damage to the connectors or wires.
With the wiring harnesses now disconnected, we’re ready to move on to the final step – removing the stereo unit from the dashboard.
Step 5: Remove the Stereo Unit from the Dashboard
Now that the wiring harnesses have been disconnected, we can proceed to remove the stereo unit from the dashboard. Follow these steps to safely remove the stereo unit:
- Gently grasp the sides or edges of the stereo unit.
- Slowly and carefully pull the stereo unit towards you, ensuring that there are no obstructions or wires still connected.
- If the stereo unit feels stuck or doesn’t come out easily, double-check for any hidden screws or bolts that may still be securing it to the dashboard. Ensure that you have removed all the necessary hardware before proceeding.
- Continue pulling the stereo unit until it is completely free from the dashboard. Be mindful of any wires or cables that may still be attached.
- Once the stereo unit is removed, place it in a safe and secure location to avoid any damage.
Remember to handle the stereo unit with care and avoid any unnecessary tugging or twisting. If you encounter any resistance during the removal process, take a moment to reassess and make sure all necessary steps have been followed.
Congratulations! You have successfully removed the stereo unit from your 2001 Honda Civic. Whether you’re planning to upgrade to a new stereo or need to repair the existing one, you now have the freedom to proceed with your desired modifications. Don’t forget to refer to the manufacturer’s instructions or consult a professional if you encounter any difficulties or have specific questions during the installation or reassembly process.
Before concluding, let’s recap the steps we’ve covered:
- Disconnect the negative battery terminal.
- Remove the dashboard trim.
- Unmount the stereo unit.
- Disconnect the wiring harnesses.
- Remove the stereo unit from the dashboard.
By following these steps and taking your time, you can safely and effectively remove the stereo unit from your 2001 Honda Civic. Enjoy your future audio endeavors and be sure to take advantage of your newly gained knowledge!
Conclusion
Removing the stereo unit from a 2001 Honda Civic is a relatively straightforward process that can be accomplished with the right tools and a little bit of patience. By following the steps outlined in this guide, you can successfully remove the stereo unit and proceed with your desired modifications or repairs.
Upgrading your car stereo can significantly enhance your music experience while driving. With features like Bluetooth connectivity, hands-free calling, and advanced audio settings, you can enjoy a more convenient and immersive audio experience.
Remember to always prioritize safety when working on any electrical components of your vehicle. Start by disconnecting the negative battery terminal to prevent any electrical mishaps. Use the appropriate tools, such as screwdrivers and socket sets, to unmount the stereo unit and detach the wiring harnesses. Take your time and be cautious throughout the removal process to avoid any damage to the stereo unit or other components.
If you’re planning on installing a new stereo, refer to the manufacturer’s instructions or consult a professional for guidance. They can provide valuable insights and ensure a successful installation process.
Now that you have successfully removed the stereo unit from your 2001 Honda Civic, you can move forward with your desired modifications or repairs. Whether you choose to install a new stereo or make necessary repairs, enjoy the enhanced audio experience that awaits you.
Thank you for following this guide, and we hope it has been helpful in your stereo removal journey. Safe travels and happy listening!


