Home>Production & Technology>Audio Cable>How To Wire Splice An IPhone Lightning Audio Cable

Audio Cable
How To Wire Splice An IPhone Lightning Audio Cable
Published: December 22, 2023
Learn how to wire splice an iPhone Lightning audio cable with our step-by-step guide. Upgrade your audio experience with this simple DIY project.
(Many of the links in this article redirect to a specific reviewed product. Your purchase of these products through affiliate links helps to generate commission for AudioLover.com, at no extra cost. Learn more)
Table of Contents
Introduction
Welcome to the world of audio cables, where the quality of your connection can make all the difference in your listening experience. Whether you’re a music lover, a podcast enthusiast, or a professional audio engineer, having the right cables is essential to get the most out of your audio devices.
Among the various types of audio cables available, the iPhone Lightning audio cable stands out for its compatibility and versatility. This cable lets you listen to music, watch videos, and make phone calls using your iPhone and other Apple devices. However, as with any cable, wear and tear can sometimes lead to the need for repairs or splicing.
In this article, we’ll guide you through the process of wire splicing an iPhone Lightning audio cable. By following these step-by-step instructions and using the right tools and materials, you’ll be able to repair your cable and restore its functionality.
Before we dive into the splicing process, it’s important to note that this guide assumes a basic understanding of electronics and soldering techniques. If you’re new to splicing cables or working with electronics, it might be helpful to do some additional research or seek assistance from someone with experience.
Now, let’s gather our tools and materials and get started with splicing an iPhone Lightning audio cable!
Tools and Materials Needed
Before you begin splicing an iPhone Lightning audio cable, make sure you have the following tools and materials on hand:
- Soldering iron: A soldering iron is essential for joining the wires together. Choose a soldering iron with a fine tip to ensure precision.
- Solder: Select a high-quality solder that is specifically designed for electrical connections. Look for solder with a rosin core, as this will help create a strong and reliable bond.
- Wire strippers: Wire strippers are crucial for removing the outer insulation from the cable wires. Opt for wire strippers that are appropriate for the gauge of your cable.
- Heat shrink tubing: Heat shrink tubing is used to insulate and protect the spliced wires. Choose tubing with a diameter that will comfortably cover the spliced area.
- Heat gun or lighter: A heat gun or lighter is necessary to shrink the heat shrink tubing and create a secure seal around the spliced wires.
- Electrical tape: Electrical tape can be used as an alternative to heat shrink tubing for insulation and protection. It is also helpful for securing the cable and keeping the wires in place.
- Wire cutter or scissors: You’ll need a wire cutter or scissors to trim the excess wire and ensure a clean and neat splice.
- Helping hands or clamps: Having a pair of helping hands or clamps can make the splicing process easier by holding the cable and wires in place while you work.
- Multimeter: A multimeter is optional but recommended for testing the continuity of the spliced connection. It can help ensure a successful splice and detect any potential issues.
By having these tools and materials ready, you’ll be well-equipped to proceed with the wire splicing process. Now that we have everything we need, let’s move on to the first step: preparing the Lightning audio cable.
Step 1: Prepare the Lightning Audio Cable
Before you begin splicing an iPhone Lightning audio cable, it’s important to properly prepare the cable. This involves ensuring that the cable is clean, free from any obstacles, and ready for the splicing process.
Here’s how to prepare the Lightning audio cable:
- Inspect the cable: Start by thoroughly examining the Lightning audio cable. Look for any visible signs of damage, such as frayed wires or exposed insulation. If you notice any damage, it’s best to replace the cable entirely.
- Clean the cable: Use a clean cloth or cotton swab to wipe down the cable. This will remove any dirt or debris that may interfere with the splicing process.
- Unplug the cable: Ensure that the Lightning audio cable is disconnected from any power source or device before proceeding. This is essential for your safety and to prevent any electrical mishaps.
Once you have completed these steps, you are ready to move on to the next step: stripping the wires.
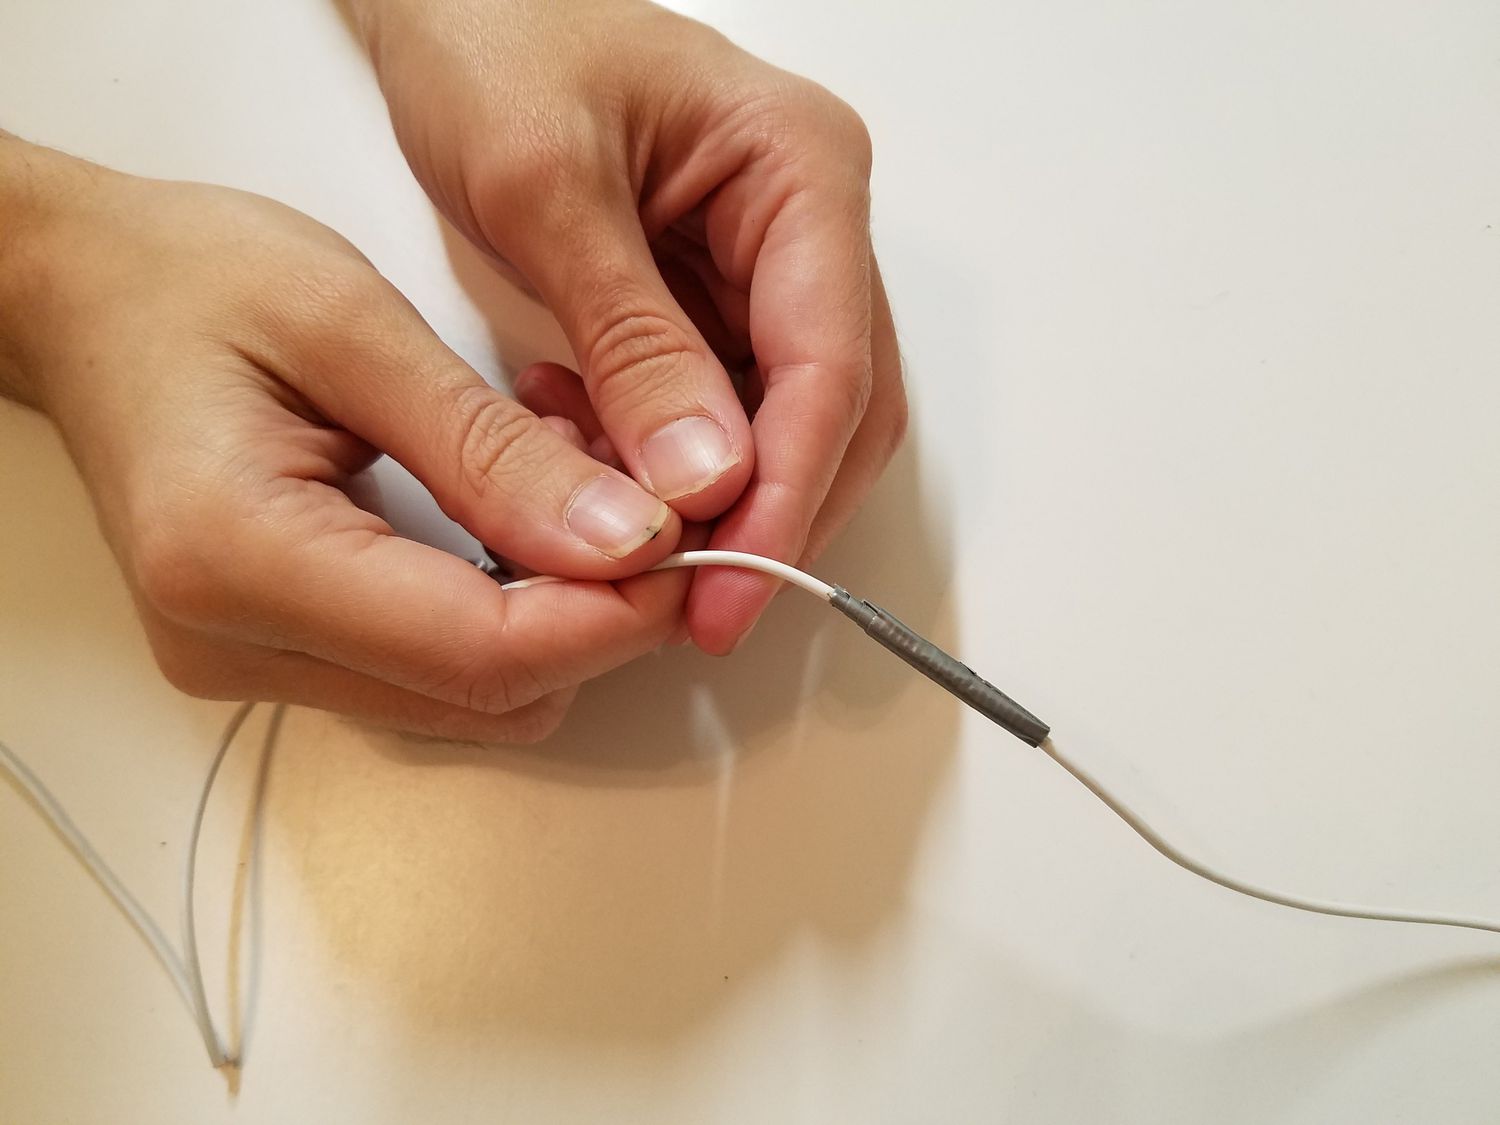
Step 2: Strip the Wires
Stripping the wires is a crucial step in the wire splicing process as it exposes the conductive metal inside the cable. This allows for a proper connection between the wires, ensuring the audio signal can flow smoothly.
Follow these steps to strip the wires of your Lightning audio cable:
- Identify the wires: The Lightning audio cable typically consists of several wires inside the outer insulation. Identify the wires that you need to splice together. These are usually color-coded, with the most common colors being red, green, white, and black.
- Measure and mark: Measure about ½ inch (1.27 cm) from the end of each wire that needs to be spliced. Use a marker or tape to mark this point. This will serve as a guide for the next step.
- Use wire strippers: Grab your wire strippers and locate the notch or hole that corresponds to the gauge of your wire. Place the wire in the notch or hole, making sure the marked point is just beyond the stripping blades.
- Strip the wire: Squeeze the wire strippers gently around the cable, applying enough pressure to cut through the outer insulation. Carefully pull the wire strippers towards the marked point, removing the insulation along the way. Repeat this process for each wire.
- Inspect the stripped wires: Once you have stripped the wires, inspect them to ensure the insulation is completely removed. The exposed metal inside should be clean and free from any debris or stray strands of wire.
By properly stripping the wires, you create a clean and exposed surface for the next step: matching the wires.
Step 3: Match the Wires
Matching the wires is a crucial step in splicing an iPhone Lightning audio cable. It involves identifying and pairing the corresponding wires that need to be connected together. This ensures that the audio signal is transmitted correctly and minimizes the risk of any short circuits or connectivity issues.
Follow these steps to match the wires of your Lightning audio cable:
- Refer to the cable’s color code: Most Lightning audio cables follow a specific color code for their wires. Common color codes include red for the right audio channel, green for the left audio channel, white for the ground connection, and black for the microphone. Refer to the manufacturer’s documentation or conduct an online search to determine the specific color code for your cable.
- Match the corresponding wires: Once you know the color code, match the wires accordingly. Take the first wire from one end and find its matching color on the other end. For example, the red wire on one end should be matched with the red wire on the opposite end.
- Double-check the matches: After pairing the wires, double-check to ensure that each wire is correctly matched. This is important to ensure proper audio channel separation and functionality.
Matching the wires correctly sets the foundation for a successful splice. Once you have matched the wires, you can proceed to the next step: twisting the wires together.
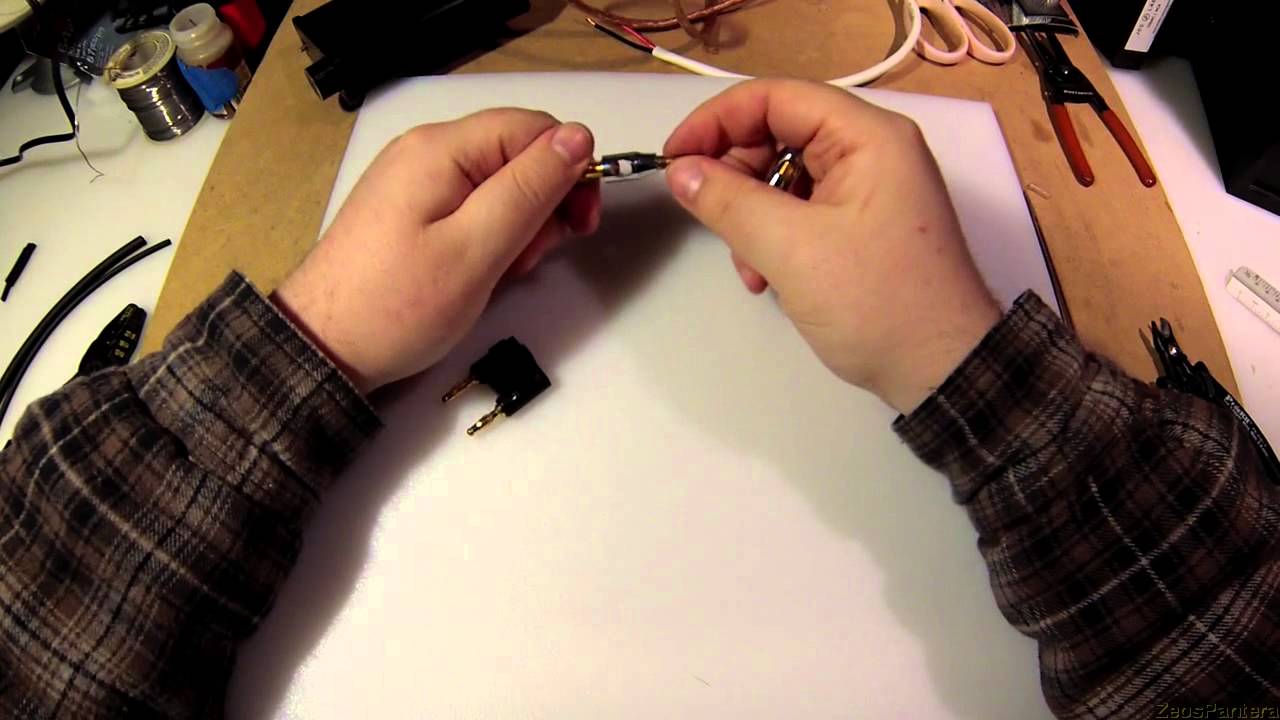
Step 4: Twist the Wires Together
Once you have matched the wires of your iPhone Lightning audio cable, it’s time to twist them together. Twisting the wires creates a secure connection and ensures a reliable transfer of the audio signal.
Follow these steps to twist the wires together:
- Hold the matched wires: Take two matched wires and hold them side by side, making sure that the exposed metal ends touch each other.
- Twist the wires: Using your fingers or a pair of pliers, gently twist the wires together. Start at the end where the exposed metal ends meet and work your way up towards the insulation. Continue twisting until the connection feels tight and secure.
- Repeat for the remaining matched wires: Repeat the twisting process for each pair of matched wires, ensuring that all connections are properly twisted together.
When twisting the wires, it’s important to be gentle and avoid applying too much force. Applying excessive pressure may cause the wires to break or separate, compromising the integrity of the splice.
With the wires now twisted together, it’s time to move on to the next step: securing the wiring splice.
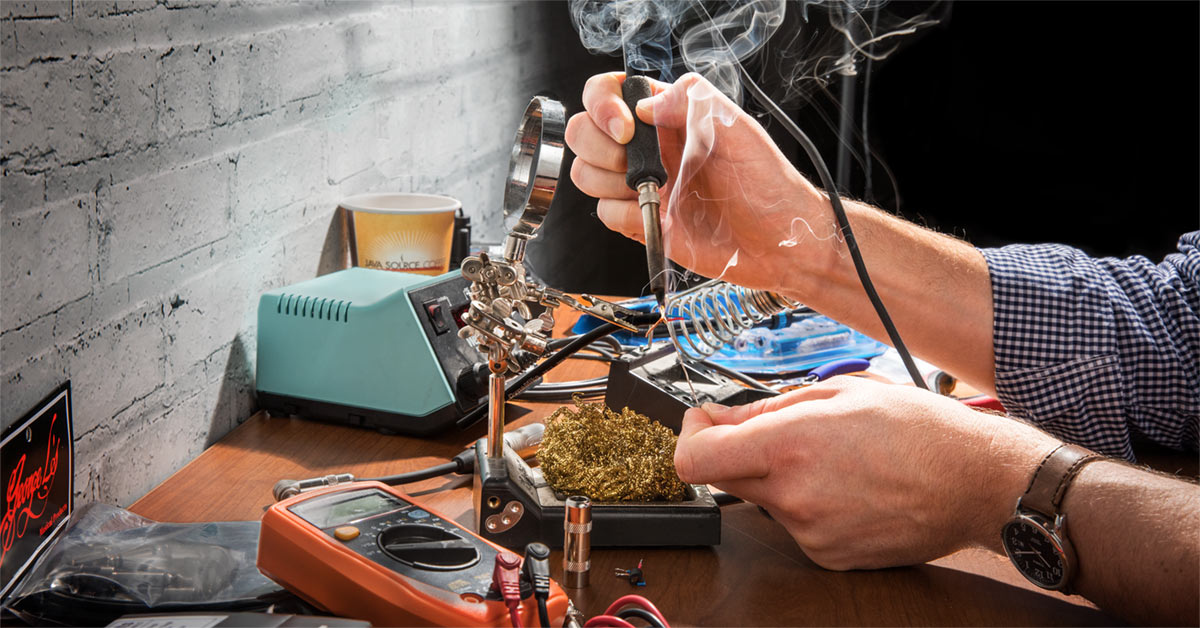
Step 5: Secure the Wiring Splice
After you have twisted the wires together, it’s important to secure the wiring splice to prevent the wires from coming loose or getting damaged. This will ensure the durability and longevity of your spliced Lightning audio cable.
Follow these steps to secure the wiring splice:
- Inspect the connection: Before proceeding, take a moment to inspect the twisted wires. Ensure that they are tightly and evenly twisted together. If necessary, make any adjustments to ensure a solid connection.
- Solder the wires (optional): For an extra secure splice, you can choose to solder the twisted wires together. To do this, heat up your soldering iron and apply a small amount of solder to the twisted wires. This will create a strong bond between the wires.
- Trim the excess wire: Once the connection is secure, use wire cutters or scissors to trim any excess wire beyond the twisted portion. This will help create a neat and tidy splice.
By securing the wiring splice, you ensure that the connection remains intact and reliable, even with continued use and movement of the cable.
Now that the wiring splice is secure, let’s move on to the next step: insulating the connection.
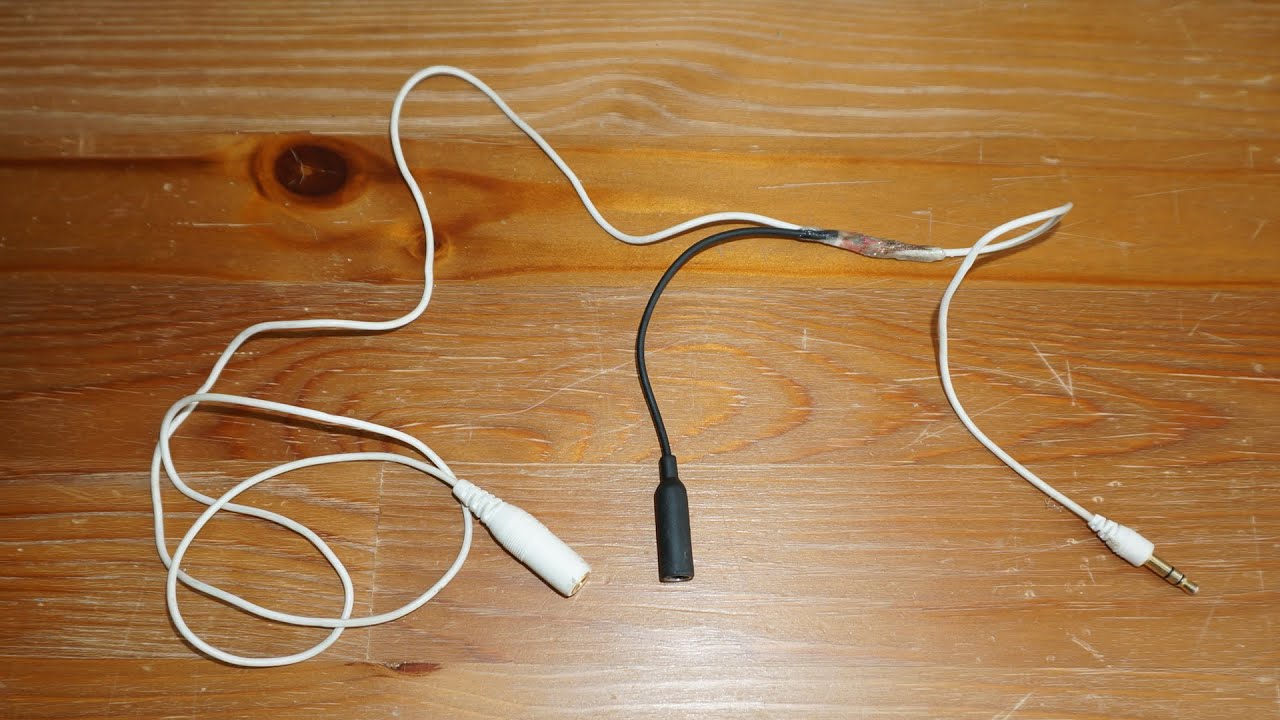
Step 6: Insulate the Connection
Insulating the connection is a crucial step in splicing an iPhone Lightning audio cable. It protects the exposed wires from external elements, prevents short circuits, and ensures the longevity of your spliced cable.
Follow these steps to insulate the connection:
- Heat shrink tubing: If you’re using heat shrink tubing, slide a piece of tubing over the twisted and secured wires. Position it so that it covers the twisted portion completely.
- Heat the tubing: Use a heat gun or a lighter to gently heat the shrink tubing. Ensure that you keep the heat source moving and don’t concentrate heat in one place for too long. As you heat the tubing, it will shrink and conform to the shape of the wires, creating a tight and protective seal.
- Alternative: If you don’t have heat shrink tubing, you can use electrical tape as an alternative. Wrap the exposed wire area with several layers of electrical tape, making sure to cover it completely. This provides insulation and protection to the connection.
Whether you choose to use heat shrink tubing or electrical tape, make sure that the entire exposed wire area is properly insulated. This will safeguard the connection and prevent any potential damage.
With the connection insulated, it’s time to move on to the next step: testing the spliced cable.
Step 7: Test the Spliced Cable
Once you have completed the splicing process and insulated the connection, it’s important to test the spliced cable to ensure its functionality. Testing the cable will help you verify that the audio signal is transmitting correctly and that the spliced connection is secure.
Follow these steps to test the spliced cable:
- Connect the cable: Plug the Lightning end of the cable into your iPhone or other compatible audio device. Ensure that the other end of the cable is connected to the appropriate audio output device, such as speakers or headphones.
- Play audio: Play some audio through the connected device and listen for any distortions, crackling, or loss of sound. Verify that the audio is coming through both channels (left and right speakers).
- Test microphone (if applicable): If your cable includes a microphone, test its functionality by making voice recordings or making a phone call. Check if the microphone is picking up your voice properly and if the sound quality is clear.
- Check for physical stability: Gently move and flex the cable while testing to ensure that the connection remains stable. Check for any intermittent audio or disruptions that may indicate loose or faulty wiring.
If the spliced cable passes these tests and functions properly, congratulations! You have successfully spliced your iPhone Lightning audio cable. If you encounter any issues or notice any disruptions in the audio signal, it may indicate a problem with the spliced connection that requires further inspection or reworking.
By testing the spliced cable, you can have confidence in its functionality and enjoy your audio experience without any interruptions.
Now that you’ve tested the cable, you can finally wrap up the process and enjoy your restored iPhone Lightning audio cable.
Conclusion
Splicing an iPhone Lightning audio cable can be a straightforward and cost-effective way to repair a damaged cable and restore its functionality. By following the steps outlined in this guide and using the right tools and materials, you can successfully splice the wires and enjoy a reliable audio connection once again.
Throughout the splicing process, it’s important to exercise caution and attention to detail. Properly preparing the cable, stripping the wires, matching the wires correctly, and securely twisting them together are all essential for a successful splice. Insulating the connection and testing the spliced cable ensure its durability and functionality.
Remember to take your time, use the proper tools, and follow safety procedures, especially when working with a hot soldering iron or heat source. If you are unsure about any step or lack experience with electronic repair, it’s always best to seek assistance from someone with expertise in the field.
By splicing your Lightning audio cable, you can avoid the expenses and potential waste associated with buying a new cable. Additionally, you can feel empowered knowing that you have the skills to repair and maintain your audio equipment.
So, don’t let a damaged audio cable stop you from enjoying your favorite music or podcasts. With a bit of patience, practice, and the right guidance, you can successfully splice your iPhone Lightning audio cable and continue to indulge in the audio experience you love.