Home>Production & Technology>Audio Interface>How To Record With A Podhd 500X Without An Audio Interface

Audio Interface
How To Record With A Podhd 500X Without An Audio Interface
Published: February 5, 2024
Learn how to record with a Podhd 500X without the need for an audio interface. Capture studio-quality sound directly with this step-by-step guide.
(Many of the links in this article redirect to a specific reviewed product. Your purchase of these products through affiliate links helps to generate commission for AudioLover.com, at no extra cost. Learn more)
Table of Contents
Introduction
Welcome to the world of music recording! If you’re a guitarist or a music enthusiast looking to capture your musical ideas, then you’re in the right place. One of the first steps in recording your guitar is to have a reliable audio interface. However, what if you don’t have one? Fear not! In this article, we will explore how to record with a POD HD 500X without an audio interface.
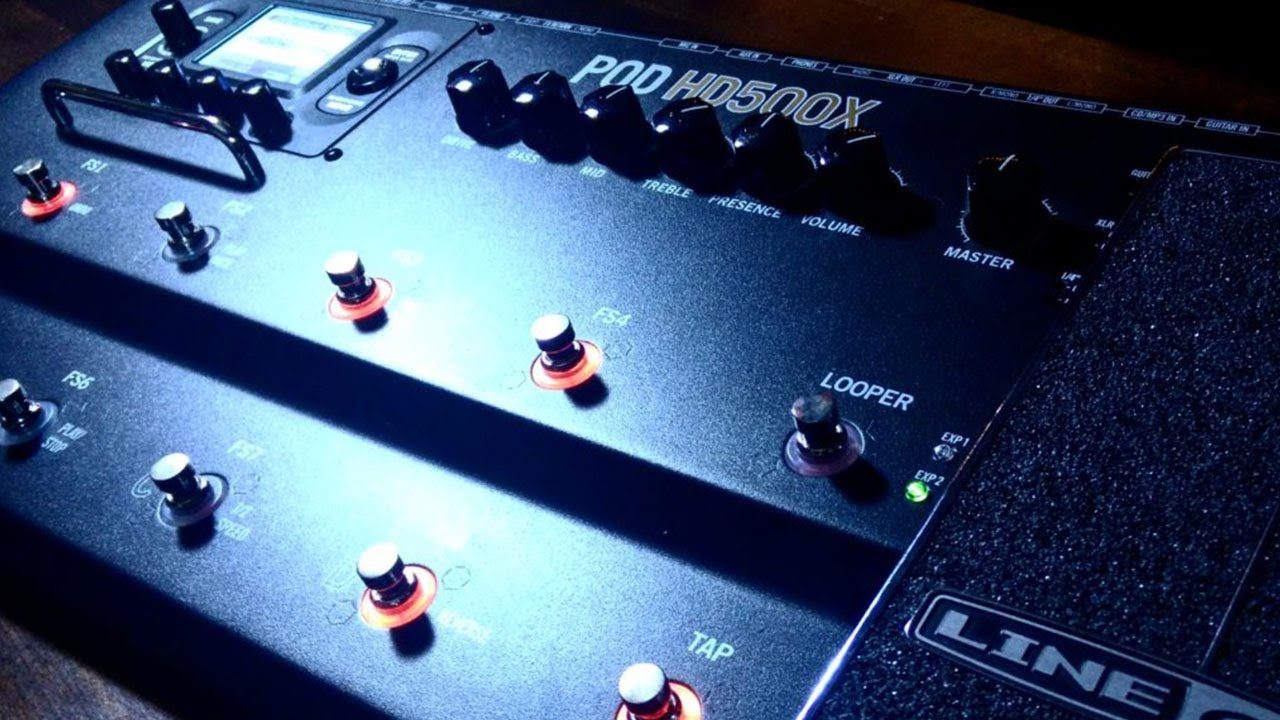
The POD HD 500X is a powerful multi-effects processor and amp modeler that not only offers a wide range of tones and effects but also provides USB connectivity for direct recording to your computer. This means that you can bypass the need for a separate audio interface and start recording your guitar right away. Whether you’re a guitarist on a budget or simply want a streamlined recording setup, the POD HD 500X can be a great solution.
While having an audio interface can offer additional features and flexibility, using the POD HD 500X as an audio interface provides you with a convenient and straightforward way to record your guitar. Let’s dive into the necessary equipment and the steps to get started with recording using the POD HD 500X.
Necessary Equipment
Before we dive into the process of recording with a POD HD 500X without an audio interface, let’s make sure you have all the necessary equipment. Here’s what you’ll need:
- POD HD 500X: This is the heart of your recording setup. The POD HD 500X is a versatile multi-effects processor and amp modeler that will serve as both your guitar effects unit and audio interface.
- Computer: You’ll need a computer to connect your POD HD 500X and record your guitar. The computer should have a USB port to establish a connection.
- Guitar: Of course, you’ll need a guitar to record! Any electric or electro-acoustic guitar with a standard 1/4 inch cable output will work seamlessly with the POD HD 500X.
- USB Cable: To connect your POD HD 500X to your computer, you’ll need a USB cable. Make sure it’s in good condition to ensure a stable connection.
- Recording Software: Lastly, you’ll need recording software on your computer. There are plenty of options available, such as GarageBand (for Mac), Audacity (free software), or Reaper (affordable and feature-packed). Choose the one that suits your needs and install it before moving forward.
With these essential items in place, you’re ready to configure your POD HD 500X and start recording your guitar without the need for an external audio interface. Let’s move on to the next section to learn how to set up your POD HD 500X for recording.
Configuring the POD HD 500X
Setting up the POD HD 500X for recording involves a few key steps. Let’s walk through the process:
- Connect the POD HD 500X to your computer: Plug one end of the USB cable into the USB port on the back of the POD HD 500X and the other end into an available USB port on your computer. Ensure that both the POD HD 500X and your computer are powered on.
- Launch the recording software: Open your recording software of choice on your computer. Make sure it recognizes the POD HD 500X as the audio input device. You may need to select it from the software’s preferences or settings.
- Configure the audio settings: Within your recording software, navigate to the audio settings. Set the input and output to the POD HD 500X. Adjust the sample rate and buffer size according to your preference or the recommended settings of your software.
- Select the desired guitar tone: On the POD HD 500X, choose the amp model, effects, and any other settings that you want to use for recording. Spend some time experimenting to find the tone that best suits your musical style and preferences.
- Test the audio signal: Play your guitar and monitor the audio signal within the recording software. Ensure that the signal is coming through and adjust the input gain on the POD HD 500X if needed. Aim for a clear and balanced signal without any clipping or distortion.
By following these steps, you will have successfully configured your POD HD 500X for recording. Take some time to familiarize yourself with the settings and experiment with different tones to find the perfect sound for your recordings. Once everything is set up, you’re ready to start recording your guitar directly through the POD HD 500X. We’ll cover the recording process in the next section.
Connecting the POD HD 500X to a Computer
Now that you have configured the POD HD 500X for recording, it’s time to establish a solid connection between the device and your computer. Follow these steps to ensure a seamless connection:
- Plug in one end of the USB cable: Take the USB cable and insert one end into the USB port located on the back panel of the POD HD 500X.
- Connect the other end to your computer: Insert the other end of the USB cable into an available USB port on your computer. Ensure it fits snugly to establish a stable connection.
- Confirm the connection: Once you have plugged in both ends of the USB cable, the POD HD 500X should be recognized by your computer as a connected device. You may see a notification indicating the successful connection or find the device listed in your computer’s audio settings.
- Configure the audio settings: Within your recording software, make sure the input and output sources are set to the POD HD 500X. This allows the software to receive the audio input from your guitar and send the output to the POD HD 500X for monitoring.
- Test the audio signal: Play your guitar and monitor the audio signal within your recording software. You should see the signal coming through the software’s audio meters or level indicators. Adjust the input gain on the POD HD 500X if necessary to ensure a clean and undistorted signal.
By following these steps, you should have a successful connection between your POD HD 500X and your computer. Always double-check the connections and audio settings to ensure a reliable and stable recording setup. With the POD HD 500X connected, you’re ready to move on to the next section where we’ll explore the process of recording your guitar using the POD HD 500X as an audio interface.
Recording with the POD HD 500X
Now that you have your POD HD 500X configured and connected to your computer, it’s time to start recording your guitar. Follow these steps to begin the recording process:
- Create a new track: Open your recording software and create a new track for your guitar recording. Set the track to receive input from the POD HD 500X.
- Arm the track for recording: Arm the track by clicking on the record button or selecting the track as the record-enabled track in your recording software.
- Set the recording preferences: Choose the recording format, such as WAV or MP3, as well as the desired recording quality. Higher quality recordings may take up more storage space, so consider your preferences and available disk space.
- Start recording: Press the record button in your recording software and start playing your guitar. The software will capture the audio signal from the POD HD 500X, and you’ll see the recording meters indicating the level of your guitar signal.
- Monitor your recording: While recording, you can monitor your guitar signal through the POD HD 500X. Use headphones or connect external speakers to the POD HD 500X’s audio outputs to hear your playing in real-time.
- Make multiple takes: If you’re not satisfied with a particular take, simply stop recording and start again. Recording software allows you to create multiple takes and choose the best one during the editing process.
- Save your recording: After you’re finished recording, save your recording project in your recording software. Remember to create backup copies to prevent any data loss.
With these steps, you can now confidently record your guitar using the POD HD 500X as your audio interface. Take your time to experiment with different styles, tones, and effects to capture your musical ideas effectively. Don’t forget to enjoy the recording process and have fun while exploring the possibilities of your POD HD 500X.
Troubleshooting Tips
While recording with the POD HD 500X as an audio interface is generally straightforward, you may encounter some common issues. Here are a few troubleshooting tips to help you overcome any obstacles you may face:
- No audio signal: If you’re not getting any sound when recording with the POD HD 500X, check the following: ensure that both the POD HD 500X and your computer are powered on, verify that the USB cable is securely connected at both ends, and confirm that the audio settings in your recording software are correctly configured.
- Distorted audio signal: If your recorded guitar signal sounds distorted or clipped, reduce the input gain on the POD HD 500X. This will prevent the signal from peaking and causing distortion. Additionally, check the input level settings in your recording software to make sure they are correctly set.
- Latency issues: Latency is the delay between when you play a note and when you hear it through your computer’s speakers or headphones. To reduce latency, try increasing the buffer size in your recording software’s audio settings. This will give your computer more time to process the audio signal, reducing the delay.
- Crackling or popping sounds: If you hear crackling or popping sounds during playback, it may be due to a low buffer size or an issue with your computer’s processing power. Try increasing the buffer size or closing unnecessary applications to free up system resources.
- Noisy recordings: If your recordings have a lot of background noise or interference, make sure that you’re using good quality cables and that they are properly shielded. It’s also helpful to minimize any potential sources of electrical interference, such as keeping your recording setup away from power cables or other electronic devices.
Remember, troubleshooting is all about experimentation and finding the right settings for your specific setup. Don’t hesitate to consult the user manual for the POD HD 500X or reach out to support forums or online communities dedicated to audio recording if you encounter persistent issues. With patience and perseverance, you’ll be able to overcome any challenges and continue recording with your POD HD 500X smoothly.
Conclusion
Recording with the POD HD 500X without an audio interface is a convenient and cost-effective solution for capturing your guitar performances. By following the steps outlined in this article, you can achieve high-quality recordings directly through the POD HD 500X and your computer. With its versatile amp modeling and effects capabilities, the POD HD 500X offers a wide range of tones and sonic possibilities for your recordings.
We discussed the necessary equipment, including the POD HD 500X, a computer, USB cable, guitar, and recording software. Configuring the POD HD 500X and connecting it to your computer were also covered, ensuring a seamless setup for recording. By arming a track in your recording software, selecting appropriate recording settings, and hitting record, you can begin capturing your guitar performances through the POD HD 500X.
Additionally, troubleshooting tips were provided to help address common issues that may arise during the recording process. Whether you encounter problems with audio signals, latency, distortion, or noise, these tips will help you troubleshoot and optimize your recording setup.
Recording with the POD HD 500X opens up a world of creative possibilities for guitarists and music enthusiasts. Now, armed with the knowledge and steps outlined in this article, you can confidently record your guitar and share your musical ideas with the world. So go ahead, plug in your guitar, fire up the POD HD 500X, and start capturing your musical journey!

