Home>Production & Technology>Background Music>How To Add Background Music In Vsdc Video Editor
Background Music
How To Add Background Music In Vsdc Video Editor
Modified: January 22, 2024
Learn how to easily add background music to your videos using VSDC Video Editor. Enhance your videos with catchy tunes and create engaging content.
(Many of the links in this article redirect to a specific reviewed product. Your purchase of these products through affiliate links helps to generate commission for AudioLover.com, at no extra cost. Learn more)
Table of Contents
Introduction
Background music is a powerful tool that can greatly enhance the impact and emotional appeal of your videos. Whether you’re creating a promotional video, a vlog, or a video montage, adding the right background music can take your content to the next level.
VSDC Video Editor is a versatile and user-friendly video editing software that allows you to easily incorporate background music into your projects. In this article, we will guide you through the process of adding background music in VSDC Video Editor, step by step.
Before we delve into the technical details, it’s important to mention that the choice of background music is crucial. You want to select a track that complements the mood and theme of your video, while also respecting copyright laws. There are various platforms, such as royalty-free music libraries, where you can find high-quality music that is safe to use for your projects.
Now, let’s dive into the process of adding background music in VSDC Video Editor. Follow the steps outlined in this article, and you’ll be well on your way to creating engaging and professional videos with the perfect soundtrack.
Step 1: Importing the video project
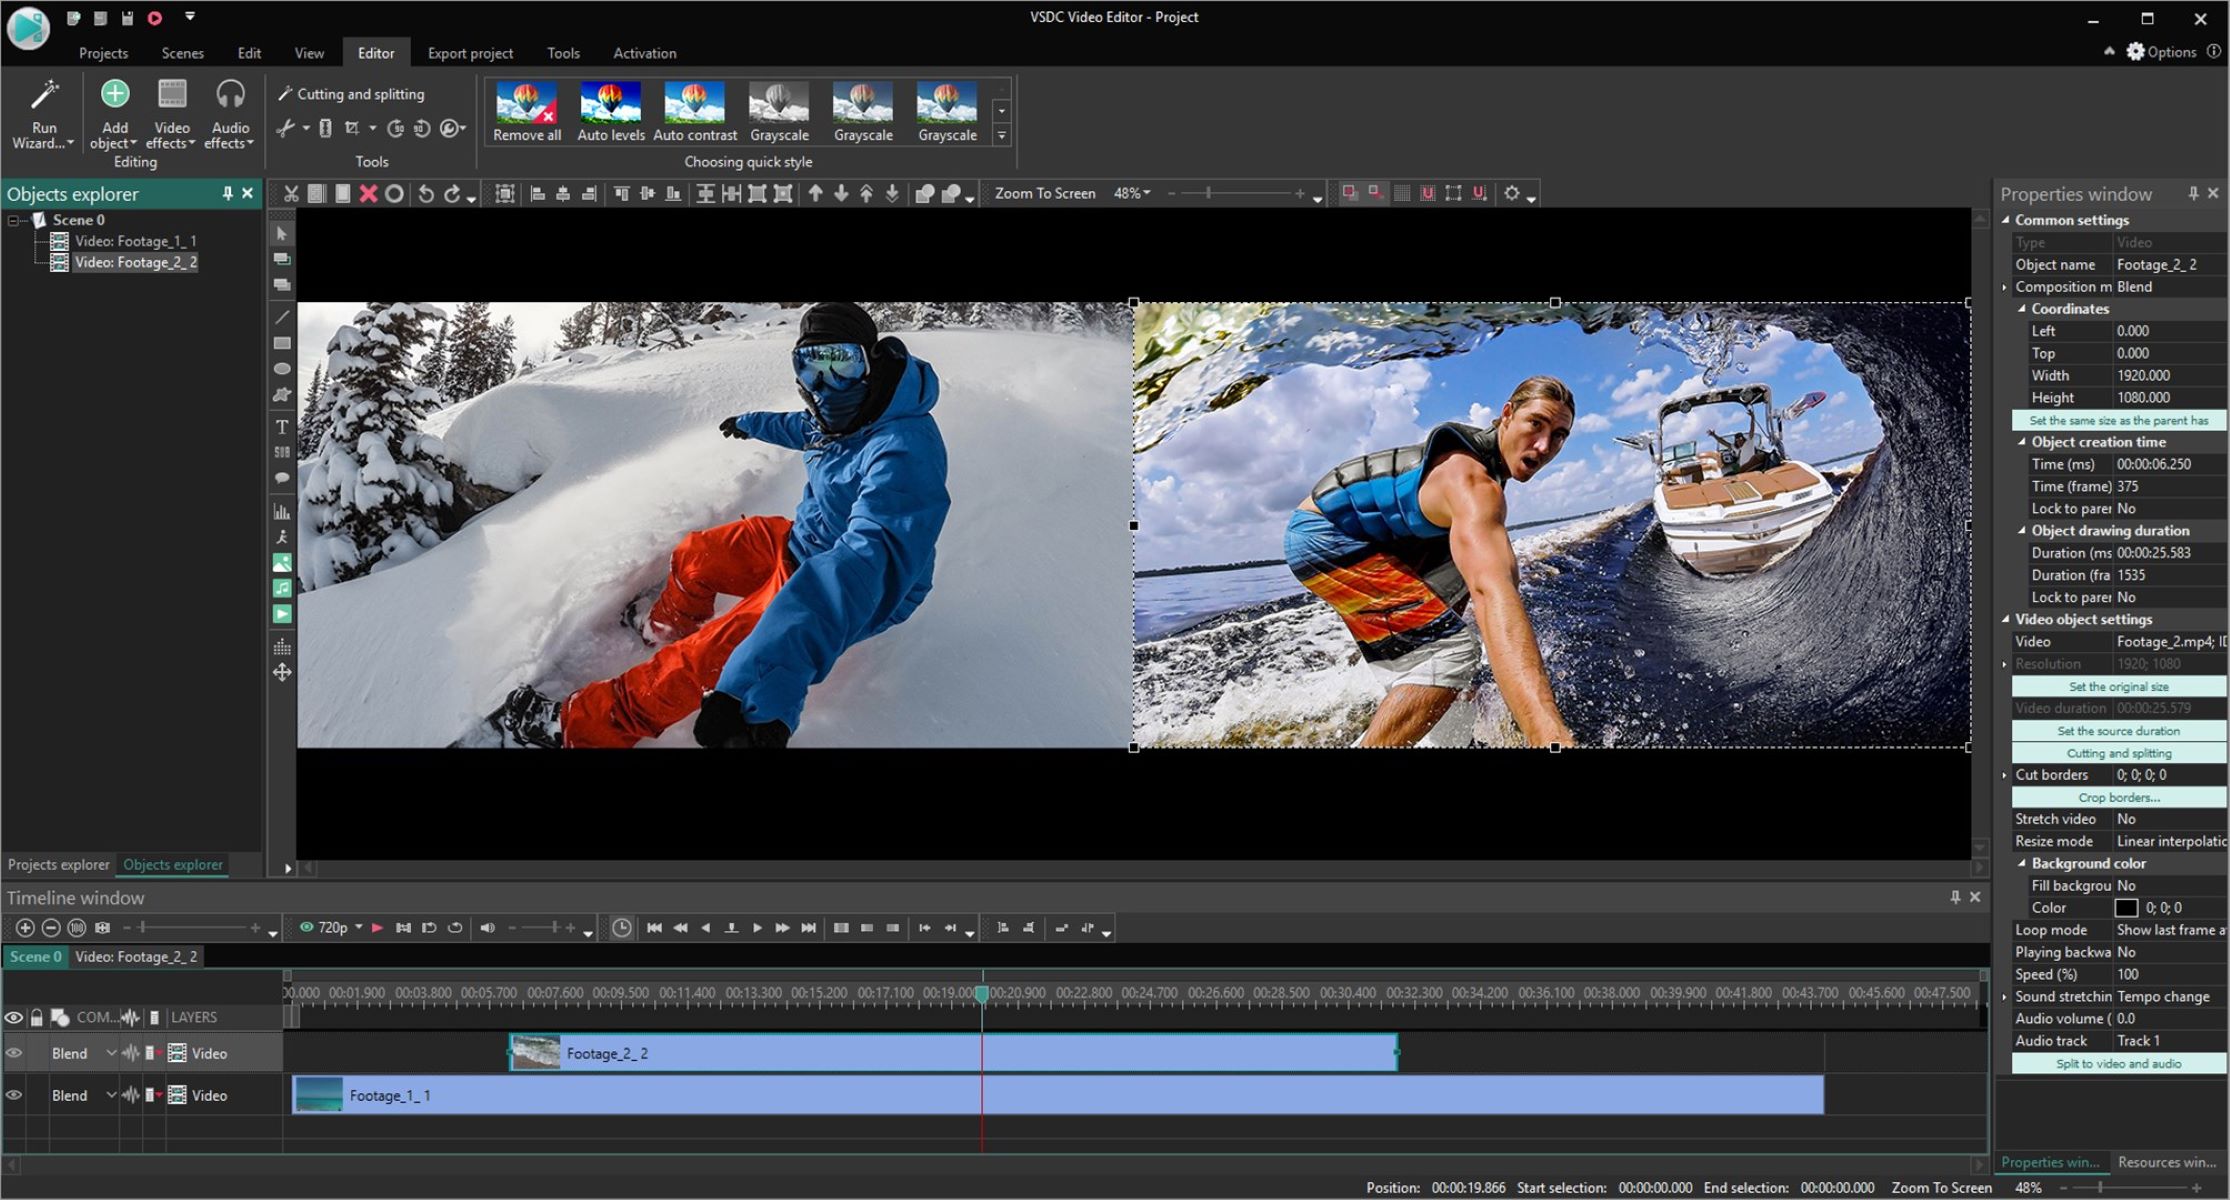
Before you can add background music to your video, you’ll need to import your video project into VSDC Video Editor. Here’s how to do it:
- Open VSDC Video Editor on your computer.
- Create a new project or open an existing project where you want to add the background music.
- Click on the “Import Content” button, usually located in the top menu bar. Alternatively, you can use the shortcut Ctrl+I.
- A file explorer window will open. Navigate to the location where your video project is saved.
- Select the video file or files you want to import and click “Open”.
- Your video project will now be imported into VSDC Video Editor and displayed in the timeline.
It’s important to ensure that the video project you import into VSDC Video Editor contains all the necessary video clips and footage that you want to add background music to. If you need to make any edits or trim the video, you can do so within VSDC Video Editor before proceeding to the next step.
Now that your video project is imported and ready, let’s move on to the next step: importing the background music.
Step 2: Importing the background music
Now that you have your video project imported into VSDC Video Editor, it’s time to import the background music that will accompany your video. Follow these steps to import the background music:
- In the media library section, located on the left side of the VSDC Video Editor interface, click on the “Import Content” button. Alternatively, you can use the shortcut Ctrl+I.
- A file explorer window will open. Navigate to the location where your background music file is saved.
- Select the background music file and click “Open”.
- The background music file will now be imported into VSDC Video Editor and will appear in the media library section.
You can import multiple background music files if you want to have a variety of tracks to choose from. This gives you the flexibility to switch between different background music options and select the one that best fits each section of your video.
It’s important to note that VSDC Video Editor supports various audio file formats, including MP3, WAV, and OGG. Before importing your background music, make sure it is in a compatible format.
With your background music now imported into VSDC Video Editor, you’re ready to move on to the next step: adjusting the audio track.
Step 3: Adjusting the audio track
Once you have imported the background music into VSDC Video Editor, you’ll need to adjust the audio track to ensure it fits seamlessly with your video. Here’s how you can do it:
- Drag and drop the background music file from the media library section to the audio track in the timeline section.
- Click on the audio track to select it.
- On the top menu, click on the “Audio Effects” tab to reveal the different audio editing options.
- Explore the available audio effects to enhance or modify the background music. You can adjust the volume, apply fade-in and fade-out effects, or add equalization to fine-tune the audio.
- To adjust the volume level of the background music, click on the “Audio Effects” tab and then click on the “Volume” option. A volume slider will appear. Drag the slider to increase or decrease the volume as desired.
- Preview the video with the adjusted audio track to ensure it sounds just right. Use the play button in the preview window to listen to the video with the background music.
Take your time to experiment with different audio effects and volume settings to find the best configuration for your video. Remember, the goal is to strike a balance where the background music enhances your video without overpowering other audio elements or distracting from the main content.
Once you have adjusted the audio track to your satisfaction, move on to the next step: setting the music volume.
Step 4: Setting the music volume
Setting the volume level of the background music is an important step to ensure it blends harmoniously with your video. Here’s how you can adjust the music volume in VSDC Video Editor:
- Select the audio track containing the background music in the timeline.
- On the top menu, click on the “Audio Effects” tab.
- Click on the “Volume” option to display the volume control options.
- Adjust the volume slider to increase or decrease the volume of the background music according to your preference.
- Preview the video with the adjusted volume settings to ensure it sounds balanced and cohesive.
When adjusting the music volume, it’s important to consider the overall audio balance of your video. The background music should be audible but not overpowering. It should complement the main audio elements, such as dialogue or voiceovers, without overshadowing them.
Additionally, you may want to consider using keyframes to create dynamic volume changes throughout the video. This can help to emphasize certain moments or transitions in your video content. With keyframes, you can gradually increase or decrease the volume of the background music at specific points in the timeline.
By setting the music volume appropriately, you can ensure that the background music enhances the mood and atmosphere of your video without overwhelming the viewer. After adjusting the music volume, proceed to the next step: syncing the music with the video.
Step 5: Syncing the music with the video
Syncing the background music with the video is crucial to create a seamless and engaging viewing experience. Here’s how you can synchronize the music with the video in VSDC Video Editor:
- Select the audio track containing the background music in the timeline.
- To sync the music with a specific section of the video, you can drag the audio track left or right in the timeline until it aligns with the desired video segment.
- If you want to sync the music with specific events or transitions in the video, you can use keyframes. Place keyframes on the audio track at the precise moments where you want the music to start, stop, or change intensity.
- To add a keyframe, right-click on the audio track at the desired point, select “Add Keyframe,” and adjust the properties such as volume or position.
- Move the keyframes along the timeline to synchronize the music with the desired video events.
Take the time to fine-tune the synchronization of the background music with the video content. Pay attention to transitions, crucial scenes, and any visual cues that can guide your timing decisions. This synchronization adds rhythm and impact to your video, enhancing the overall viewing experience.
Preview your video to ensure that the music is appropriately synced with the video and that it enhances the desired emotions and atmosphere. Make any necessary adjustments until the music and video complement each other seamlessly.
Now that your background music is synced with the video, you’re ready to move on to the final step: exporting the edited video.
Step 6: Exporting the final video
Once you have added background music, adjusted the audio track, set the music volume, and synced the music with your video, it’s time to export the final edited video. Follow these steps to export your video in VSDC Video Editor:
- In the top menu, click on the “Export project” button. Alternatively, you can use the shortcut Ctrl+E.
- A dialog box will appear, allowing you to customize the export settings for your video. Select the desired format, resolution, and quality options.
- Choose the output folder where you want to save the exported video.
- Provide a filename for the exported video.
- Click on the “Export” button to begin the exporting process.
- Wait for the export process to complete. This may take some time depending on the length and complexity of your video.
Once the export is finished, you will have a final edited video with the background music included. You can now share your video on social media platforms, upload it to video hosting sites, or use it for any other purpose you desire.
Remember to save your VSDC Video Editor project file separately, in case you want to make further edits or adjustments in the future. This allows you to retain the flexibility to modify your video without having to start from scratch.
Congratulations! You have successfully added background music to your video using VSDC Video Editor and exported the final edited video. Enjoy sharing your creation with the world!
Conclusion
Adding background music to your videos can elevate the overall quality and impact of your content. With VSDC Video Editor, the process of incorporating background music into your video projects becomes seamless and straightforward.
By following the steps outlined in this article, you can import your video project, import the background music, adjust the audio track, set the music volume, sync the music with the video, and finally export the final edited video. Each step is crucial in ensuring that the background music harmonizes with the visuals and enhances the desired mood and atmosphere of your video.
Remember to choose background music that aligns with the theme and mood of your video, and ensure that you comply with copyright laws by using royalty-free music or obtaining the necessary licenses for copyrighted tracks.
Experiment with different audio effects, volume settings, and synchronization techniques to find the perfect balance between the background music and other audio elements in your video. This will help you create a polished and professional end product that captivates your audience.
Once you have completed the steps and exported your video, you can share it on various platforms, such as social media, websites, or video hosting sites, to showcase your creativity and engage with your audience.
Whether you’re creating marketing videos, vlogs, tutorials, or any other type of video content, incorporating background music can make a significant difference in the overall viewer experience. It adds depth, emotion, and memorability to your videos, leaving a lasting impression on your audience.
Now that you have the knowledge and tools to add background music to your videos using VSDC Video Editor, it’s time to unleash your creativity and enhance your video projects with captivating soundtracks. Happy video editing!