Home>Production & Technology>Background Music>How To Add Background Music To Google Slides Presentation

Background Music
How To Add Background Music To Google Slides Presentation
Published: October 28, 2023
Want to enhance your Google Slides presentation? Learn how to easily add background music to captivate your audience. Background Music Guide.
(Many of the links in this article redirect to a specific reviewed product. Your purchase of these products through affiliate links helps to generate commission for AudioLover.com, at no extra cost. Learn more)
Table of Contents
Introduction
Adding background music to a Google Slides presentation can greatly enhance the overall experience and engagement for your audience. Whether you are creating a slideshow for a business presentation or a school project, incorporating music can set the mood, emphasize key points, and create a memorable experience for your viewers.
With Google Slides, you have the flexibility to add background music that complements your content and captures the attention of your audience. Whether you want to use music from your own collection or find the perfect track on YouTube, Google Slides offers a user-friendly interface that makes it easy to insert and customize audio files.
In this comprehensive guide, we will walk you through the step-by-step process of adding background music to your Google Slides presentation. From accessing Google Slides to customizing the audio playback options, you’ll learn everything you need to know to create a captivating and immersive slideshow experience.
Before we get started, it’s important to note that while adding background music can enhance your presentation, it’s crucial to use it sparingly and thoughtfully. Consider the context of your presentation and ensure that the music does not overshadow your content or distract your audience. The goal is to create a harmonious blend between your visuals, message, and the background music.
Now, let’s dive into the step-by-step process of adding background music to your Google Slides presentation.
Step 1: Access Google Slides
The first step in adding background music to your Google Slides presentation is to access Google Slides itself. Google Slides is a cloud-based presentation software that allows you to create, edit, and share presentations online.
To begin, open your web browser and navigate to slides.google.com. If you have a Google account, sign in with your credentials. If you don’t have an account, you can easily create one by clicking on “Create account” and following the prompts.
Once you are signed in to Google Slides, you will be greeted with the main dashboard. Here, you will see your existing presentations or the option to create a new one. If you already have a presentation that you want to add background music to, simply click on the desired file to open it. If you need to create a new presentation, click on the “Blank” option to start from scratch.
Google Slides offers a range of helpful features and tools to create dynamic presentations. You can add text, images, videos, shapes, and more to customize your slides and convey your message effectively.
Now that you have accessed Google Slides, you are ready to move on to the next step of adding background music to your presentation.
Step 2: Choose a Slide to Add Background Music
Before adding background music to your Google Slides presentation, you need to choose the slide where you want the music to start playing. This step allows you to select the specific slide or section of your presentation where the background music will begin.
To choose a slide, simply navigate to the slide sorter view in Google Slides. You can access this view by clicking on the icon in the bottom-left corner of the screen that looks like a grid of small slides. This view allows you to see an overview of all the slides in your presentation.
Once you are in the slide sorter view, select the slide where you want to add the background music. Click on the desired slide to highlight it. You can choose to add background music to a single slide or multiple slides, depending on your preference and the flow of your presentation.
When selecting the slide, think about the content and the timing of your presentation. Consider whether you want the background music to play throughout the entire presentation or only during specific sections or key slides. This will help you determine the most effective placement for the background music.
Remember that background music should enhance your presentation and not distract from the content. Choose a slide that aligns with the mood or theme of the music you plan to add. For example, if your presentation is about a relaxing vacation, you might want to add background music to the slide that showcases beautiful beach photos.
Once you have chosen the slide, you are ready to proceed to the next step, where you will learn how to insert the audio file into your Google Slides presentation and add the background music.
Step 3: Insert Audio File from Google Drive or YouTube
Now that you have chosen the slide where you want to add background music, it’s time to insert the audio file into your Google Slides presentation. Google Slides allows you to add music from your Google Drive or even directly from YouTube.
To insert an audio file from your Google Drive:
- Click on the “Insert” menu at the top of your screen.
- Select “Audio” from the dropdown menu.
- A sidebar will appear on the right-hand side of your screen. Click on the “Upload” tab.
- Click on the “Select a file from your device” button.
- Locate and select the audio file you want to upload from your computer.
- The audio file will be uploaded to your Google Drive and inserted into your selected slide.
To insert an audio file from YouTube:
- Click on the “Insert” menu at the top of your screen.
- Select “Audio” from the dropdown menu.
- A sidebar will appear on the right-hand side of your screen. Click on the “YouTube” tab.
- Search for the desired audio file using keywords or the URL of the YouTube video.
- Select the video that contains the audio you want to add.
- The audio file will be inserted into your selected slide directly from YouTube.
After inserting the audio file, you can customize its appearance on the slide. You can resize the audio player, reposition it, or even hide it if you want the music to play seamlessly in the background without any visible player.
By following these simple steps, you can successfully insert an audio file from Google Drive or YouTube into your Google Slides presentation and get one step closer to creating a captivating multimedia experience for your viewers.
Step 4: Adjust the Audio Settings
Once you have inserted the audio file into your Google Slides presentation, you can proceed to adjust the audio settings to ensure it plays and functions as you desire. Google Slides provides several options to customize the audio, including controlling the volume, setting the playback options, and adding automatic transitions between slides.
To adjust the audio settings, follow these steps:
- Select the slide that contains the audio file.
- Click on the audio file to display the audio toolbar at the top of the screen.
- Use the volume slider to adjust the volume of the audio. Drag it to the right to increase the volume or to the left to decrease it.
- To control when and how the audio plays, click on the “Play Options” button.
- Choose from the available options, such as “Start on Click” to manually control when the audio starts, “Start Automatically” to play the audio when the slide appears, or “Loop Until Stopped” to continuously repeat the audio.
- If you want the audio to play across multiple slides, check the box next to “Play Across Slides”. This option ensures that the audio continues to play as you navigate through the presentation.
- Toggle the “Hide During Presentation” switch if you want to hide the audio player during the slideshow. This option allows for a seamless background music experience.
- To add automatic transitions between slides, click on the “Transitions” button in the toolbar. Choose the desired transition and adjust its duration if needed.
By adjusting these audio settings, you can tailor the background music to suit the flow and timing of your presentation. Whether you want a subtle and continuous background music experience or a more interactive and controlled playback, Google Slides provides the flexibility to meet your specific needs.
Once you have fine-tuned the audio settings, you can preview and test the background music to ensure it aligns seamlessly with your content and enhances the overall impact of your presentation.
Step 5: Preview and Test the Background Music
After adjusting the audio settings for your Google Slides presentation, it’s important to preview and test the background music to ensure it functions as intended. This step allows you to listen to the audio, check its timing, and verify that it aligns well with your slide content and transitions.
To preview and test the background music, follow these steps:
- Enter the presentation mode by clicking on the “Present” button at the top-right corner of your screen.
- Navigate through your slides and observe how the background music plays.
- Pay attention to the volume, timing, and transitions between slides.
- Make any necessary adjustments based on your observations. For example, you may need to increase or decrease the volume, adjust the timing of certain slides, or change the playback options.
- Exit the presentation mode once you are satisfied with how the background music sounds and functions.
By previewing and testing the background music, you can identify any potential issues or areas for improvement in advance. This allows you to fine-tune and optimize the audio and ensure it enhances the overall presentation experience.
During the testing phase, consider asking for feedback from colleagues, friends, or family members to gain different perspectives. They can provide valuable insights and help you refine the background music for maximum impact.
Once you have successfully previewed and tested the background music, you are ready to customize the audio playback options and finalize its implementation in your Google Slides presentation.
Step 6: Customize the Audio Playback Options
Customizing the audio playback options in your Google Slides presentation allows you to have more control over how the background music is experienced by your audience. You can adjust settings such as timing, duration, and looping to create a seamless and impactful audio experience.
To customize the audio playback options, follow these steps:
- Select the slide that contains the audio file.
- Click on the audio file to display the audio toolbar at the top of the screen.
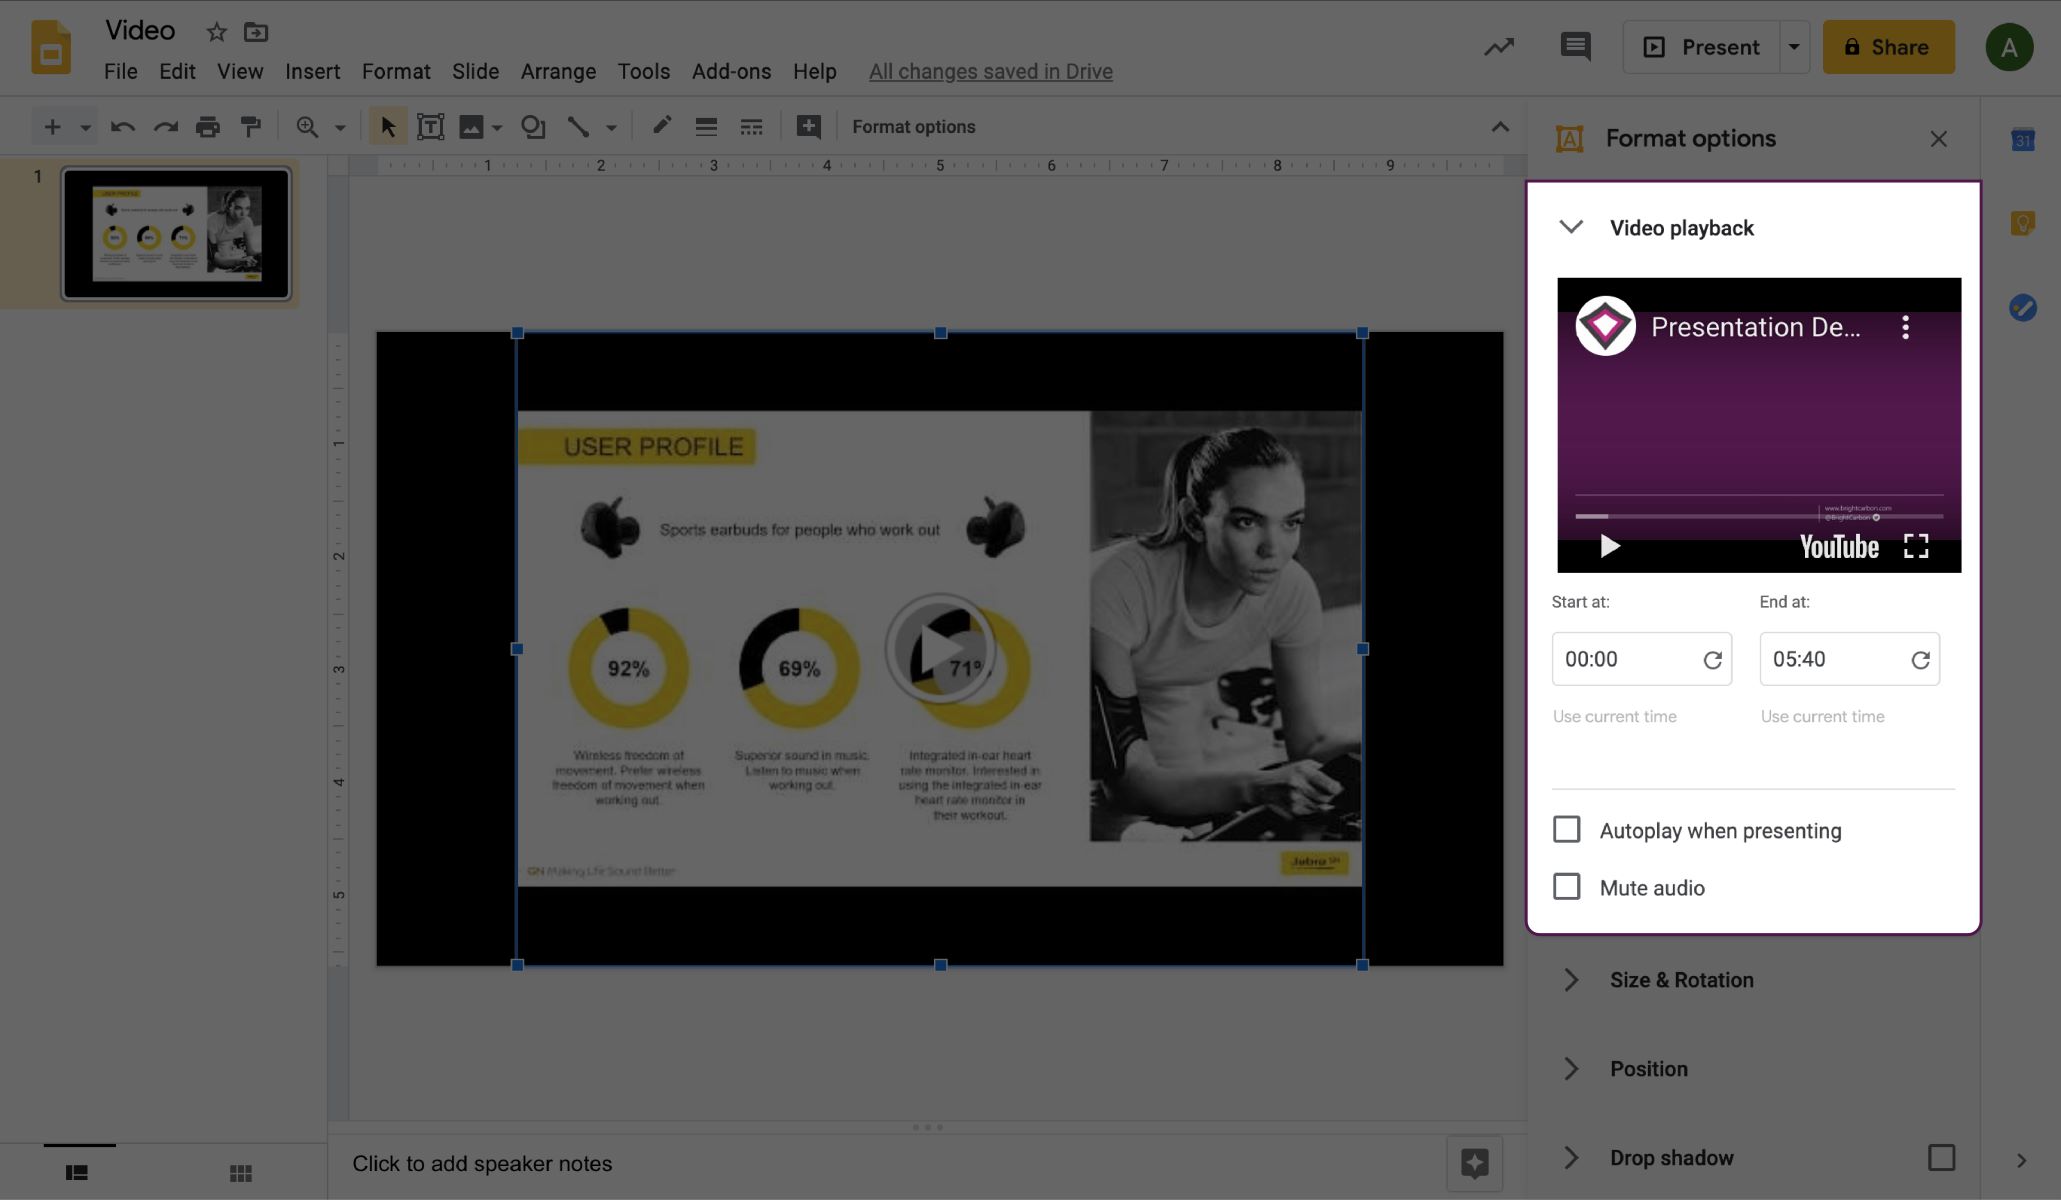
- Click on the “Format options” button in the toolbar.
- A sidebar will appear on the right-hand side of your screen. Here, you can customize various options:
- Start: Choose whether the audio starts automatically or on click.
- Stop: Determine when the audio stops playing, such as after the slide or after a certain number of slides.
- Volume: Adjust the volume level of the audio.
- Loop: Enable looping to play the audio continuously.
- Playback speed: Modify the speed at which the audio plays.
- Customize these options based on your preferences and the desired effect for your presentation.
In addition to these options, you can also make use of the “Trigger” feature to synchronize the audio with specific elements on your slide. For example, you can set the audio to start playing when a certain object or text appears on the slide, creating a more interactive and engaging experience.
Experiment with different combinations of options to find the perfect audio playback settings that align with your presentation’s purpose and content. Consider the pace, mood, and overall flow of your presentation to determine the most effective playback options for the background music.
Once you have customized the audio playback options to your satisfaction, take the time to review and test the presentation again to ensure that everything is functioning as expected.
Congratulations! You have successfully customized the audio playback options for your background music in your Google Slides presentation. Your audience is now in for an enhanced multimedia experience that captures their attention and adds an extra dimension to your presentation.
Conclusion
Adding background music to your Google Slides presentation can elevate it to the next level, captivating your audience and making your message more engaging. With the user-friendly interface of Google Slides, the process of incorporating background music is simple and accessible to anyone.
In this comprehensive guide, we have outlined the step-by-step process to add background music to your Google Slides presentation. Starting from accessing Google Slides to customizing the audio playback options, you can now confidently enhance your slideshows with captivating background music.
Remember to choose the appropriate slide to add background music, reflecting the content and mood of your presentation. Take advantage of the option to insert audio files from either your Google Drive or directly from YouTube, allowing you to select the perfect track for your slides.
Once the audio file is inserted, don’t forget to adjust the audio settings, including volume, playback options, and transitions, to ensure a seamless and impactful experience for your audience. Preview and test the background music to ensure it complements your presentation’s flow and timing.
Use the customizable audio playback options to fine-tune the background music, aligning it with the goals and atmosphere of your presentation. By personalizing the start, stop, volume, looping, and other options, you can create a memorable and engaging audio experience.
With these steps, you’re ready to create captivating Google Slides presentations with background music. However, remember to exercise caution and use background music sparingly. The goal is to enhance your content, not overpower it. Music should complement your message and create a harmonious blend with your slides.
Now, armed with the knowledge and tools outlined in this guide, go ahead and embark on your journey to create impressive and immersive presentations with background music. The sky’s the limit when it comes to enhancing your slideshows and leaving a lasting impact on your audience.