Home>Production & Technology>MIDI>How To Hook Up MIDI Keyboard To Logic Pro X

MIDI
How To Hook Up MIDI Keyboard To Logic Pro X
Modified: February 22, 2024
Learn how to connect your MIDI keyboard to Logic Pro X with our step-by-step guide. Get started with MIDI and unlock new musical possibilities!
(Many of the links in this article redirect to a specific reviewed product. Your purchase of these products through affiliate links helps to generate commission for AudioLover.com, at no extra cost. Learn more)
Table of Contents
Introduction
Connecting a MIDI keyboard to Logic Pro X opens up a world of musical possibilities, allowing you to harness the power of digital technology to create, record, and produce music. MIDI, which stands for Musical Instrument Digital Interface, serves as the bridge between your physical keyboard and the digital realm of your computer. By establishing this connection, you can seamlessly integrate your keyboard into the Logic Pro X software, enabling you to explore a diverse range of sounds, instruments, and effects.
In this comprehensive guide, we will delve into the process of setting up and configuring your MIDI keyboard with Logic Pro X. Whether you're a seasoned musician or a budding producer, understanding the intricacies of this integration will empower you to unleash your creativity and bring your musical visions to life.
By the end of this tutorial, you will have a firm grasp of how to seamlessly connect your MIDI keyboard to Logic Pro X, paving the way for a smooth and efficient music production workflow. So, let's embark on this journey to unlock the full potential of your MIDI keyboard within the dynamic environment of Logic Pro X.
Setting Up the MIDI Keyboard
Setting up your MIDI keyboard to work seamlessly with Logic Pro X involves a few straightforward yet crucial steps. Whether you're using a compact MIDI controller or a full-sized keyboard, the process remains consistent. Let's dive into the essential aspects of setting up your MIDI keyboard to ensure a smooth and efficient integration with Logic Pro X.
-
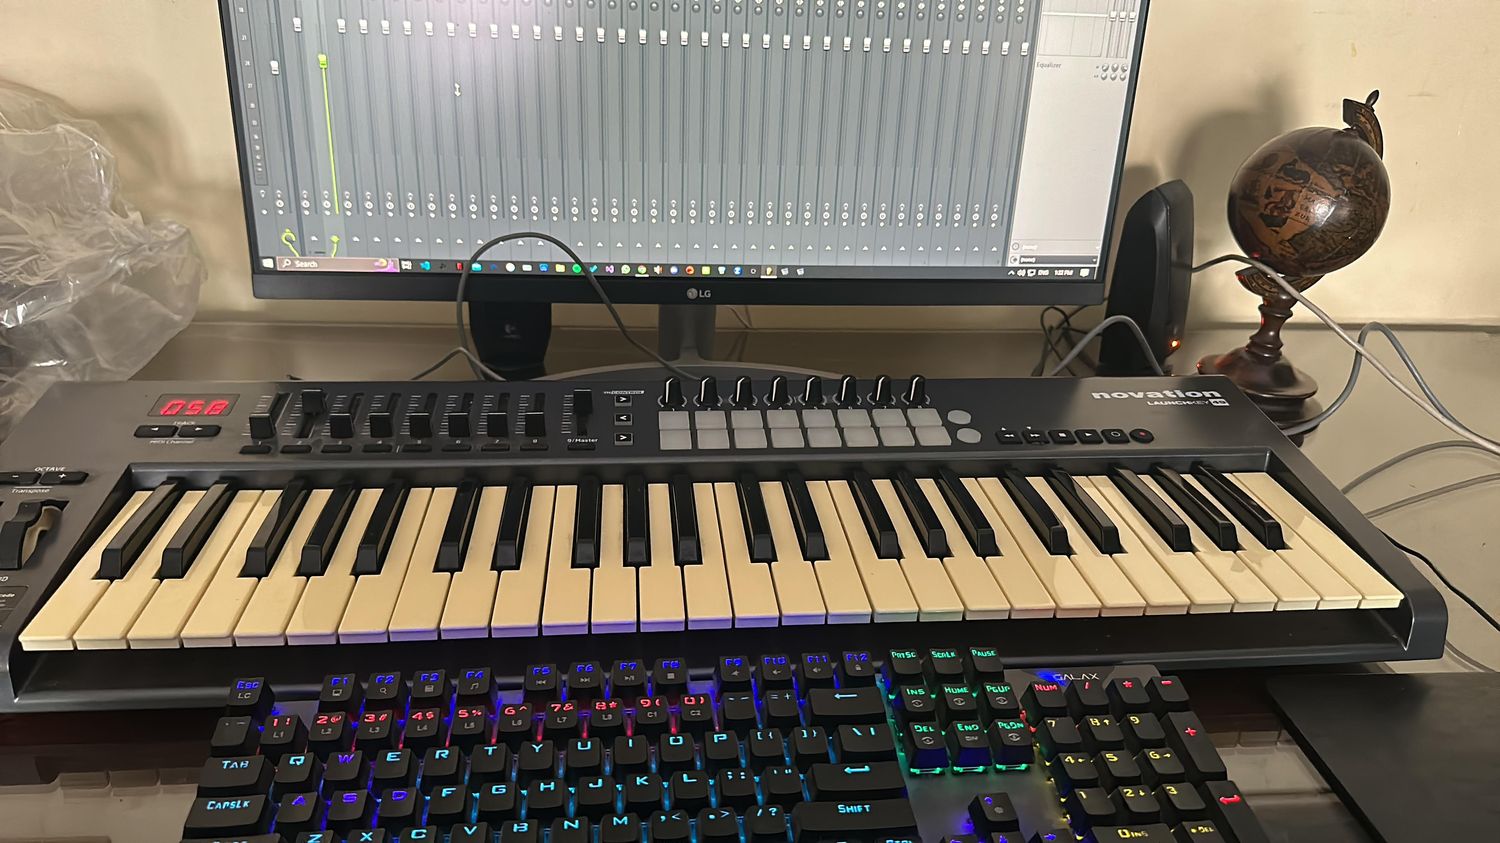
Physical Connection: Begin by connecting your MIDI keyboard to your computer using a USB cable. Most modern MIDI keyboards feature a USB port that allows for a direct connection to your computer, eliminating the need for additional MIDI interface hardware. Once the keyboard is connected, ensure that it is powered on.
-
Driver Installation (if applicable): In some cases, your MIDI keyboard may require specific drivers to be installed on your computer to ensure proper communication between the keyboard and Logic Pro X. Check the manufacturer's website for the latest drivers and follow the installation instructions provided.
-
Software Recognition: Upon connecting your MIDI keyboard, your computer should recognize it as a MIDI input device. This is a crucial step, as Logic Pro X needs to identify the keyboard as an available input for MIDI data. In most cases, modern operating systems automatically detect and configure the MIDI keyboard as a recognized input device.
-
Logic Pro X Preferences: Launch Logic Pro X and navigate to the Preferences menu. Select the MIDI tab and ensure that your MIDI keyboard is listed as an active input device. This step is essential to enable Logic Pro X to receive MIDI data from your keyboard.
-
Assigning MIDI Channels (if necessary): Depending on your specific musical setup and preferences, you may need to assign MIDI channels to your keyboard. This is particularly relevant when working with multiple MIDI devices or when integrating hardware synthesizers alongside your keyboard. Logic Pro X provides intuitive MIDI channel assignment options within its settings, allowing you to tailor the configuration to your specific requirements.
By following these steps, you can effectively set up your MIDI keyboard to seamlessly integrate with Logic Pro X. This integration lays the foundation for a productive and inspiring music production environment, where your keyboard becomes a versatile and expressive tool within the digital realm of Logic Pro X. With the physical and software connections established, you are now ready to explore the boundless creative possibilities that await at your fingertips.
Configuring Logic Pro X
Configuring Logic Pro X to effectively communicate with your MIDI keyboard is a pivotal step in harnessing the full potential of this integration. By fine-tuning the software settings, you can ensure that your keyboard becomes an intuitive and responsive instrument within Logic Pro X, enabling seamless interaction with virtual instruments, MIDI tracks, and recording functionalities.
MIDI Setup:
Navigate to the Preferences menu within Logic Pro X and select the MIDI tab. Here, you can verify that your MIDI keyboard is correctly recognized as an input device. Logic Pro X provides a comprehensive list of available MIDI input devices, allowing you to select your keyboard and designate it as the primary MIDI input source. This fundamental configuration establishes the communication pathway through which MIDI data from your keyboard will be received and processed by Logic Pro X.
MIDI Mapping:
Logic Pro X offers a versatile MIDI mapping interface, empowering you to assign specific MIDI controls on your keyboard to various parameters within the software. This feature enables you to customize the functionality of knobs, sliders, and other MIDI controls on your keyboard to interact with virtual instruments, effects, and mixing parameters in Logic Pro X. By mapping these controls to your preferences, you can tailor the tactile experience of your MIDI keyboard to align with your unique workflow and creative requirements.
Instrument Integration:
One of the key advantages of connecting your MIDI keyboard to Logic Pro X is the seamless integration of virtual instruments. Within Logic Pro X, you can effortlessly access a diverse array of virtual instruments, including synthesizers, pianos, drums, and orchestral sounds. Upon configuring your MIDI keyboard, you can directly control and play these instruments, leveraging the expressive capabilities of your keyboard to infuse your music with nuance and emotion. Logic Pro X's instrument integration capabilities ensure that your MIDI keyboard becomes a versatile and dynamic tool for composing, performing, and recording musical ideas.
Recording Setup:
Configuring Logic Pro X to record MIDI input from your keyboard involves specifying the input source for MIDI tracks. By accessing the track settings within Logic Pro X, you can designate your MIDI keyboard as the input source for recording MIDI data. This streamlined setup allows you to effortlessly capture your performances and musical ideas directly from your MIDI keyboard, facilitating a fluid and intuitive recording process within Logic Pro X.
By meticulously configuring Logic Pro X to harmonize with your MIDI keyboard, you establish a cohesive and responsive environment for musical exploration and creativity. This synergy between hardware and software empowers you to seamlessly translate your musical inspirations into tangible compositions, leveraging the full potential of your MIDI keyboard within the dynamic realm of Logic Pro X.
Testing the Connection
After setting up your MIDI keyboard and configuring Logic Pro X, it's essential to validate the connection to ensure seamless functionality. Testing the connection serves as a crucial checkpoint, allowing you to confirm that your MIDI keyboard effectively communicates with Logic Pro X, enabling responsive interaction and accurate transmission of MIDI data.
MIDI Input Verification:
To initiate the testing process, play the keys on your MIDI keyboard while having Logic Pro X open. As you play, observe the MIDI activity within Logic Pro X to verify that the software accurately receives MIDI input from your keyboard. This validation ensures that the MIDI signals generated by your keyboard are successfully transmitted to Logic Pro X, laying the groundwork for recording, performing, and controlling virtual instruments within the software.
Virtual Instrument Response:
Select a virtual instrument within Logic Pro X and commence playing your MIDI keyboard. As you play, monitor the responsiveness and accuracy of the virtual instrument in mirroring your keyboard inputs. This step allows you to assess the real-time interaction between your MIDI keyboard and the virtual instrument, confirming that the integration is seamless and that your keyboard effectively triggers the corresponding sounds and articulations within the software.
Recording Test:
Initiate a recording session within Logic Pro X and use your MIDI keyboard to input musical phrases and melodies. As you record, pay attention to the precision and fidelity of the recorded MIDI data, ensuring that your keyboard's nuances and dynamics are accurately captured within the software. By testing the recording functionality, you can ascertain that your MIDI keyboard seamlessly integrates with Logic Pro X's recording capabilities, empowering you to capture your musical performances with precision and clarity.
Control Surface Validation:
If your MIDI keyboard features additional controls such as knobs, sliders, or pads, test their functionality within Logic Pro X. Map these controls to various parameters and functions within the software, and assess their responsiveness and accuracy in manipulating the assigned parameters. This step allows you to confirm that your MIDI keyboard operates as a versatile control surface within Logic Pro X, enhancing your ability to shape and modulate sounds, effects, and mixing parameters with tactile precision.
By diligently testing the connection between your MIDI keyboard and Logic Pro X, you establish confidence in the seamless integration of these components, ensuring a cohesive and responsive environment for music production and performance. This validation process serves as the final assurance that your MIDI keyboard harmoniously interacts with Logic Pro X, setting the stage for uninhibited musical creativity and expression.
Troubleshooting Common Issues
While connecting your MIDI keyboard to Logic Pro X is generally a straightforward process, encountering common issues can disrupt the seamless integration between the hardware and software components. By understanding and addressing these potential challenges, you can effectively troubleshoot and resolve issues that may arise, ensuring a smooth and uninterrupted music production experience.
1. Recognition and Connectivity
If your MIDI keyboard is not being recognized by Logic Pro X or is experiencing connectivity issues, begin by checking the physical connection between the keyboard and your computer. Ensure that the USB cable is securely plugged in, and if applicable, try using a different USB port to rule out potential port-related issues. Additionally, verify that the keyboard is powered on and receiving adequate power.
2. Driver Compatibility
In cases where specific drivers are required for your MIDI keyboard, ensure that the installed drivers are compatible with your operating system and version of Logic Pro X. Visit the manufacturer's website to download the latest drivers and follow the installation instructions meticulously. Updating the drivers can often resolve compatibility issues and facilitate seamless communication between the MIDI keyboard and Logic Pro X.
3. MIDI Input Configuration
If you encounter challenges with MIDI input recognition or mapping within Logic Pro X, revisit the software's MIDI settings to verify that your MIDI keyboard is correctly designated as the primary input device. Additionally, ensure that MIDI channels are appropriately assigned, especially when working with multiple MIDI devices or intricate setups involving hardware synthesizers and controllers. Adjusting these settings can rectify MIDI input-related issues and enhance the responsiveness of your MIDI keyboard within Logic Pro X.
4. Latency and Performance
Latency, characterized by a delay between pressing a key on your MIDI keyboard and hearing the corresponding sound, can impede the real-time performance and recording experience. To address latency issues, consider optimizing the audio buffer settings within Logic Pro X to minimize processing delays. Additionally, closing unnecessary background applications and processes on your computer can alleviate system resource strain, potentially improving overall performance and reducing latency during MIDI keyboard usage.
5. Firmware Updates
Regularly check for firmware updates for your MIDI keyboard, as manufacturers often release firmware updates to address performance optimizations and compatibility enhancements. By keeping your MIDI keyboard's firmware up to date, you can mitigate potential software conflicts and ensure optimal functionality within Logic Pro X.
By proactively addressing these common issues and implementing the recommended troubleshooting steps, you can fortify the connection between your MIDI keyboard and Logic Pro X, fostering a reliable and efficient music production environment. Embracing a proactive approach to troubleshooting empowers you to overcome challenges swiftly, enabling you to focus on unleashing your creativity and musical expression within the captivating realm of Logic Pro X.