Home>Production & Technology>Surround Sound>How To Hook Up Surround Sound To Laptop

Surround Sound
How To Hook Up Surround Sound To Laptop
Modified: January 22, 2024
Learn how to easily hook up surround sound to your laptop and enjoy immersive audio experiences. Enhance your entertainment with the power of surround sound.
(Many of the links in this article redirect to a specific reviewed product. Your purchase of these products through affiliate links helps to generate commission for AudioLover.com, at no extra cost. Learn more)
Table of Contents
Introduction
Surround sound is an incredibly immersive audio experience that can elevate your movie nights, gaming sessions, and music listening to a whole new level. While surround sound systems are commonly connected to TVs and home theater setups, you might be surprised to learn that you can also hook them up to your laptop.
Whether you want to enjoy a cinematic experience while watching movies or immerse yourself in the virtual world of gaming, connecting surround sound to your laptop can greatly enhance your audio experience. In this article, we will guide you through the process of setting up surround sound with your laptop.
Before we get started, it’s essential to note that the specific steps may vary depending on the brand and model of your laptop and surround sound system. It’s always a good idea to refer to the user manuals of your devices for detailed instructions. With that said, let’s dive into the steps to hook up surround sound to your laptop.
Step 1: Check Your Laptop’s Audio Output Options
The first step in connecting your laptop to a surround sound system is to check the available audio output options on your laptop. Most laptops come with multiple audio output ports, such as headphone jacks, HDMI ports, and USB ports.
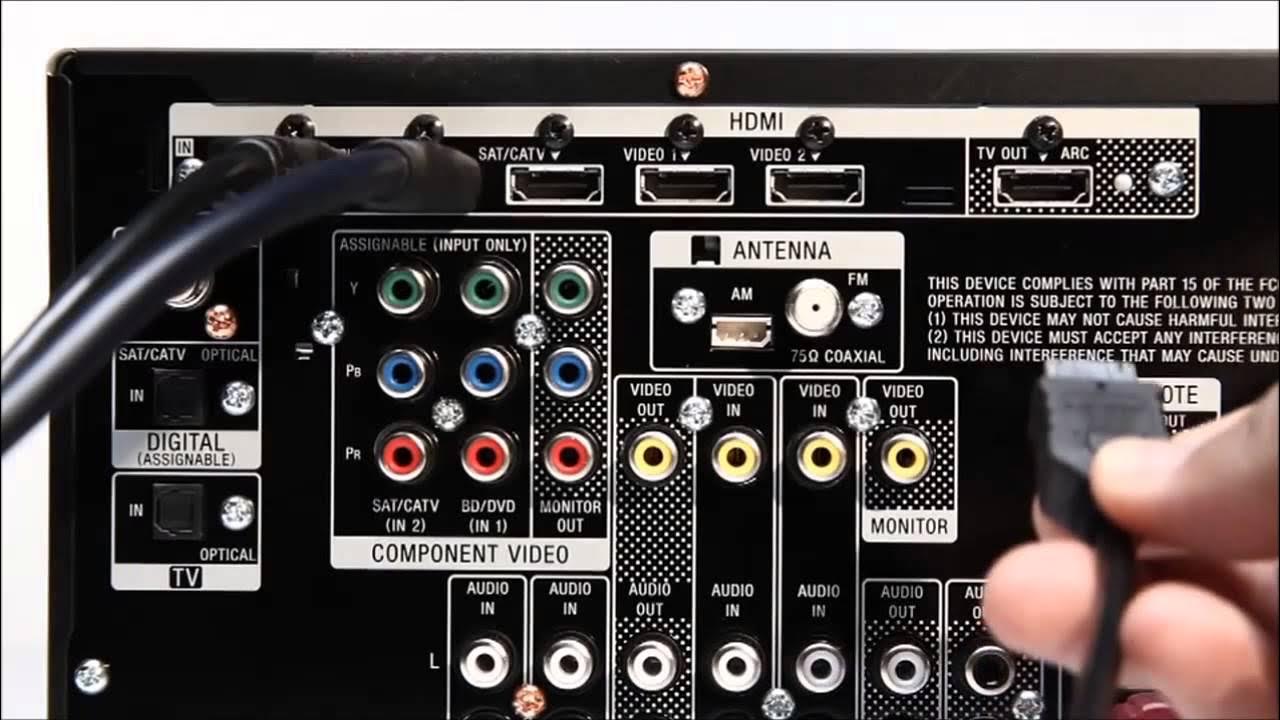
Start by checking if your laptop has an HDMI port. HDMI ports are commonly found on laptops and are an excellent option for connecting to a surround sound system. HDMI cables carry both high-definition video and audio signals, making them perfect for delivering surround sound audio to your speakers.
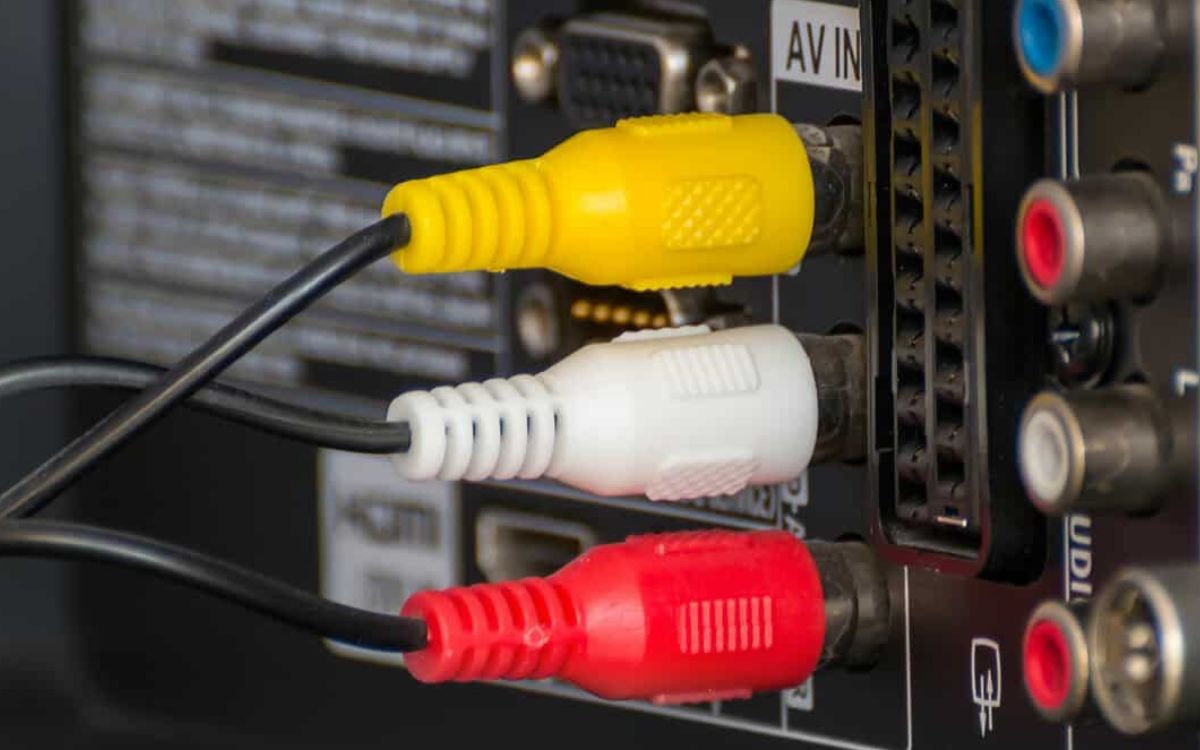
If your laptop doesn’t have an HDMI port, look for a headphone jack. While a headphone jack may not provide true surround sound, it can still deliver a decent audio experience. You can connect your laptop to a surround sound system using a 3.5mm audio cable that splits into multiple RCA connectors or a digital audio cable.
Alternatively, some laptops have USB ports that support audio output. USB audio ports allow you to connect external sound cards or USB DACs (Digital-to-Analog Converters), which can provide high-quality audio signals to your surround sound system.
Once you’ve identified the available audio output options on your laptop, make a note of them. This information will come in handy when selecting the appropriate cables or adapters to connect your laptop to the surround sound system.
Step 2: Choose the Right Surround Sound System
Choosing the right surround sound system for your laptop is crucial to ensure optimal audio performance and compatibility. There are a few factors to consider when selecting a surround sound system:
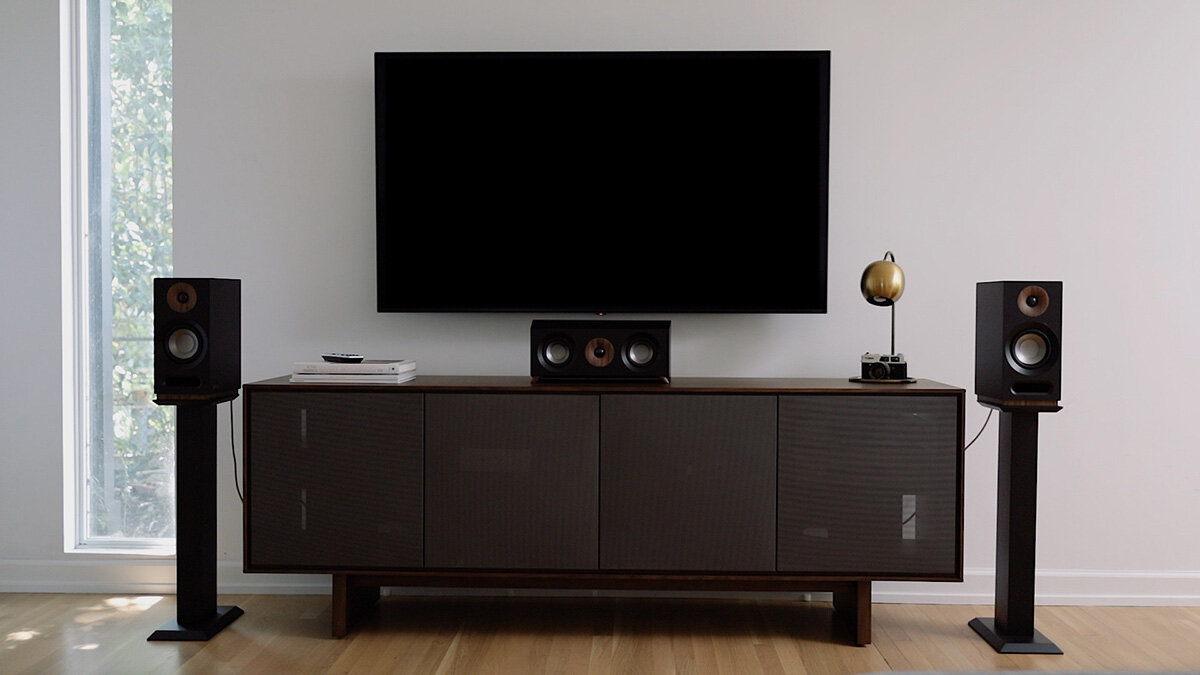
1. Speaker Configuration: Surround sound systems typically come in different configurations, such as 5.1, 7.1, or even 9.1. The numbers represent the number of speakers and subwoofers included in the system. A 5.1 setup consists of five speakers (left, center, right, rear left, and rear right) and one subwoofer. Evaluate the size of your room and your audio preferences to determine the ideal speaker configuration.
2. Connectivity Options: Ensure that the surround sound system you choose has the appropriate inputs to connect to your laptop. If your laptop has an HDMI port, look for a system with HDMI input support. Alternatively, if you’re using a 3.5mm audio cable or USB audio connection, make sure the system has the corresponding input ports.
3. Audio Quality: Consider the audio quality of the surround sound system. Look for systems with high-resolution audio support, wide frequency response, and low distortion. Reading customer reviews and checking expert recommendations can help you gauge the audio quality of different systems.
4. Size and Design: Take into account the size and design of the surround sound system. Ensure that it fits well within your space and complements your aesthetic preferences. Some systems offer compact satellite speakers that are ideal for small rooms, while others feature floor-standing speakers for a more immersive experience.
Research different surround sound system options, compare their features, and read customer reviews to make an informed decision that suits your budget and audio needs. Once you’ve chosen the right surround sound system, you’re ready to move on to the next step.
Step 3: Connect the Surround Sound System to Your Laptop
Now that you have selected the appropriate surround sound system, it’s time to connect it to your laptop. Depending on the audio output options of your laptop and the input ports of your surround sound system, the steps may vary. Here are a few common methods:
1. HDMI Connection: If your laptop has an HDMI port, connecting it to the surround sound system is relatively straightforward. Use an HDMI cable to connect the HDMI output of your laptop to the HDMI input of the surround sound system. Ensure that both devices are powered off before making the connection. Once connected, power on both the laptop and the surround sound system.
2. 3.5mm Audio Cable Connection: If your laptop has a headphone jack, you can use a 3.5mm audio cable to connect it to the input port on the surround sound system. If the surround sound system supports RCA connections, use a 3.5mm to RCA cable to make the connection. Alternatively, if the system has a digital audio input, use a 3.5mm to digital audio cable. Make sure to connect the corresponding left and right channels to the correct input ports.
3. USB Audio Connection: If your laptop has a USB port that supports audio output, you can connect it to the surround sound system using a USB audio adapter or an external USB DAC. These devices typically come with USB inputs on one side and RCA or digital audio outputs on the other. Connect the USB end to your laptop and the corresponding audio outputs to the input ports of the surround sound system.
Remember to refer to the user manuals of your laptop and surround sound system for specific connection instructions. Once you have made the connections, ensure that all the cables are secure. Now, you’re ready to move on to the next step to adjust the audio settings on your laptop.
Step 4: Adjust Audio Settings on Your Laptop
After connecting your laptop to the surround sound system, it’s important to adjust the audio settings on your laptop to ensure proper audio output. Here are the steps to adjust the audio settings:
1. Open the Sound Settings: On Windows laptops, right-click on the volume icon in the taskbar and select “Open Sound settings.” On Mac laptops, go to the Apple menu, select “System Preferences,” then choose “Sound.”
2. Select the Output Device: In the Sound settings, locate the section for selecting the audio output device. Choose the option that corresponds to your connected surround sound system. It may be listed as the system’s brand or model name, or the specific input port used to connect the system.
3. Configure Surround Sound: Depending on your laptop’s audio settings, you may have the option to configure the surround sound setup. Look for an option to set the audio output to surround sound or select a specific speaker configuration, such as 5.1 or 7.1. Make sure to choose the desired configuration that matches your surround sound system.
4. Test the Audio: To ensure that the surround sound system is functioning correctly, play some audio or video content that has surround sound effects. The sound should come out from the appropriate speakers, creating a rich and immersive audio experience. If the sound is not playing correctly or coming from the wrong speakers, double-check the connections and revisit the audio settings to make any necessary adjustments.
5. Adjust Volume and Equalizer: Finally, adjust the volume levels and equalizer settings to your preference. You can increase or decrease the overall volume using the laptop’s volume controls or the volume controls on the surround sound system. Additionally, many laptops have built-in equalizer settings that allow you to customize the audio output according to your preferred sound profile.
Take some time to fine-tune the audio settings to achieve the best possible sound quality and surround sound experience. Once you are satisfied with the settings, you’re ready to enjoy the immersive audio experience provided by your laptop and surround sound system.
Step 5: Test the Surround Sound System
After connecting and adjusting the audio settings on your laptop, it’s important to test the surround sound system to ensure everything is functioning properly. Here are some steps to help you test the system:
1. Play Surround Sound Content: Find content specifically mixed in surround sound, such as movies or video games that include surround sound effects. This will allow you to fully experience the immersive capabilities of your surround sound system. Make sure the content is set to output audio in surround sound format.
2. Identify Speaker Locations: Pay attention to the sound coming from each speaker in your surround sound system. The front speakers (left, center, and right) should deliver audio from the front of the room, while the rear speakers should emit sound from behind you. The subwoofer is responsible for low-frequency sounds, adding depth and impact to the audio experience.
3. Check Speaker Balance: In some cases, certain speakers may be louder or quieter than others. Use the audio settings on your laptop or the controls on the surround sound system to adjust the balance between the speakers. This will ensure that audio is evenly distributed, creating a seamless surround sound experience.
4. Test Surround Sound Effects: Surround sound systems are designed to create a sense of spatial immersion, allowing you to hear sounds coming from different directions. Test this by playing content with specific surround sound effects, such as scenes with movement or action. Observe how the sound moves from one speaker to another, enhancing the realism of the audio.
5. Fine-tune Audio Settings: If you notice any issues during the testing phase, go back to the audio settings on your laptop and make any necessary adjustments. You may need to tweak the volume levels, speaker configurations, or equalizer settings to achieve the desired audio output.
Remember, testing the surround sound system allows you to ensure that all speakers are working correctly and that the audio distribution is accurate. It also gives you the opportunity to make any necessary optimizations to enhance your audio experience.
Once you have successfully tested the system and verified that all components are functioning as expected, sit back, relax, and enjoy the immersive audio experience that your laptop and surround sound system now provide.
Conclusion
Connecting surround sound to your laptop can greatly enhance your audio experience, whether you’re watching movies, playing games, or listening to music. By following the steps outlined in this guide, you can easily hook up your laptop to a surround sound system and enjoy immersive and high-quality audio.
Throughout the process, it’s important to consider the available audio output options on your laptop, choose the right surround sound system based on your preferences, and properly connect and adjust the audio settings to ensure optimal performance. Testing the system and fine-tuning the settings will help you achieve the best possible surround sound experience.
Remember, each laptop and surround sound system may have specific requirements and connections, so it’s always a good idea to consult the user manuals and manufacturer instructions for detailed information.
Once you have successfully connected the surround sound system to your laptop and tested the audio, you’ll be able to enjoy a truly immersive audio experience that enhances your entertainment sessions. Immerse yourself in the rich surround sound and feel as if you are right in the middle of the action, whether you are watching a blockbuster movie or battling it out in your favorite video game.
Now, grab your laptop, hook it up to a surround sound system, and get ready to be blown away by the incredible audio experience that awaits you.