Home>Devices & Equipment>Radio>How To Hook Up Subs To A Stock Radio
Radio
How To Hook Up Subs To A Stock Radio
Modified: February 18, 2024
Learn how to easily hook up subs to your stock radio and enhance your audio experience. Follow our step-by-step guide and enjoy powerful bass without swapping out your radio.
(Many of the links in this article redirect to a specific reviewed product. Your purchase of these products through affiliate links helps to generate commission for AudioLover.com, at no extra cost. Learn more)
Table of Contents
- Introduction
- Understanding Subwoofers and Stock Radios
- Checking Compatibility with Your Stock Radio
- Gathering Necessary Components
- Preparing the Installation
- Connecting the Power and Ground Wires
- Connecting the Subwoofer Output Converter
- Connecting the Subwoofers
- Adjusting the Audio Settings
- Testing the Setup
- Conclusion
Introduction
Welcome to the world of car audio enthusiasts! If you’re looking to upgrade your stock radio by adding subwoofers to your car, you’ve come to the right place. Subwoofers can greatly enhance the audio experience in your vehicle, delivering deep bass and a more immersive sound. While it may seem like a daunting task to hook up subs to a stock radio, with the right knowledge and components, it can be a rewarding DIY project.
Before we dive into the installation process, it’s important to understand the basics of subwoofers and stock radios. Subwoofers are specialized speakers designed to reproduce low-frequency audio, commonly known as bass. They add depth and richness to music, making it more enjoyable, especially for those who appreciate genres such as hip-hop, EDM, or rock.
Stock radios, also known as factory radios, are the audio systems that come pre-installed in most vehicles. While they get the job done, they often lack the power and audio customization options that dedicated car audio systems provide. However, with the right techniques and components, it is possible to integrate subwoofers into your stock radio setup.
Before you begin the process of adding subwoofers to your stock radio, it’s crucial to check the compatibility between your stock radio and the subwoofers. Some stock radios may not have the necessary outputs or settings to accommodate subwoofers. It’s important to research your specific stock radio model or consult a professional to ensure compatibility.
In this comprehensive guide, we will walk you through the step-by-step process of hooking up subs to your stock radio. We will cover gathering the necessary components, preparing for the installation, connecting the power and ground wires, installing a subwoofer output converter, connecting the subwoofers, adjusting the audio settings, and testing the setup.
Understanding Subwoofers and Stock Radios
Before delving into the process of hooking up subs to a stock radio, it’s essential to have a basic understanding of subwoofers and stock radios and how they work together to enhance your car audio system.
Subwoofers are specialized speakers designed to reproduce low-frequency sound, typically below 200 Hz. They are responsible for producing deep bass, adding richness and impact to your music. Subwoofers come in various sizes, ranging from 8 inches to 15 inches or larger, and are available in both powered and passive configurations. Powered subwoofers have an amplifier built into the enclosure, while passive subwoofers require an external amplifier for power.
Stock radios, on the other hand, are the original audio systems that come installed in vehicles when manufactured. While stock radios are functional, they are often limited in power and audio customization options compared to aftermarket head units. Stock radios usually have standard preamp outputs for connecting to external amplifiers or powered subwoofers, but some older models may not have these outputs.
One common challenge when hooking up subs to a stock radio is the lack of dedicated subwoofer outputs or a low-pass filter. Subwoofers require a specific audio signal separate from the other speakers to reproduce deep bass accurately. Without a subwoofer output, you can still connect subs using a subwoofer output converter or an amplifier with high-level inputs to tap into the stock speaker wires. The converter or amplifier will extract the necessary audio signal for the subwoofers.
It’s crucial to check the compatibility of your stock radio with subwoofers before proceeding with the installation. Research the specifications and features of your stock radio model to ensure it has the necessary outputs or settings to accommodate subs. If you’re not confident in your abilities or want professional advice, consult with a car audio specialist who can recommend the best options for your specific stock radio.
By understanding the function and limitations of both subwoofers and stock radios, you’ll be better equipped to make the necessary connections and adjustments during the installation process. With the right components and techniques, you can achieve a seamless integration of subs into your stock radio setup and enjoy a more immersive and impactful audio experience on the road.
Checking Compatibility with Your Stock Radio
Before you dive into the process of hooking up subs to your stock radio, it’s crucial to ensure that your stock radio is compatible with subwoofers. Here are some steps to help you determine if your stock radio can accommodate subs:
- Research your stock radio model:
- Check for dedicated subwoofer outputs:
- Determine if a low-pass filter is available:
- Inspect the speaker wire connections:
- Consider adding a subwoofer output converter:
Start by finding out the make and model of your stock radio. You can usually find this information in the vehicle’s owner’s manual or by checking the manufacturer’s website. Look for any specifications or features related to audio outputs or subwoofer compatibility.
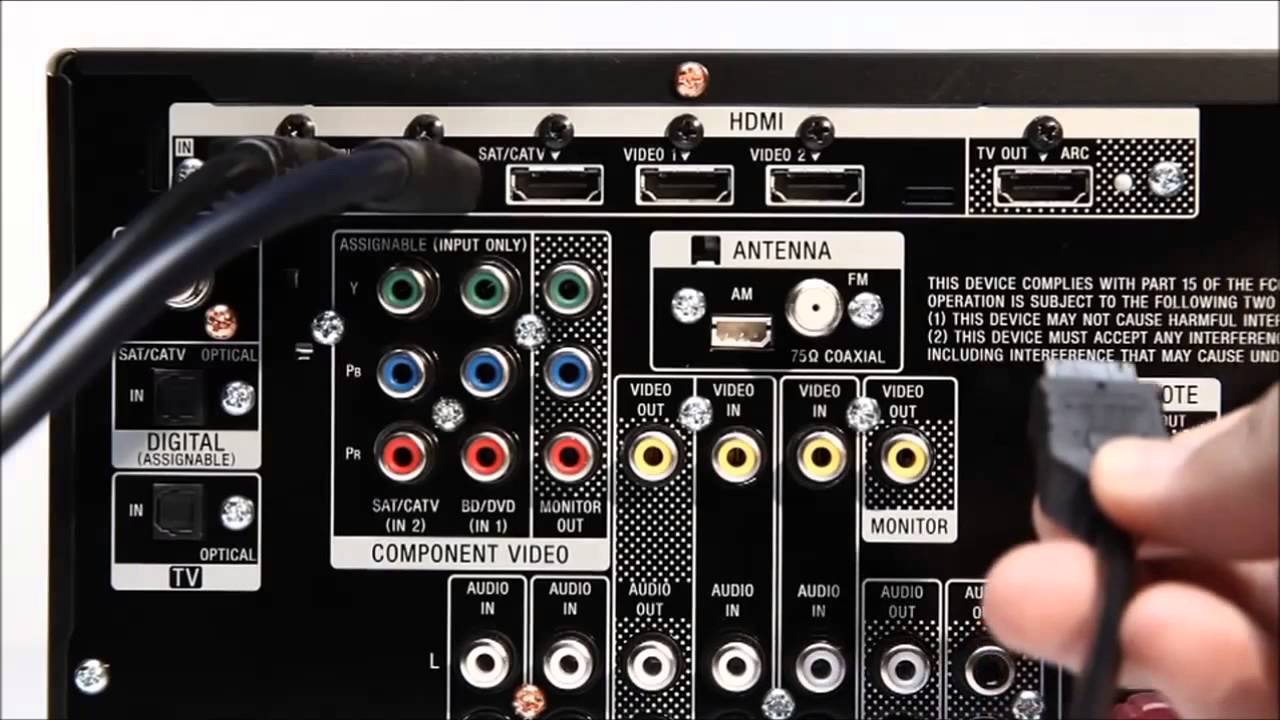
Some stock radios have dedicated subwoofer outputs that allow you to connect a subwoofer or amplifier directly. These outputs are often labeled as “subwoofer,” “sub out,” or “preamp out.” If your stock radio has these outputs, it is likely compatible with subwoofers.
A low-pass filter is a feature that allows you to adjust the frequency range sent to the subwoofers, ensuring they only reproduce the low-frequency bass. Check if your stock radio has a built-in low-pass filter or adjustable crossover settings. This feature is useful for fine-tuning the audio and preventing any overlapping with the main speakers.
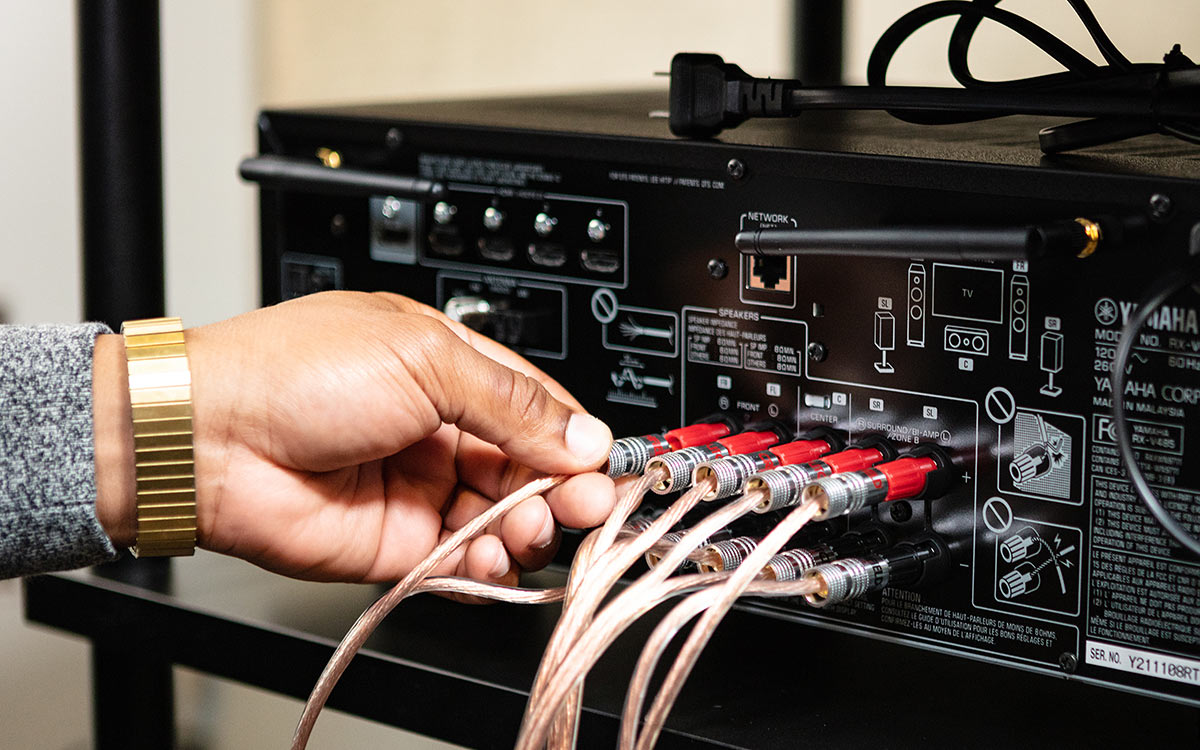
Examine the back of your stock radio for speaker wire connections. Some stock radios may have speaker-level outputs, which can be used to connect an amplifier with high-level inputs. This setup allows you to tap into the stock speaker wires and extract the necessary audio signal for the subwoofers.
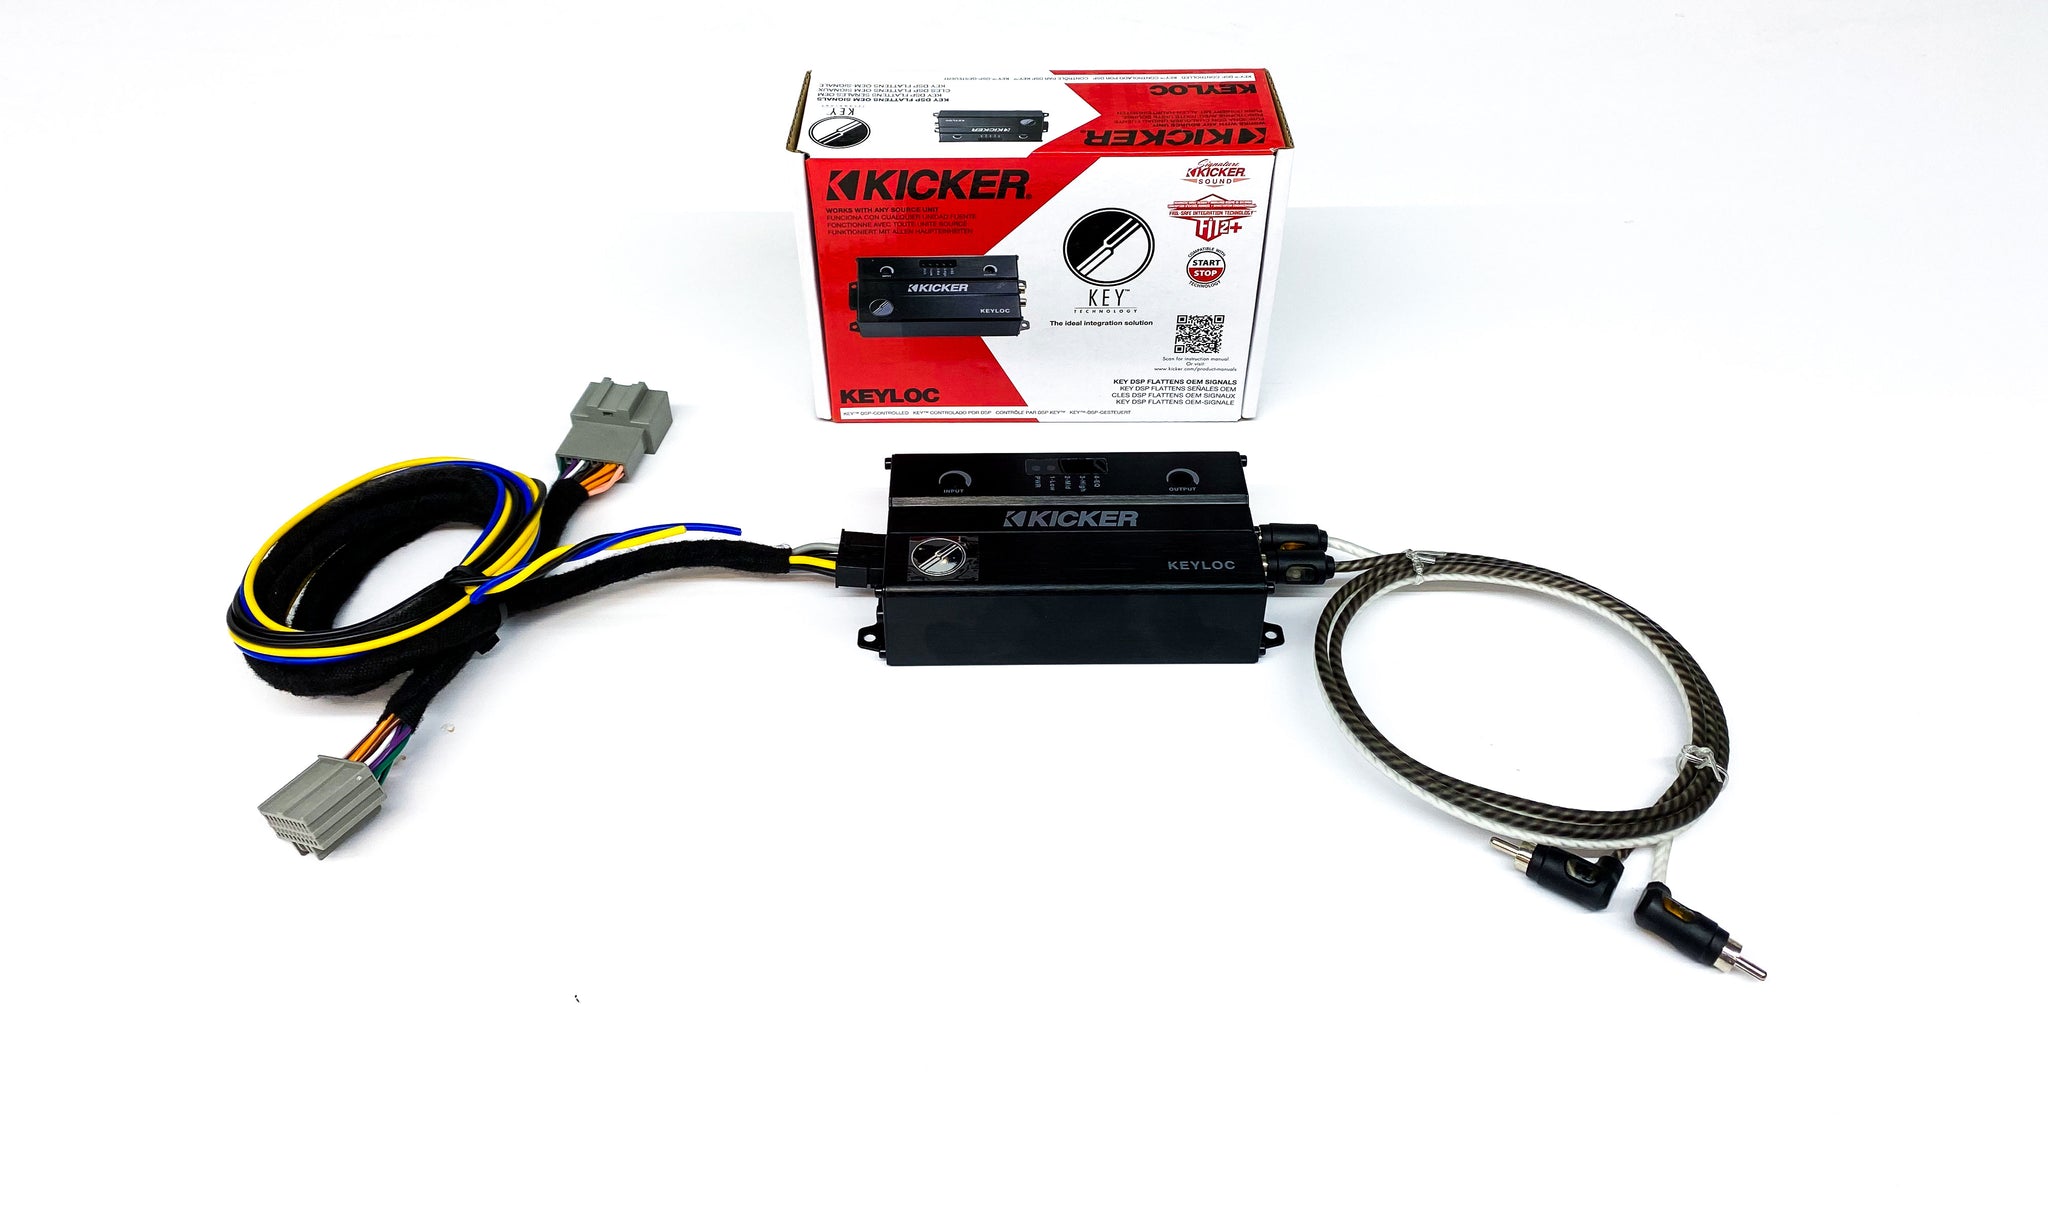
If your stock radio does not have dedicated subwoofer outputs or speaker-level outputs, you can still connect subs using a subwoofer output converter. This device connects to the stock speaker wires and converts the audio signal into a cleaner and stronger RCA signal that can be connected to an amplifier or powered subwoofer.
If you’re unsure about the compatibility of your stock radio or find that it lacks the necessary features, consider consulting with a car audio specialist. They can provide expert advice and recommend suitable solutions for integrating subs into your stock radio setup.
By checking the compatibility of your stock radio beforehand, you can ensure a smoother installation process and optimize the performance of your subwoofers. Don’t overlook this crucial step, as it will play a significant role in the success of your upgraded car audio system.
Gathering Necessary Components
Now that you’ve confirmed the compatibility of your stock radio with subwoofers, it’s time to gather the necessary components for the installation. Here’s a list of essential components you’ll need:
- Subwoofers: Choose subwoofers based on your desired bass response and available space in your vehicle. Consider the size, power handling, and enclosure type (sealed or ported) that best suits your preferences and vehicle.
- Amplifier: An amplifier is necessary to provide power to your subwoofers. Select an amplifier that matches the power requirements of your subwoofers and has the right number of channels to support your configuration.
- Wiring Kit: A wiring kit includes the necessary cables, such as power wire, ground wire, speaker wire, and RCA cables. Make sure the wiring kit is suitable for the power requirements of your amplifier and the length needed to reach your subwoofers.
- Subwoofer Enclosure: If your subwoofers are not already installed in an enclosure, you’ll need to purchase or build one. The enclosure type (sealed or ported) should be chosen based on the subwoofer’s specifications and your audio preferences.
- Subwoofer Output Converter (if needed): If your stock radio does not have dedicated subwoofer outputs or speaker-level outputs, you’ll need a subwoofer output converter. This device converts the audio signal from the stock speaker wires into a usable signal for your amplifier or powered subwoofer.
- Mounting Hardware and Accessories: Depending on your installation setup, you may need mounting brackets, screws, and other accessories to secure the subwoofers, amplifier, and wiring in place.
- Tools: Gather a set of common tools such as screwdrivers, wire cutters, wire strippers, electrical tape, and zip ties. These tools will help you with the installation and ensure a clean and secure connection.
Before purchasing the components, it’s important to research and compare various brands and models to ensure they meet your specific requirements and budget. Consider factors like power handling, efficiency, and customer reviews to make informed decisions. Additionally, check warranty information to ensure you’re protected in case of any defects or issues.
Once you’ve gathered all the necessary components, you’ll be well-prepared to move on to the installation process. Take your time to understand each component and ensure they are compatible and properly matched to achieve the best audio performance from your subwoofers.
Remember, quality components and proper installation techniques are key to achieving optimal sound quality and maximizing the potential of your upgraded car audio system.
Preparing the Installation
Before you begin the installation process of hooking up subs to your stock radio, it’s important to properly prepare for the task. This preparation will help ensure a smooth and successful installation. Here are the steps to follow:
- Read the Manuals: Familiarize yourself with the user manuals for your subwoofers, amplifier, and any other components you’ll be using. Understanding the specifications, wiring diagrams, and installation instructions will prevent mistakes and help you make optimal connections.
- Select the Installation Location: Decide where you want to mount the subwoofers and the amplifier. Consider available space, accessibility, and aesthetics. Ensure that the chosen location allows for proper ventilation and does not interfere with the functionality of other car components.
- Plan the Wiring Route: Determine the route for running the power, ground, and signal cables from the battery to the amplifier and from the amplifier to the subwoofers. Look for existing wire channels or create new ones to keep the wiring neat and hidden.
- Disconnect the Battery: Before starting any wiring work, disconnect the vehicle’s negative battery terminal. This precaution will prevent accidental electrical shorts and ensure your safety during the installation process.
- Clean the Installation Area: Clear the installation area of any debris, tools, or other objects that could interfere with the installation process. A clean workspace will make it easier to work efficiently and avoid any damage to the vehicle or components.
- Inspect Existing Wiring: Check existing wiring in the vehicle to ensure there are no worn or damaged wires. Replace or repair any faulty wiring to maintain the integrity of the electrical system.
- Secure Loose Panels: Take the time to tighten any loose dash panels, trim pieces, or other components near the installation area. This will prevent rattles and vibrations that can affect the sound quality of your car audio system.
By thoroughly preparing for the installation, you’ll minimize the chances of encountering problems and ensure a more efficient and successful process. It’s important to give attention to detail during the preparation stage, as it sets the foundation for a clean and professional installation.
Remember to read the user manuals carefully, plan your wiring route, and create a clean and organized workspace. Taking these steps will make the installation process smoother and more enjoyable, allowing you to fully realize the benefits of adding subwoofers to your stock radio.
Connecting the Power and Ground Wires
Connecting the power and ground wires is a crucial step in the process of hooking up subs to your stock radio. The power wire supplies the necessary electrical current from the battery to the amplifier, while the ground wire provides a safe path for the current to return to the vehicle’s chassis. Follow these steps to ensure a proper and secure connection:
- Determine the Proper Gauge: Choose an appropriate gauge for the power and ground wires based on the power requirements of your amplifier. Refer to the amplifier’s user manual or consult a wiring guide to determine the correct gauge, ensuring efficient power delivery without any voltage drops.
- Locate the Battery: Identify the location of your vehicle’s battery. In most cases, it is located in the engine compartment. If necessary, refer to the vehicle’s owner’s manual for specific instructions.
- Disconnect the Negative Terminal: Before working with any electrical components, disconnect the negative terminal of the battery. This precautionary step will prevent any electrical hazards and ensure your safety during the installation process.
- Route the Power Wire: Run the power wire from the battery to the amplifier. Choose a suitable route that avoids any sharp edges, moving parts, or heat sources. Secure the wire using zip ties or wire loom to prevent it from rubbing against other components or getting damaged.
- Connect the Power Wire to the Battery: Attach the power wire’s terminal to the positive terminal of the battery. Use an appropriate-sized ring terminal and secure it tightly using the battery’s clamp or a separate battery terminal adapter if required.
- Ground Wire Connection: Locate a suitable grounding point near the amplifier. It should be a bare metal surface, free from paint, rust, or corrosion. Sand the surface to establish a clean connection and remove any debris or paint that may hinder the grounding. Connect the ground wire to this point using an appropriate-sized ring terminal securely.
- Secure and Protect the Wires: Secure the power and ground wires along their respective routes using zip ties or wire loom. This will prevent them from sagging or coming into contact with any moving parts, heat sources, or sharp edges. Additionally, protect the connection points by covering them with electrical tape or heat shrink tubing.
- Perform a Voltage Test: Once the power and ground wires are connected, use a multimeter to measure the voltage at the amplifier’s power terminal. Ensure that you’re getting the correct voltage reading as specified in the amplifier’s manual. This will confirm a proper connection and ensure the amplifier is receiving adequate power.
Remember, proper installation of the power and ground wires is crucial for the performance and safety of your subwoofer setup. Take your time to ensure a secure and clean connection. Loose or inadequate connections can lead to electrical problems, poor performance, and potential damage to your vehicle’s electrical system.
By following these steps and performing a voltage test, you’ll be well on your way to completing the crucial power and ground wire connections. Next, you can move on to connecting the subwoofer output converter or amplifier to your stock radio.
Connecting the Subwoofer Output Converter
If your stock radio lacks dedicated subwoofer outputs or speaker-level outputs, you’ll need to use a subwoofer output converter to connect your subwoofers to the audio system. This device converts the audio signal from the stock speaker wires into a clean and amplified signal suitable for the subwoofers or amplifier. Here’s how to connect the subwoofer output converter:
- Locate the Stock Speaker Wires: Identify the speaker wires coming from your stock radio that correspond to the rear or non-subwoofer channels. Refer to the wiring diagram for your specific vehicle or consult a car audio specialist if needed.
- Strip the Wires: Carefully strip a small section of insulation from each stock speaker wire. Be cautious not to damage the wire strands during the stripping process, as this may affect the audio signal quality.
- Connect the Speaker Wires: Connect the positive and negative leads from the subwoofer output converter to the corresponding stock speaker wires. Match the positive and negative terminals accurately to ensure proper phase alignment.
- Connect the RCA Cables: Connect the RCA cables from the subwoofer output converter to the RCA inputs on your amplifier or powered subwoofer. Use high-quality cables to minimize interference and signal loss.
- Adjust Output Level: If your subwoofer output converter has an adjustable output level, you may need to fine-tune it. Follow the instructions provided with the converter to set the appropriate output level for your subwoofers or amplifier.
- Secure and Protect the Connections: Once all the connections are made, secure them with electrical tape, zip ties, or heat shrink tubing. This will prevent the wires from coming loose or getting damaged during use or vibrations.
- Test the Setup: With the subwoofer output converter connected, turn on your stock radio and test the audio. Ensure that the subwoofers or amplifier receive the correct audio signal and that the bass response is balanced and accurate.
By utilizing a subwoofer output converter, you can integrate subwoofers into your stock radio setup, even if it lacks dedicated subwoofer outputs. This device allows you to tap into the existing speaker wires and extract the necessary audio signal for your subwoofers or amplifier.
Remember to follow the instructions provided with your specific subwoofer output converter and refer to your stock radio’s wiring diagram or seek professional guidance if needed. Properly connecting the converter ensures that it functions correctly and provides an optimized audio signal for your subwoofers.
Once you have successfully connected the subwoofer output converter, you can move on to the next step of connecting the subwoofers or amplifier to complete the installation process.
Connecting the Subwoofers
Now that the subwoofer output converter or amplifier is properly connected to your stock radio, it’s time to connect the subwoofers themselves. Follow these steps to ensure a successful and secure connection:
- Locate the Subwoofer Outputs: Identify the subwoofer outputs on your amplifier or subwoofer enclosure. These outputs may be labeled as “sub out” or “amp out.” Take note of the positive (+) and negative (-) terminals.
- Prepare the Subwoofer Speaker Wire: Cut a length of speaker wire to reach from the subwoofer outputs to each of the subwoofers. Strip a small section of insulation from each end of the speaker wire.
- Connect the Speaker Wire: Connect the positive (+) terminal of the speaker wire to the positive (+) terminal on the subwoofer output. Similarly, connect the negative (-) terminal of the speaker wire to the negative (-) terminal on the subwoofer output.
- Secure the Connections: Ensure that the connections are tight and secure. Use crimp connectors, soldering, or other methods recommended by the manufacturer to create a solid and reliable connection.
- Connect the Subwoofers: Connect the other ends of the speaker wire to the corresponding terminals on each subwoofer. As before, make sure to match the positive (+) terminal to the positive (+) terminal and the negative (-) terminal to the negative (-) terminal.
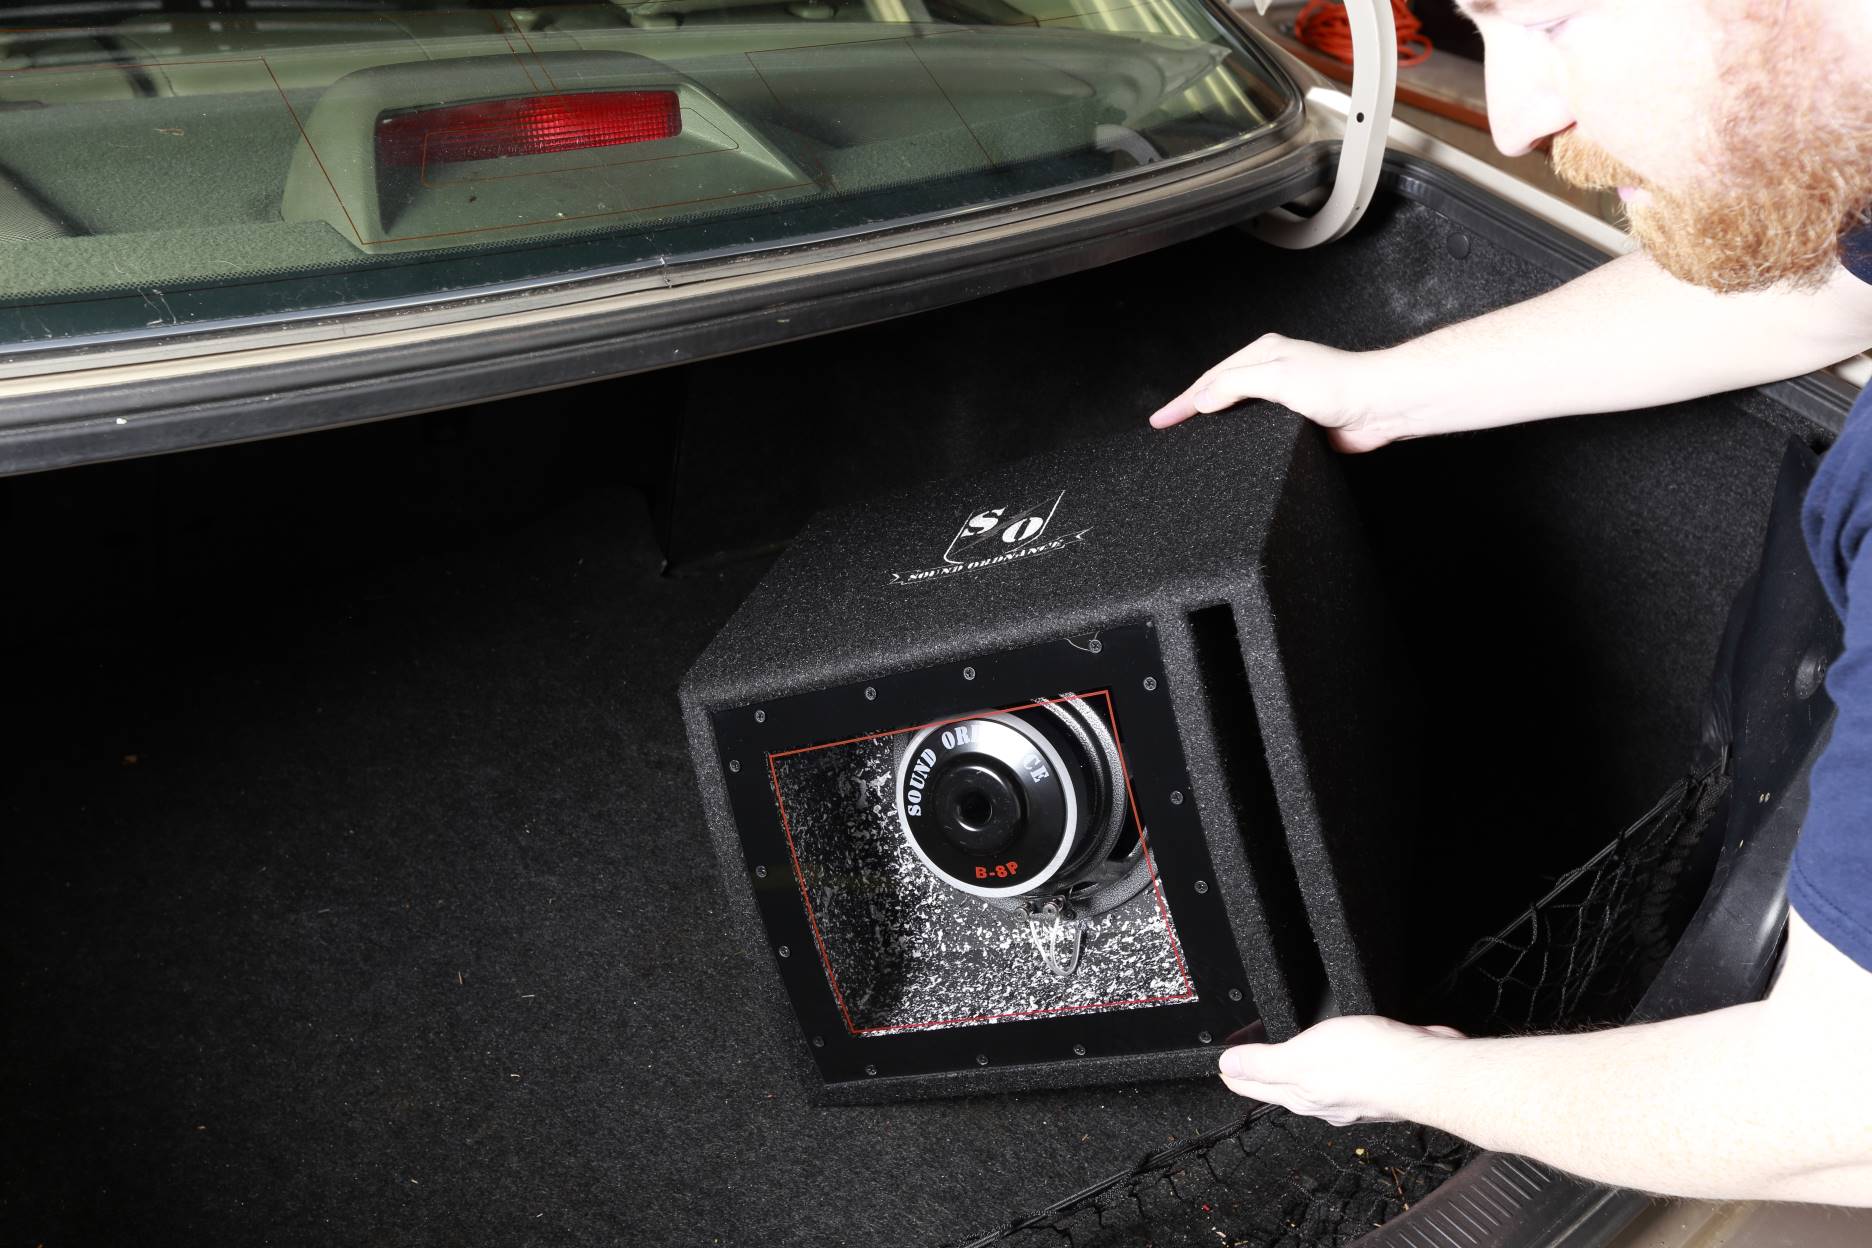
- Secure the Subwoofers: Mount the subwoofers securely in their enclosures or desired locations in the vehicle. Follow the manufacturer’s instructions for proper mounting techniques to prevent excessive vibrations or movement that could affect sound quality.
- Double-Check the Connections: Review all the connections once again to ensure they are secure and correctly matched. Take a moment to organize and tidy up any loose wires, using zip ties or wire loom if necessary.
- Test the Subwoofers: With everything connected, turn on your audio system and play some music or a bass test track. Verify that the subwoofers are producing sound and that the bass response is clean and balanced. Make any necessary adjustments to the audio settings, such as the crossover frequency or gain, for optimal performance.
By following these steps, you can successfully connect your subwoofers to your amplifier or subwoofer outputs, completing the installation process. Take your time to ensure that all connections are secure and that the subwoofers are mounted properly. This will result in reliable and satisfying bass reproduction in your vehicle’s audio system.
If you encounter any issues during the testing process, double-check all connections and consult the user manuals for your equipment. It may also be helpful to seek assistance from a car audio professional to troubleshoot and fine-tune your subwoofer setup.
With the subwoofers connected and properly working, you can now enjoy a more immersive and powerful audio experience in your vehicle.
Adjusting the Audio Settings
With your subwoofers connected and functioning, it’s time to fine-tune and adjust the audio settings to optimize the sound quality and ensure a balanced audio experience. Here are the key steps to follow:
- Access the Audio Controls: Locate the audio controls on your stock radio or head unit. These controls may vary depending on the make and model of your vehicle, but typically include settings such as bass, treble, balance, and fader.
- Start with the EQ and Tone Controls: Set the equalizer (EQ) and tone controls to a neutral or flat position. This will provide a baseline for adjusting the audio settings. If your stock radio does not have an EQ, skip to the next step.
- Adjust the Bass Control: Increase the bass control gradually to your preferred level. Listen carefully and make adjustments until you achieve a balanced and pleasing bass response. Be cautious not to overpower the other frequency ranges or create distortion.
- Fine-tune the Treble Control: Adjust the treble control to complement the bass response. Strive for a balanced sound by increasing or decreasing the treble as needed. Again, avoid excessive boosting that can result in harsh or unnatural highs.
- Balance and Fader Adjustment: Set the balance and fader controls to ensure an even sound distribution and imaging. Ideally, the sound should be centered when the balance and fader controls are set to the middle position. Make adjustments according to your preference and vehicle setup.
- Consider Using Crossover Settings: If your amplifier or head unit has crossover settings, configure them to prevent overlap or duplication of frequencies between the subwoofers and other speakers. Set the low-pass filter on the subwoofers to direct only low-frequency signals to them.
- Test and Refine: Play various types of music and tracks to assess the overall audio performance. Pay attention to the clarity and balance between the subwoofers and other speakers. Make further adjustments based on your listening preferences and the characteristics of your vehicle’s audio system.
- Seek Professional Assistance if Necessary: If you find it challenging to adjust the audio settings or desire a more refined tuning, consider consulting a professional car audio technician. They have the expertise and specialized tools to accurately fine-tune your audio system for optimal performance.
Remember, audio preferences are subjective, and what sounds good to one person may not be ideal for another. Take the time to experiment with different settings and trust your ears to achieve a sound profile that you find pleasing.
By carefully adjusting the audio settings, you can ensure that your subwoofers integrate seamlessly with your stock radio and provide a satisfying and well-balanced sound experience during your car journeys.
Testing the Setup
Once you have completed the installation and adjusted the audio settings, it’s time to put your newly upgraded car audio system to the test. Testing the setup ensures that everything is functioning correctly and allows you to fine-tune any remaining adjustments. Follow these steps to thoroughly test your setup:
- Check for Physical Connections: Prior to testing, double-check all the connections, including the power, ground, speaker wires, and RCA cables. Ensure that they are secure and properly connected to prevent any interference or sound issues.
- Select an Audio Source: Choose a variety of audio sources to test different genres of music and audio content. This will help evaluate the performance of your subwoofers across different frequencies and sound qualities.
- Listen for Balance and Clarity: Play music with a mix of low, mid, and high-frequency content to evaluate the balance and clarity of the audio. Make sure that the bass from the subwoofers is well-integrated with the other speakers and that vocals and instruments are clear and distinct.
- Monitor for Distortion: Pay close attention to any signs of distortion or clipping. Distortion occurs when the audio signal is pushed beyond the capabilities of the system, resulting in a distorted or muffled sound. If you notice distortion, adjust the audio settings or reduce the volume to avoid damaging your speakers.
- Test at Different Volumes: Test your system at both low and high volume levels to assess its performance across different listening scenarios. Ensure that the subwoofers maintain their clarity and do not overpower the rest of the audio system, even at higher volumes.
- Make Additional Adjustments if Needed: Fine-tune the audio settings and equalizer based on your preferences and any observations made during the testing process. Small adjustments can have a significant impact on the overall sound quality.
- Seek Feedback: Consider involving a friend or family member to listen and provide their feedback on the sound quality and overall performance. Another set of ears can help identify any areas that may require further attention or adjustments.
During the testing phase, it is essential to take your time and carefully evaluate the performance of your new setup. Be patient and make incremental adjustments to achieve the desired sound quality.
If you encounter any issues or are not satisfied with the results, don’t hesitate to consult with a professional car audio technician. They can offer expert advice and assistance in troubleshooting and optimizing your system for superior audio performance.
By thoroughly testing your setup, you can ensure that your new subwoofer integration with your stock radio delivers the desired audio experience, enhancing your overall enjoyment of music and sound in your vehicle.
Conclusion
Congratulations on successfully hooking up your subs to your stock radio! By following the steps outlined in this guide, you’ve taken a significant step towards enhancing your car audio system and enjoying a more immersive listening experience. Here’s a recap of what you’ve accomplished:
You started by understanding the basics of subwoofers and stock radios, ensuring compatibility between the two. Then, you gathered the necessary components such as subwoofers, an amplifier, wiring kits, and a subwoofer output converter.
With the proper preparations, you connected the power and ground wires securely, providing the necessary electrical current to the amplifier. If needed, you utilized a subwoofer output converter to tap into the stock speaker wires and convert the signal for your subwoofers or amplifier.
Next, you connected the subwoofers themselves, ensuring a tight and reliable connection between the amplifier/subwoofer outputs and the subwoofers. Through proper adjustments, you achieved a balanced and immersive bass response while preserving the clarity and balance of the audio.
Finally, you thoroughly tested the setup, listening for any anomalies or issues and making necessary adjustments to the audio settings and equalizer. By testing at various volume levels and seeking the feedback of others, you fine-tuned your system to suit your preferences and improve the overall audio experience.
Remember, it’s normal to experiment and make additional adjustments over time, as every car and personal preference is unique. With your newly integrated subwoofers enhancing your stock radio, you can now enjoy a more powerful and dynamic audio experience during your daily commutes or road trips.
If at any point during the process you felt unsure or encountered challenges, don’t hesitate to seek professional assistance. Car audio specialists are available to provide guidance and ensure that your installation meets the highest standards.
Thank you for choosing this guide to help you hook up subs to your stock radio. We hope you enjoy the enhanced audio experience and the excitement that the deep bass brings to your car audio system. Happy listening!